Let's Build A Mandolin (Page 17)
1 2 3 4 5 6 7 8 8a 9 10 11 11a 11b 12 12a 13 14 15 16 17 18 19 20
Last Modified - April 2012 (©Alan Dunwell 2012)
In Page 16 we finished out the box and did a quick prep for finishing. Now it is time to do the actual finishing. Not shown here is the "finit" process. I go over everything looking very closely at all the surfaces and joints. Any fill or smoothing, etc. needs to be done at this point. It should look and feel smooth. No need to get excessive on the sanding, I usually don't go beyond 240grit, just make sure everything is ultra-clean and the best you can get it. This will save loads of finish time if you do your prep work right.
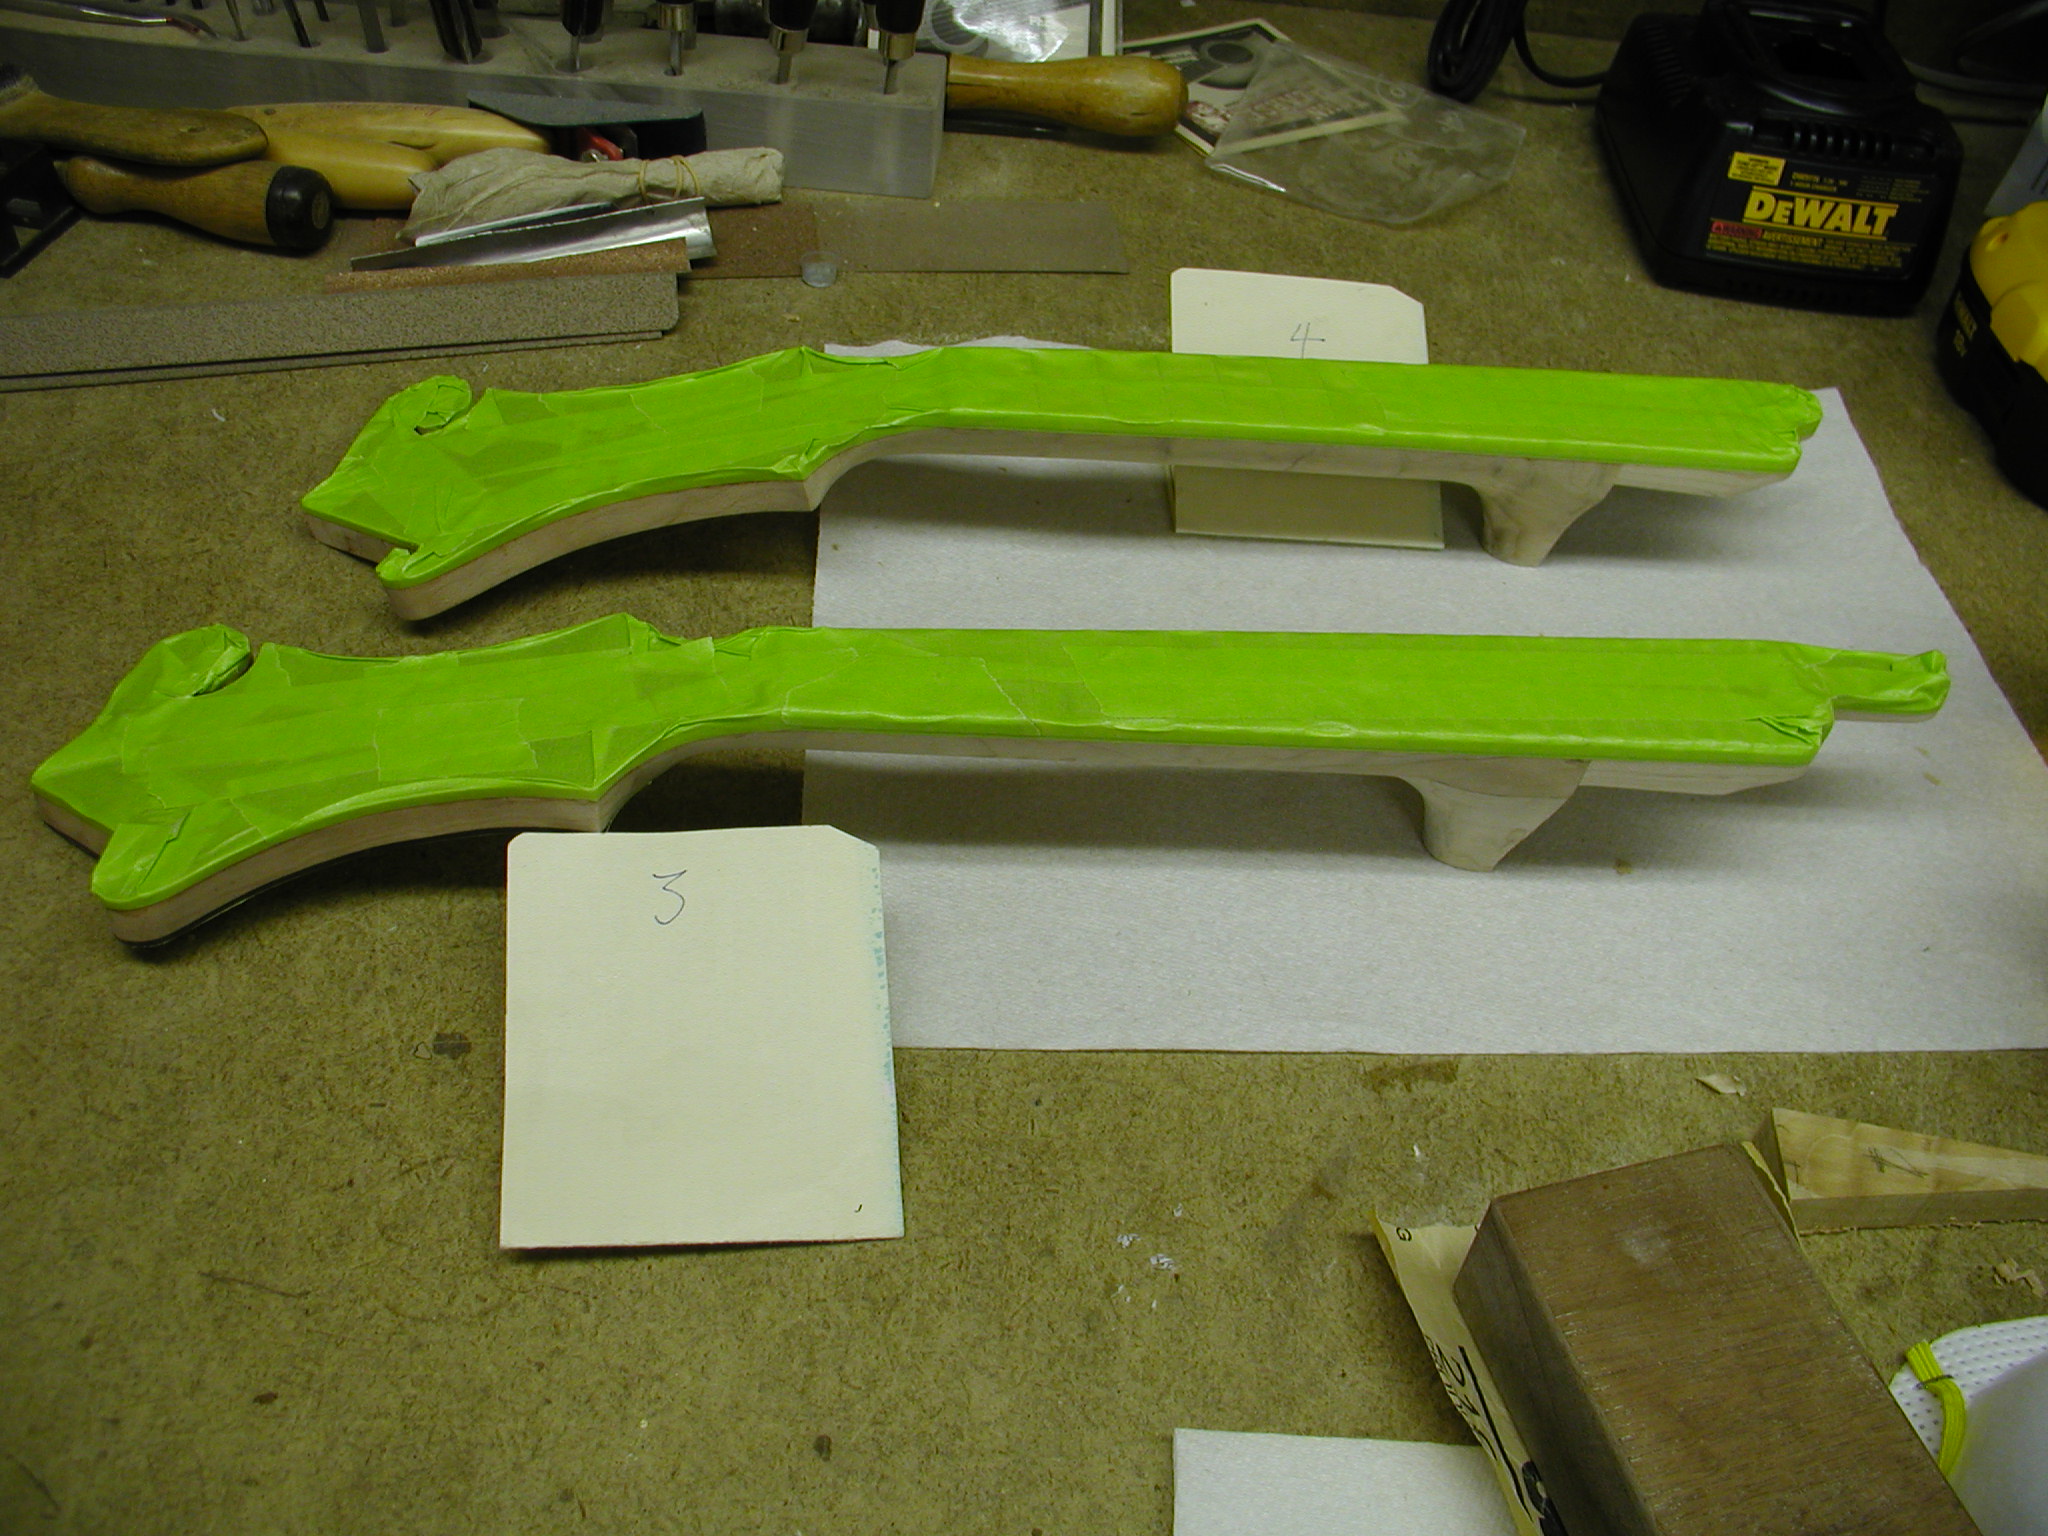
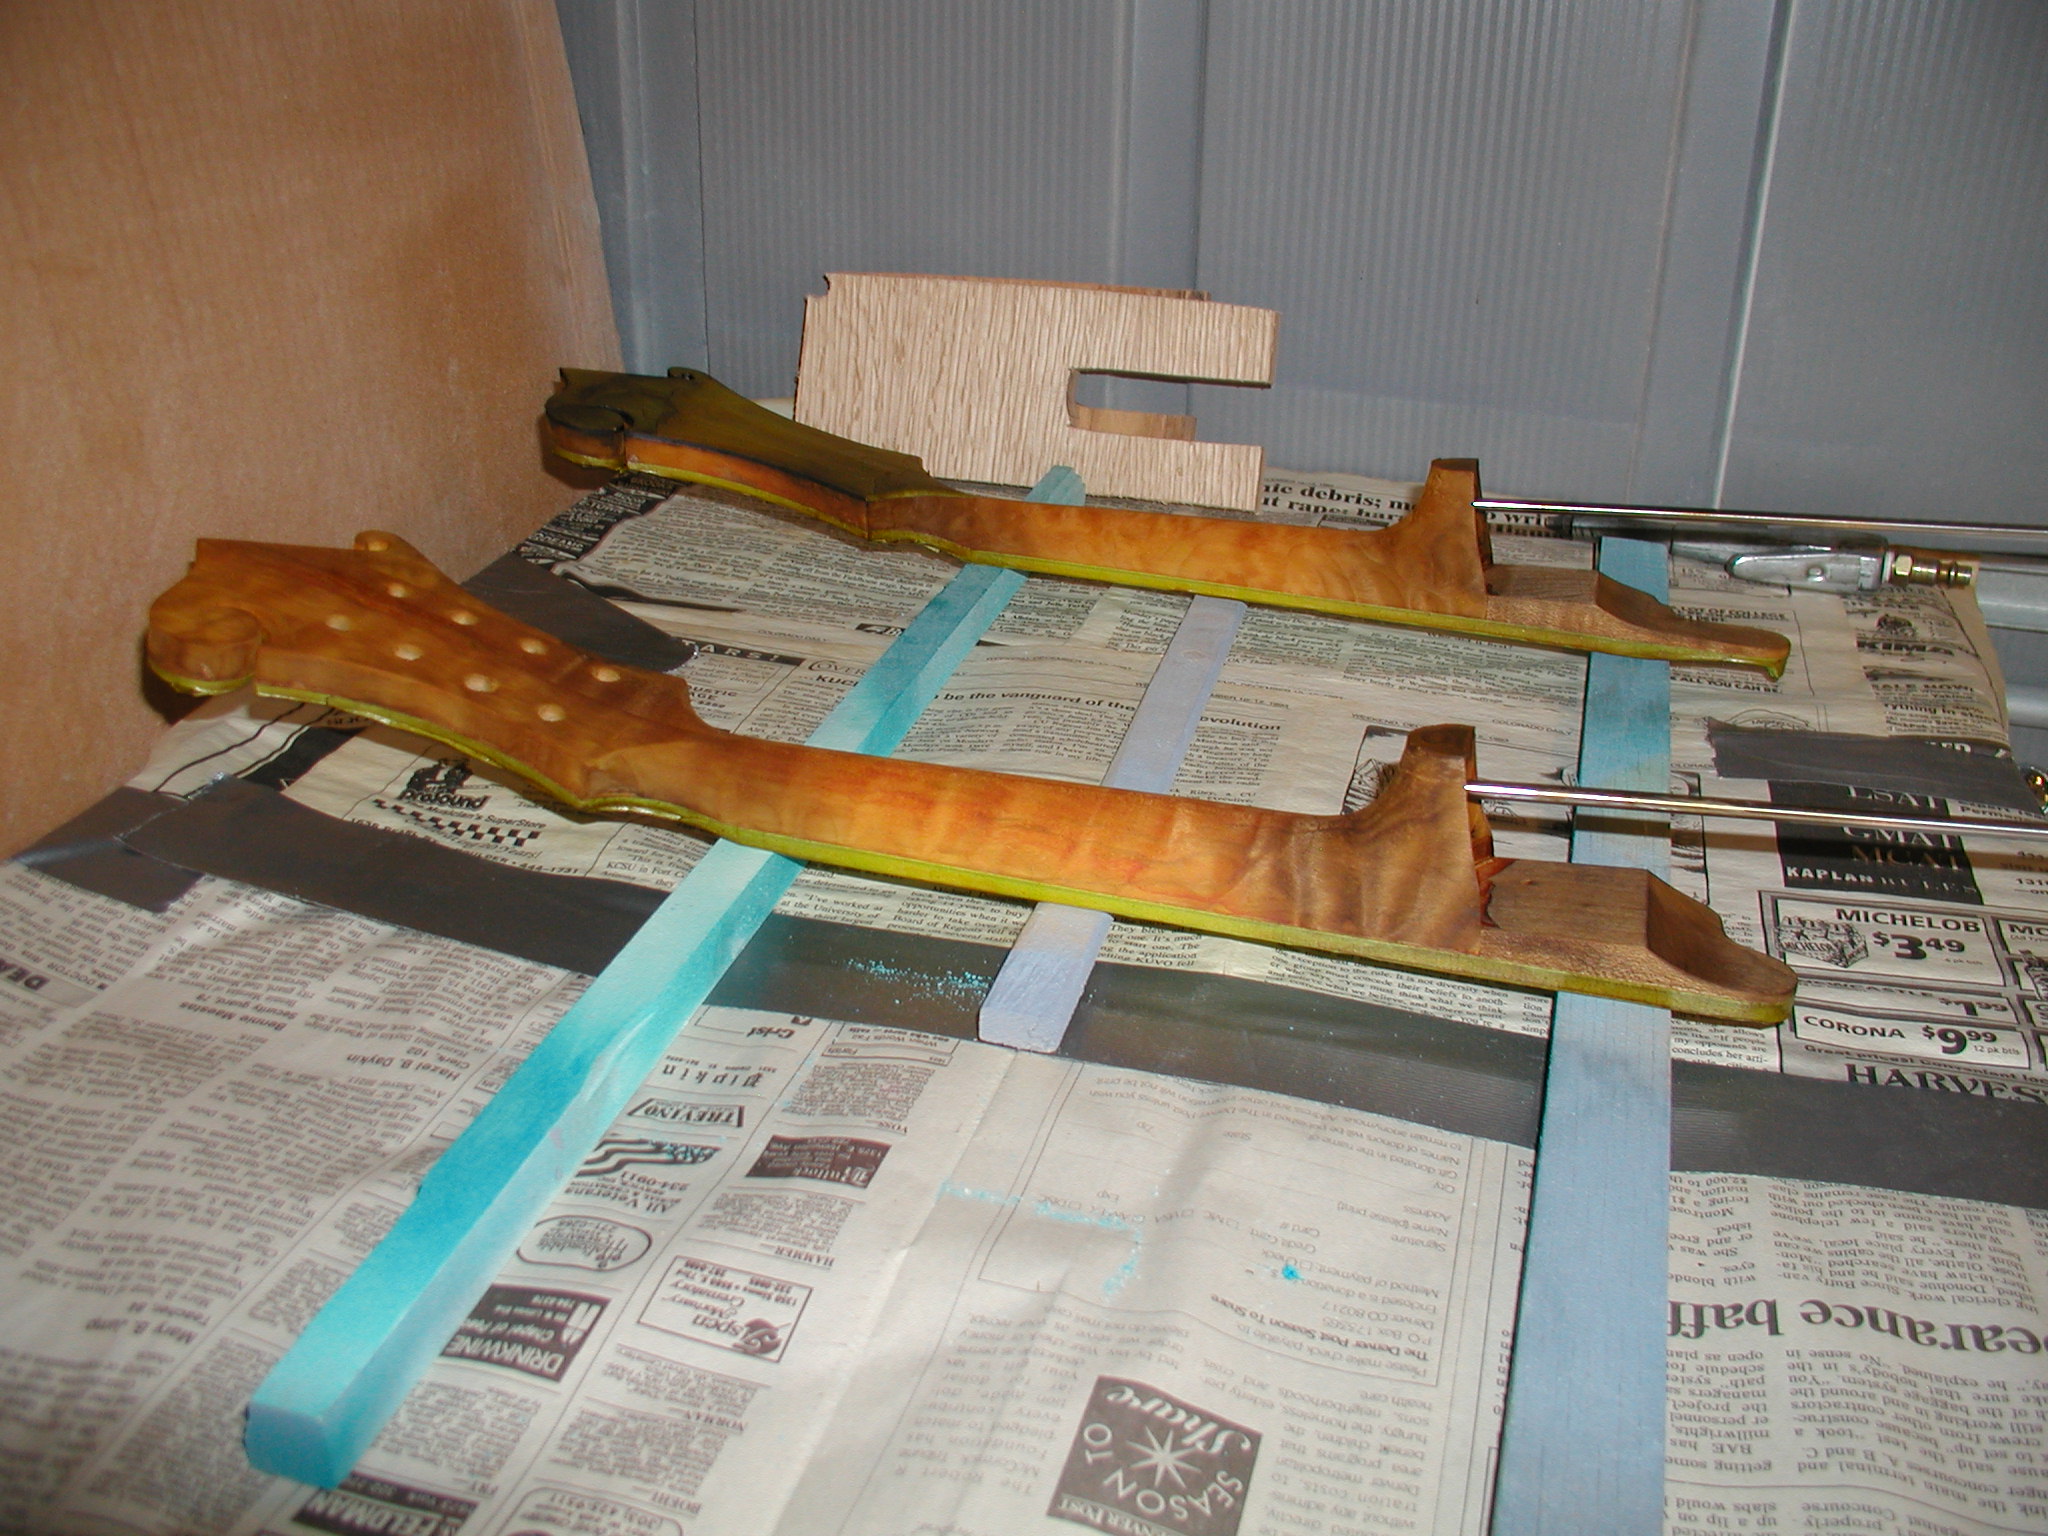
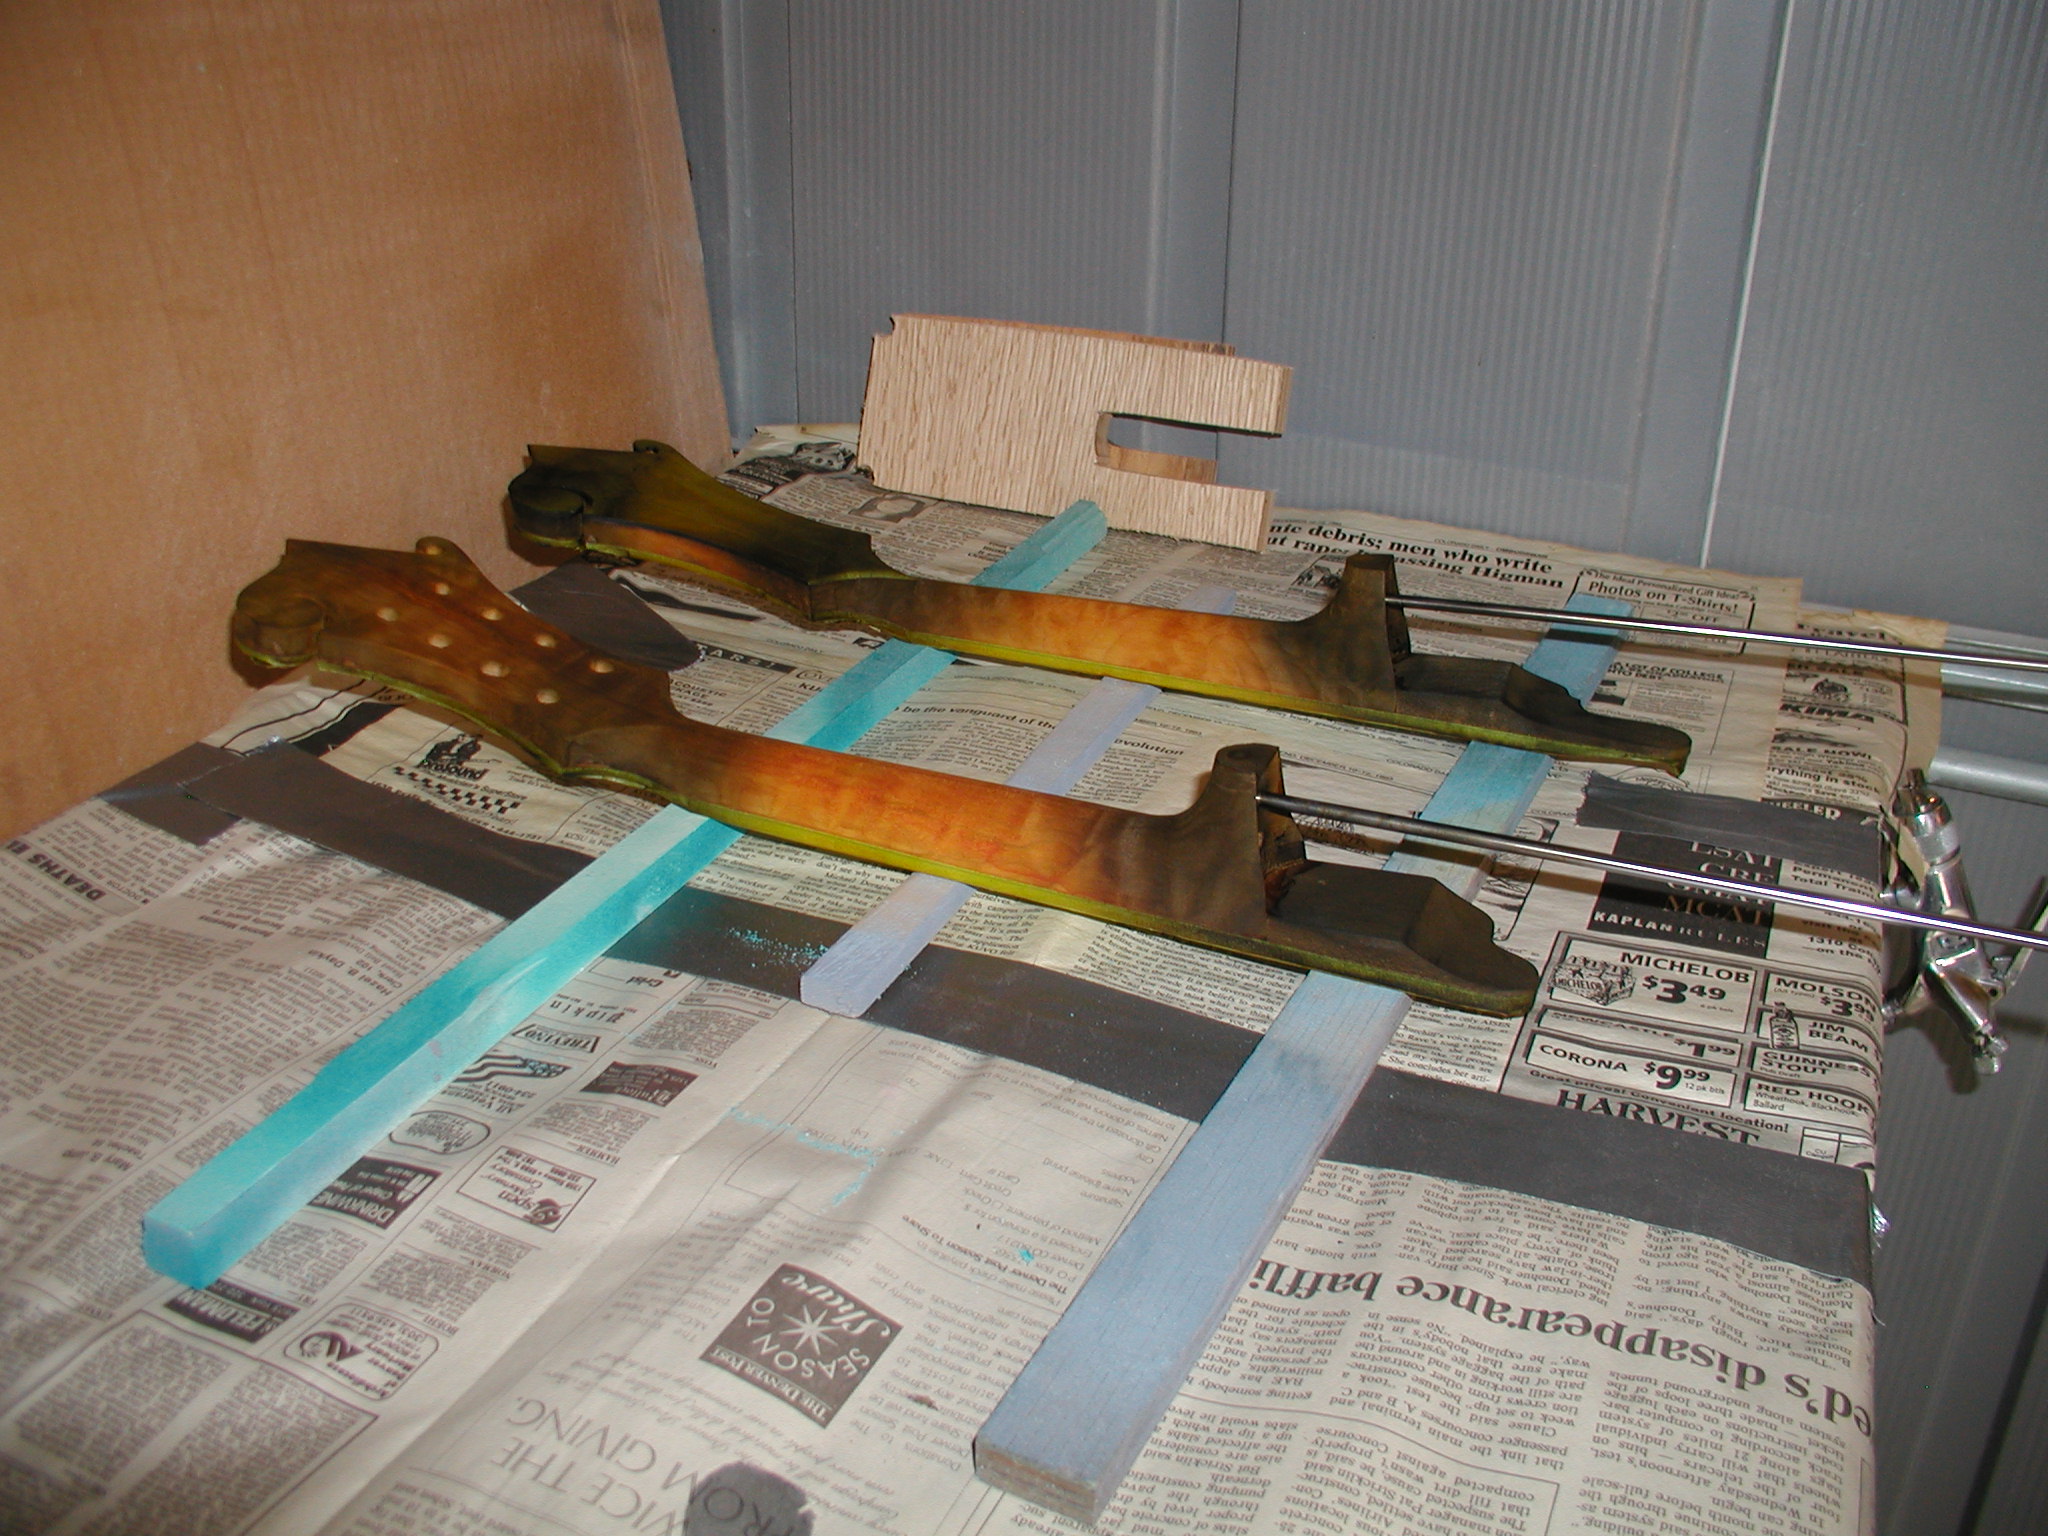
Then I mask off the neck with 3-M 233+ green tape. This is different from the regular green "painters tape" and worth bothering to get. It is a bit stretchy and somewhat thicker and if you are doing anything with lacquer it will damage lacquer the least. They used to make some green tape that was specifically called "lacquer mask" but that seems to have disappeared. The 233+ won't damage cured lacquer if you don't leave it on more than a few days. Here I'm masking everything that should not get any stains, that includes the back side on the headstock if you are making one that has a veneer.
On the body I use pin striping tape available from automotive paint supply shops. This is a plastic type tape with a pretty good adhesive and allows some flex. Try to not pull it but instead just lay it on and press firmly in place. If you stretch it in places like the waist it will later shrink and pull loose. I don't try to wrap this over on the top edge of the binding, I just trim it off. There will always be some color that sneaks under the tape and the binding will need to be scraped clean later anyway. The tape just helps keep that job to a minimum. To keep any finishing products out of the inside of the body I stuff in bits of paper towel. Others use all sorts of things like balloons, rags, bubble wrap, etc. What ever works to keep the finish stuff off the inside parts.
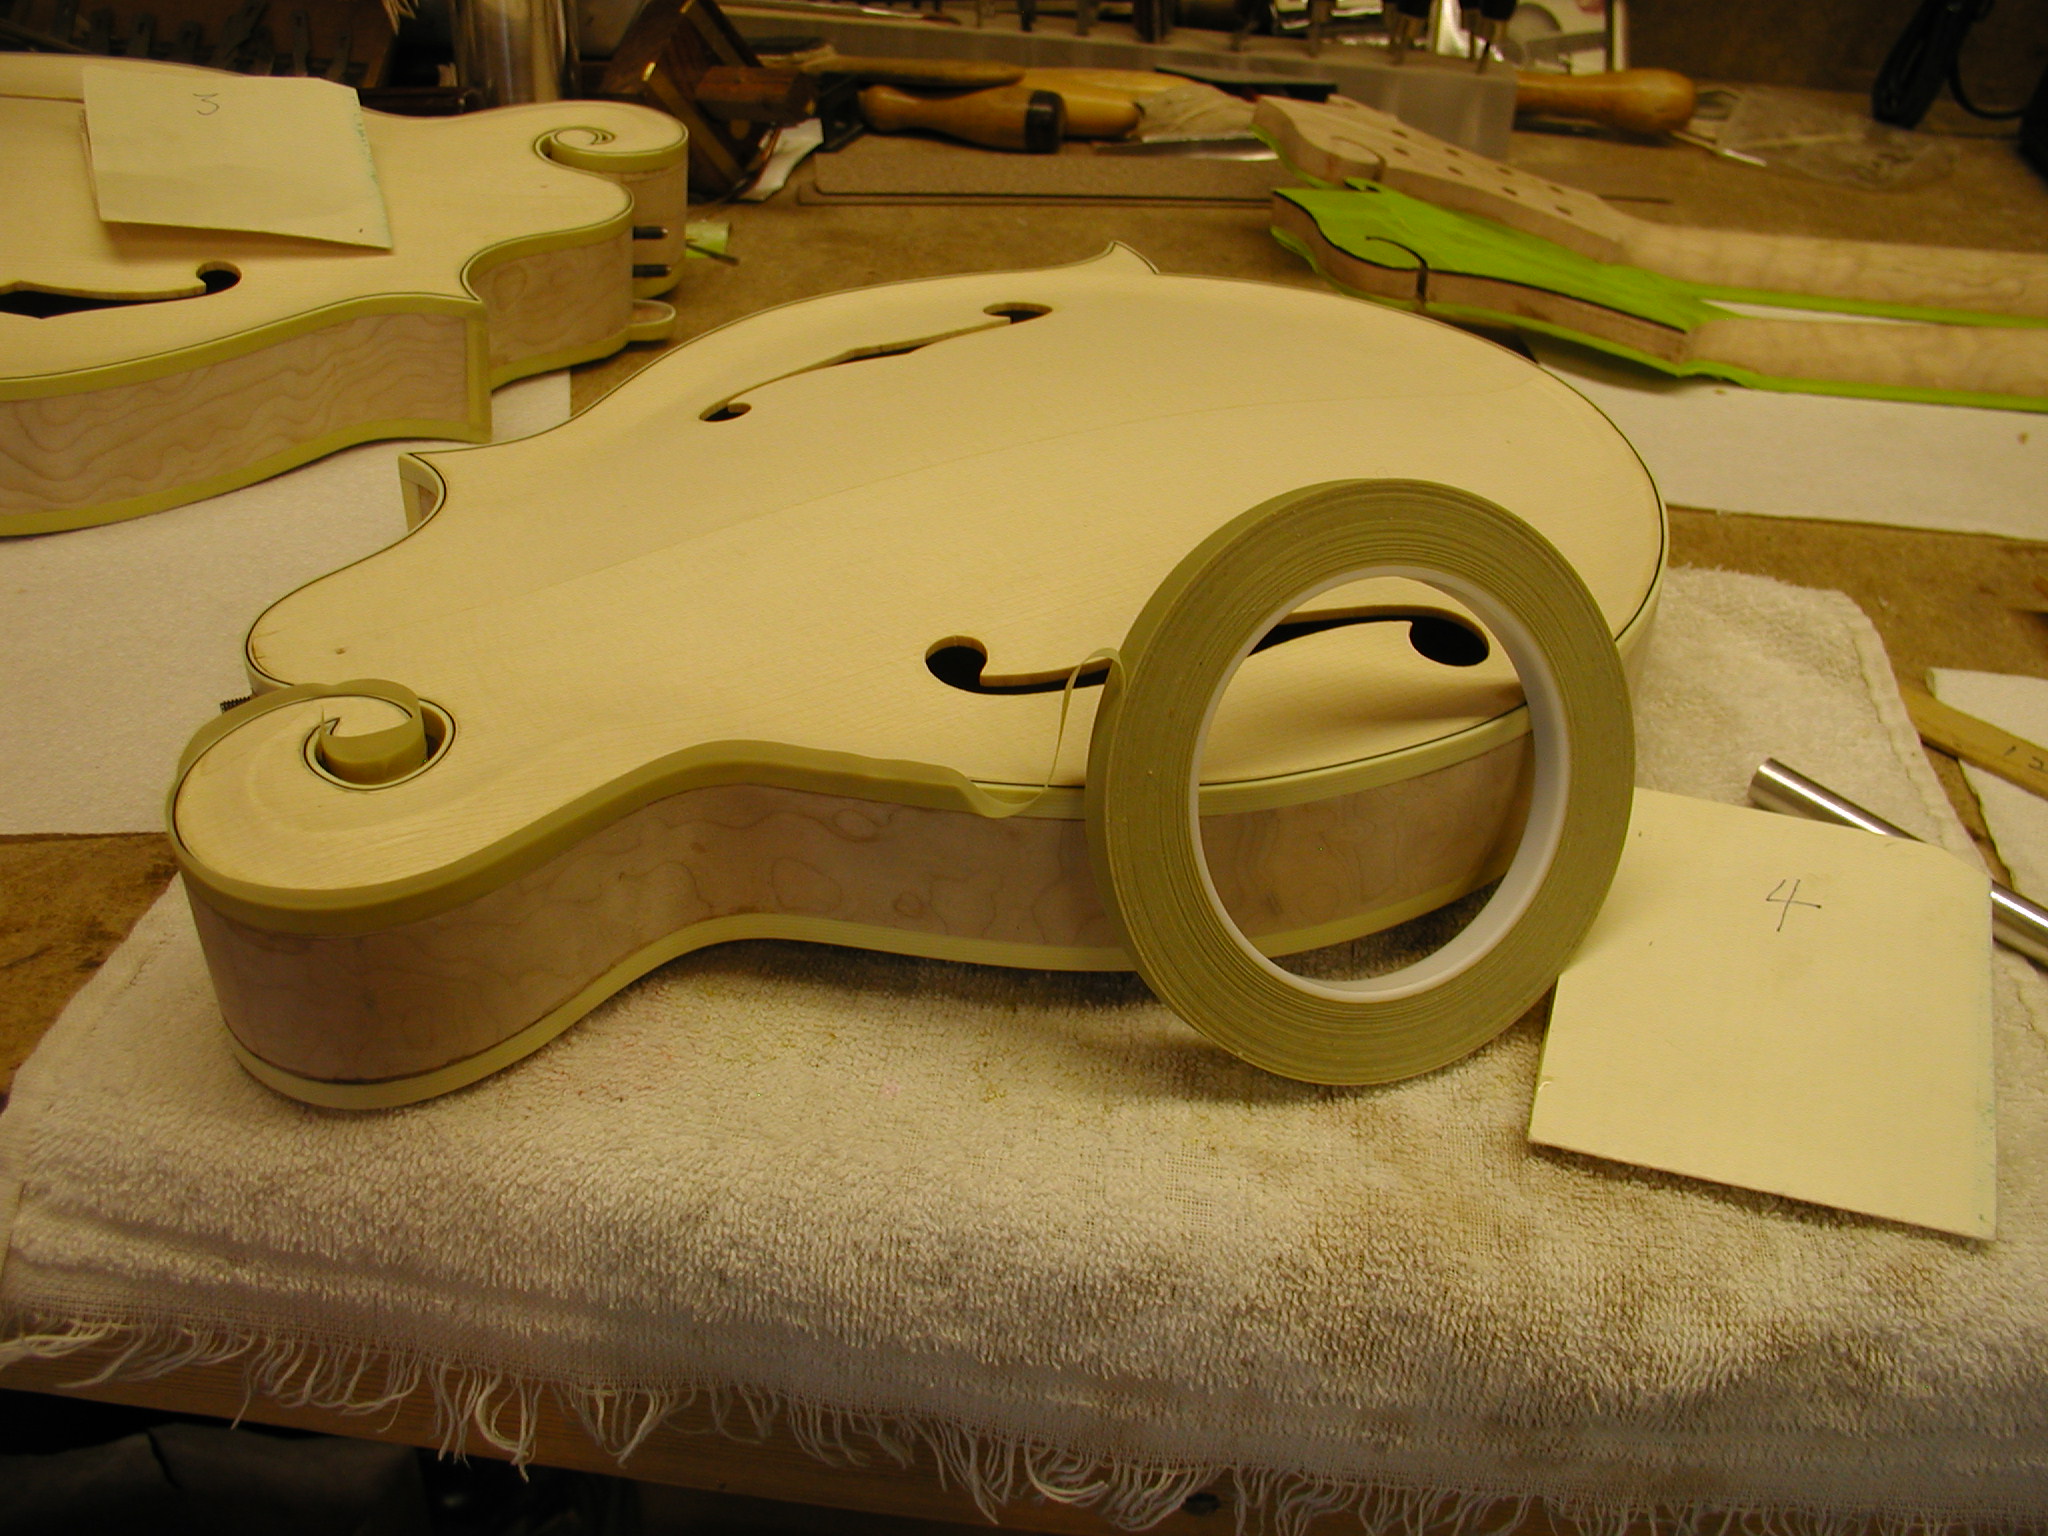

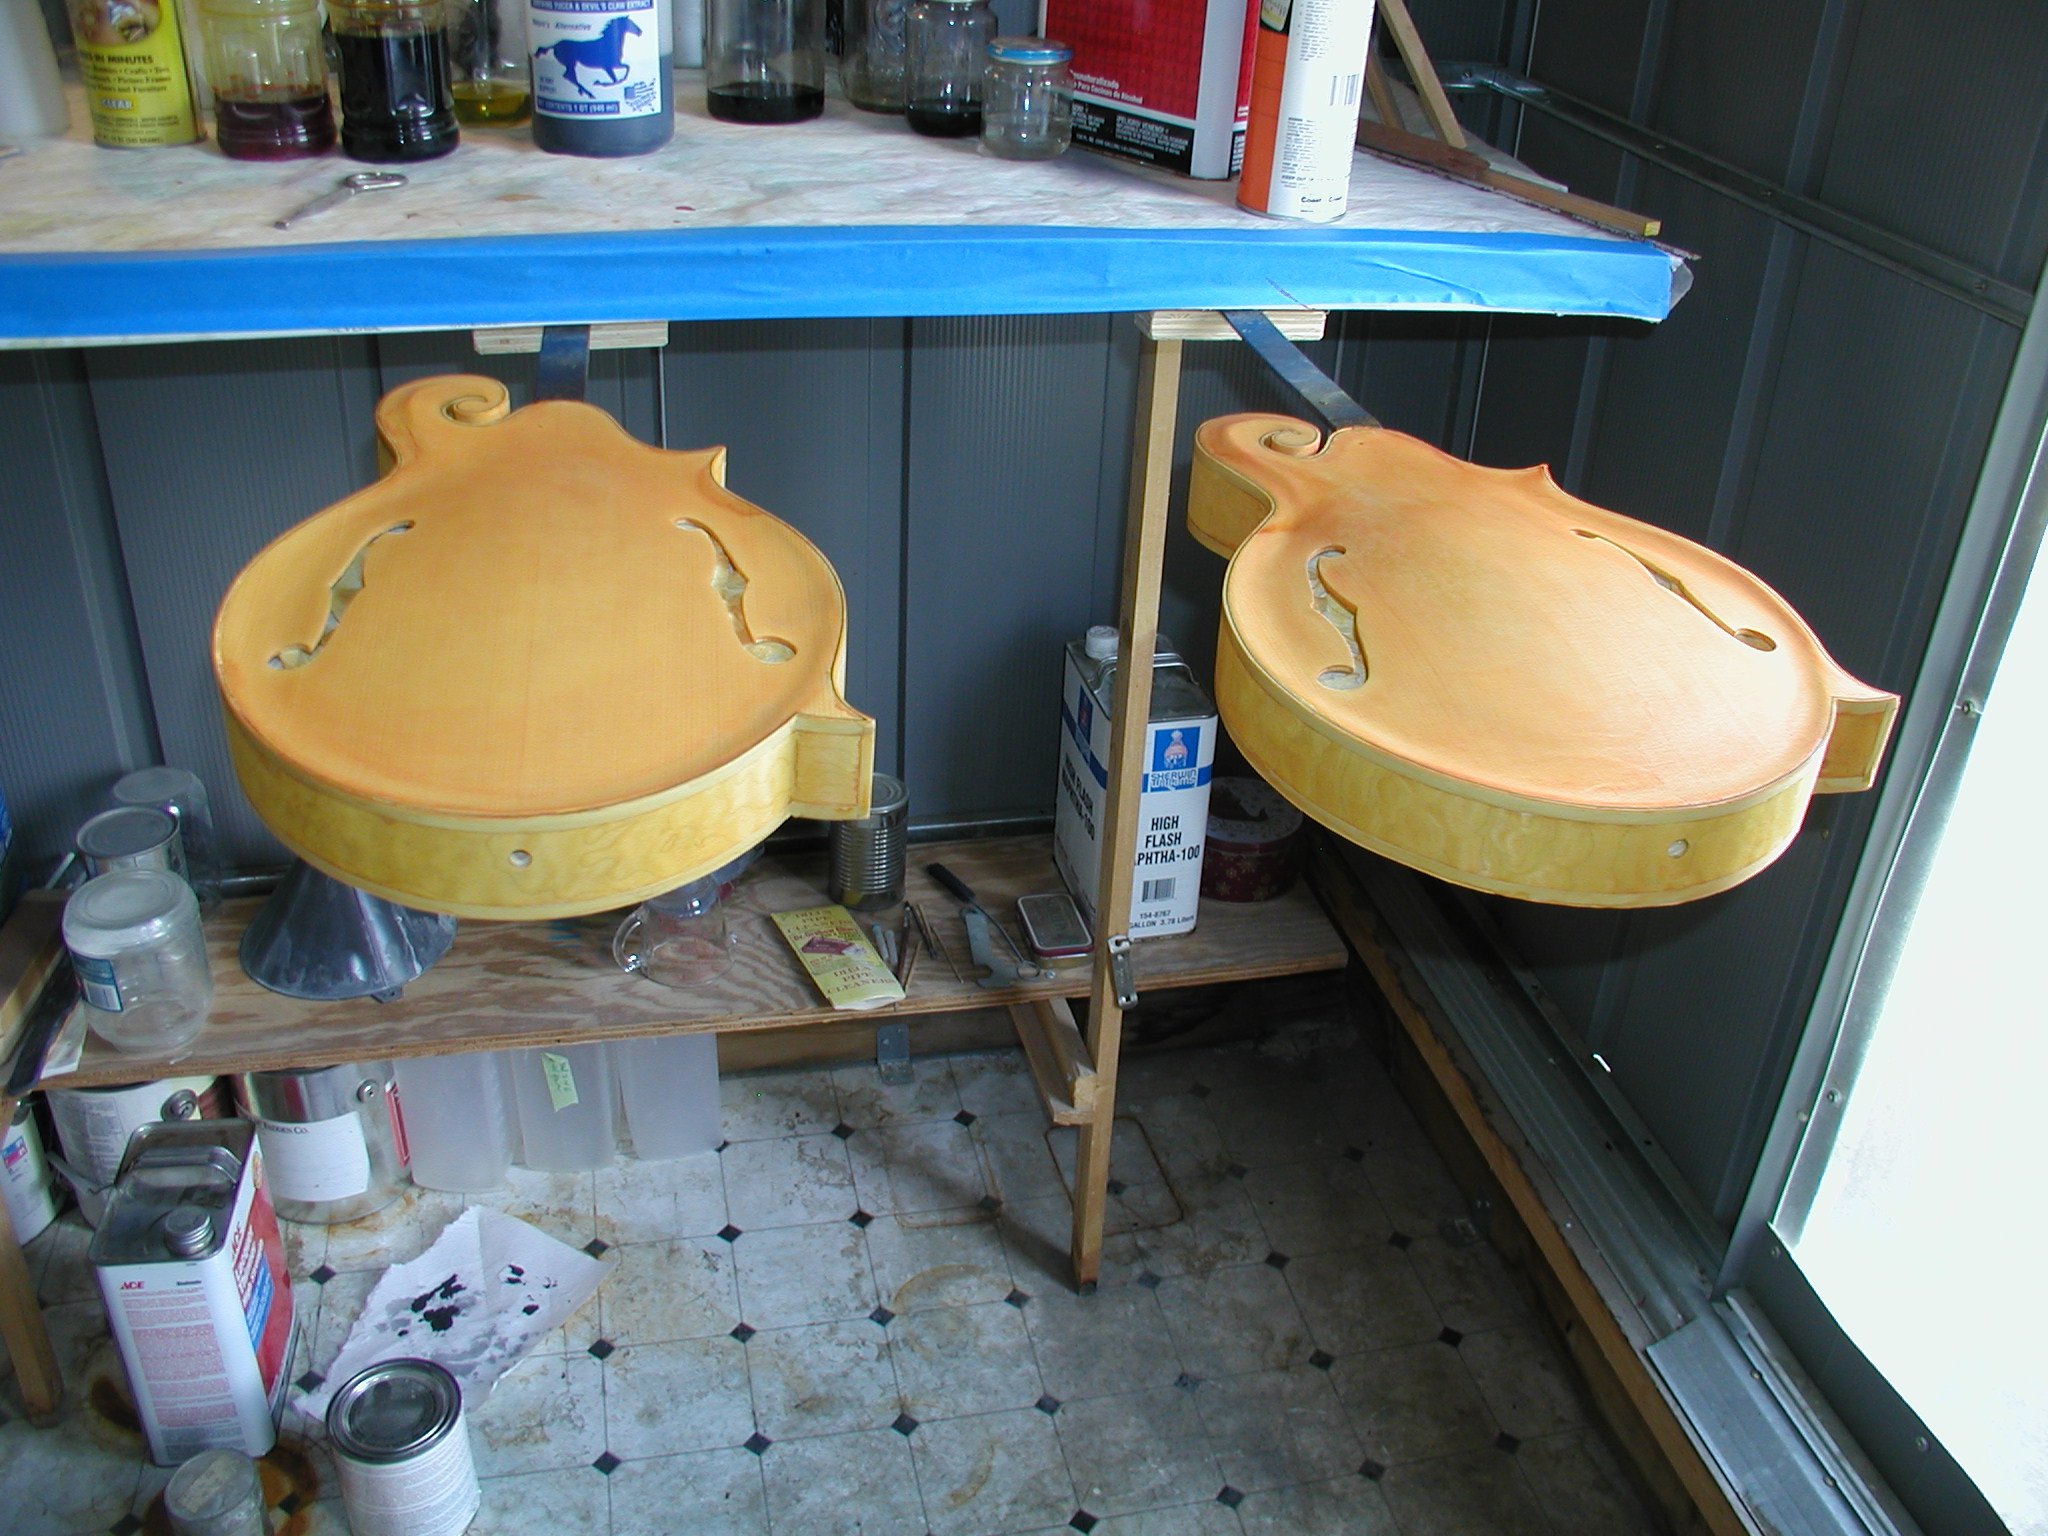
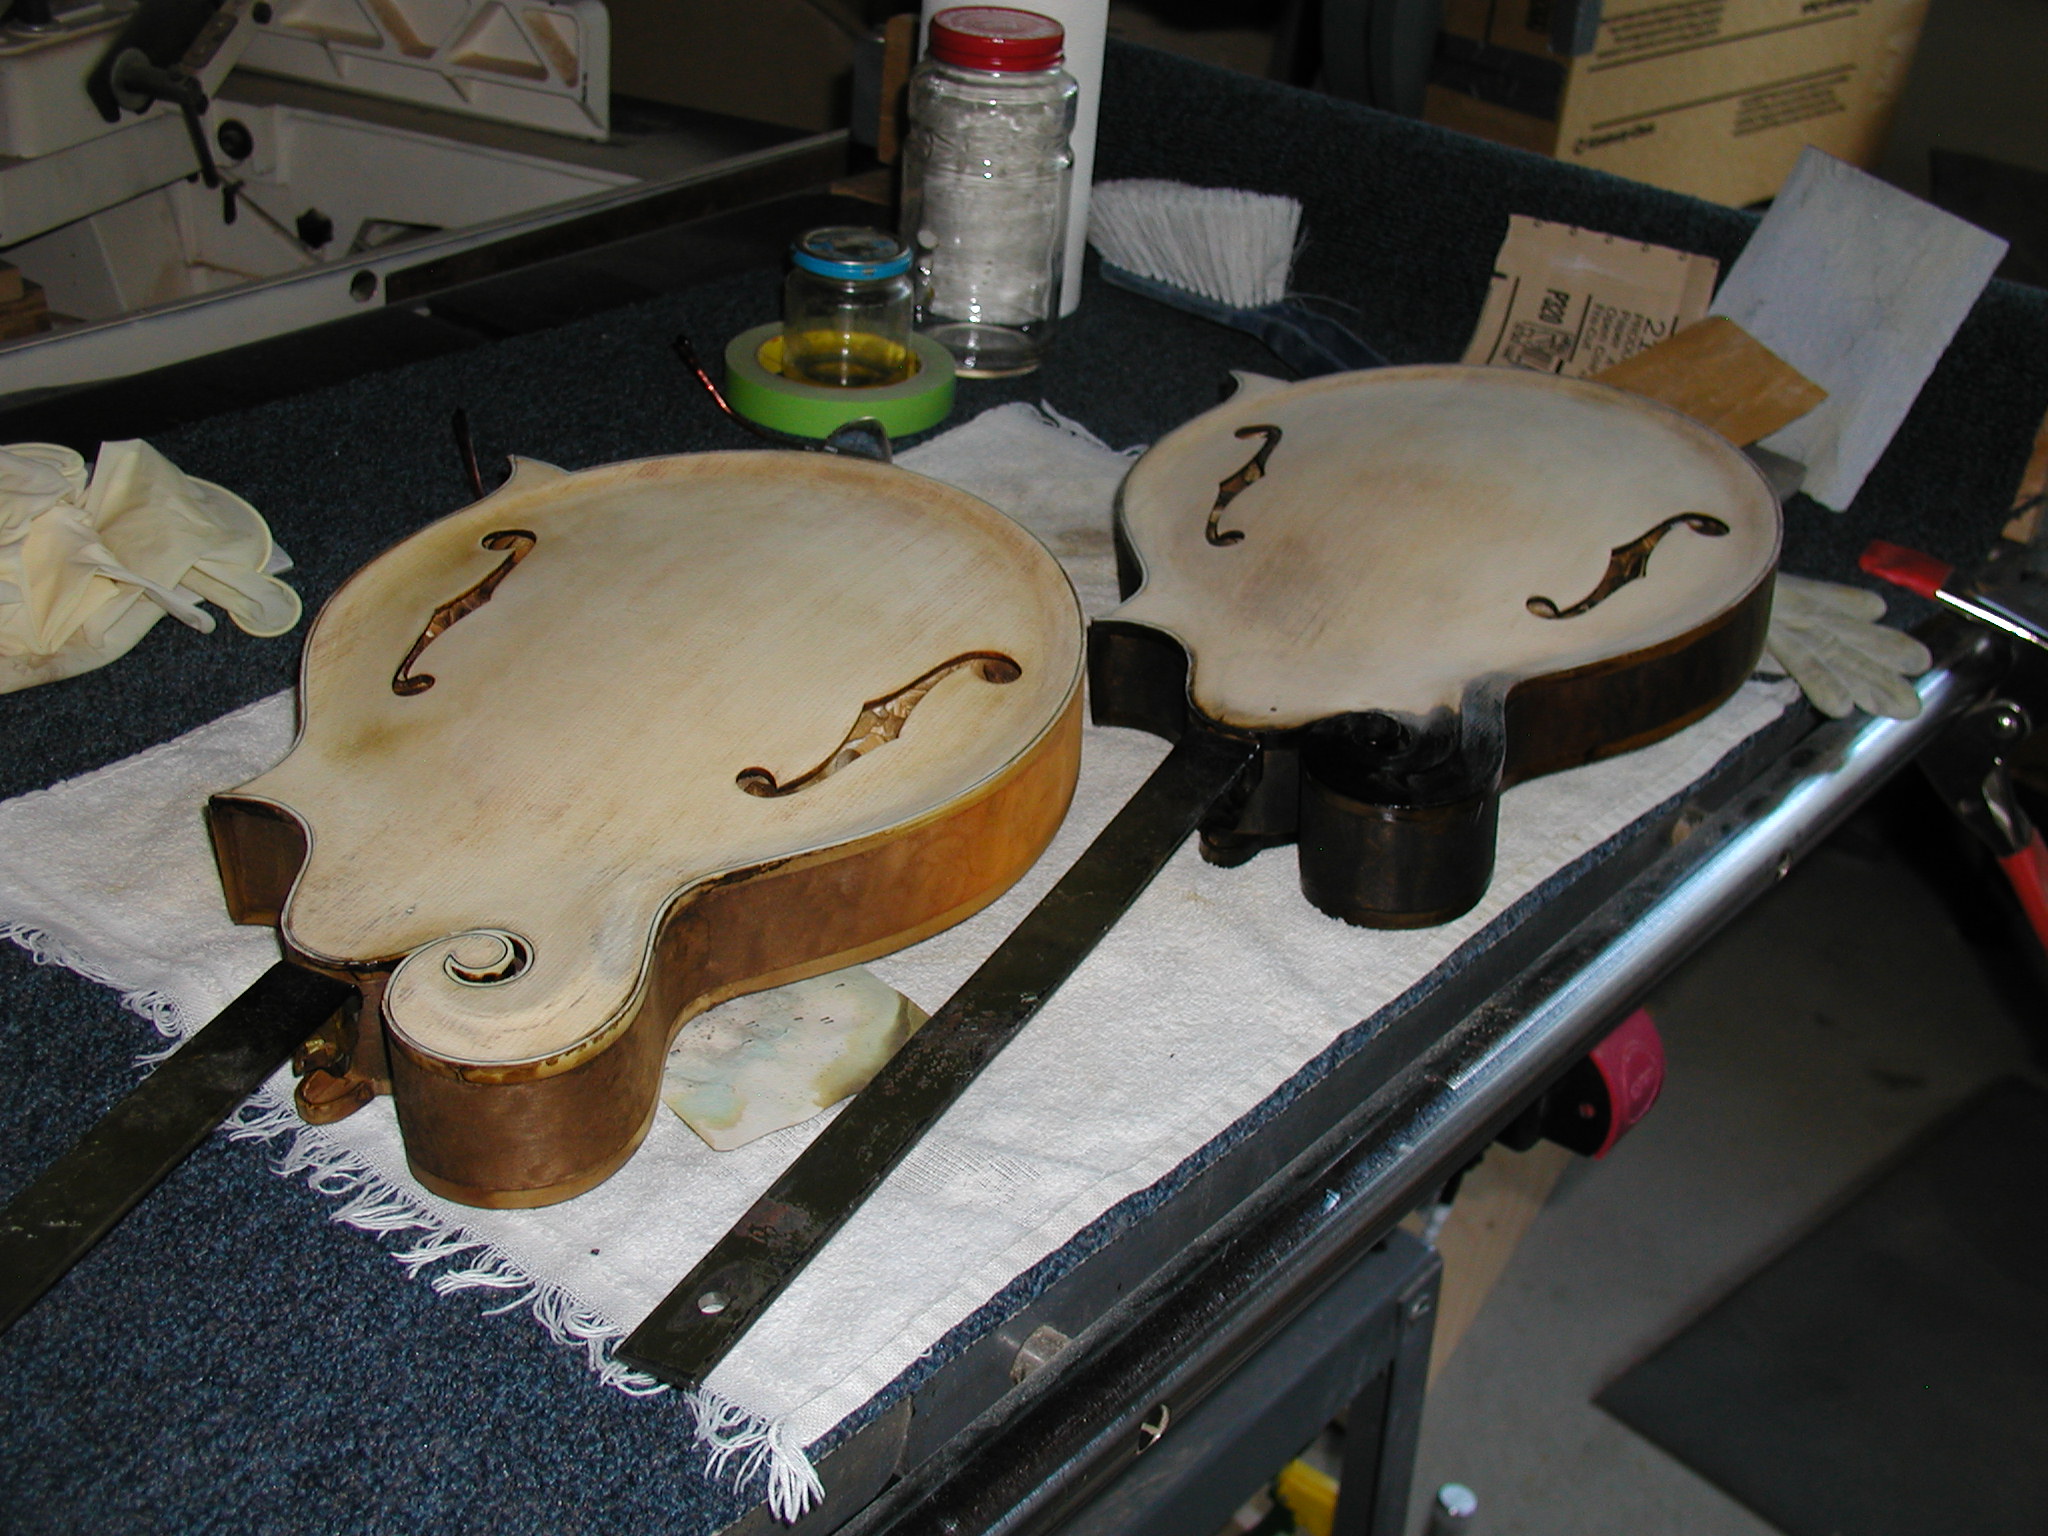
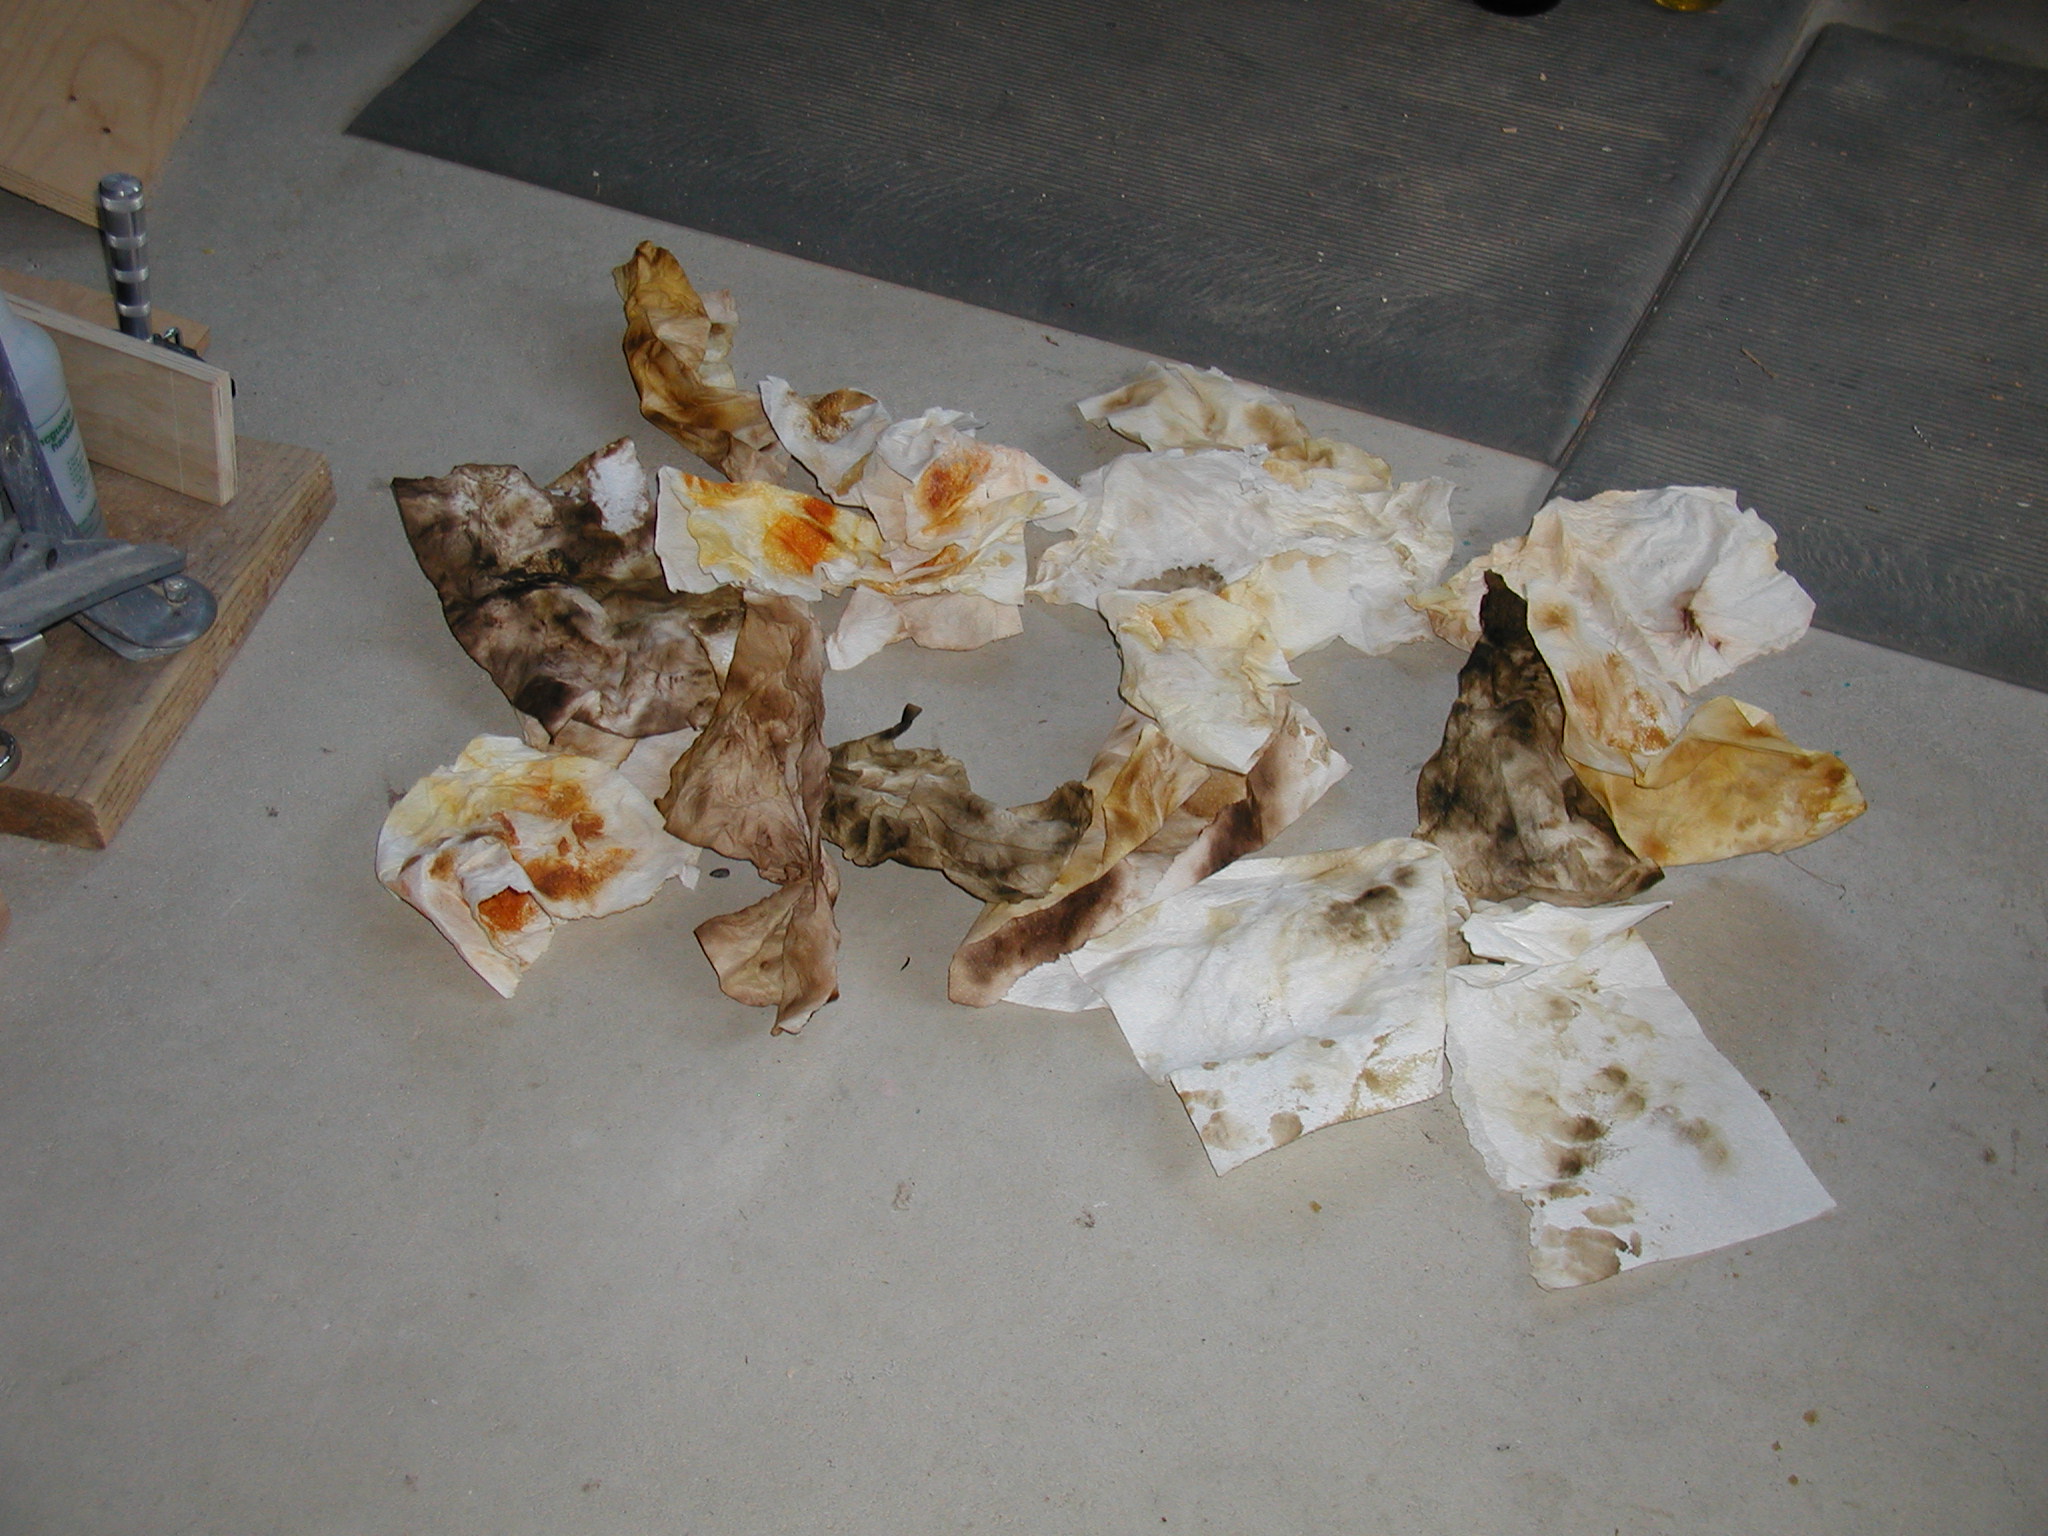
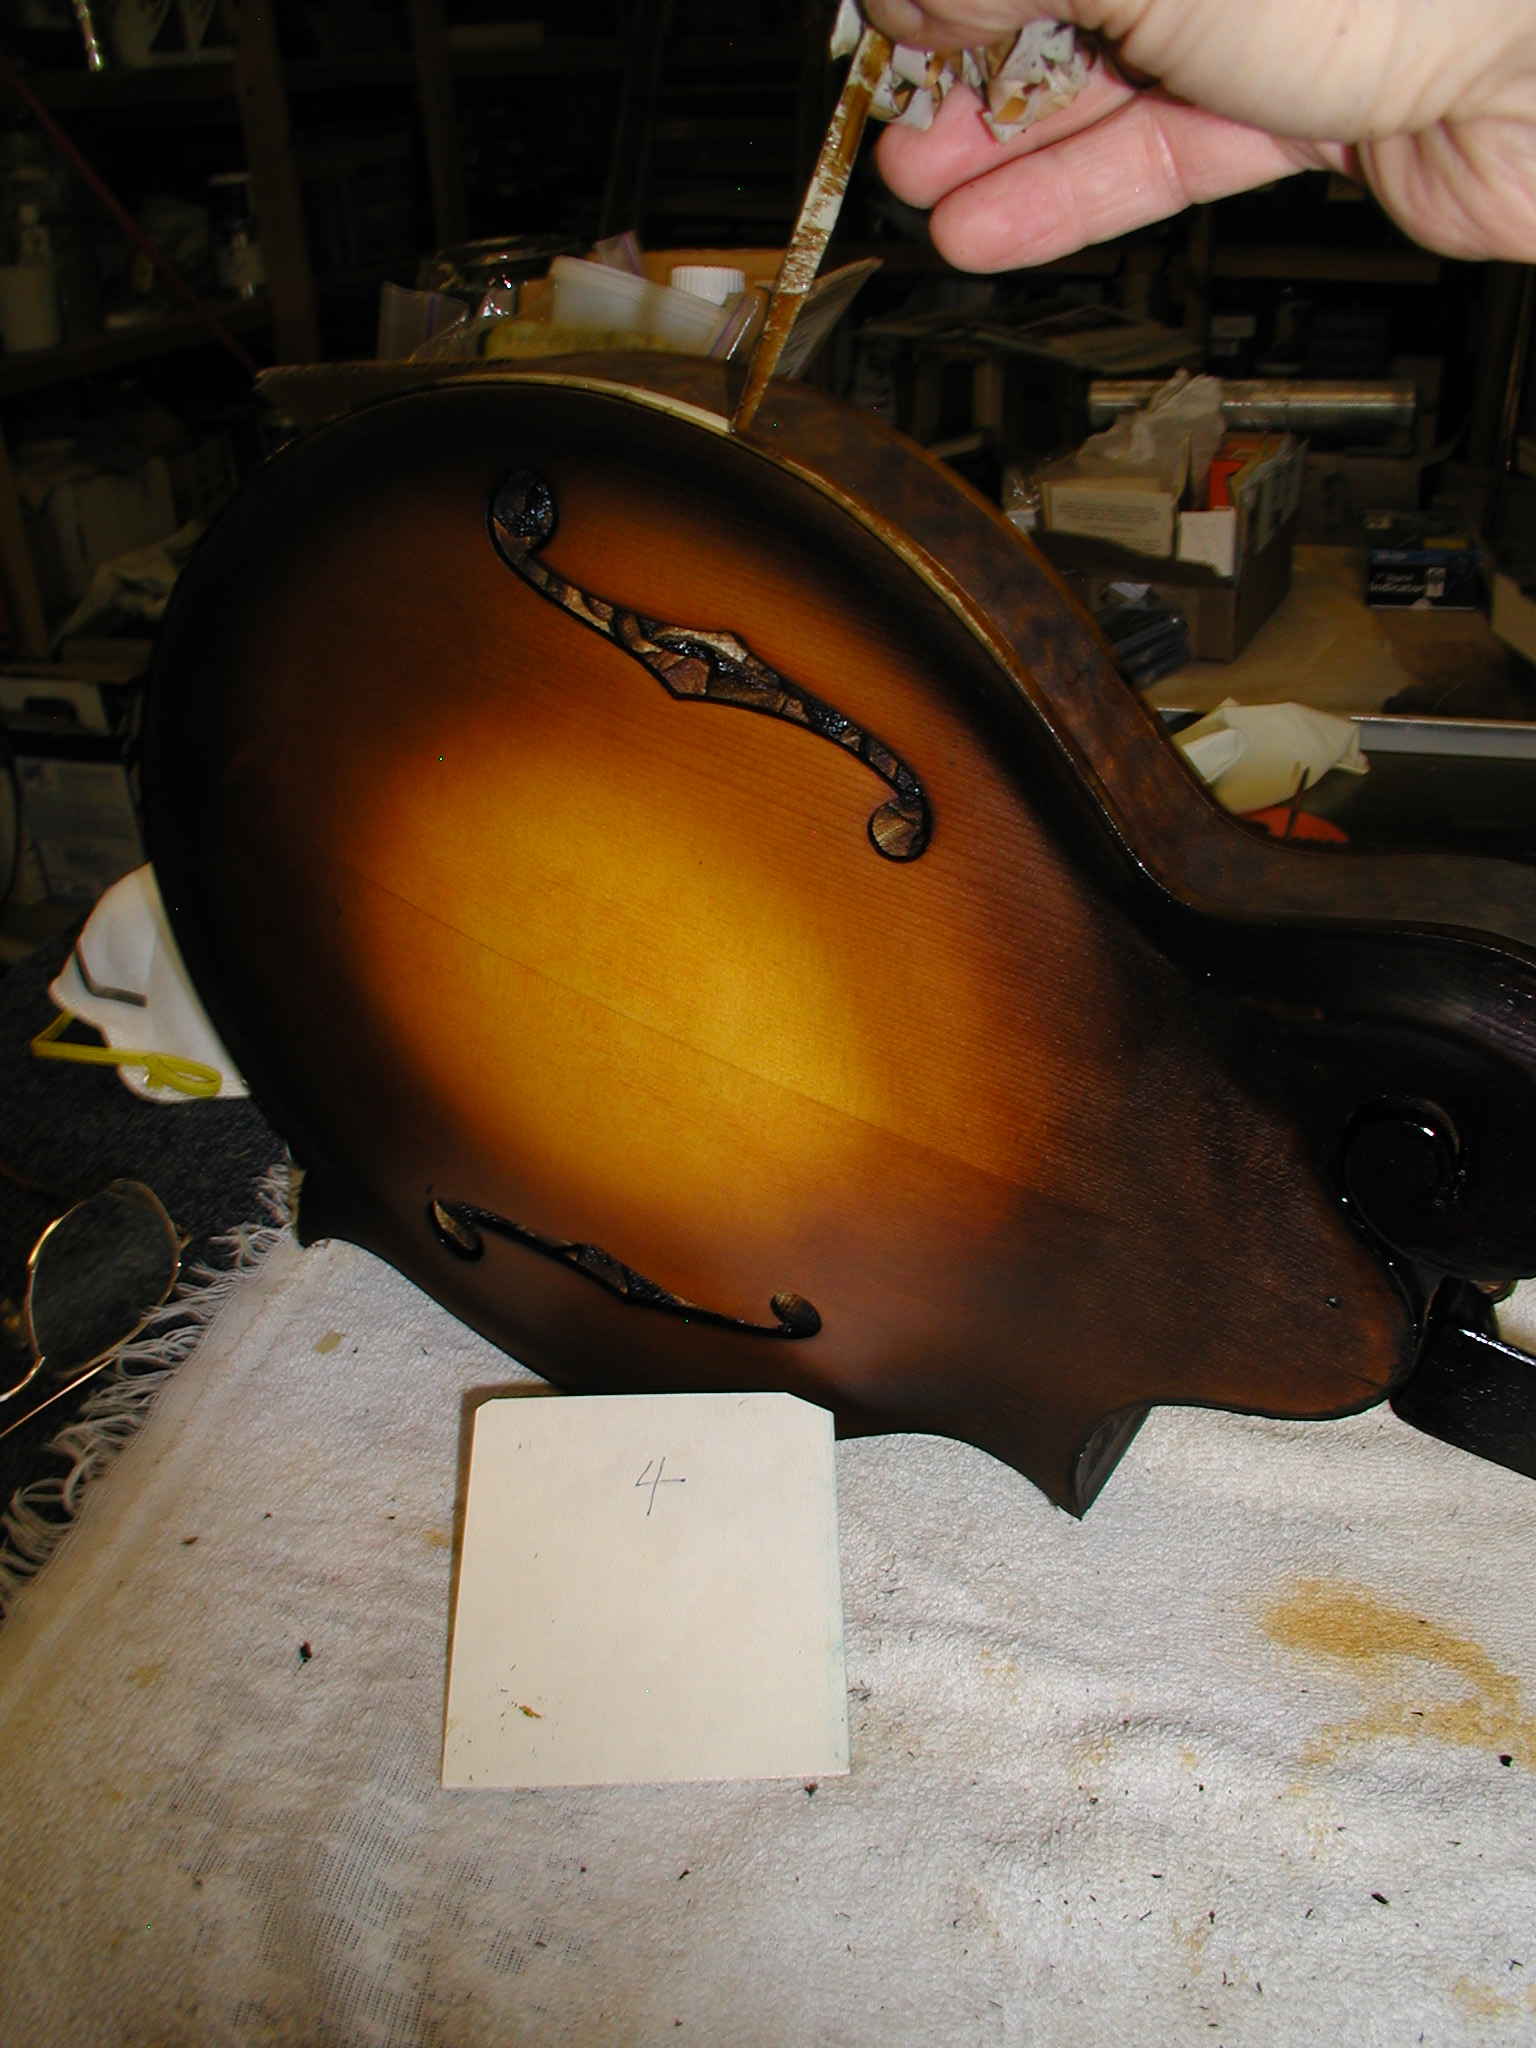
I attach handles to the body and neck since I'm finishing them separately. I have slotted holders under the table top in my spray booth I can slip the handles into for curing time. Then I progress through bright yellow, Amber, a brown mix, and last of all black. For the yellow I do everything, but do extra coats in the center of the plates since that is where it will show up most after the rest of the burst is on. The amber goes on following the burst/highlight pattern leaving the center of the plates and un-darkened areas of the neck and sides with just the yellow. I follow with the brown mix, adding it a bit at a time and fading away from the light areas to the darker with additional coats. For some reason the camera with flash makes this look very "bandy" but in real life it is faded quite nicely. Not shown is getting into the scroll slots with a small brush and/or Q-Tips with black stain to get those hard to reach places good and dark. I usually do that before I shoot the black spray.
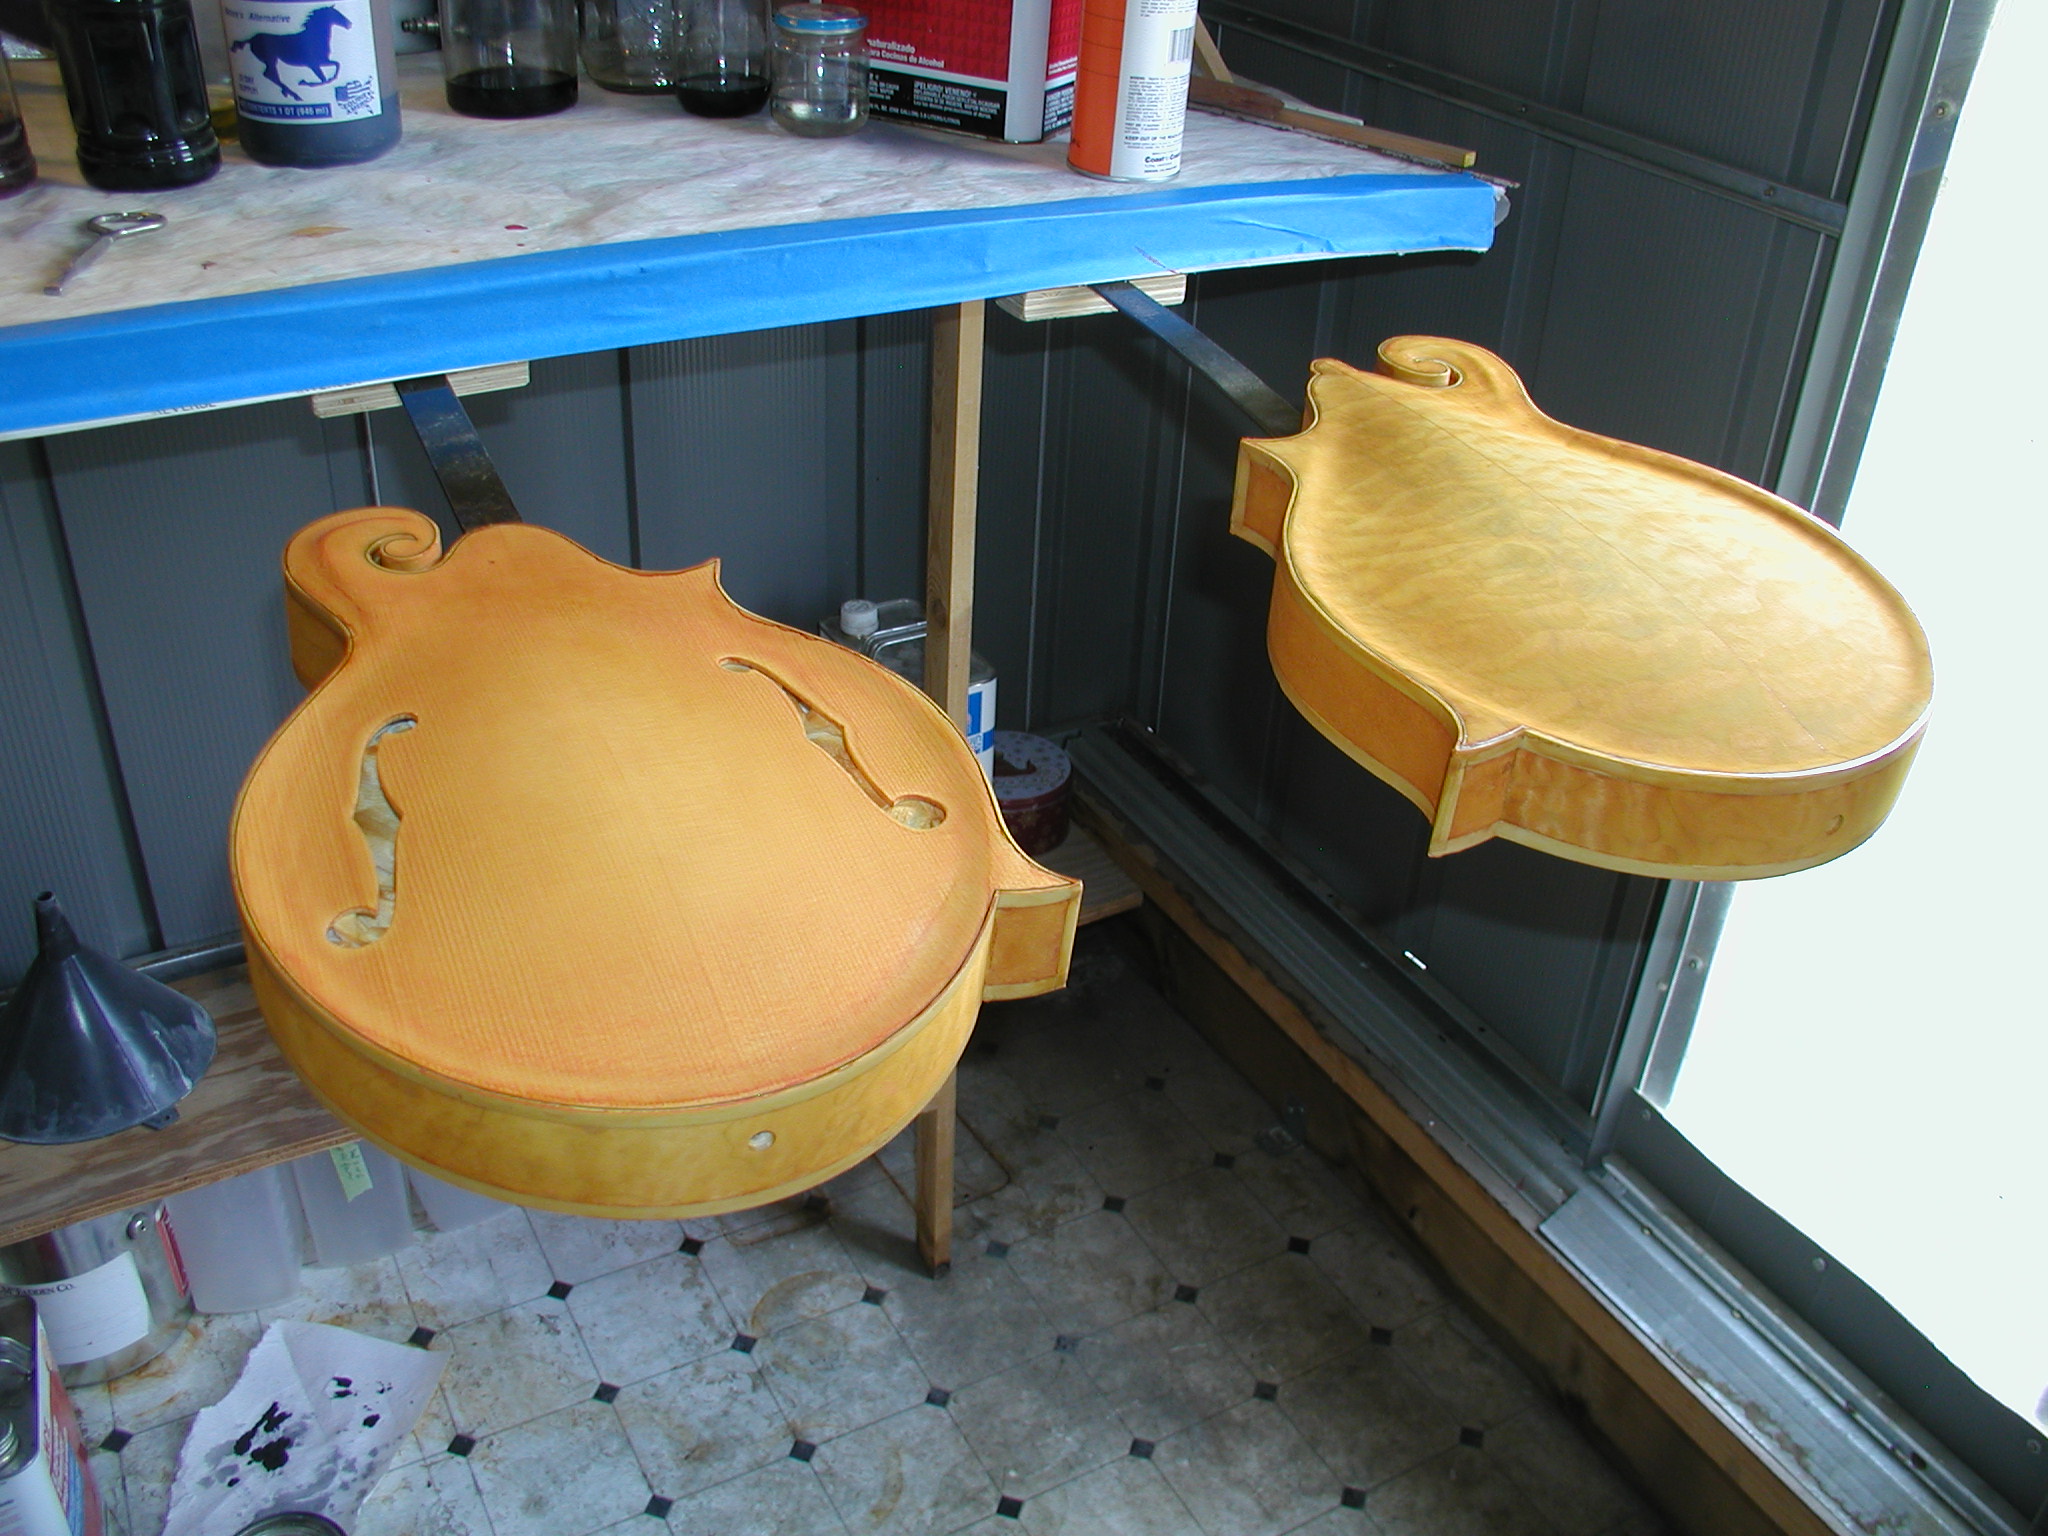

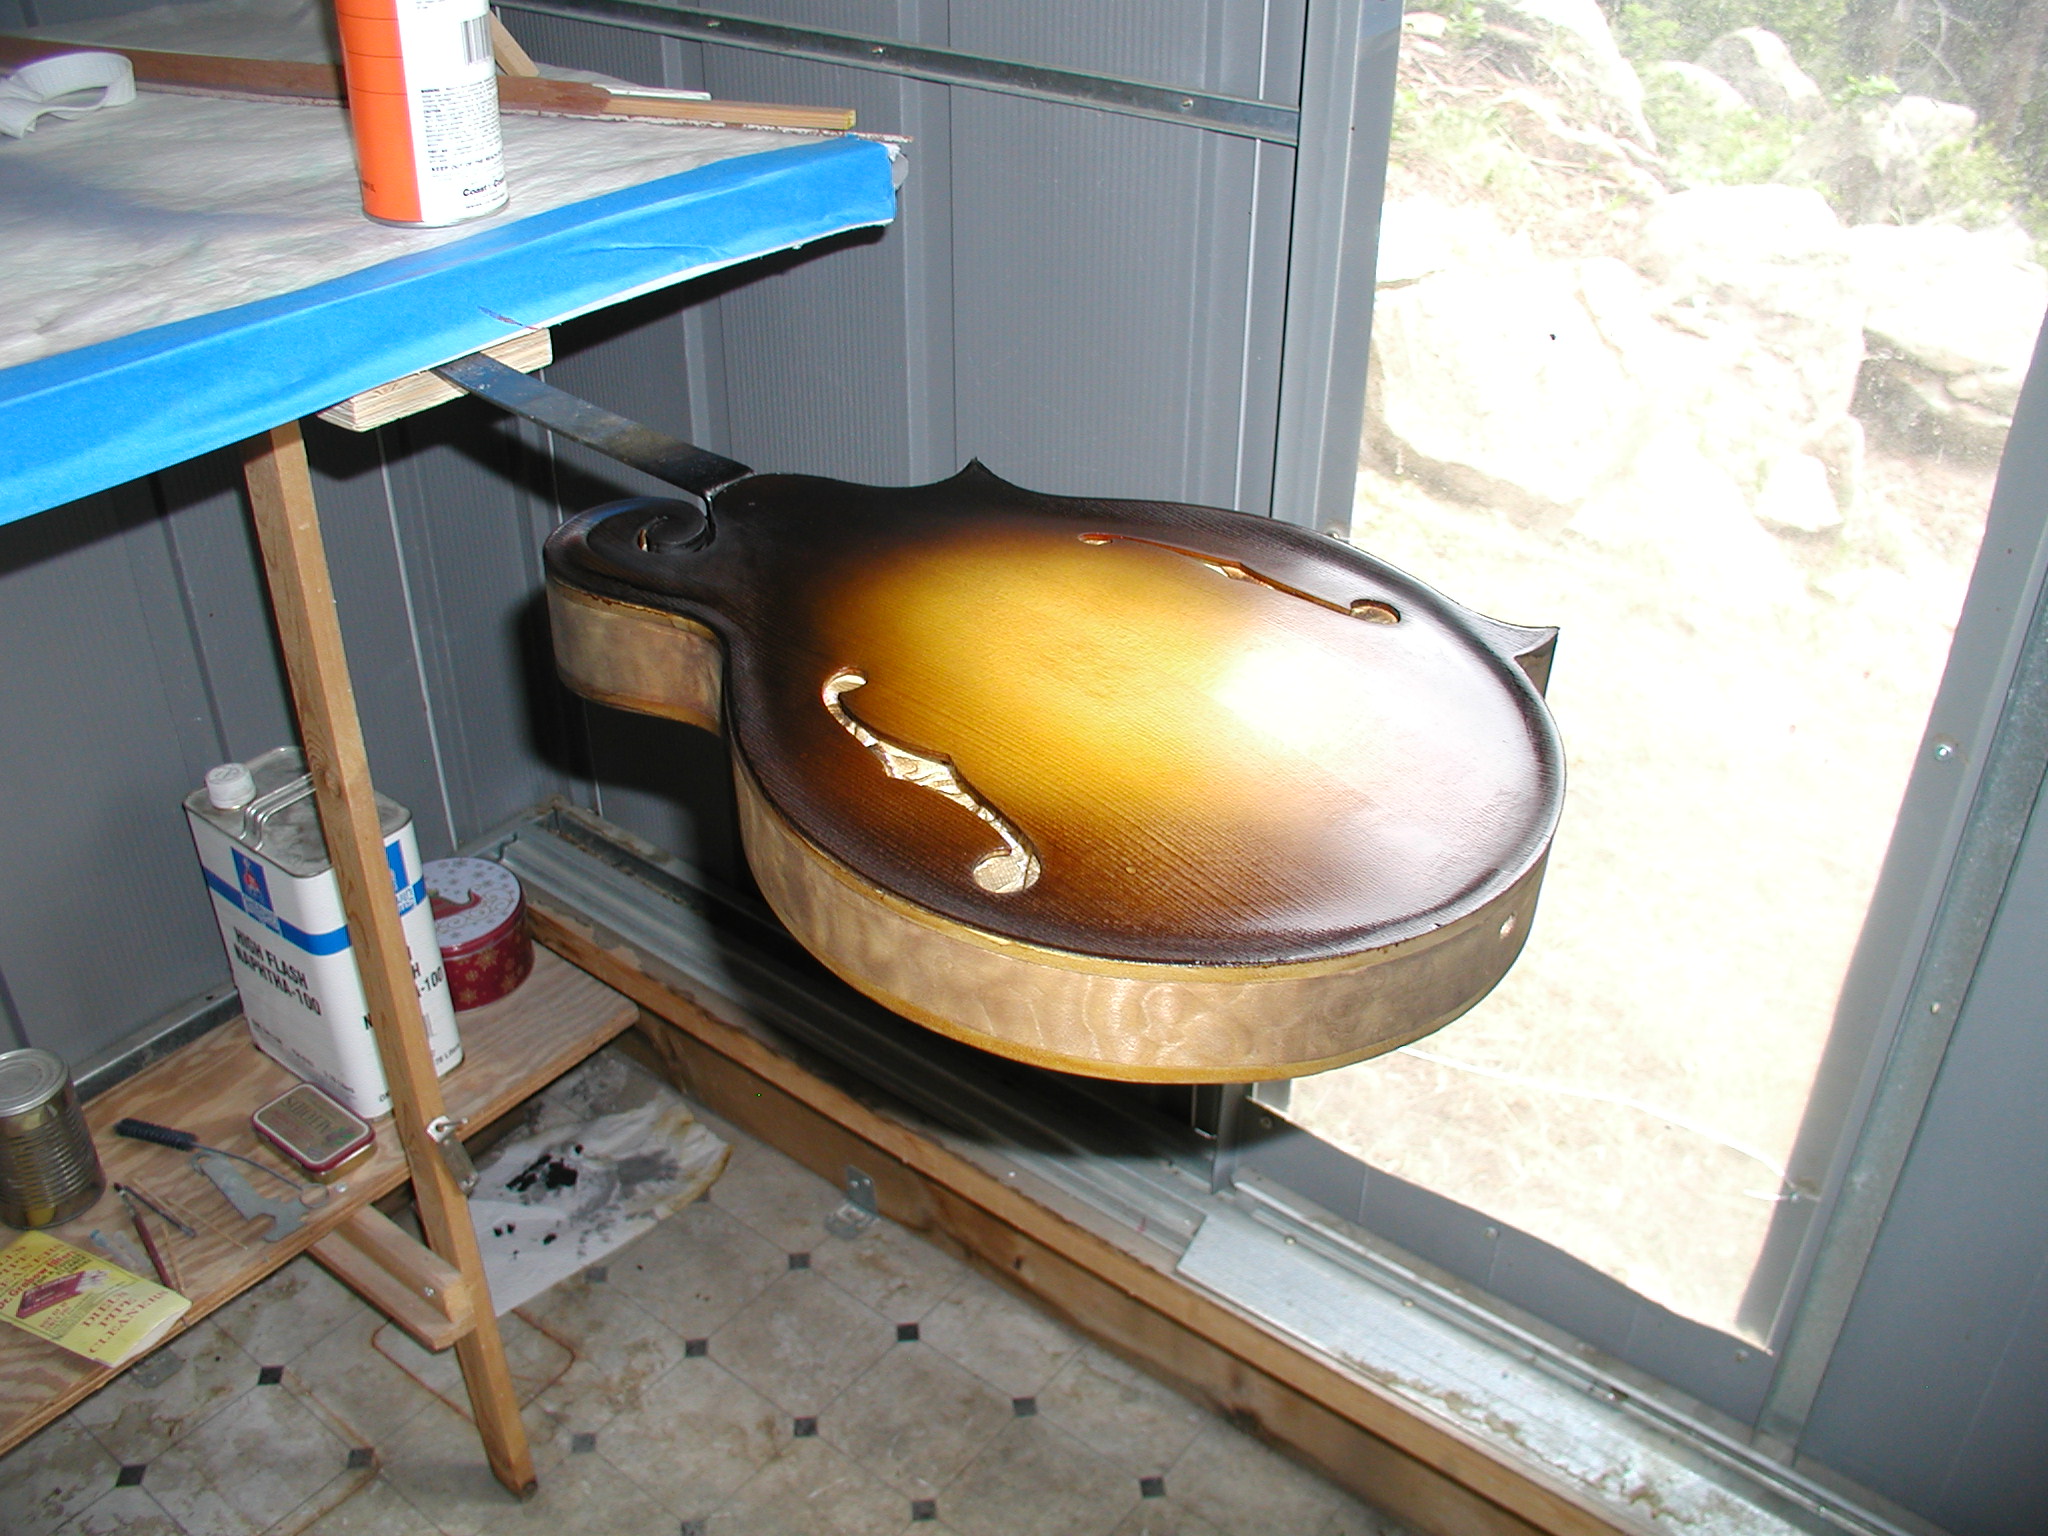
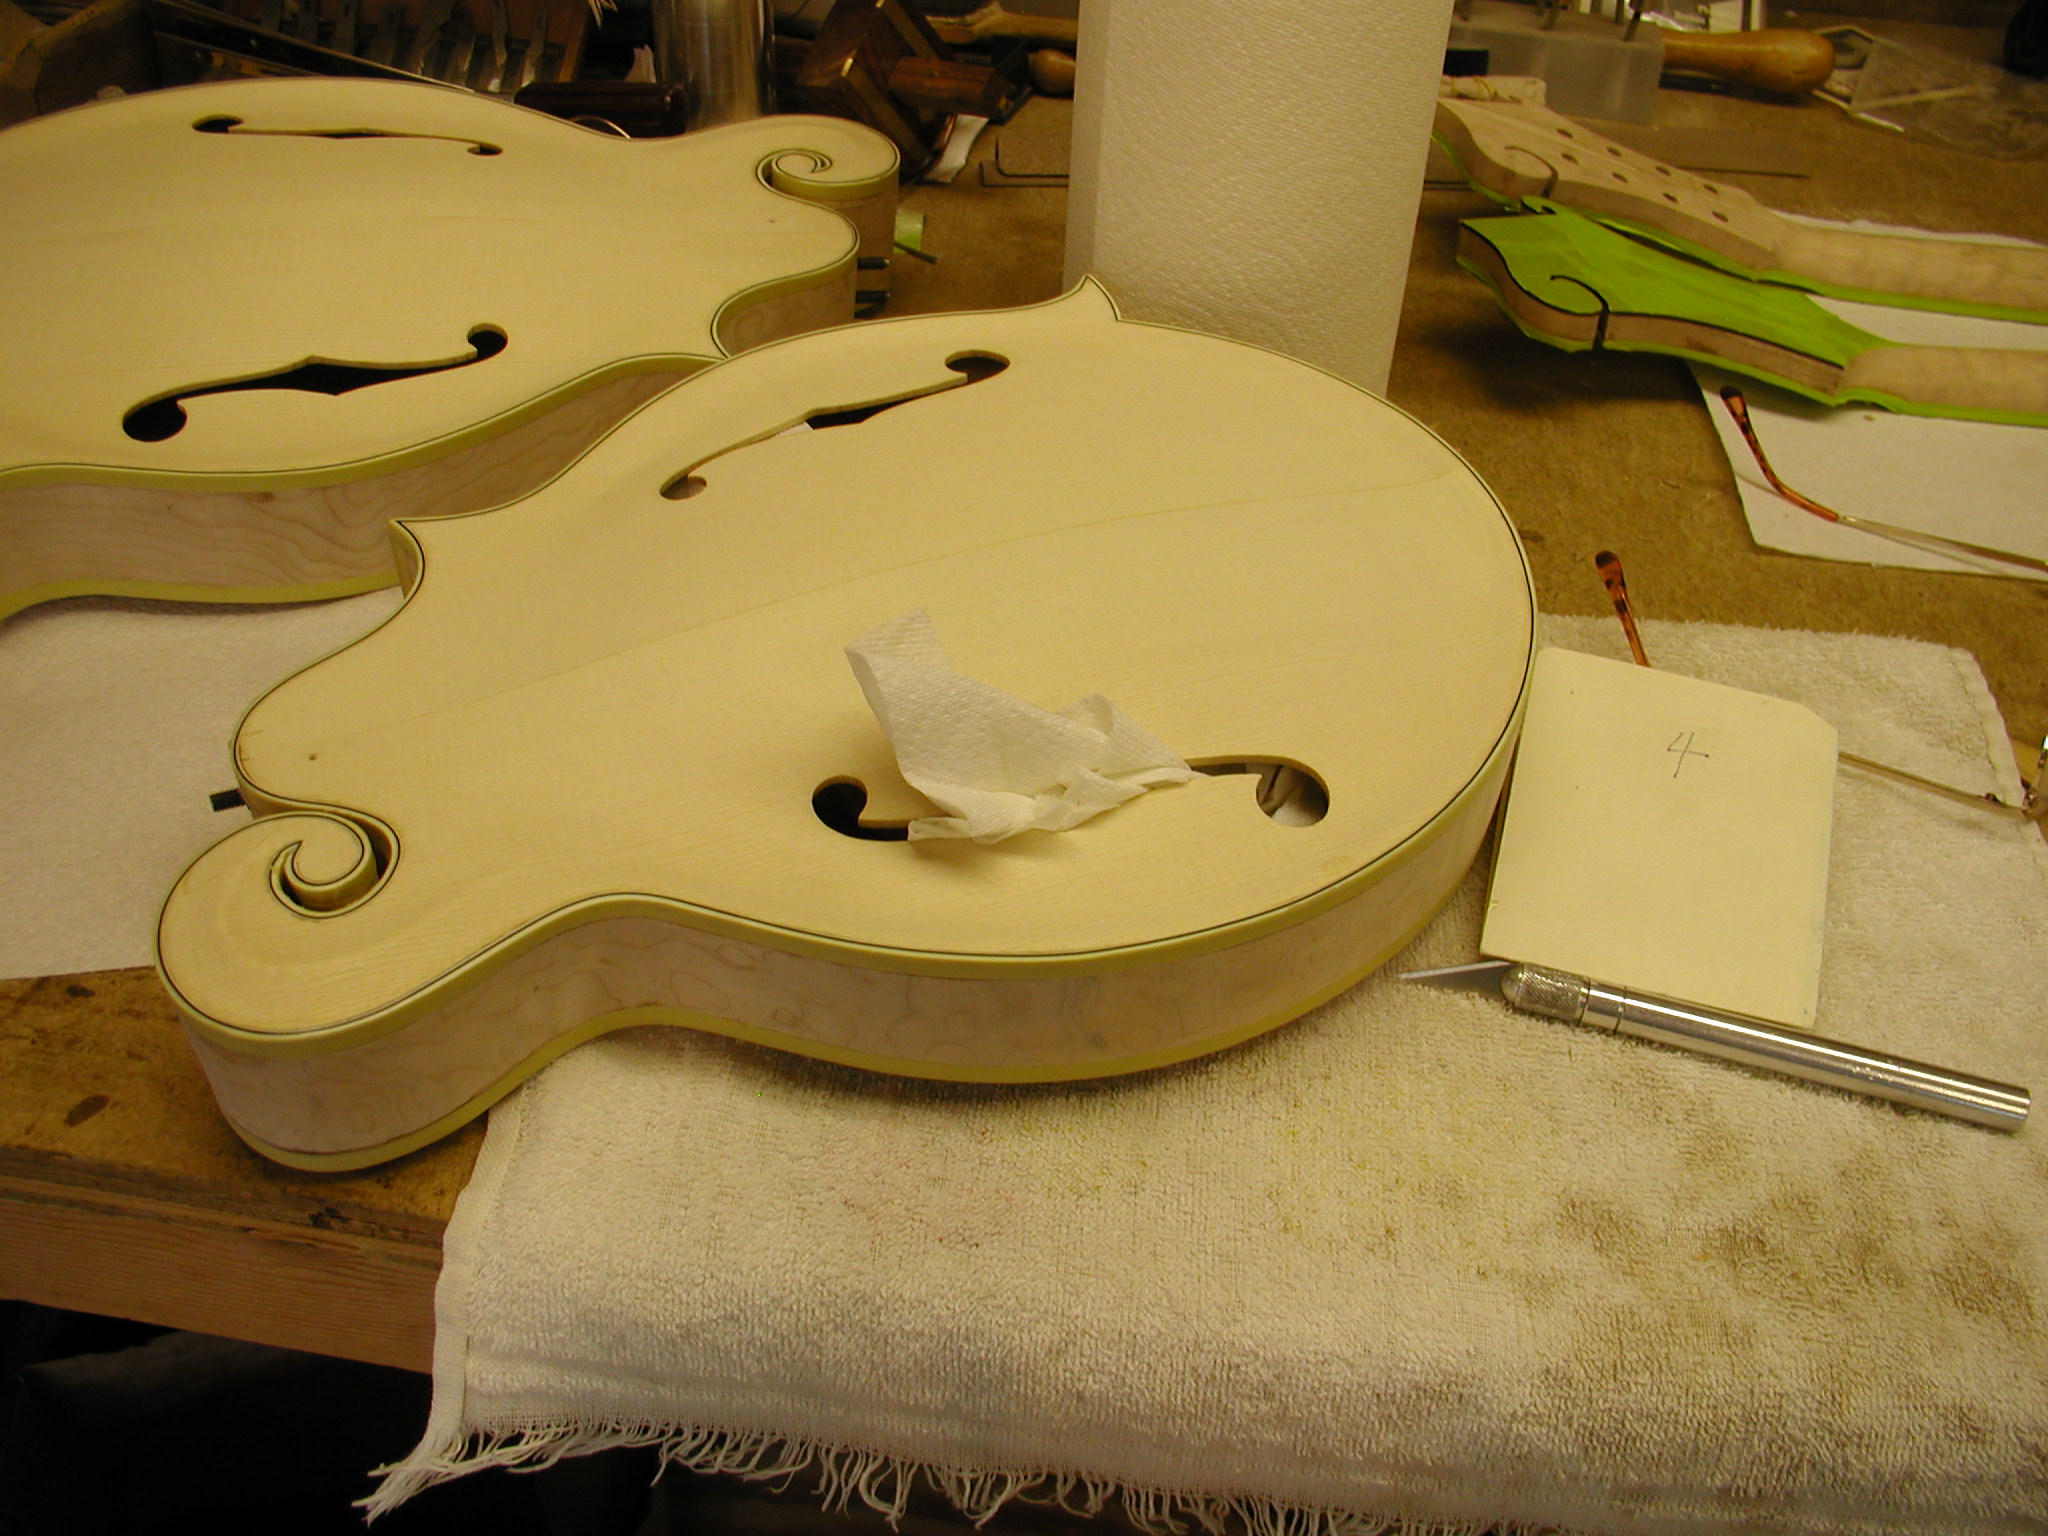
Have you ever noticed that in these online tutorials how everything just goes perfectly and effortlessly, ahhh the masters touch. Yeah, SURE! So here is a sample of stuff that can go wrong. How do you like that dark run that materialized along side the F-hole? Break out the alcohol and wipe it. I also wiped the top of the other one too because I didn't like how dark it had gotten. So I just re-shot the whole thing on both. There is No Way you can touch up this sort of thing, it will always show. Just wipe and redo it. Here is a shot of what the back looks like too.
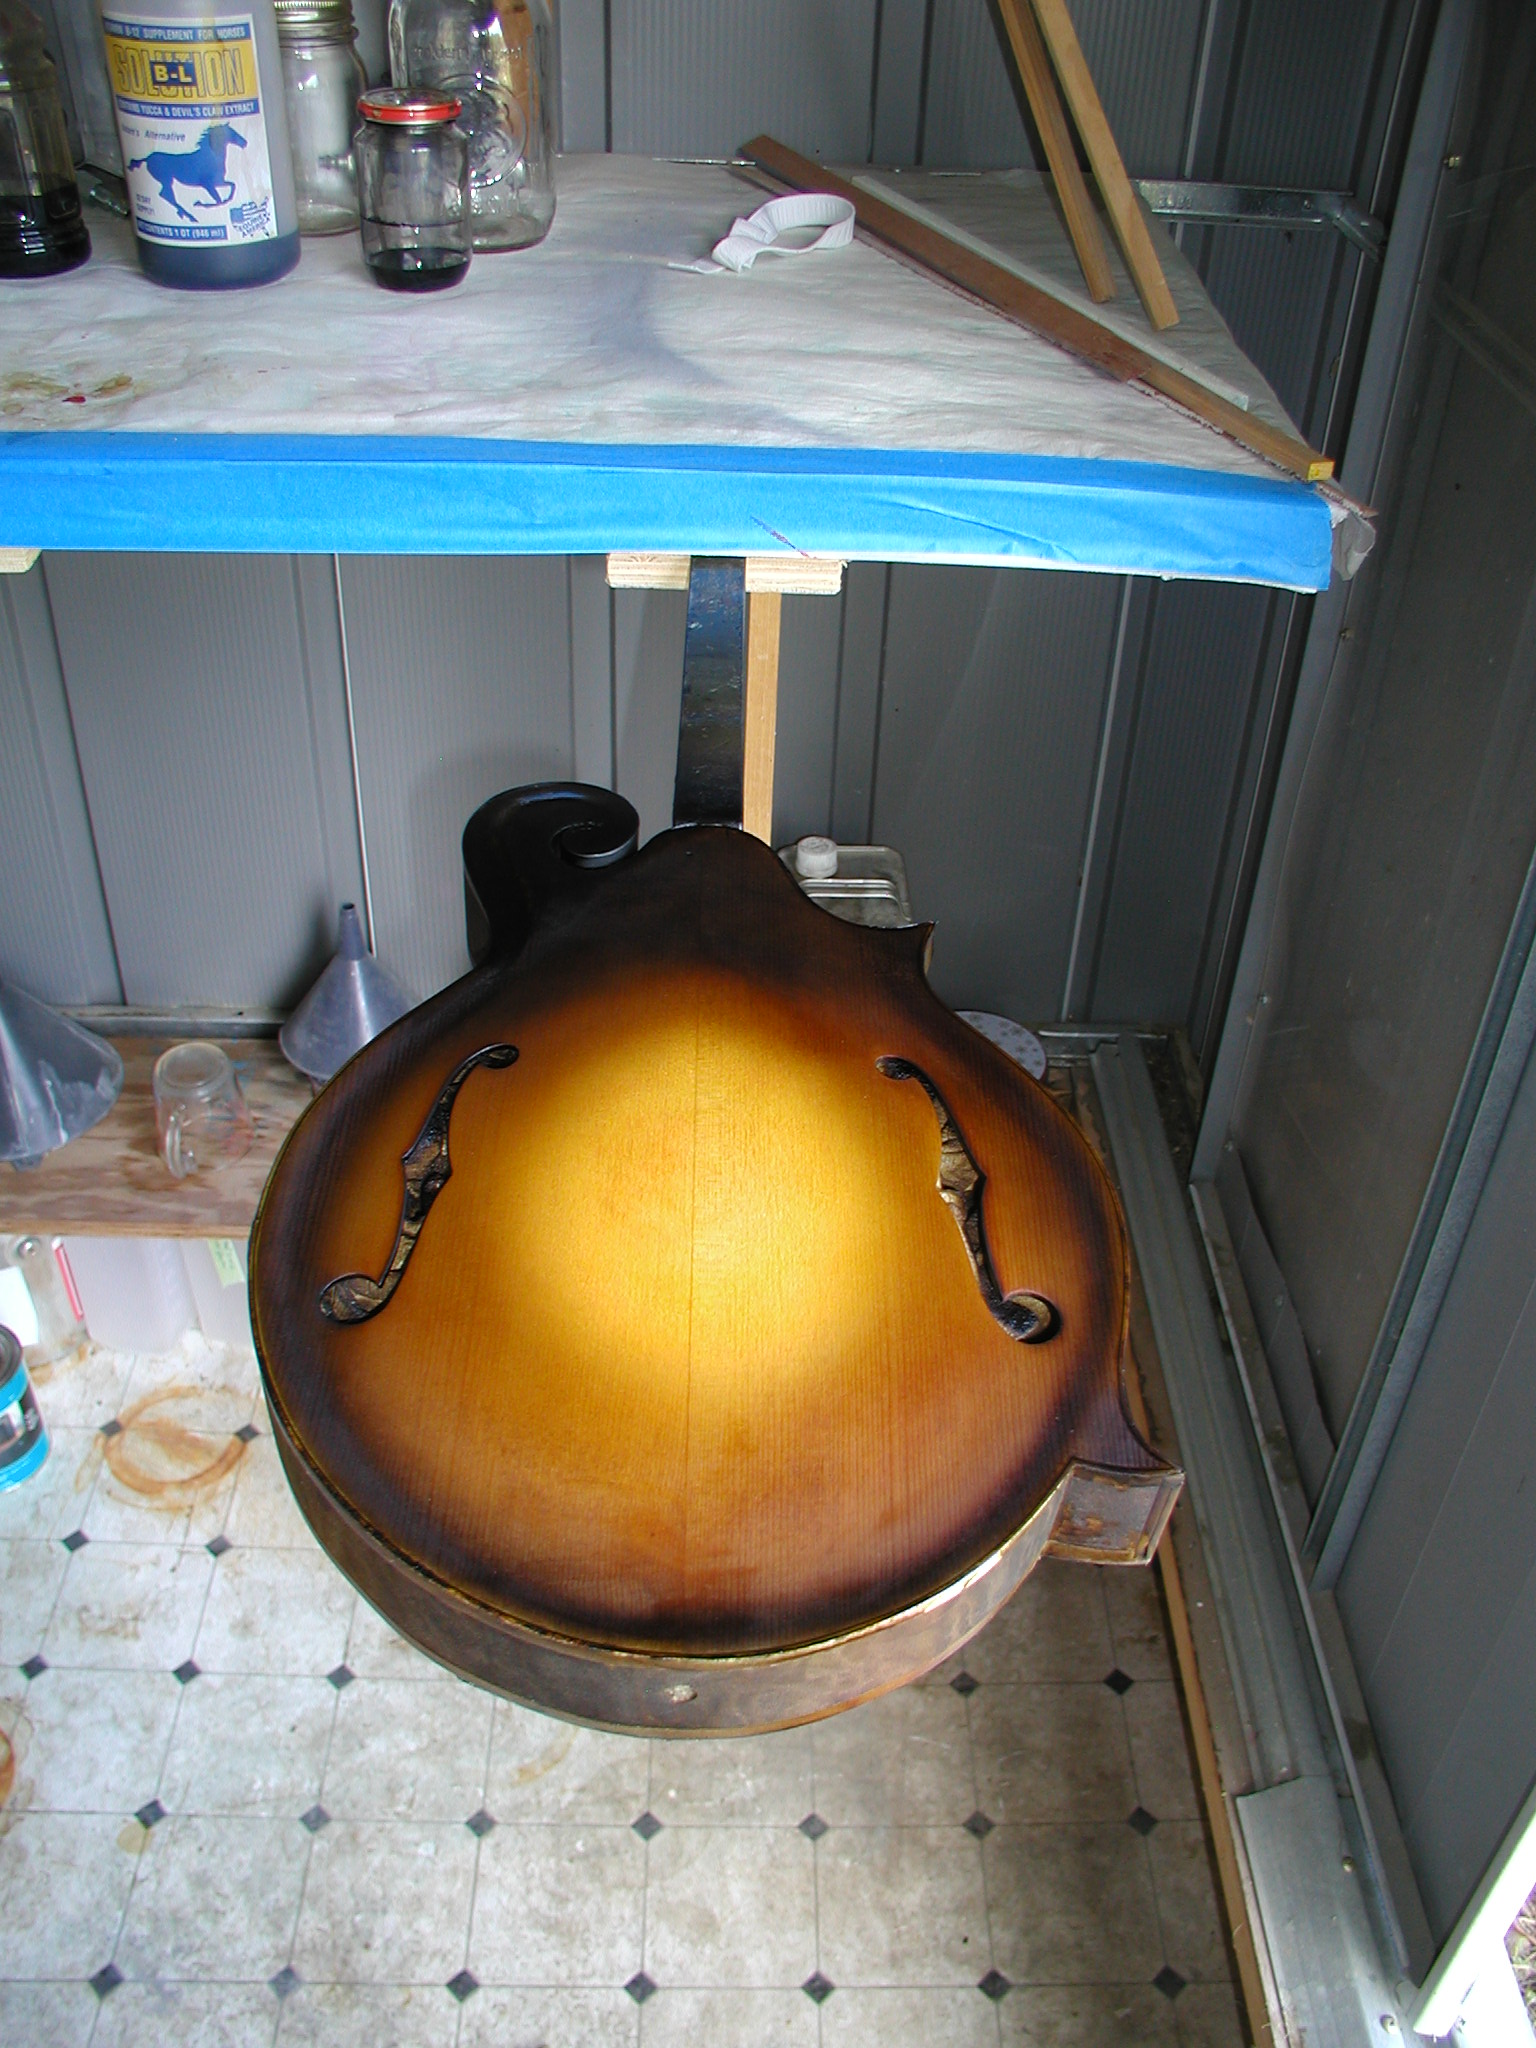

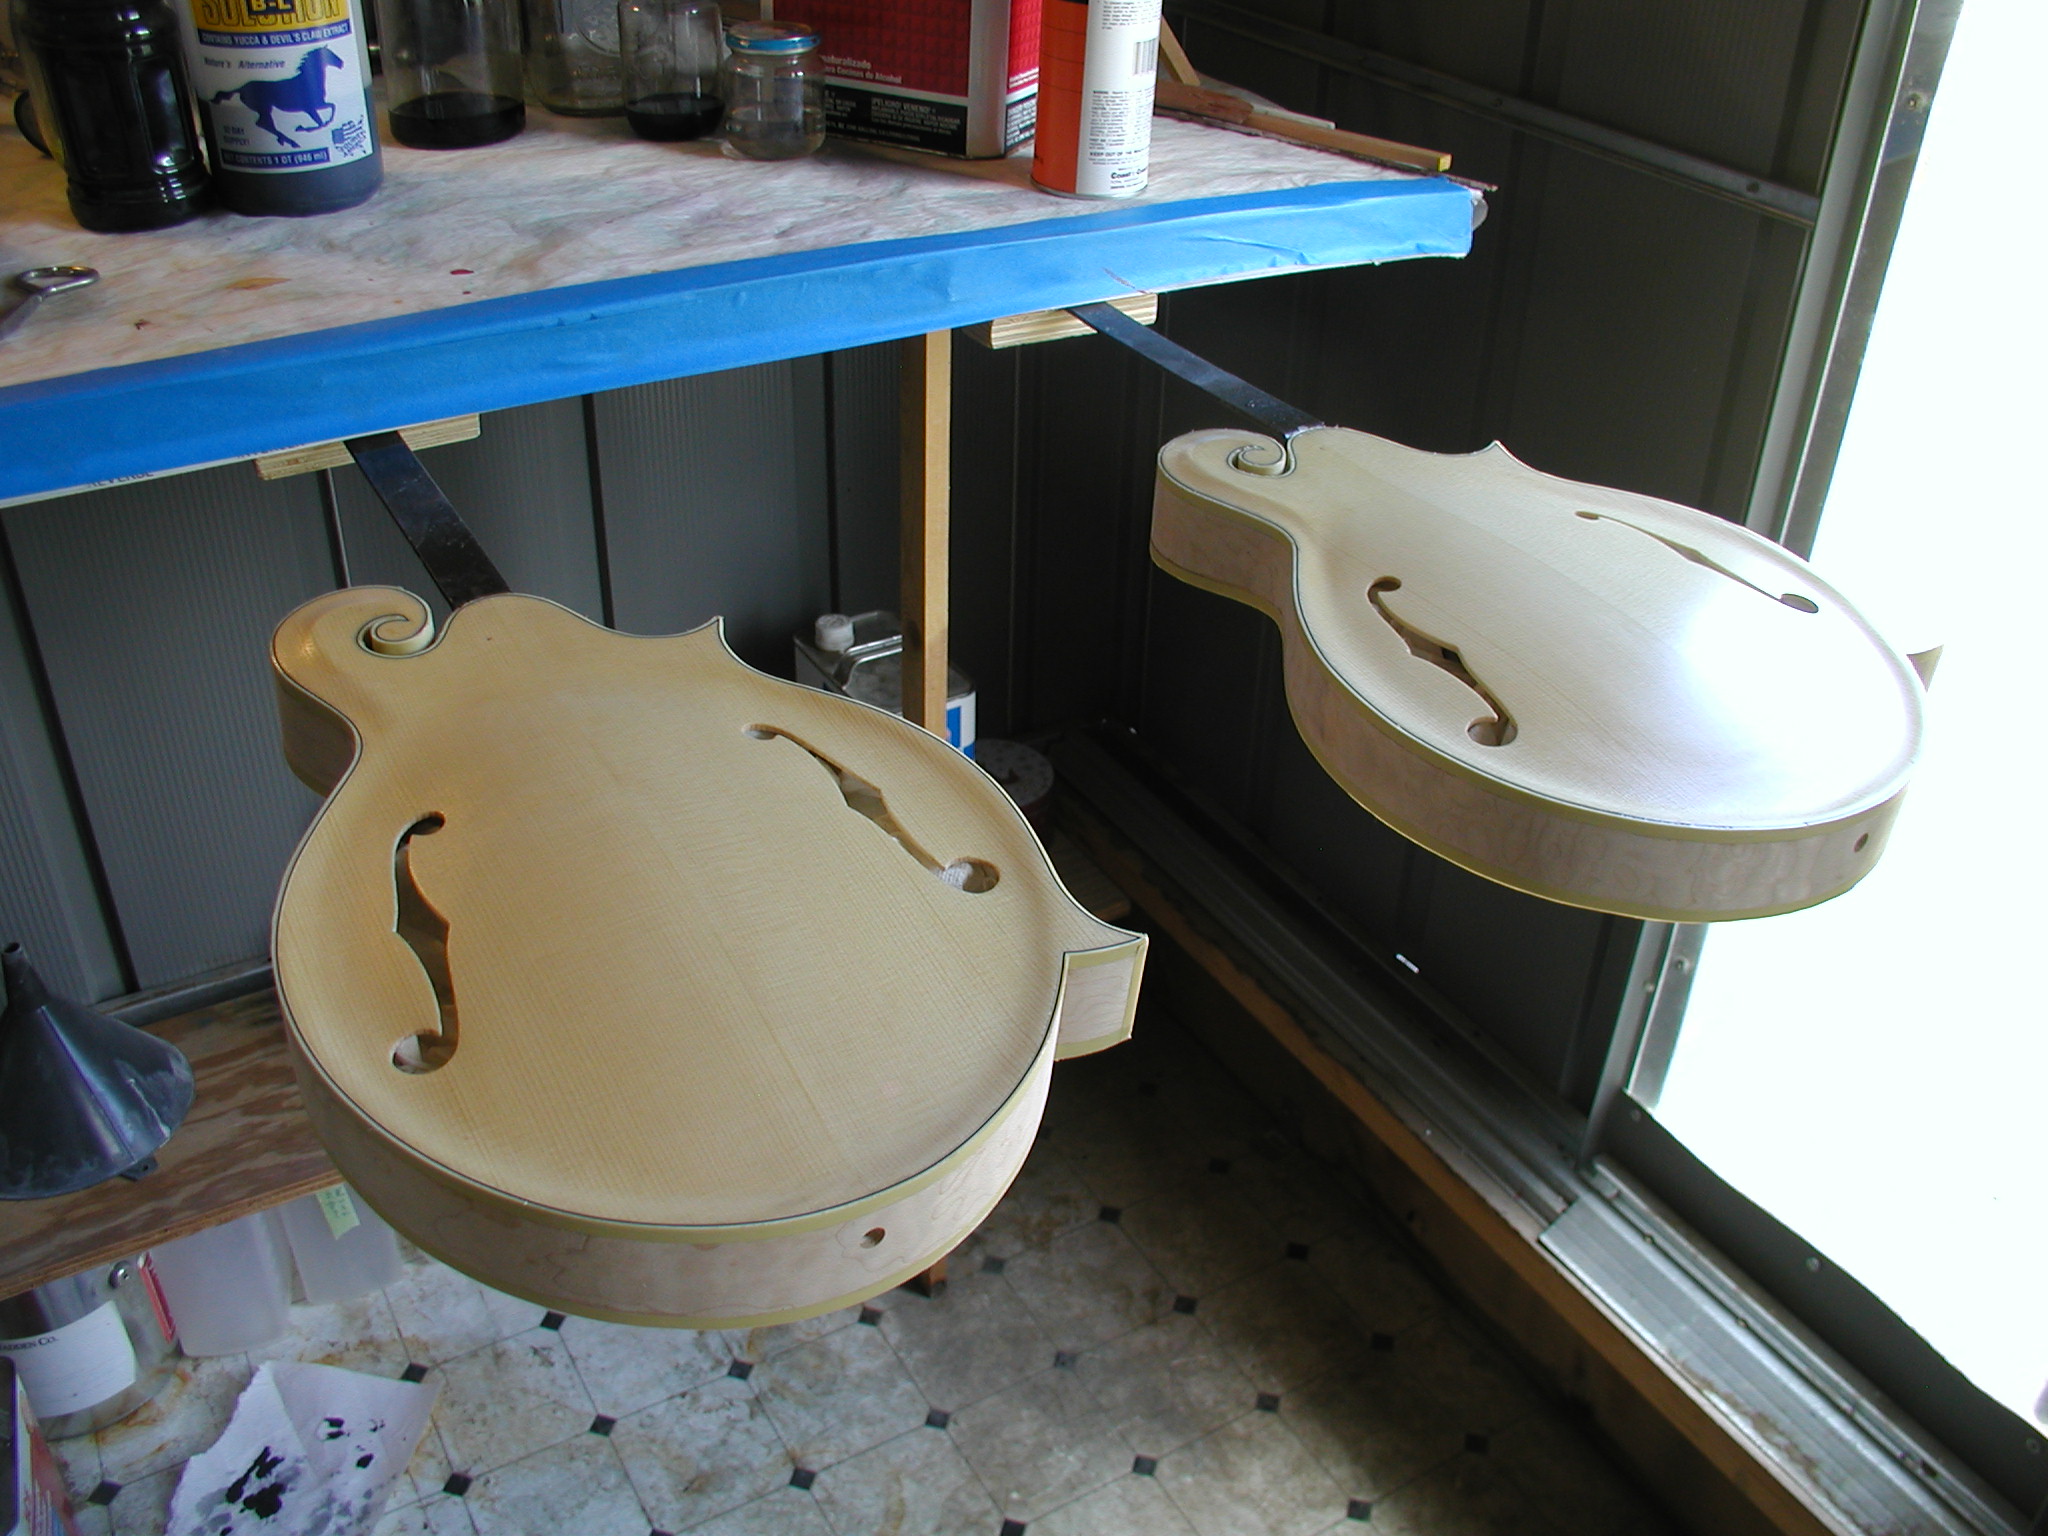
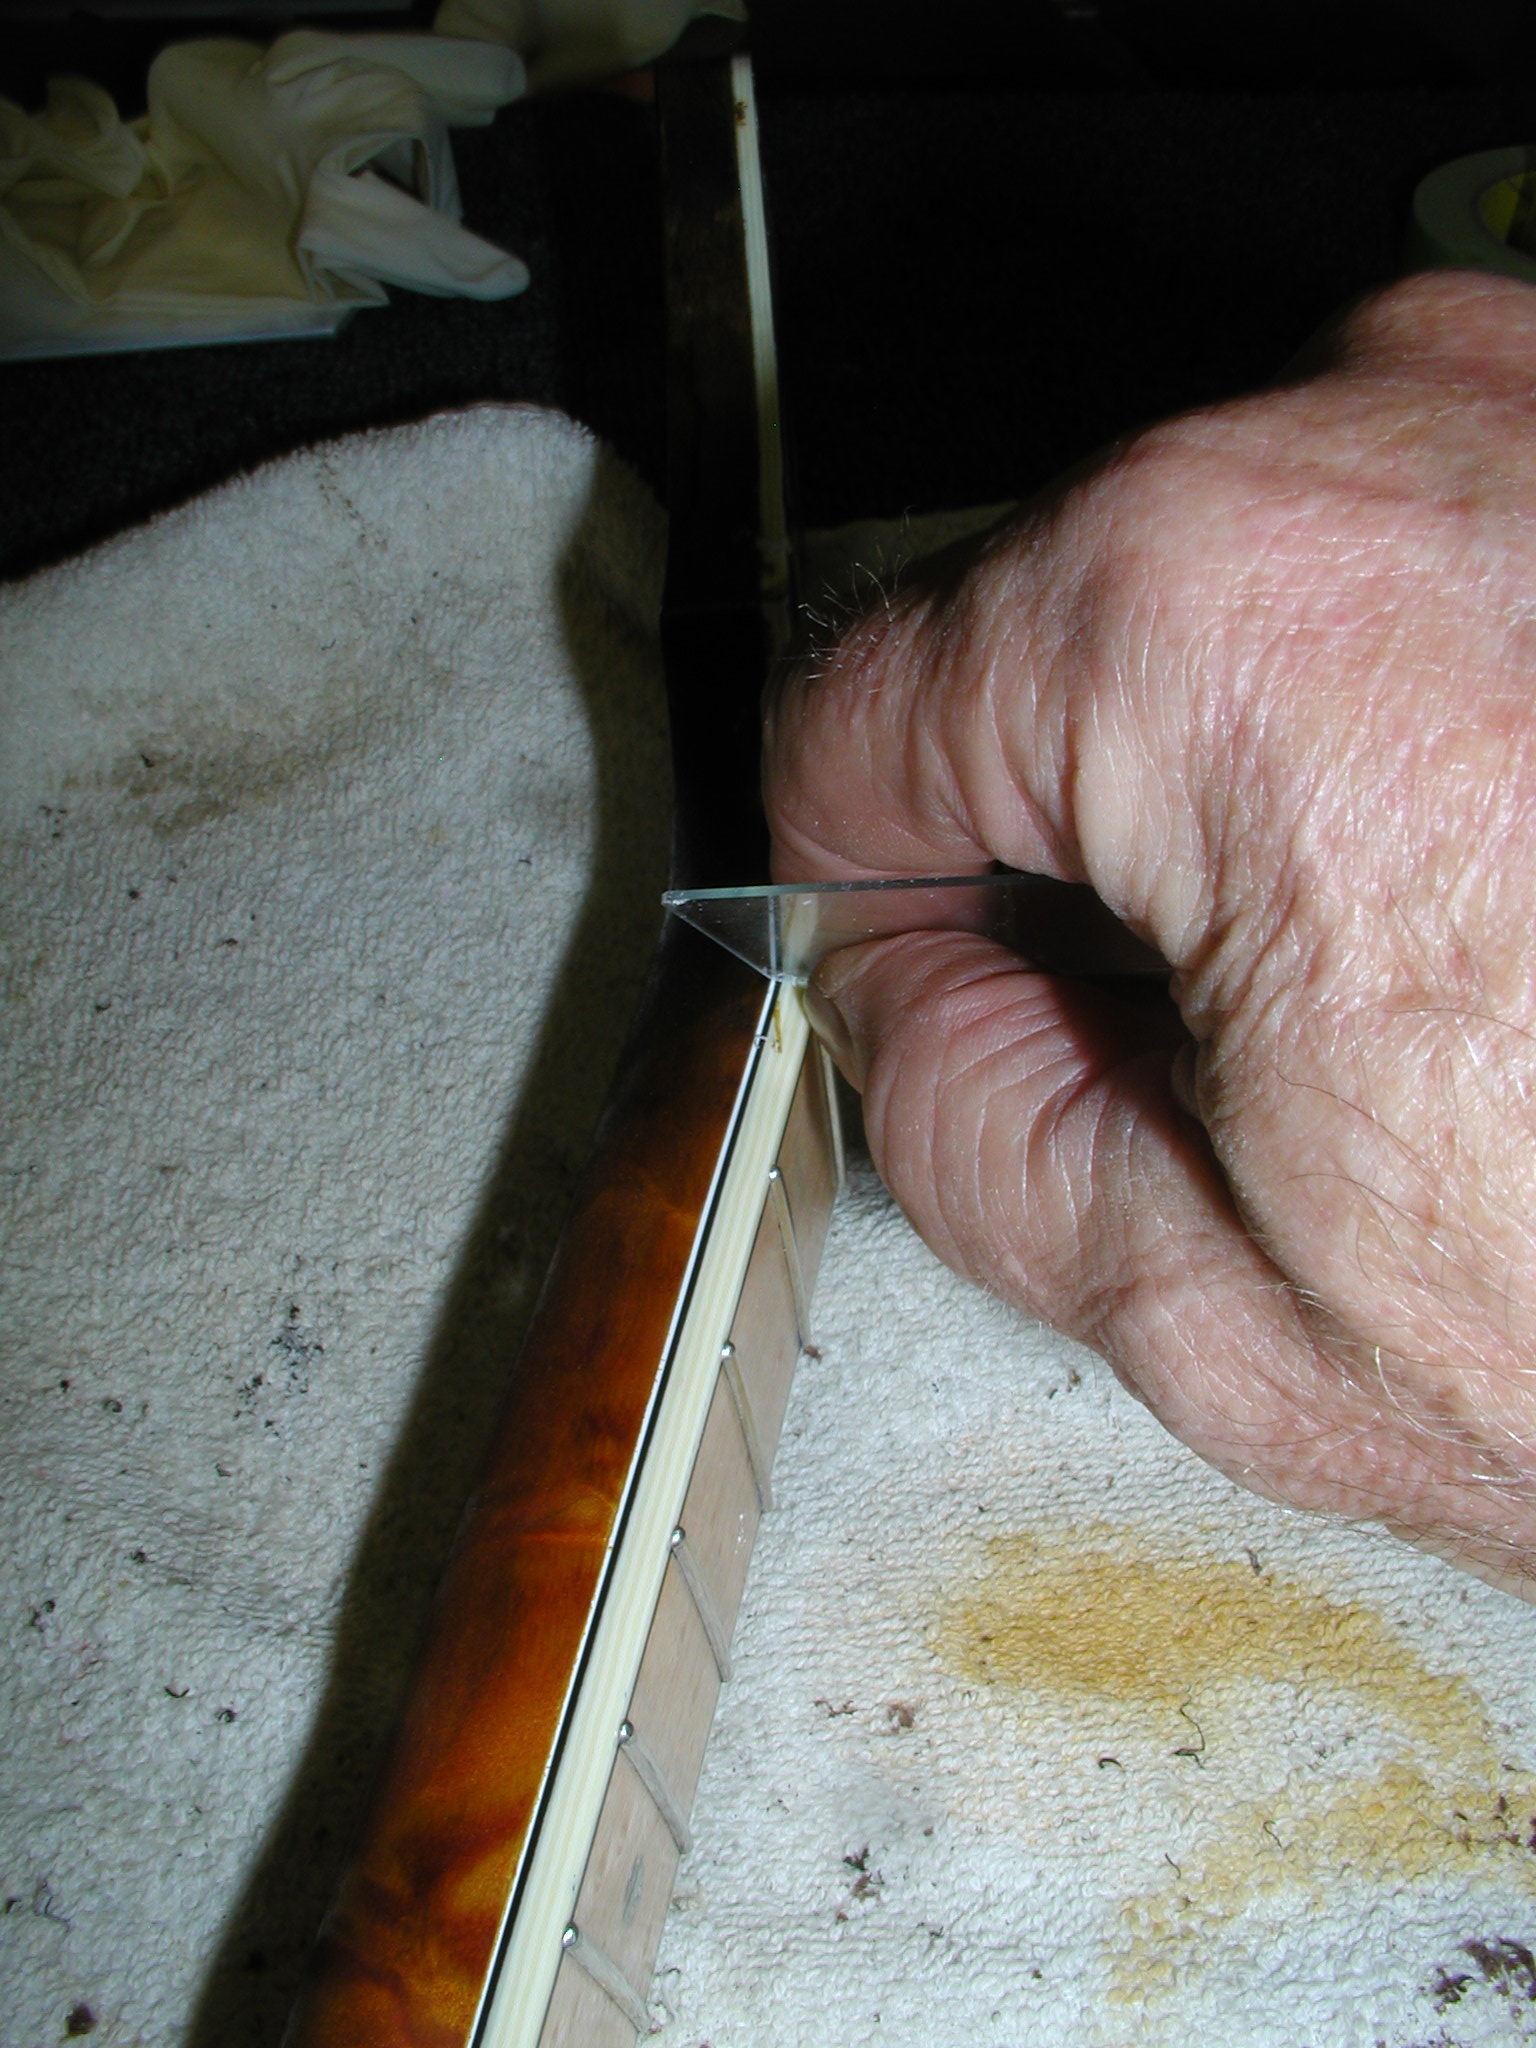
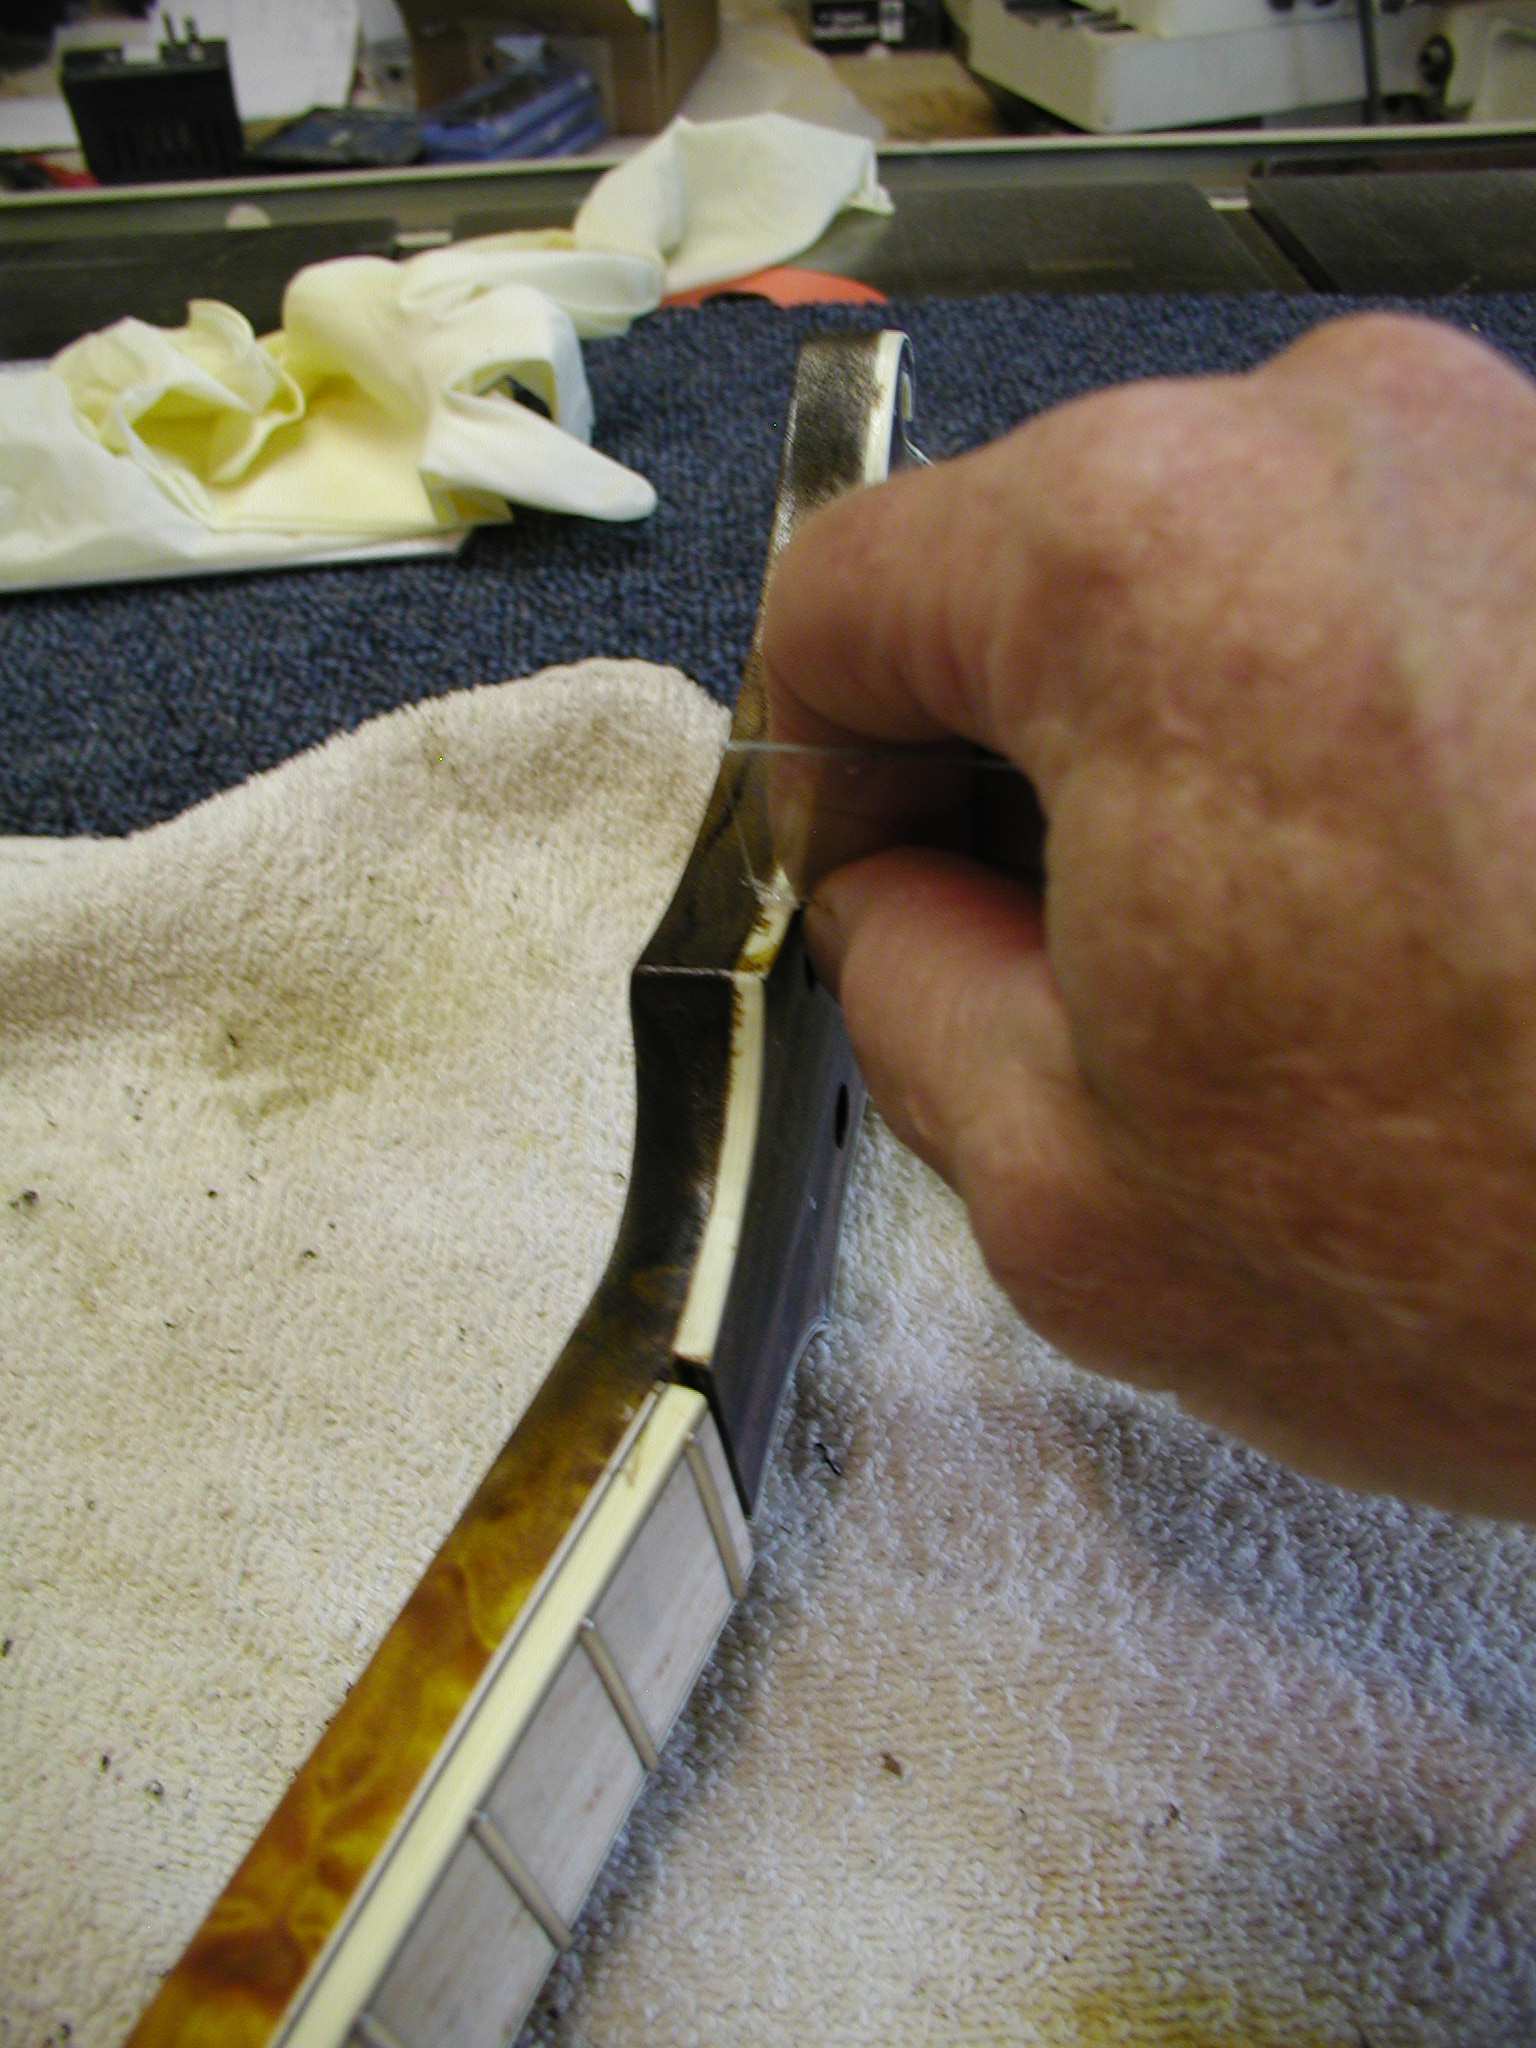
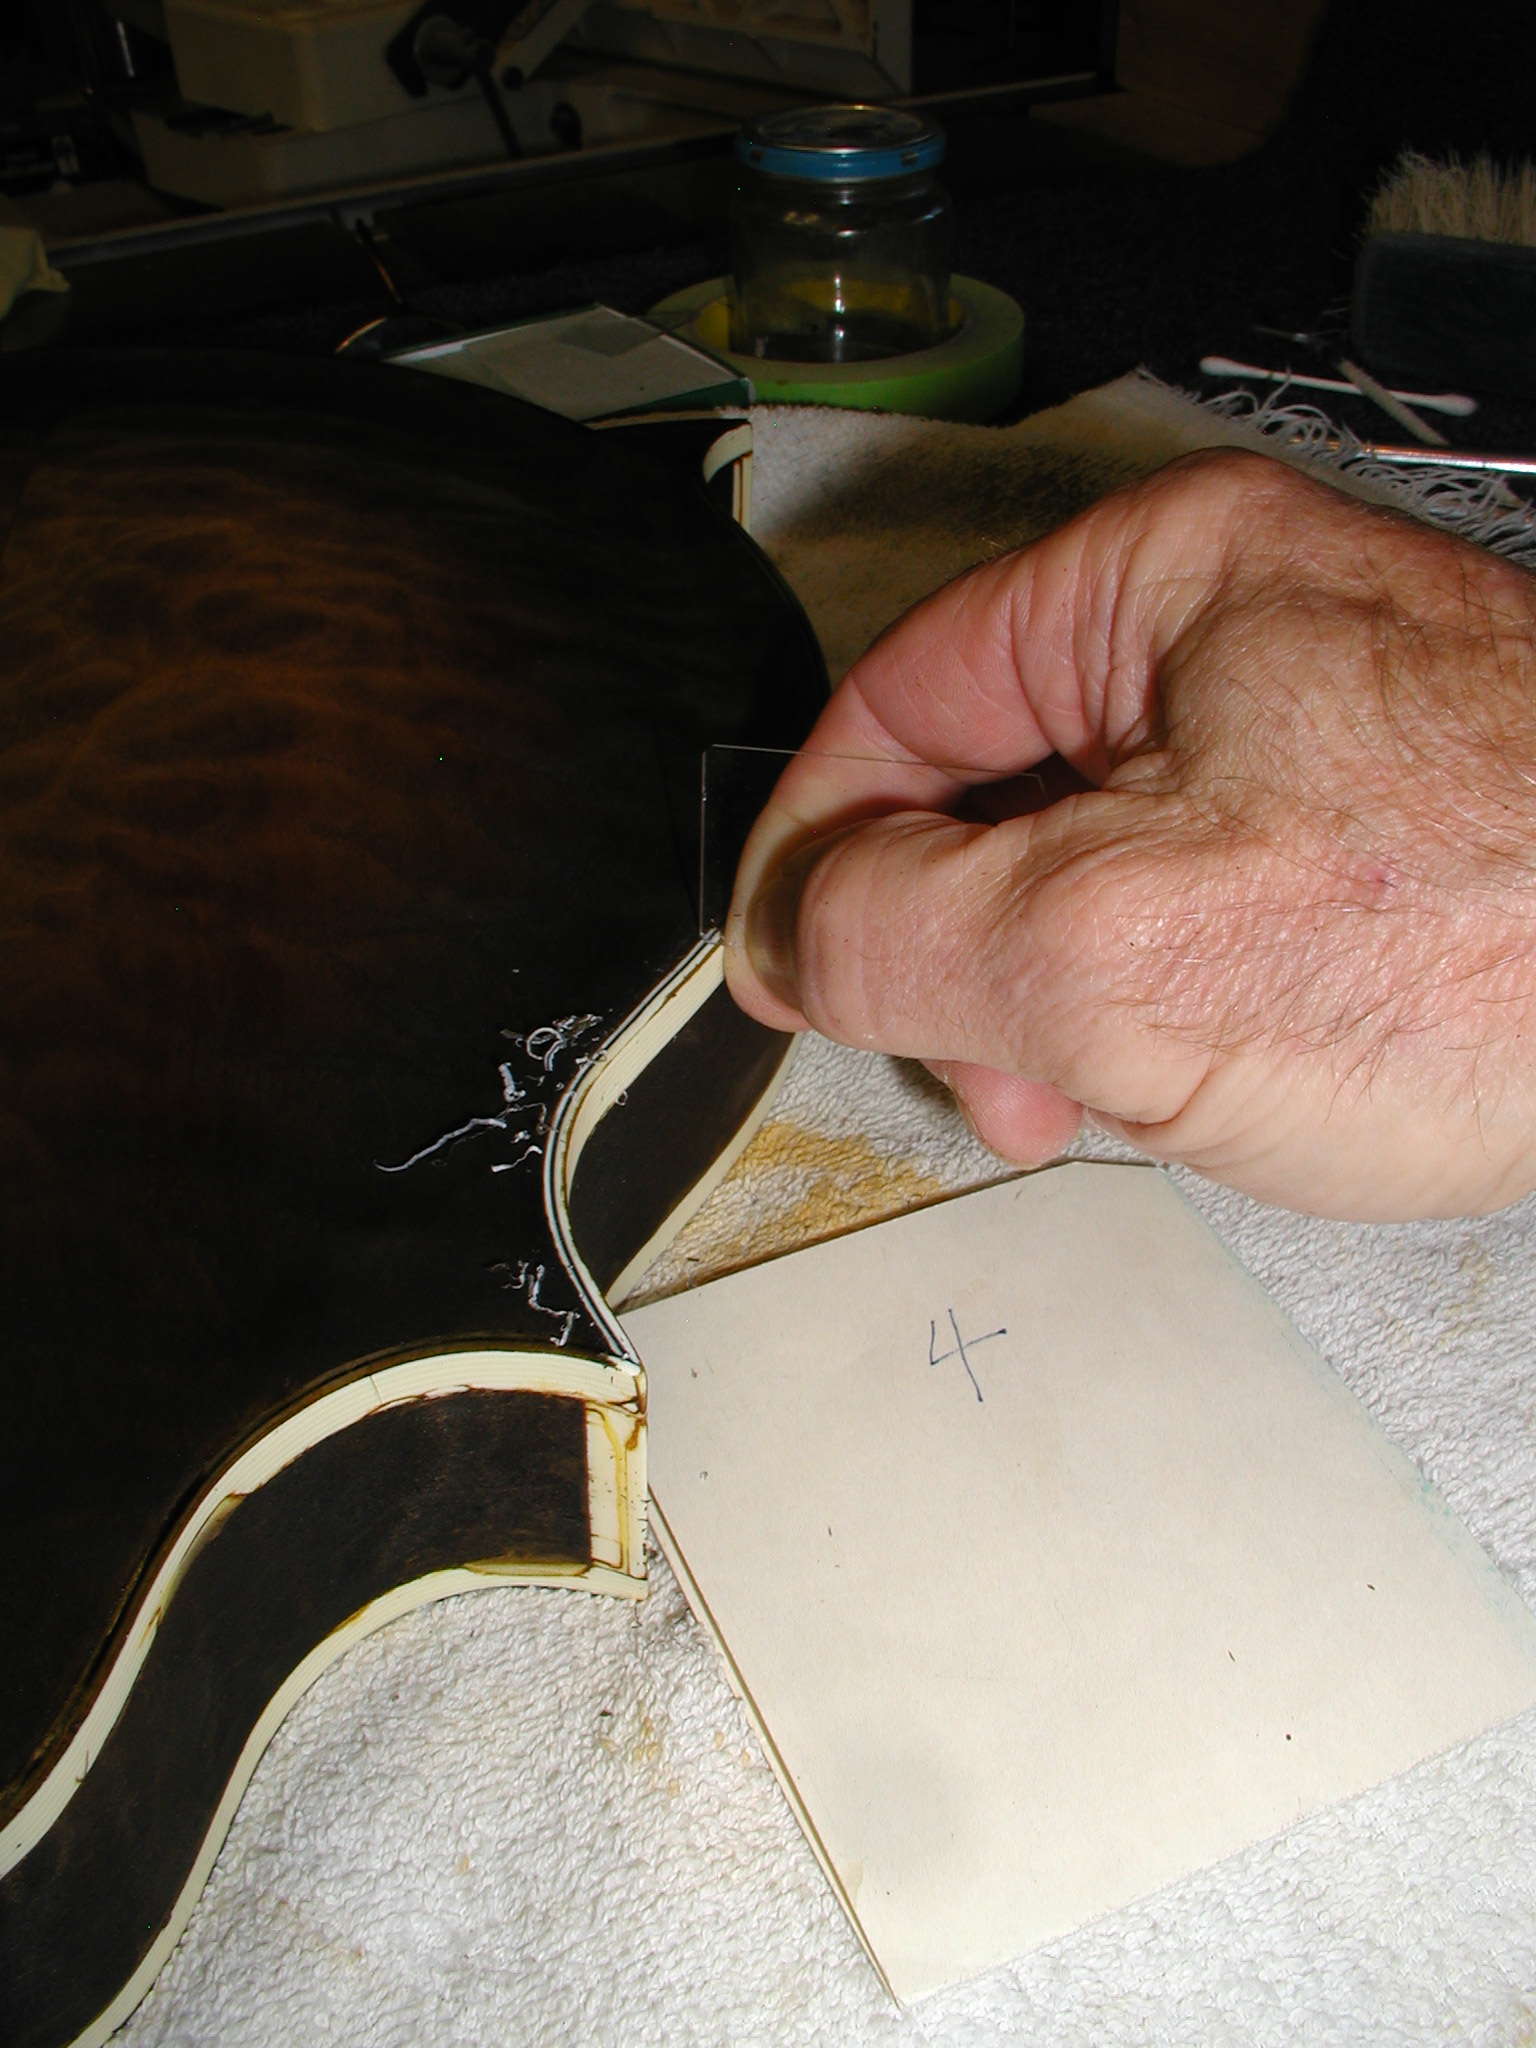
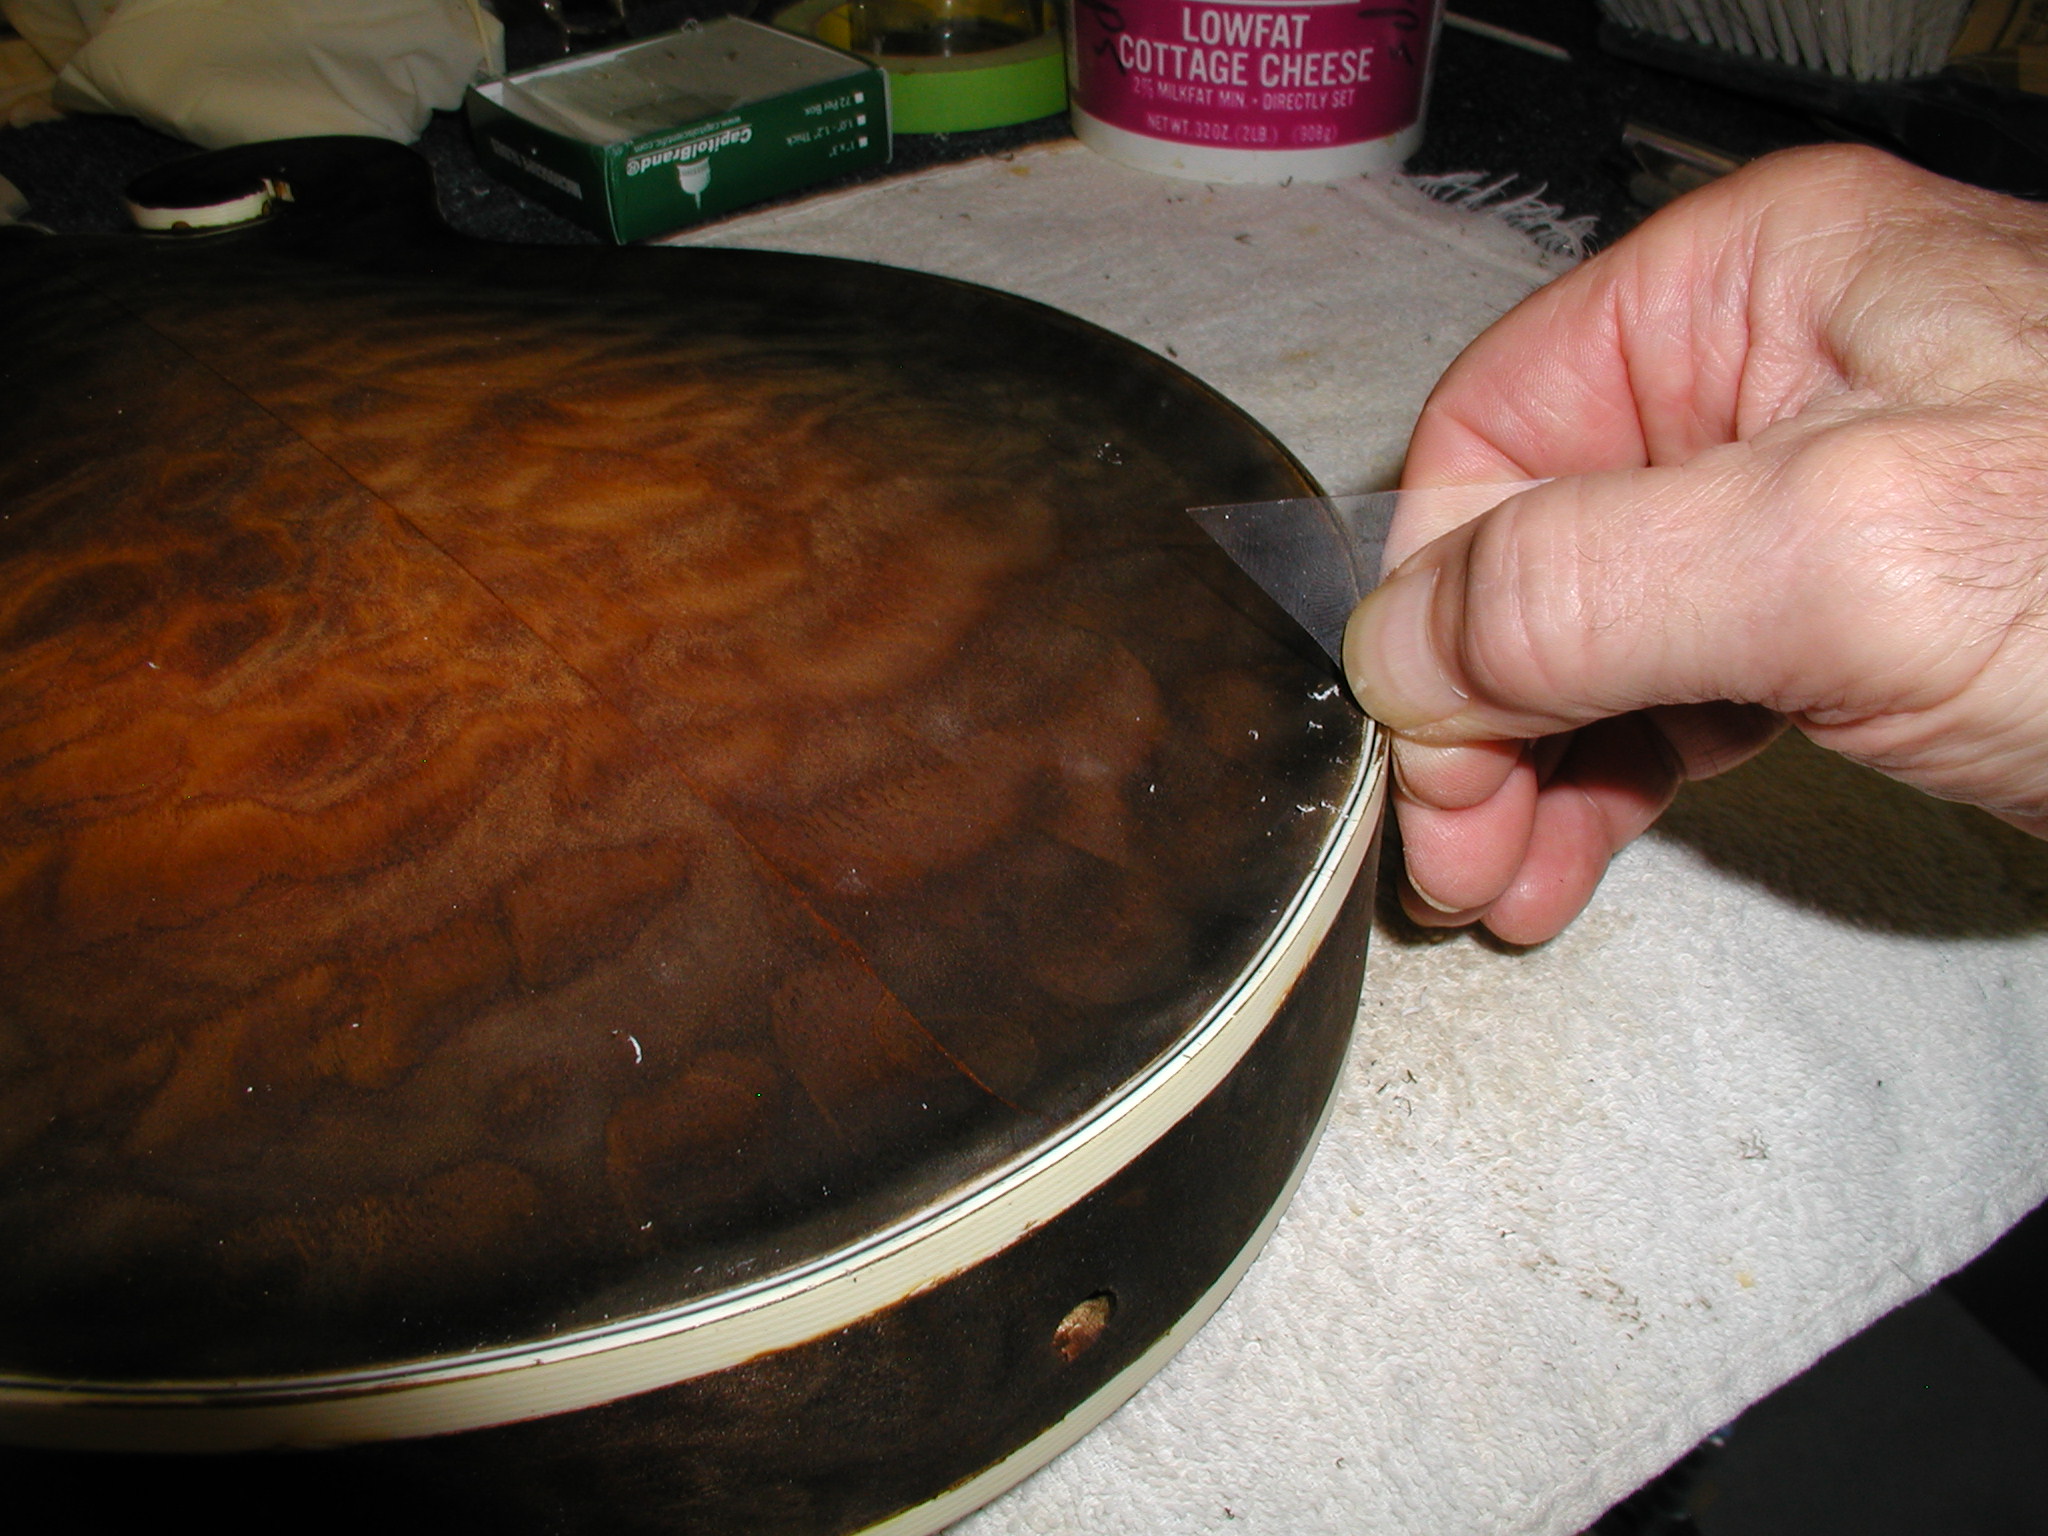
Pull the masking and scrape the binding clean. Put on some nice mellow tunes and just take your time and get it nice. I use my usual glass microscope slides and also some specially ground Xacto blades for getting in the scroll areas. If you chip into the color and expose wood, you can touch up with color and a small brush. I've found that the super small little brushes that dentists use for cleaning filling cavities and such work quite well for this. Your dentist might sample you some.

1 2 3 4 5 6 7 8 8a 9 10 11 11a 11b 12 12a 13 14 15 16 17 18 19 20