Let's Build A Mandolin (Page 6)
1 2 3 4 5 6 7 8 8a 9 10 11 11a 11b 12 12a 13 14 15 16 17 18 19 20
Last Modified - December 2011(©Alan Dunwell 2011)
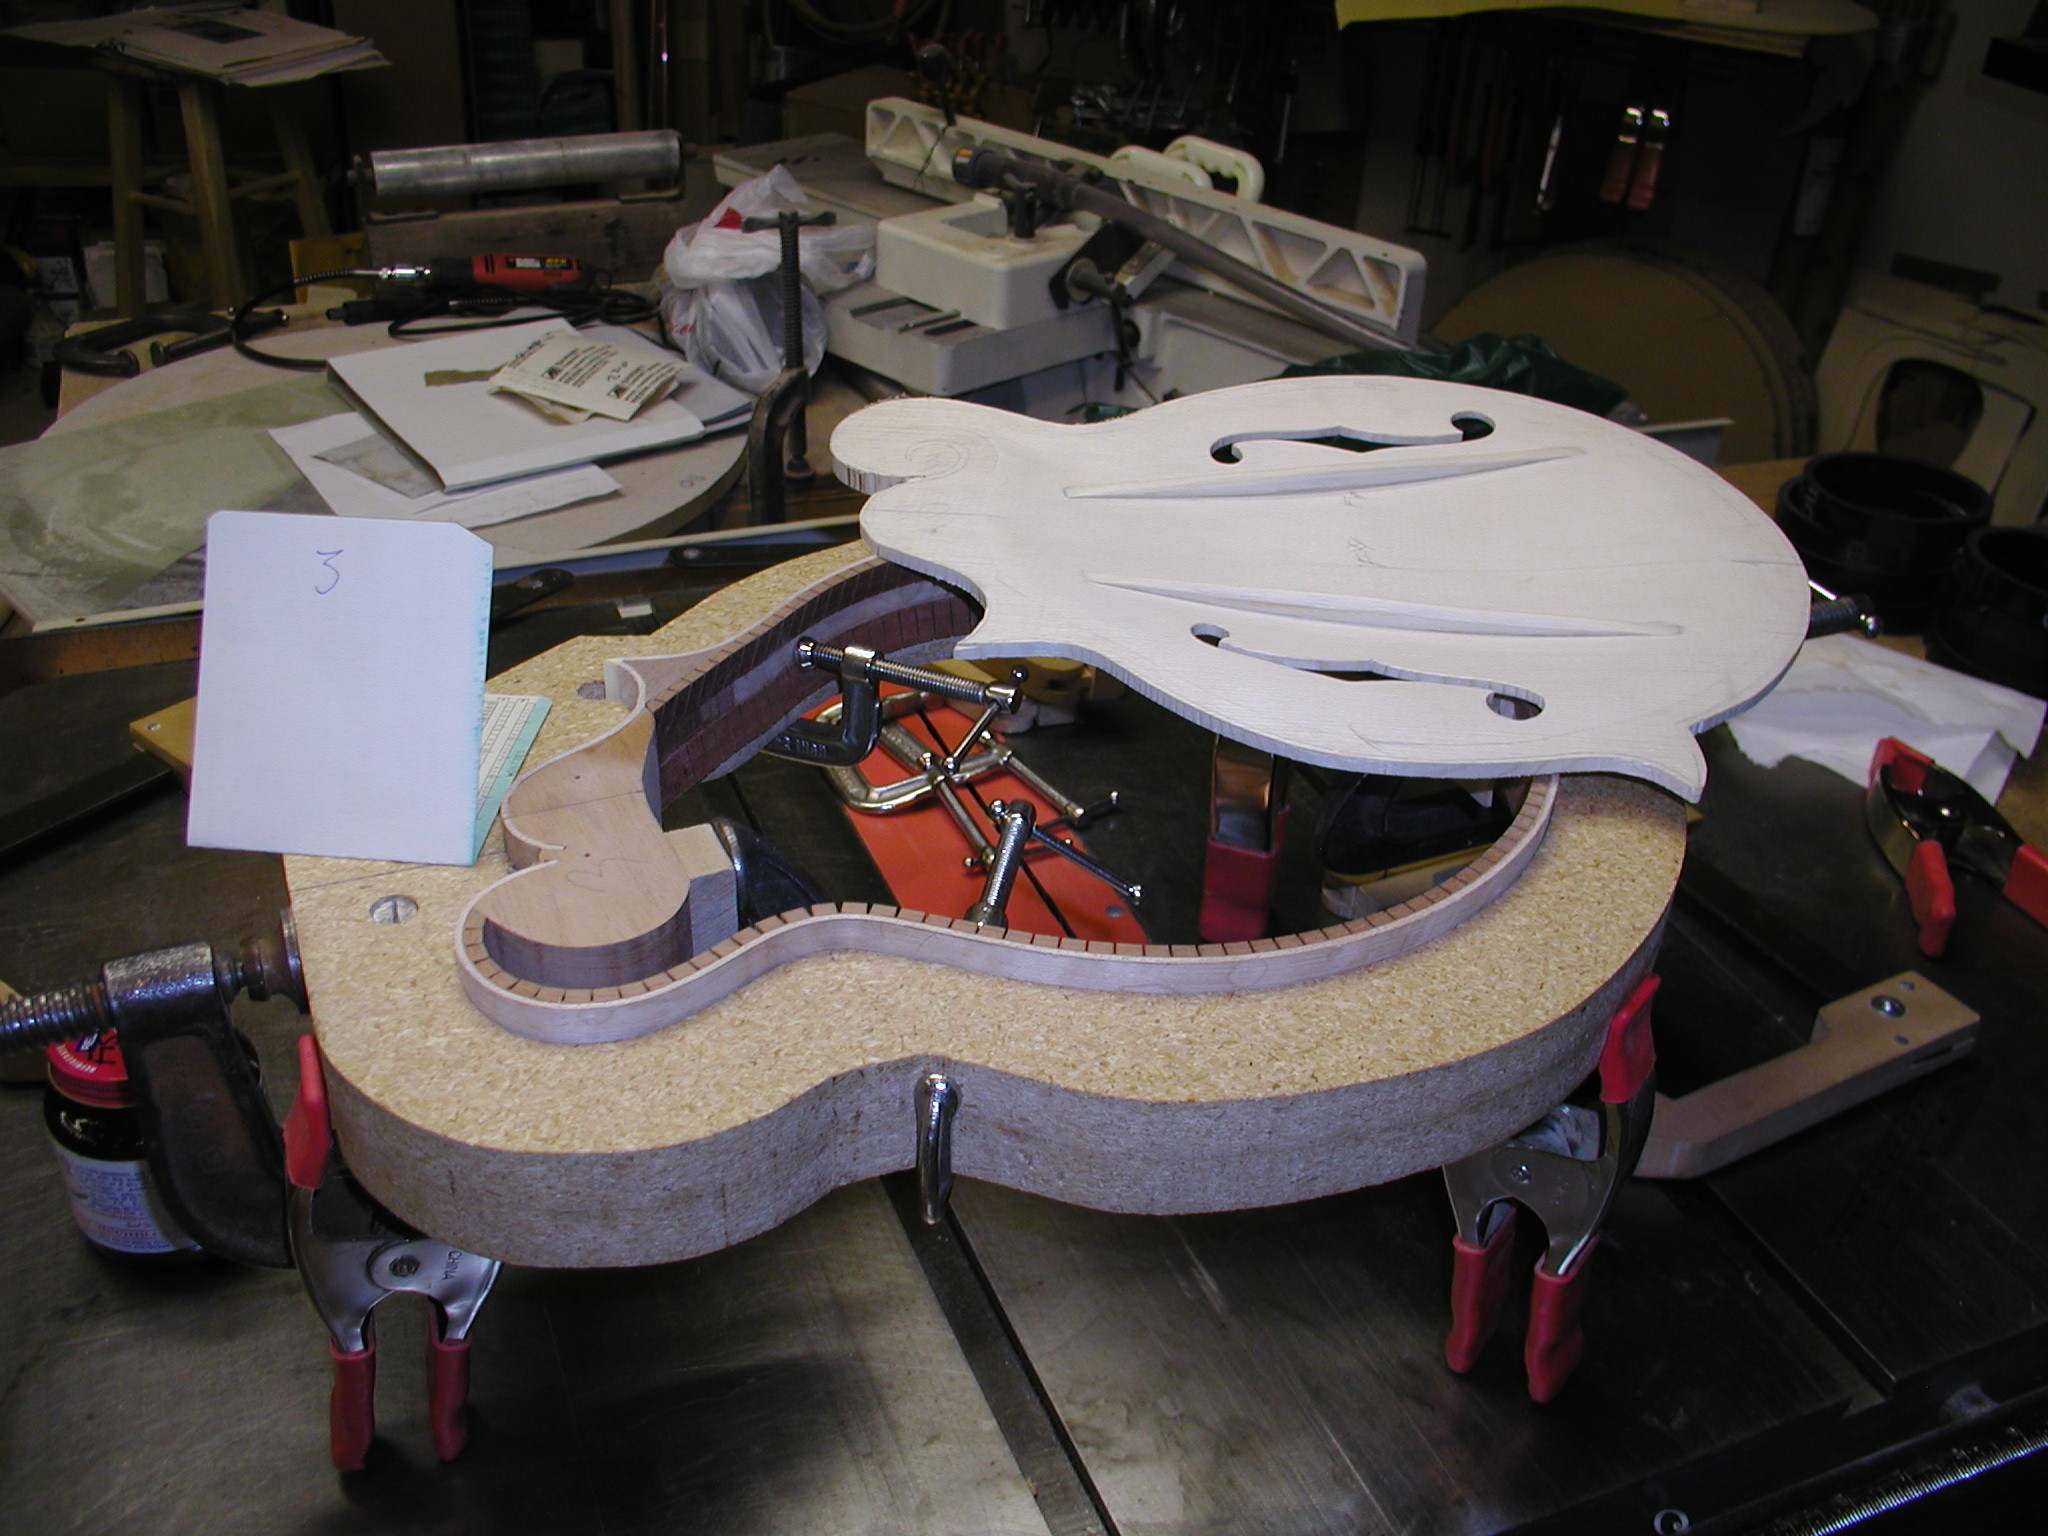
In Page 5 we completed the top plate except for some final carving around the scroll area. Now it is time to attach the top to the ribs to begin to make the box itself. I use a bunch of little PVC spring clamps for this process along with regular Sloan type clamps. The ribs are in the outside form and you can see some regular C-clamps holding it in place at the blocks. Sometimes smaller C-clamps, or as I'm using here some spring clamps, are used around the perimeter to hold the ribs in place if needed. The ribs stick up a bit from the form, make sure you have it in place and even all around. Unfortunately I didn't take detailed photos of Tom's mandolin but did for the "Sibling" #3, and I show those steps here.
First I position the top carefully in place and hold it with some Sloan clamps. Then I drill a hole through the top into the headblock in the waste area where I will later cut out the scroll slot. I do another at the heelblock but with a very small wire nail size drilling the area that will later be routed out for the binding. This can go in at an angle. Slap on some fish glue which has a long open time and works at room temperature, but is also a collagen glue like hot hide glue. Note in the second photo that I did not get glue into the hole I drilled for the guide pins. In the third photo you can see the pin for the headblock area. I use that as a guide pin and slip it into the matching hole in the headblock. Then use the endblock guide pin into its hole and press the top down into place leaving the pins in place as well. Then on go the PVC and Sloan clamps to hold it al in place. Flip the whole thing over and clean up and squeeze out glue, wipe with a damp rag to get a nice clean joint. After about a half hour the fish glue is well tacked in place but not fully cured yet. At that point I use some dikes and pull the pins since the top won't slip around at this point. Keep it clamped for at least an hour or two, I usually just leave it over night.
I tend to work the various parts in parallel. While the top and ribs are drying I cut out and glue up the neck blank. I do a two or three piece neck, here it is a two piece since it is nice quilted maple and doesn't need any center stripe to liven it up. Pretty straight forward here, I fly-leaf the two pieces so if there is any curvature to the grain it matches side to side.
![]()
![]()
![]()
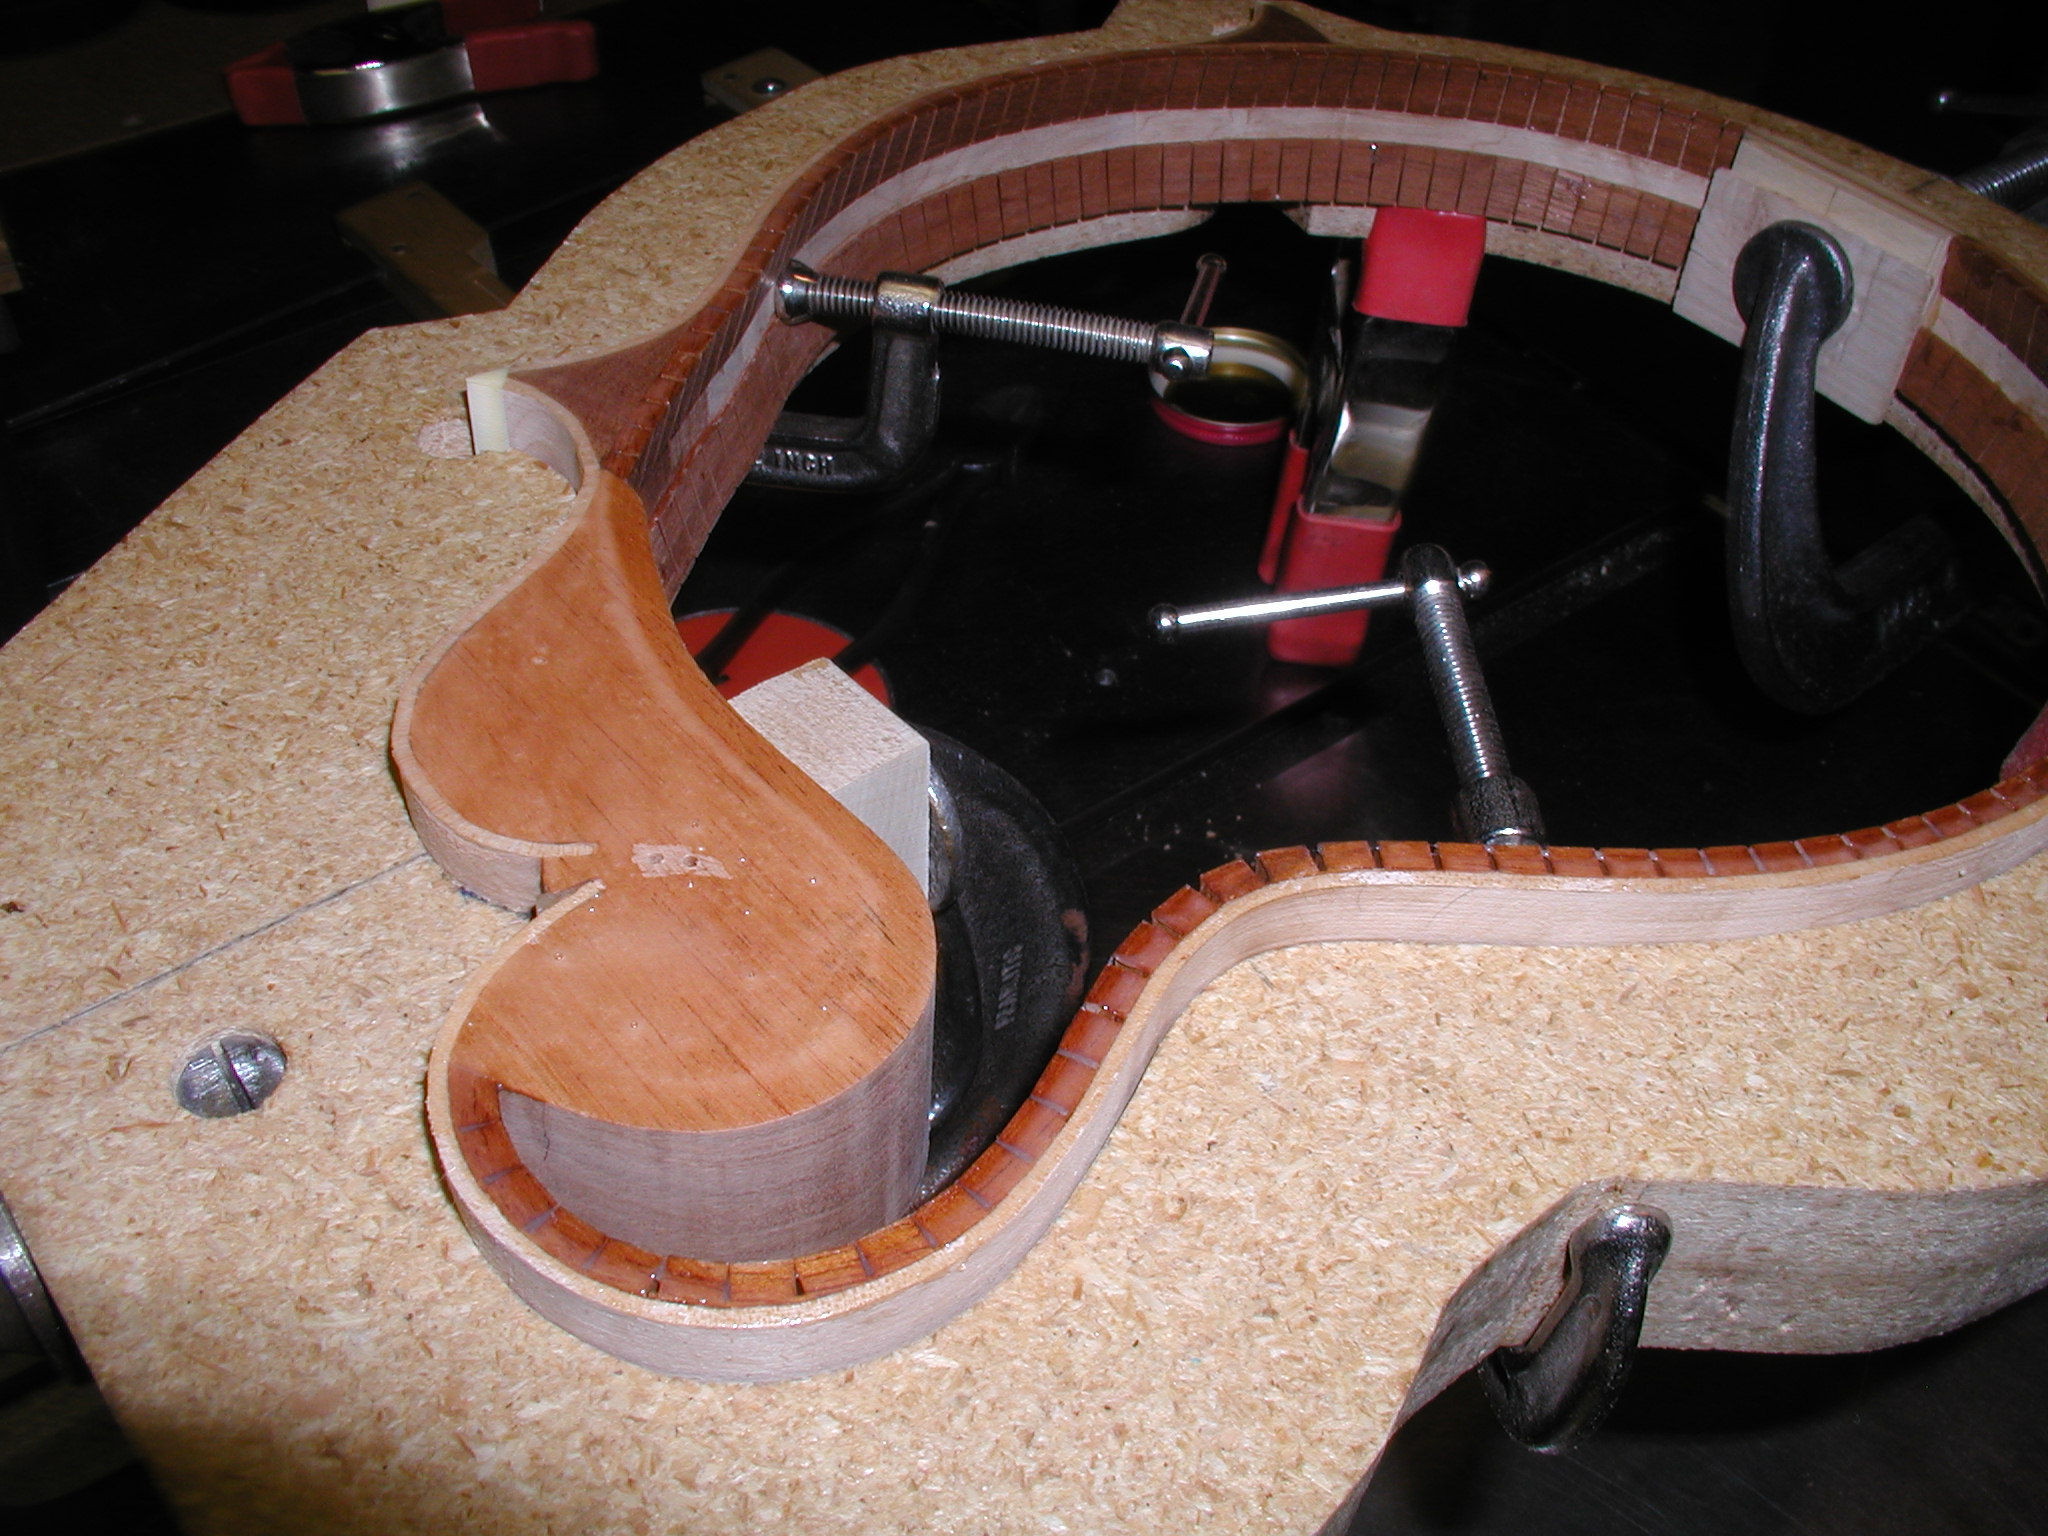
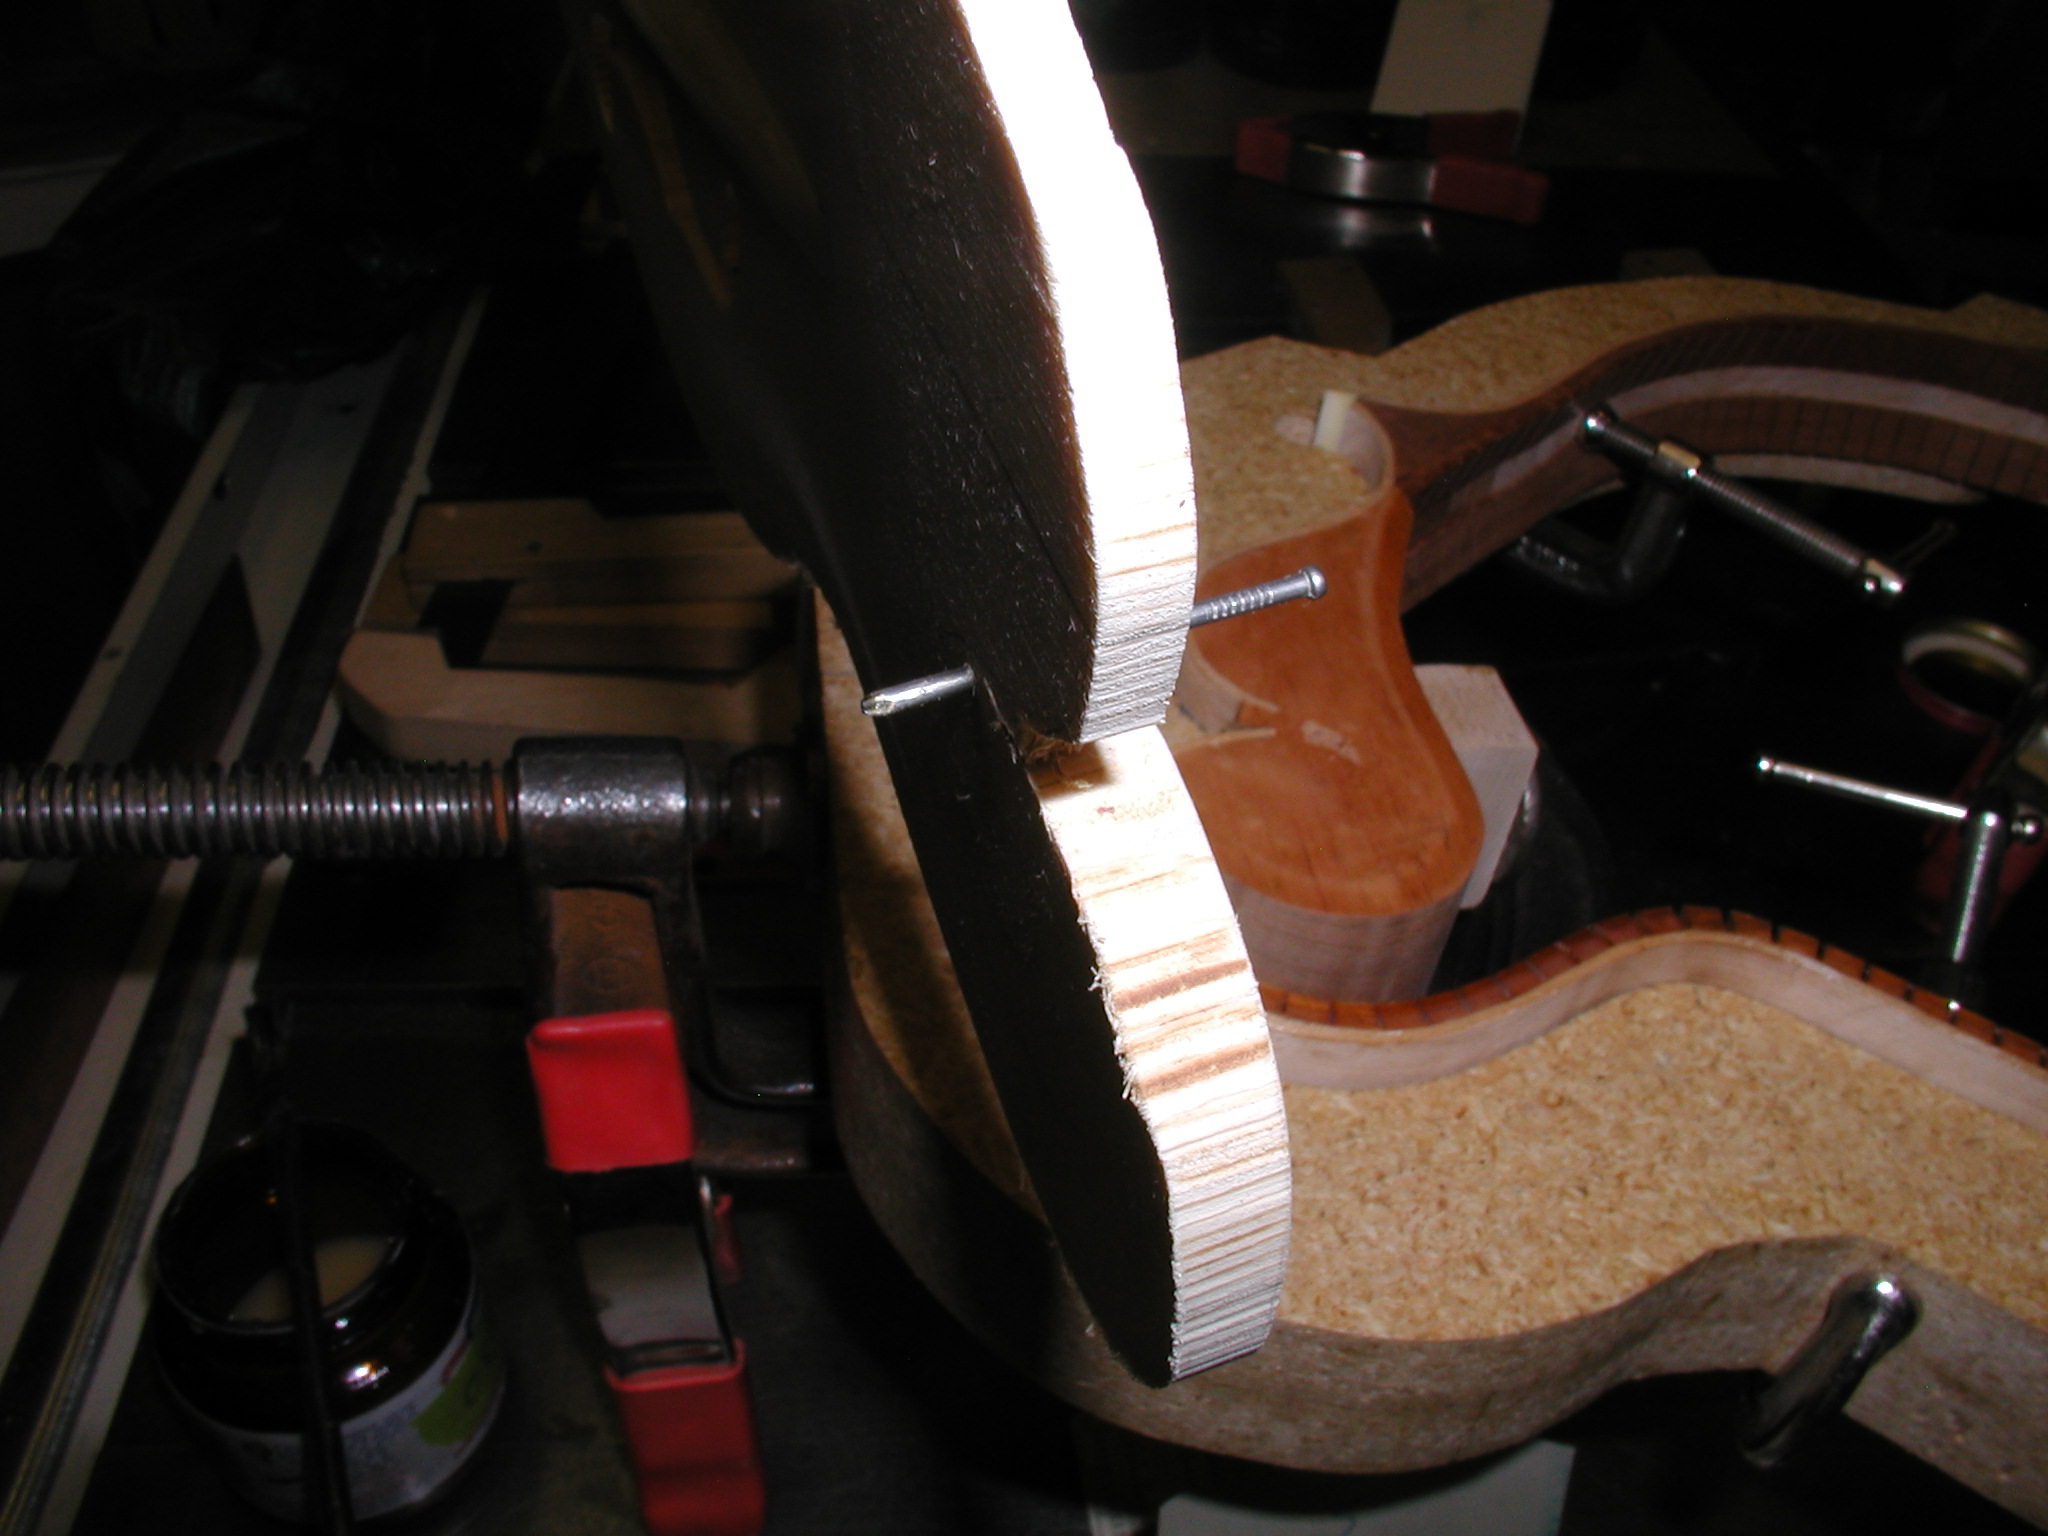
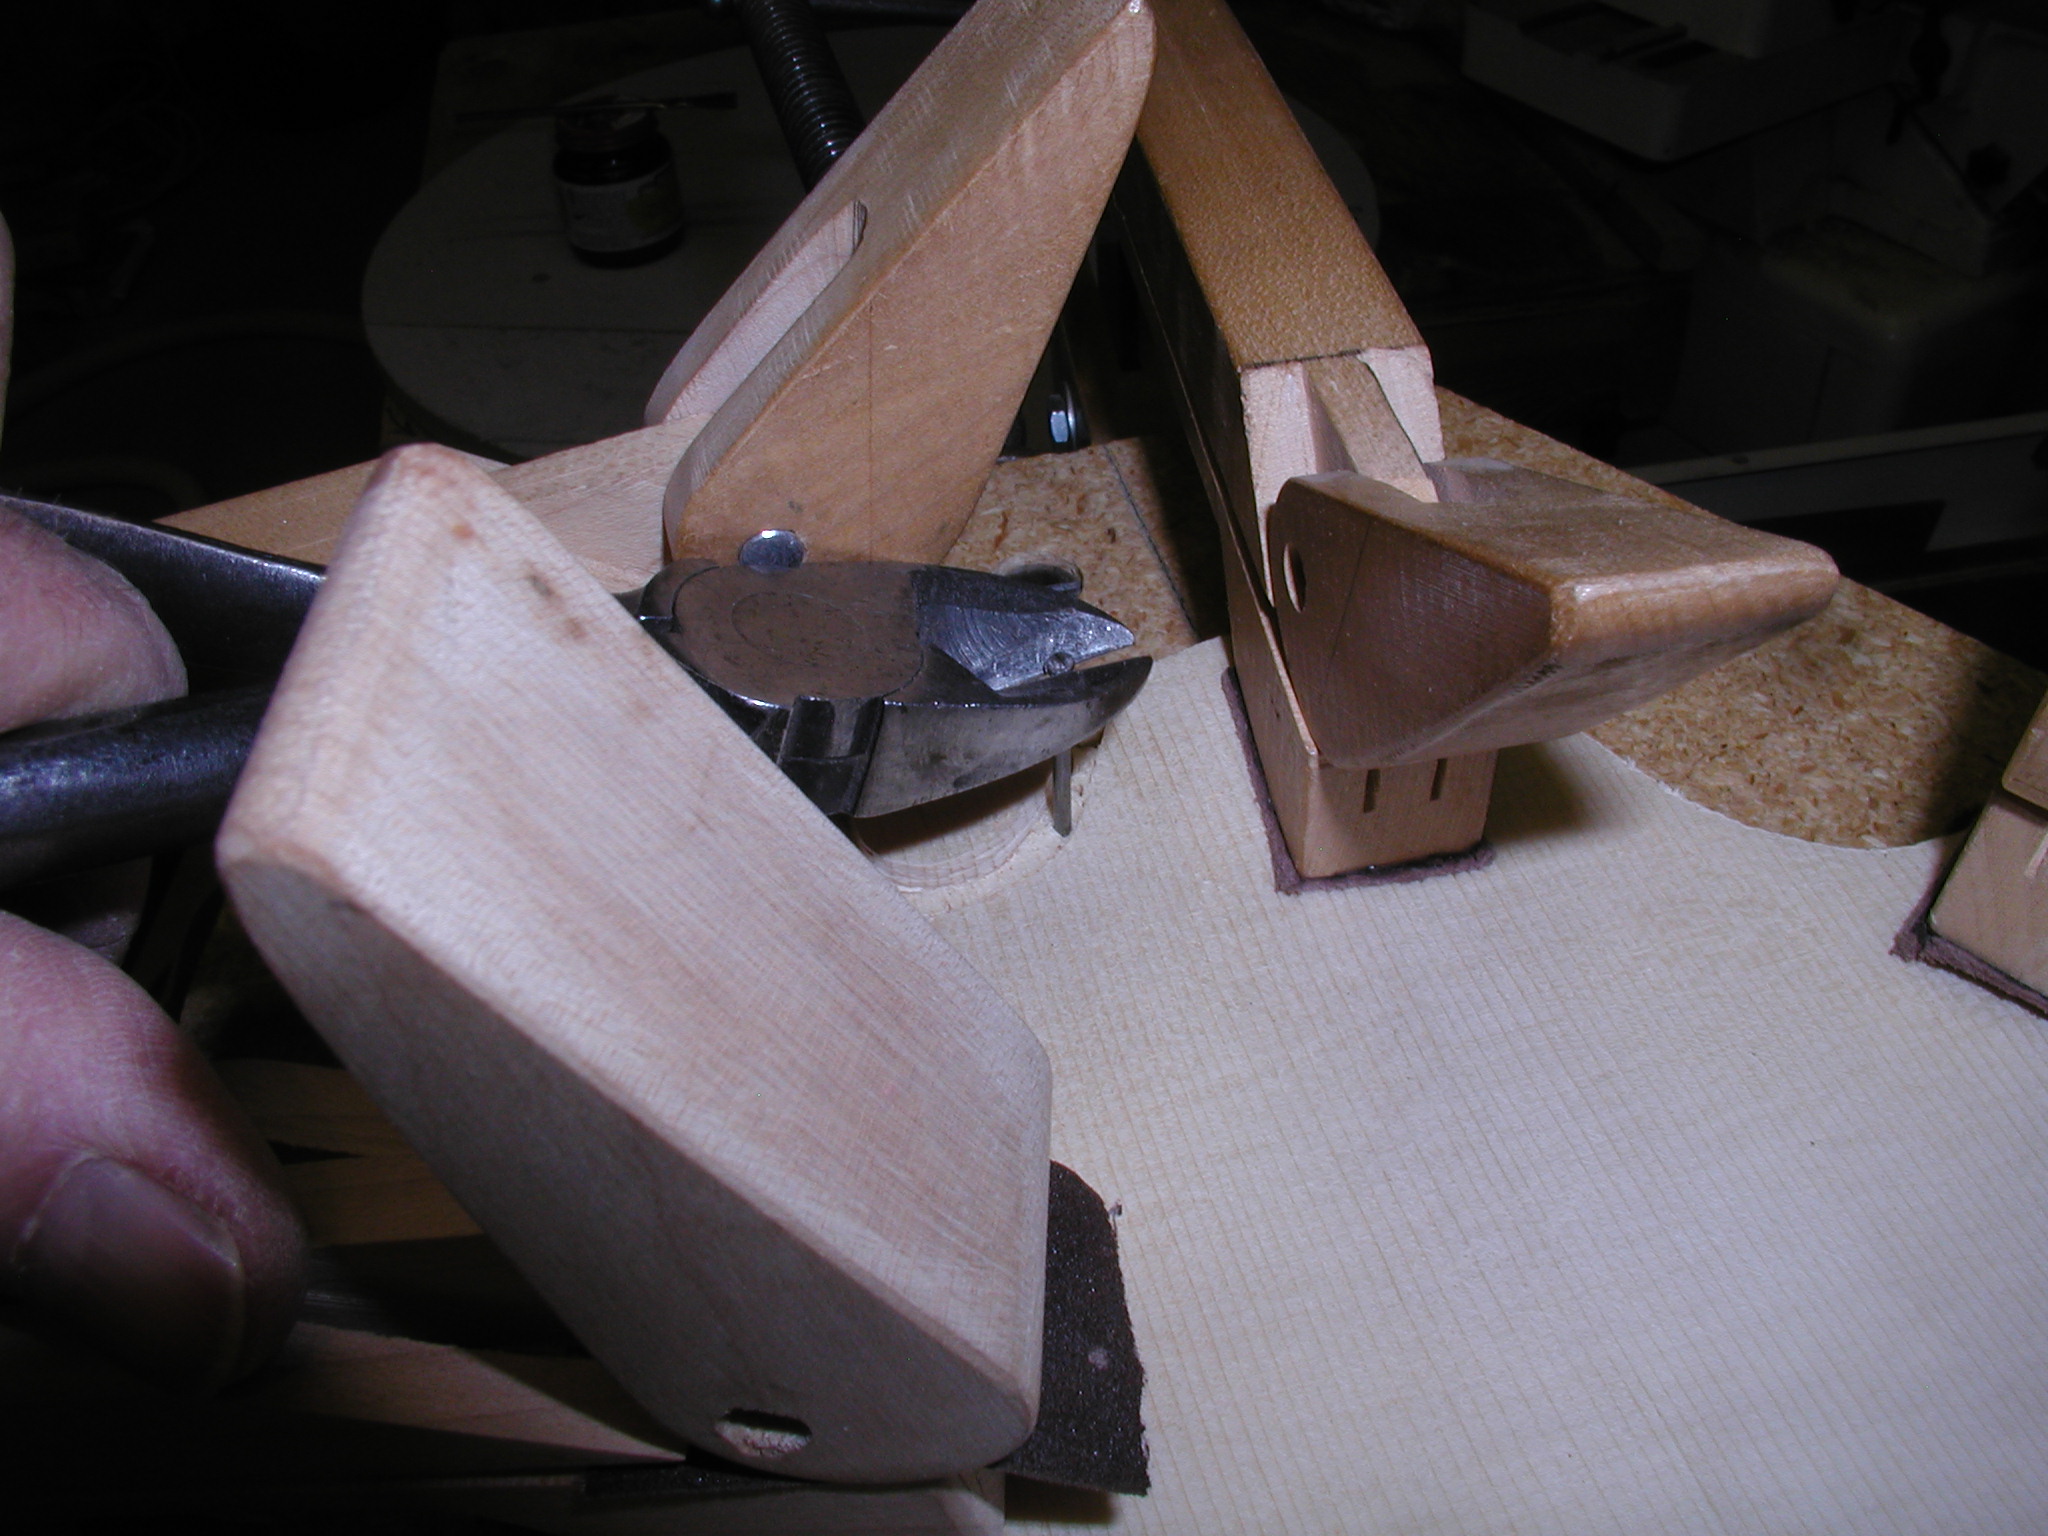
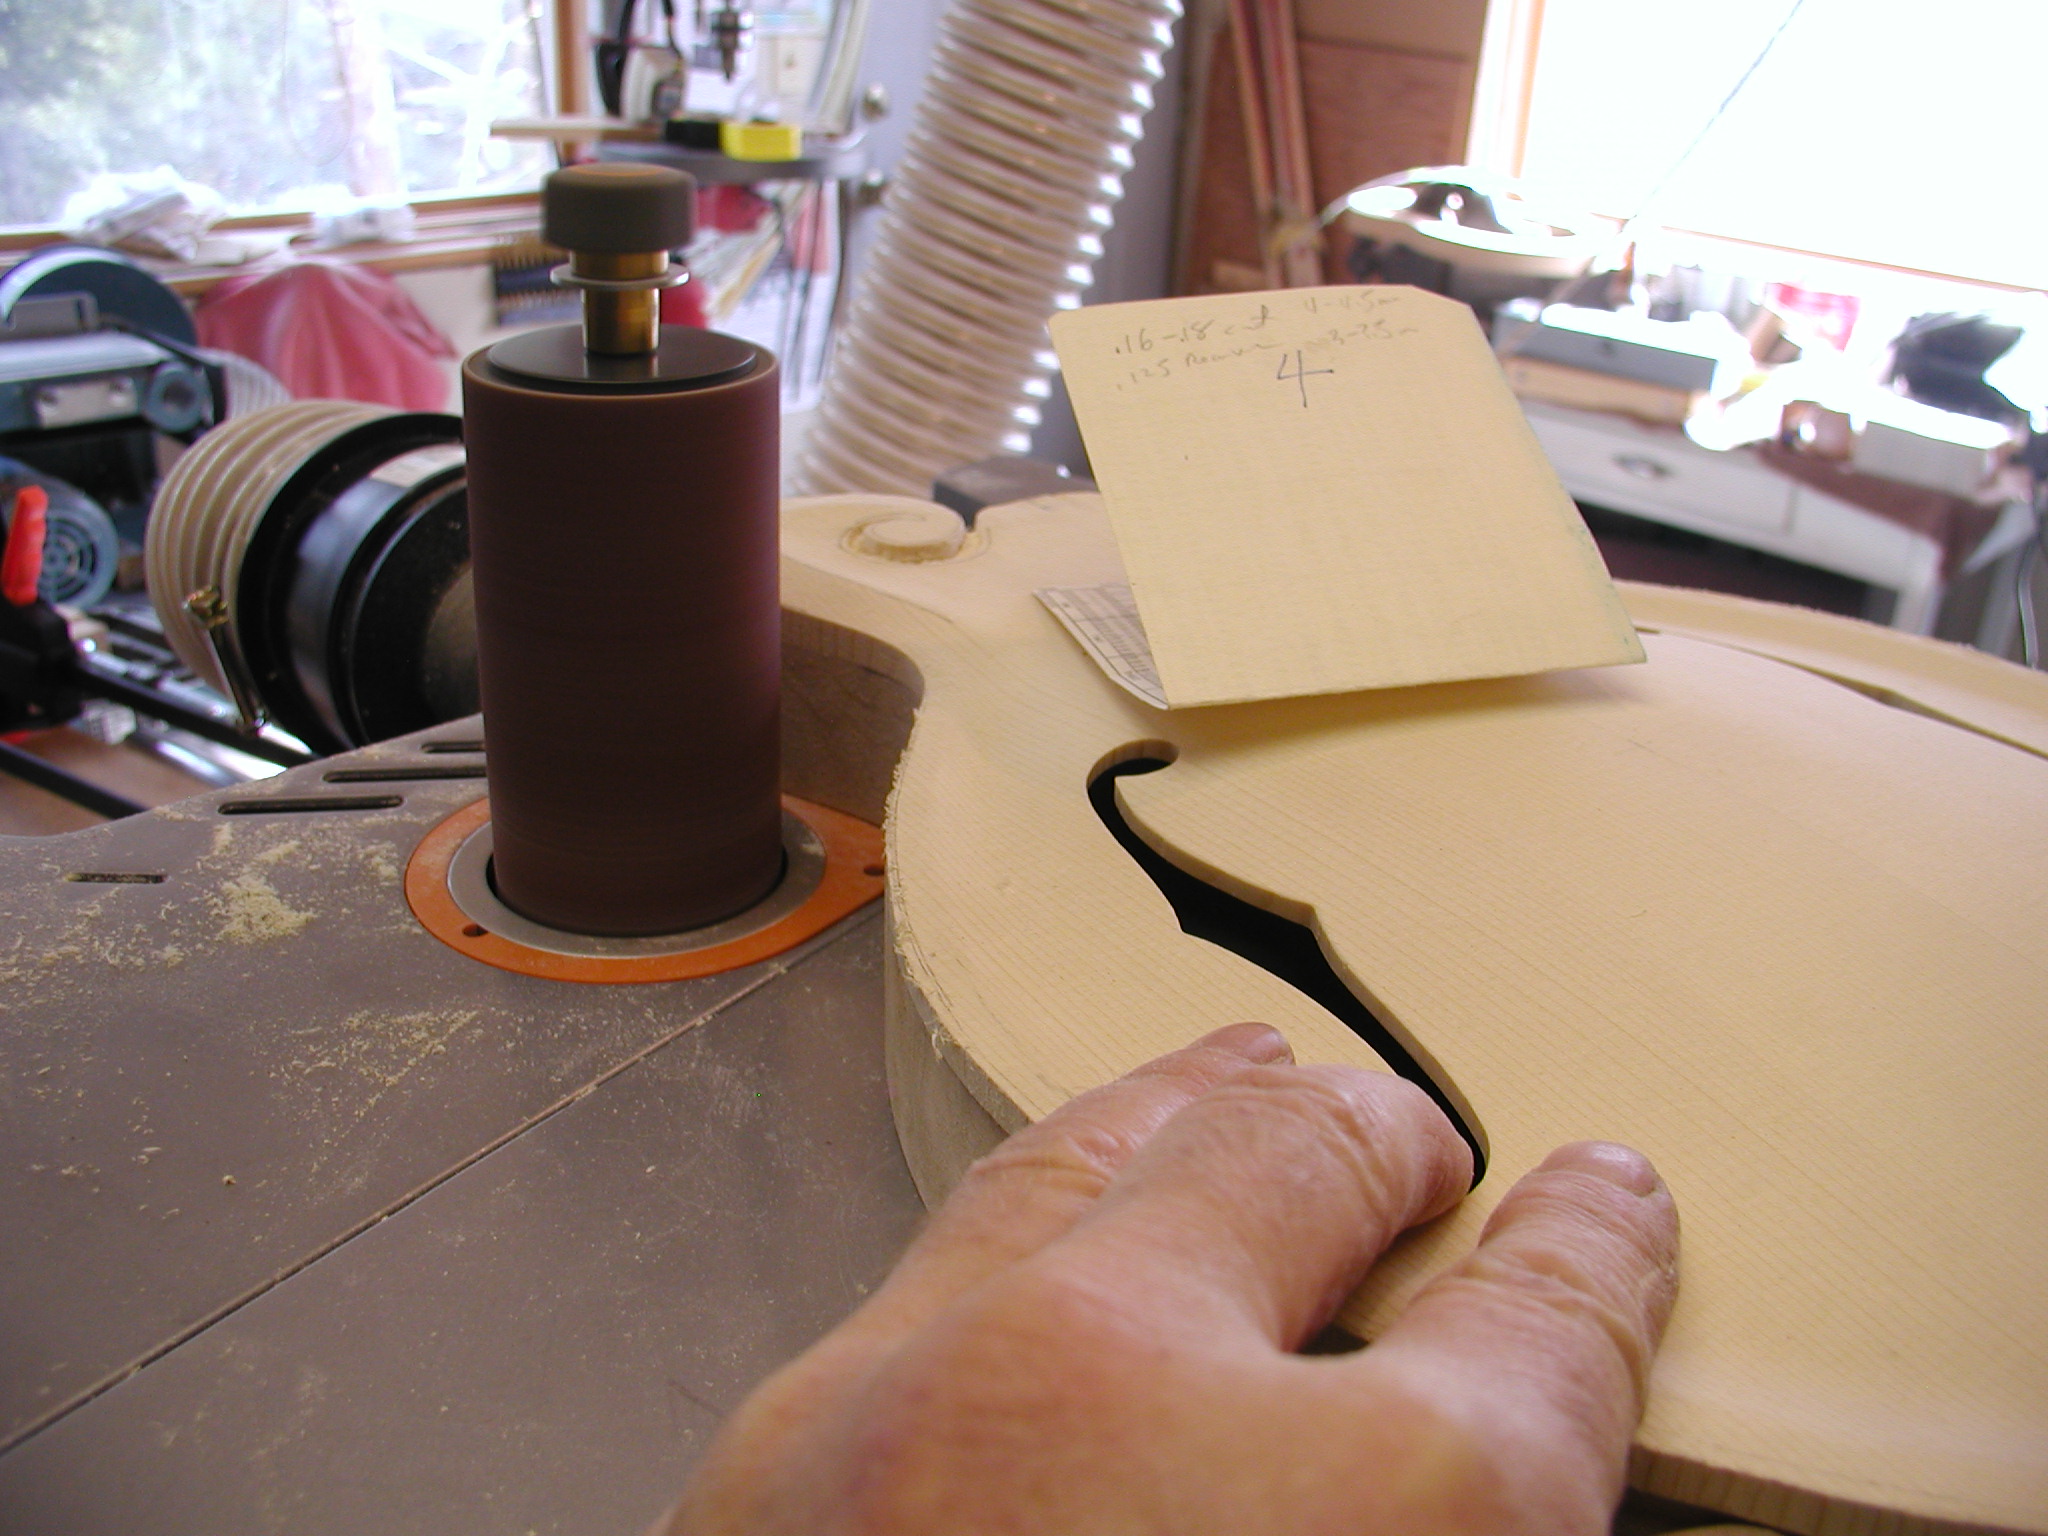
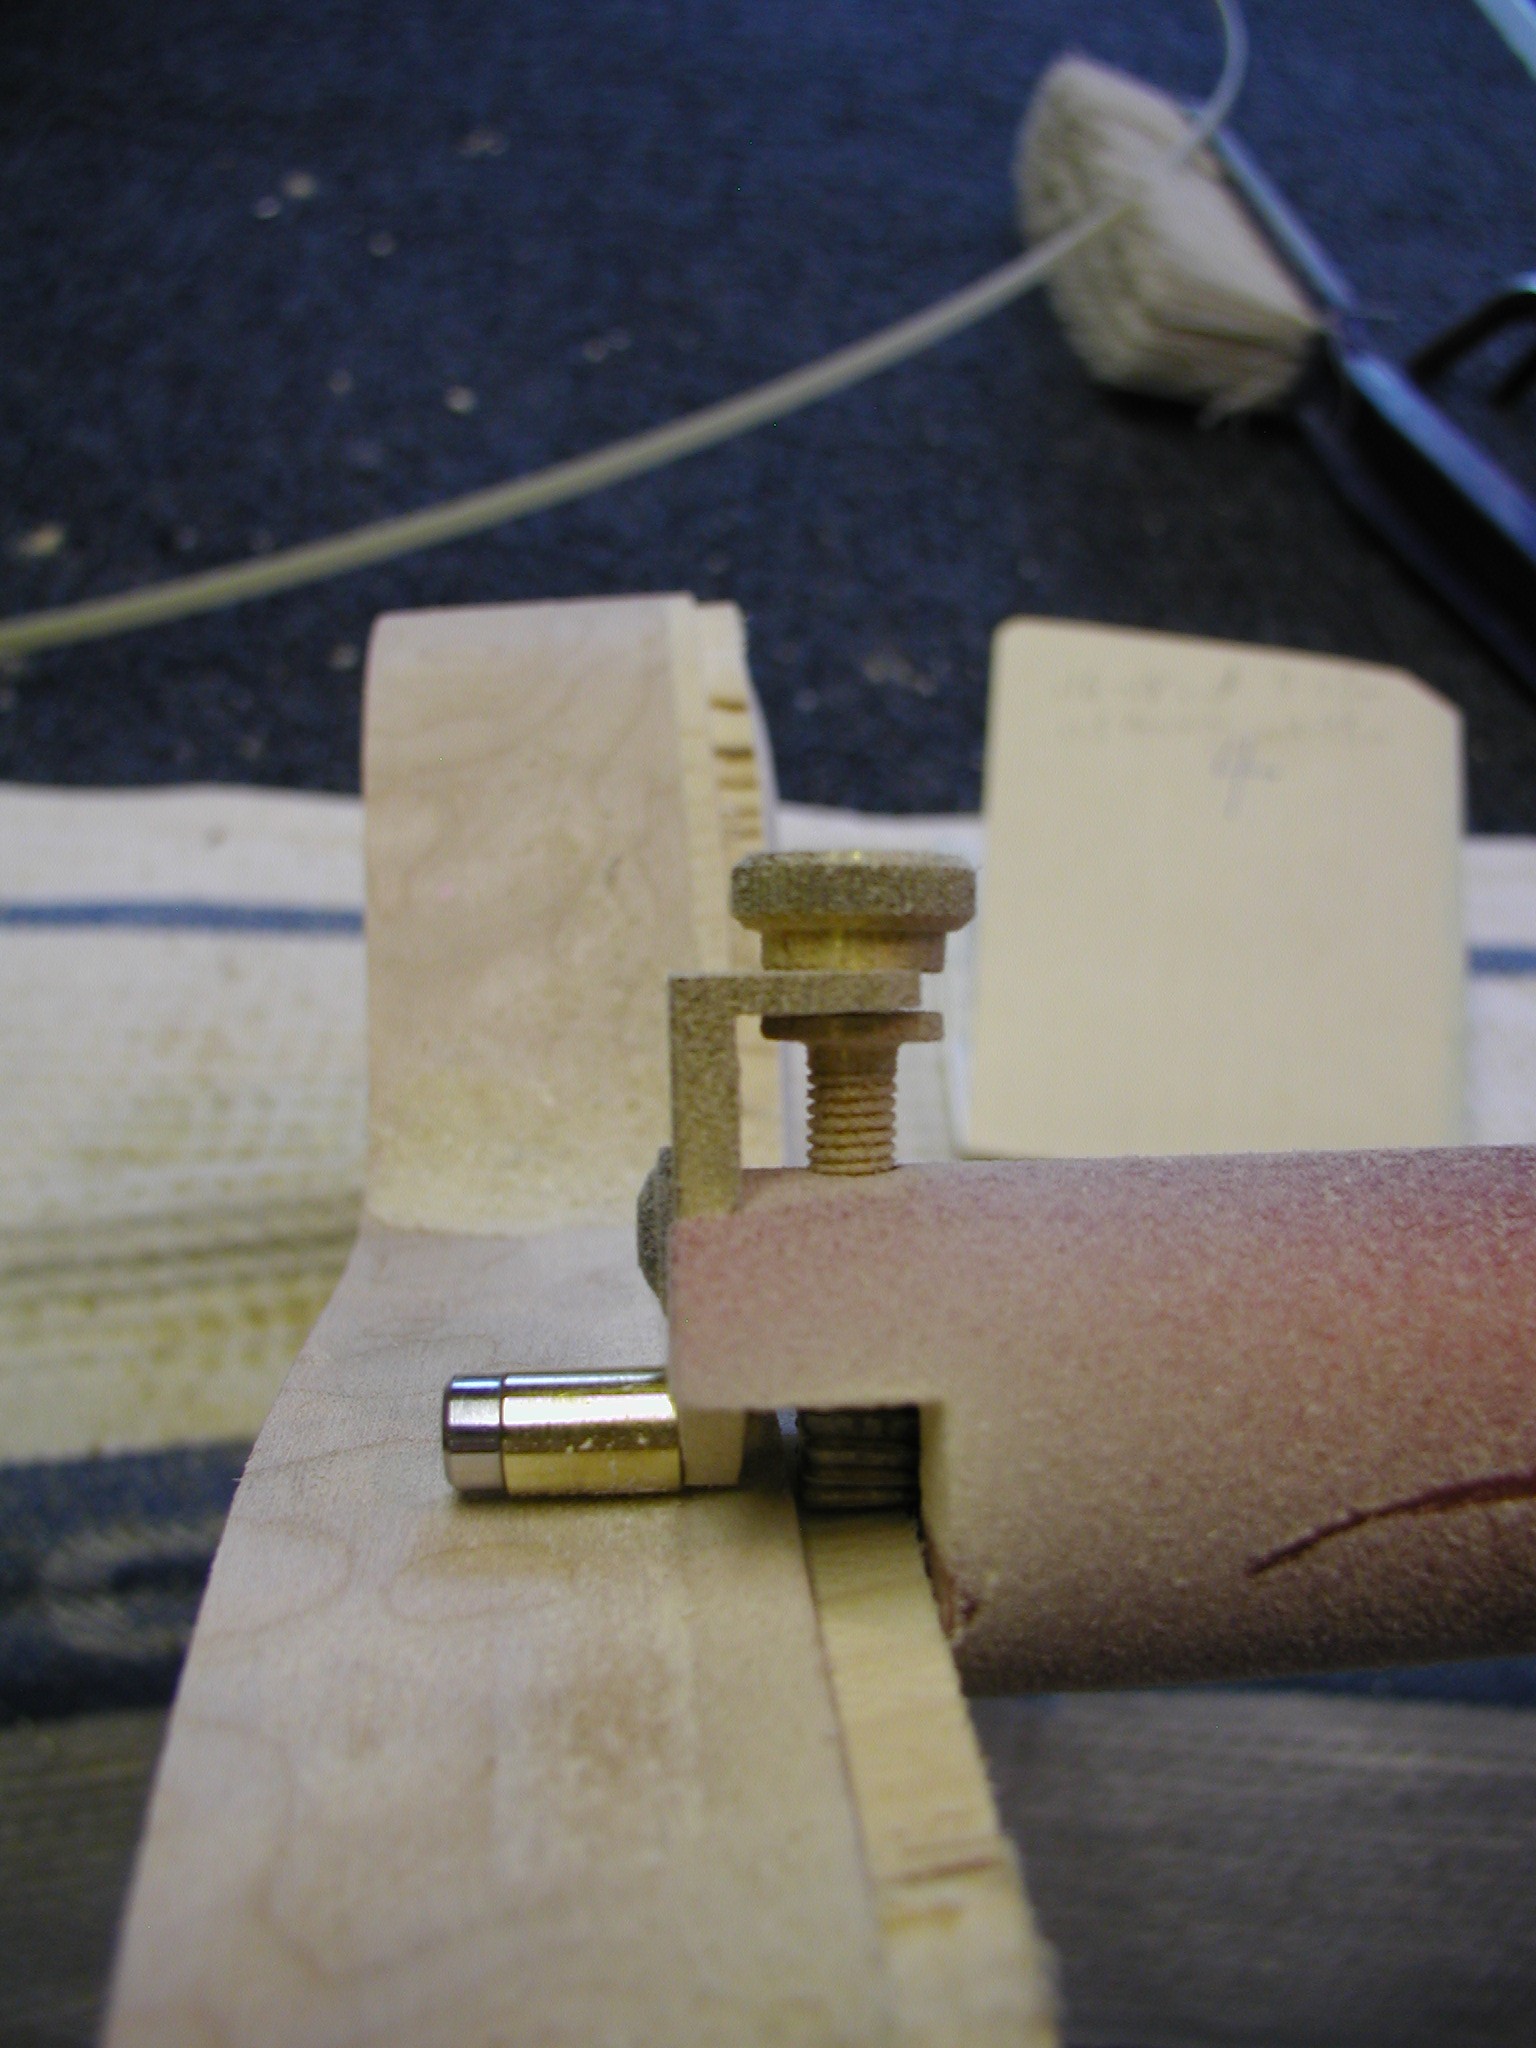
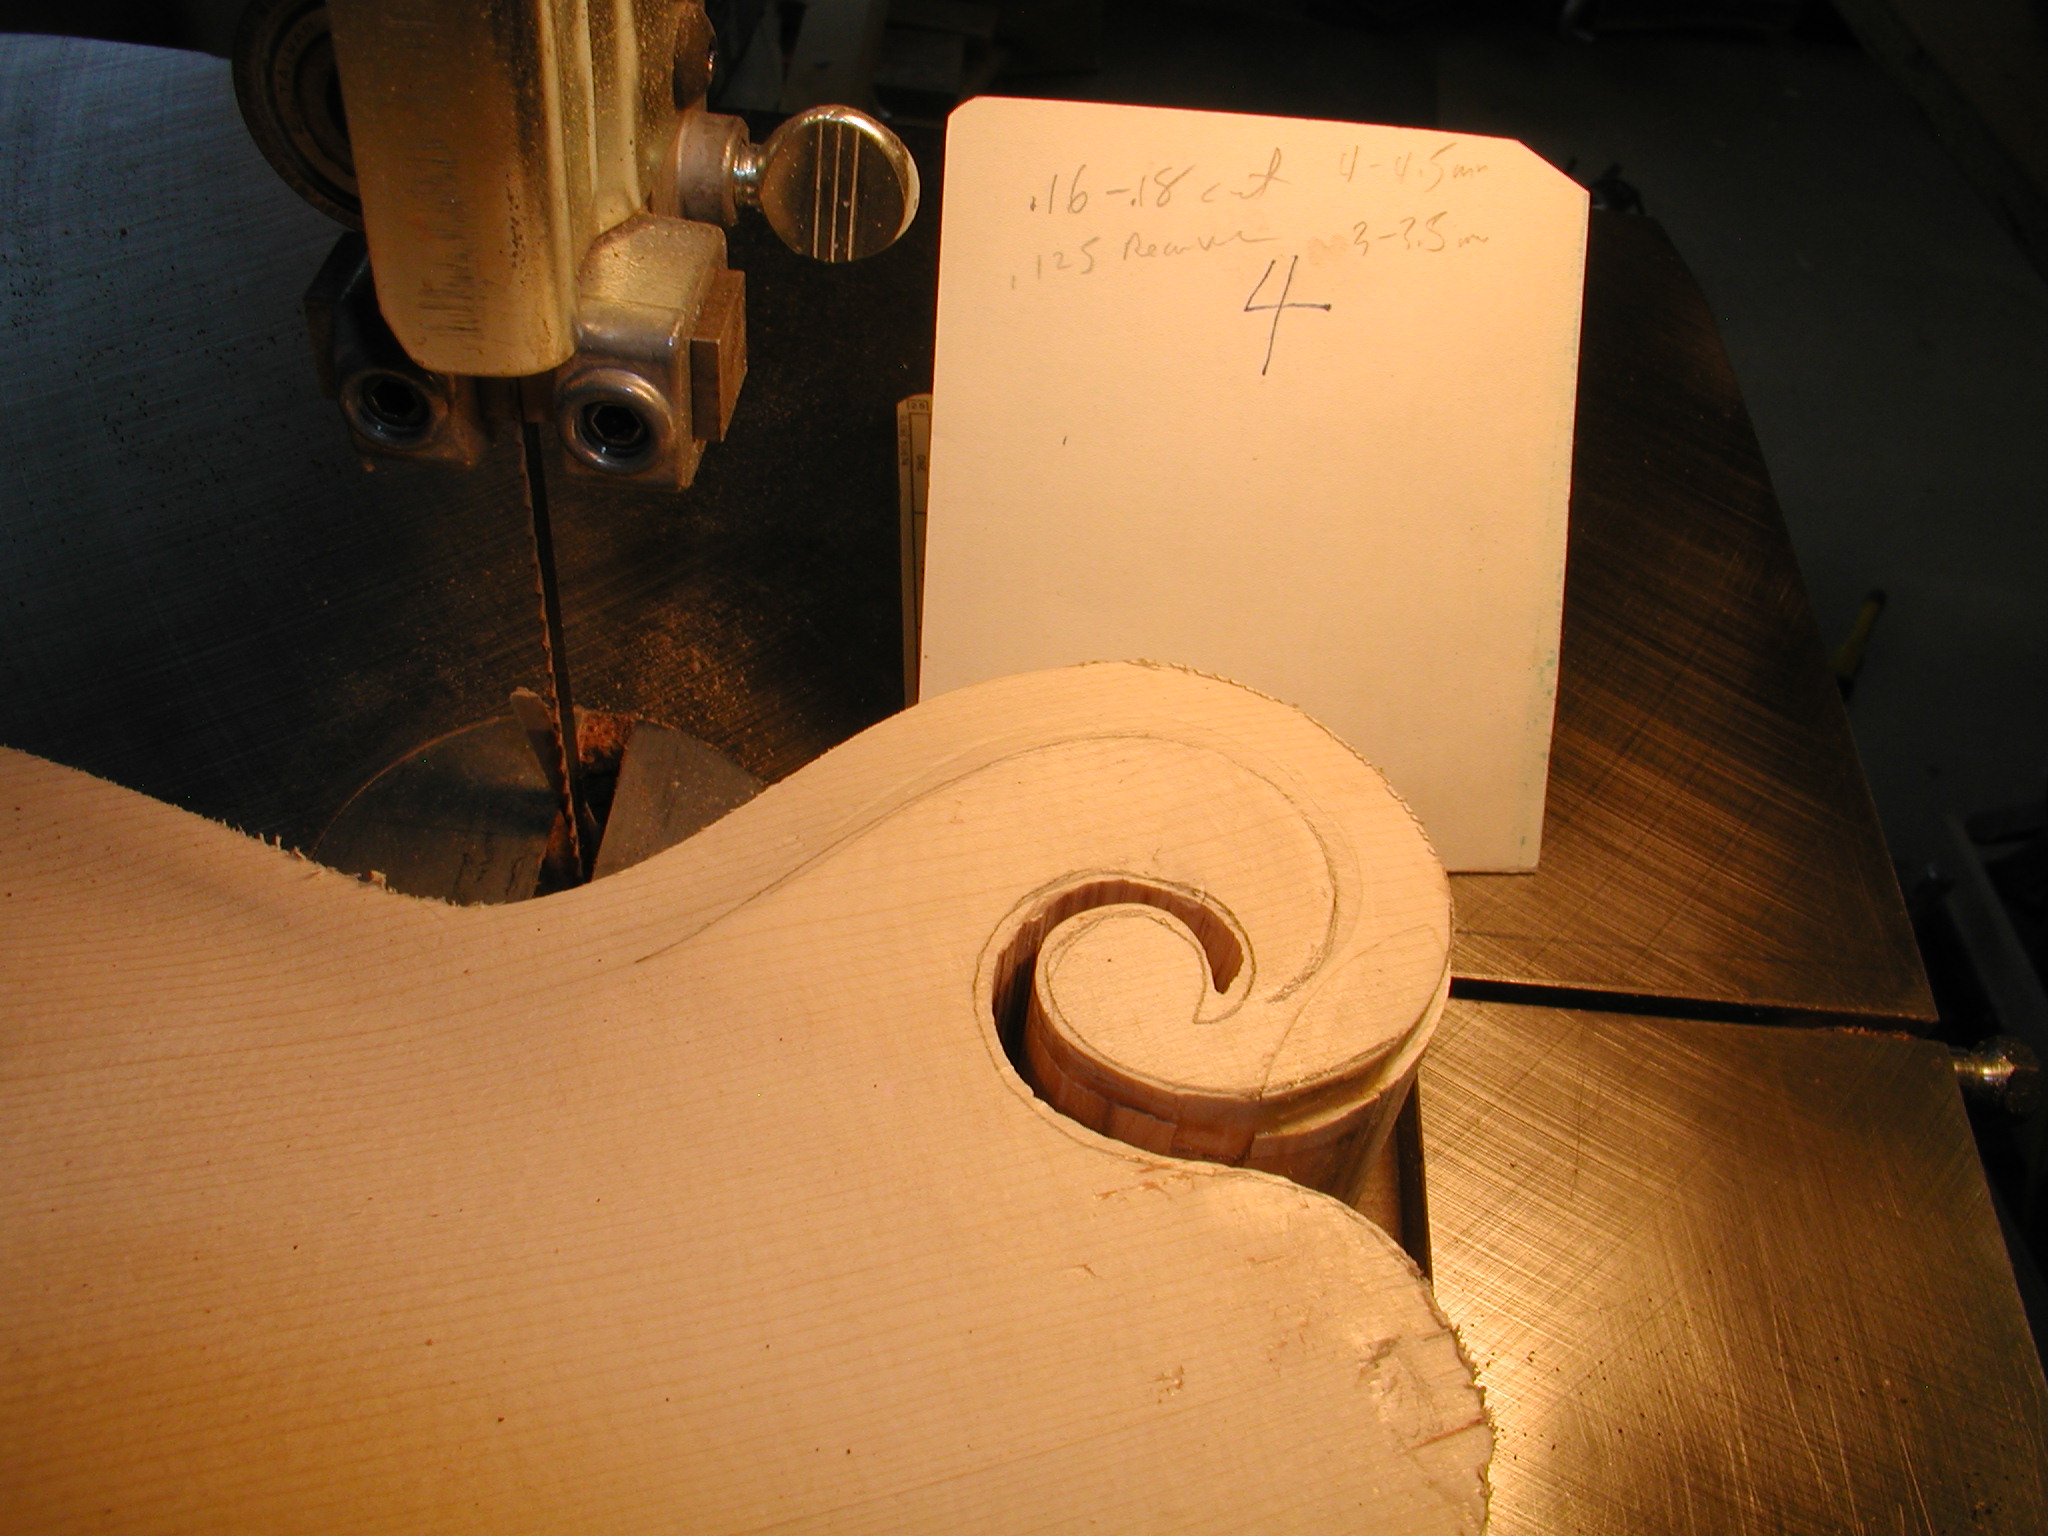
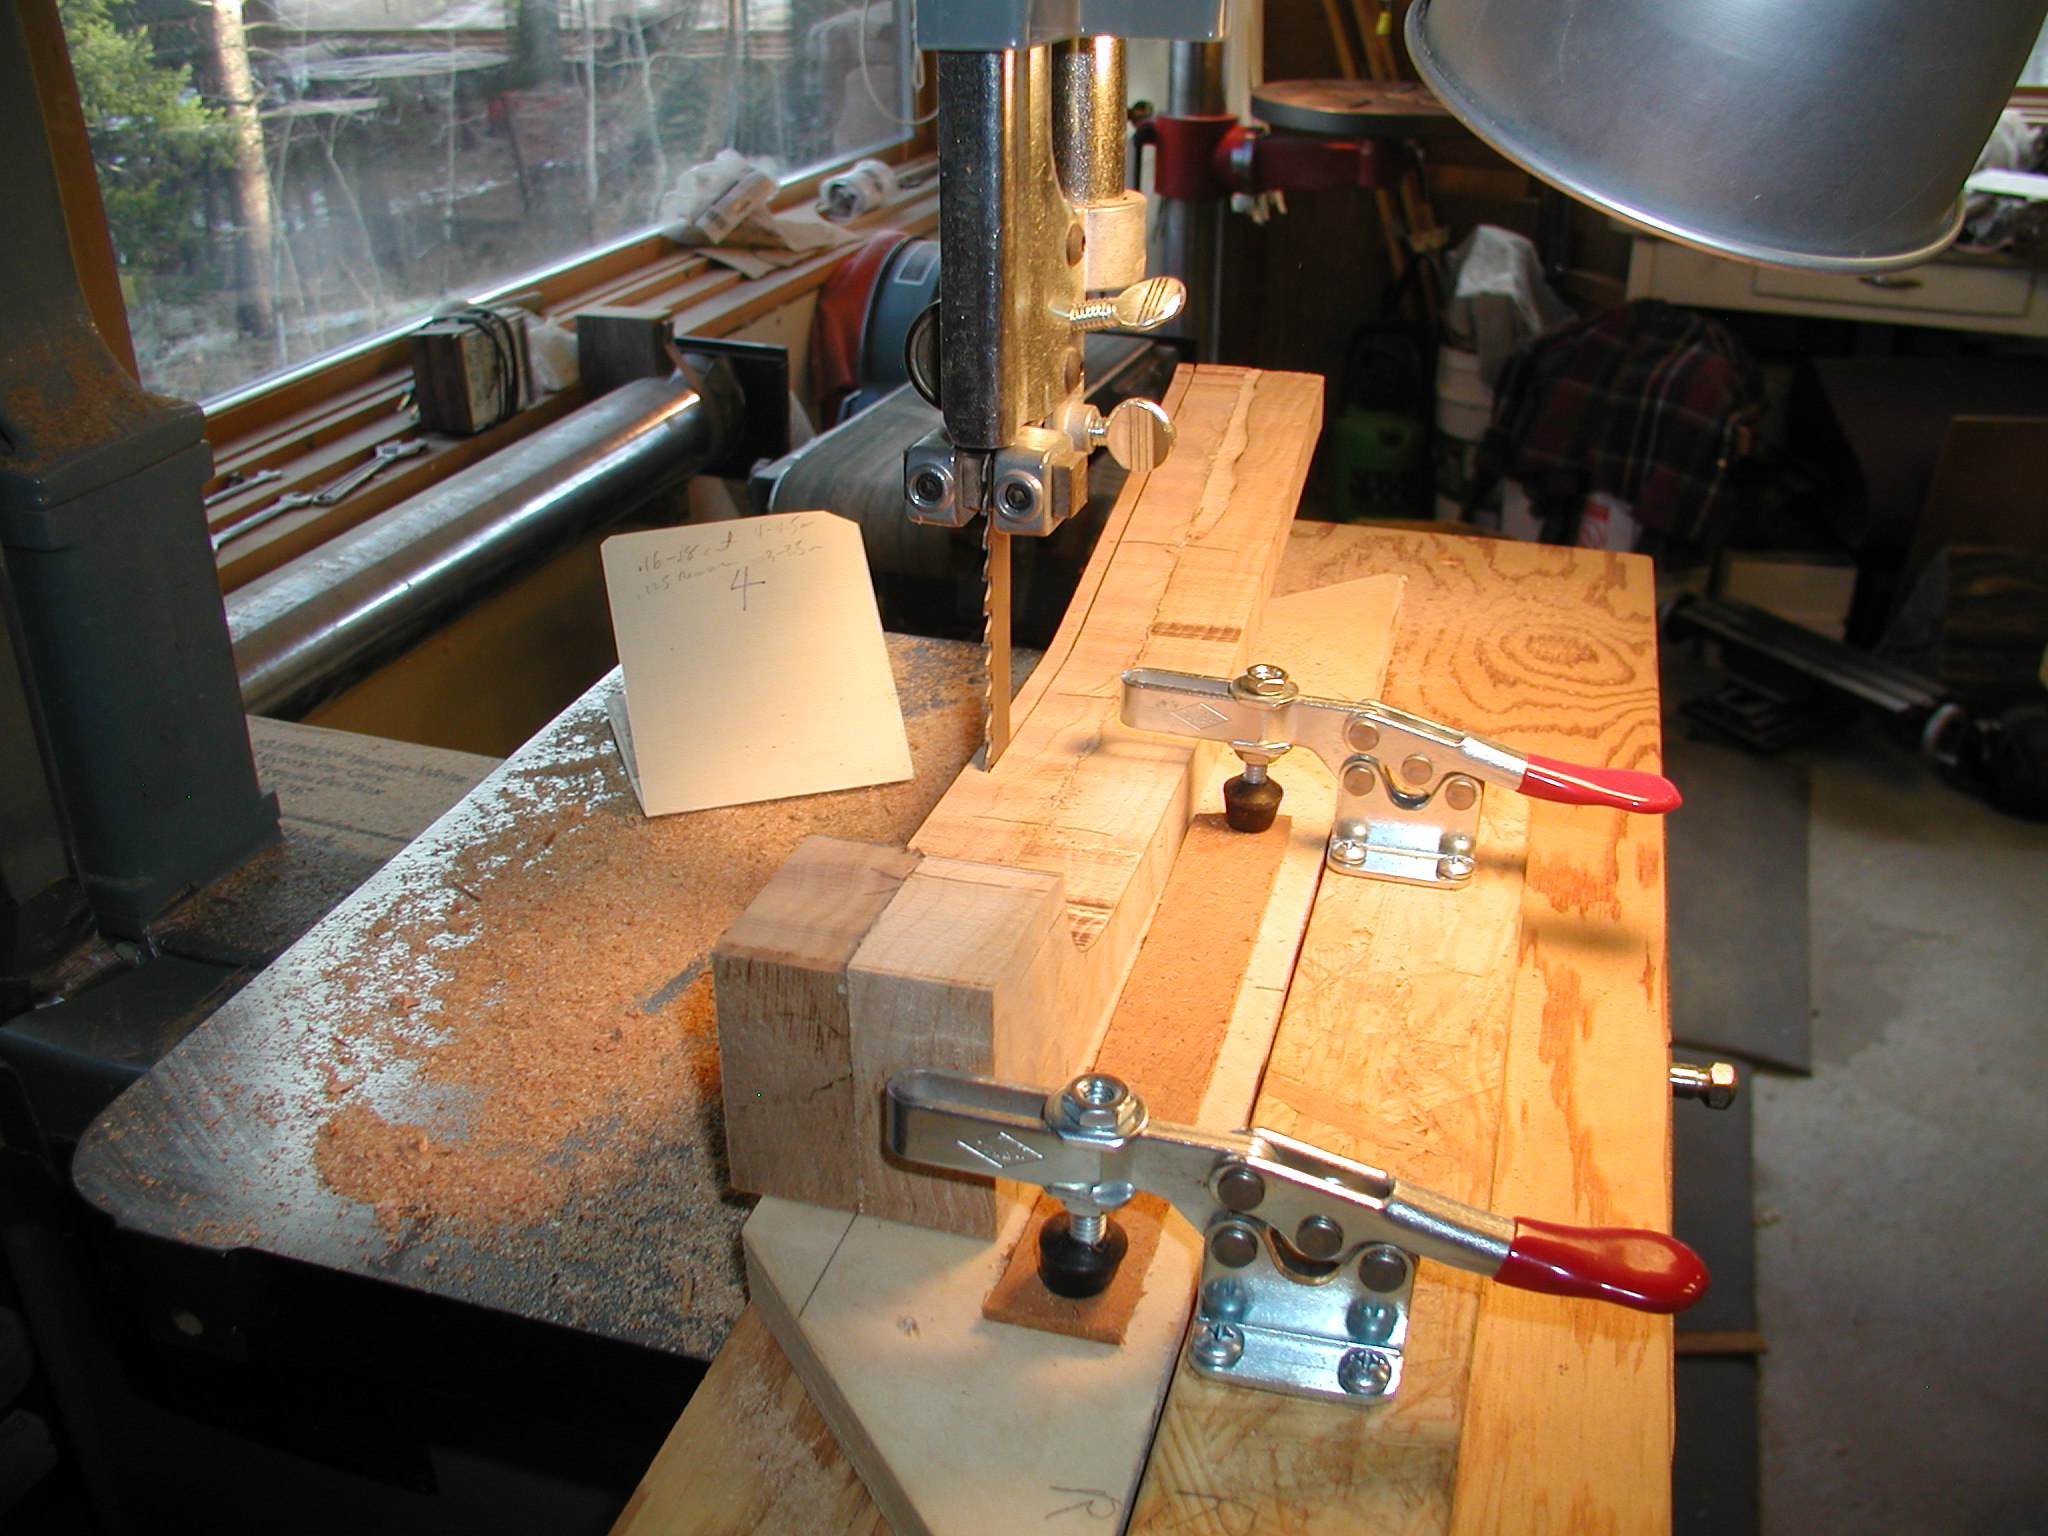
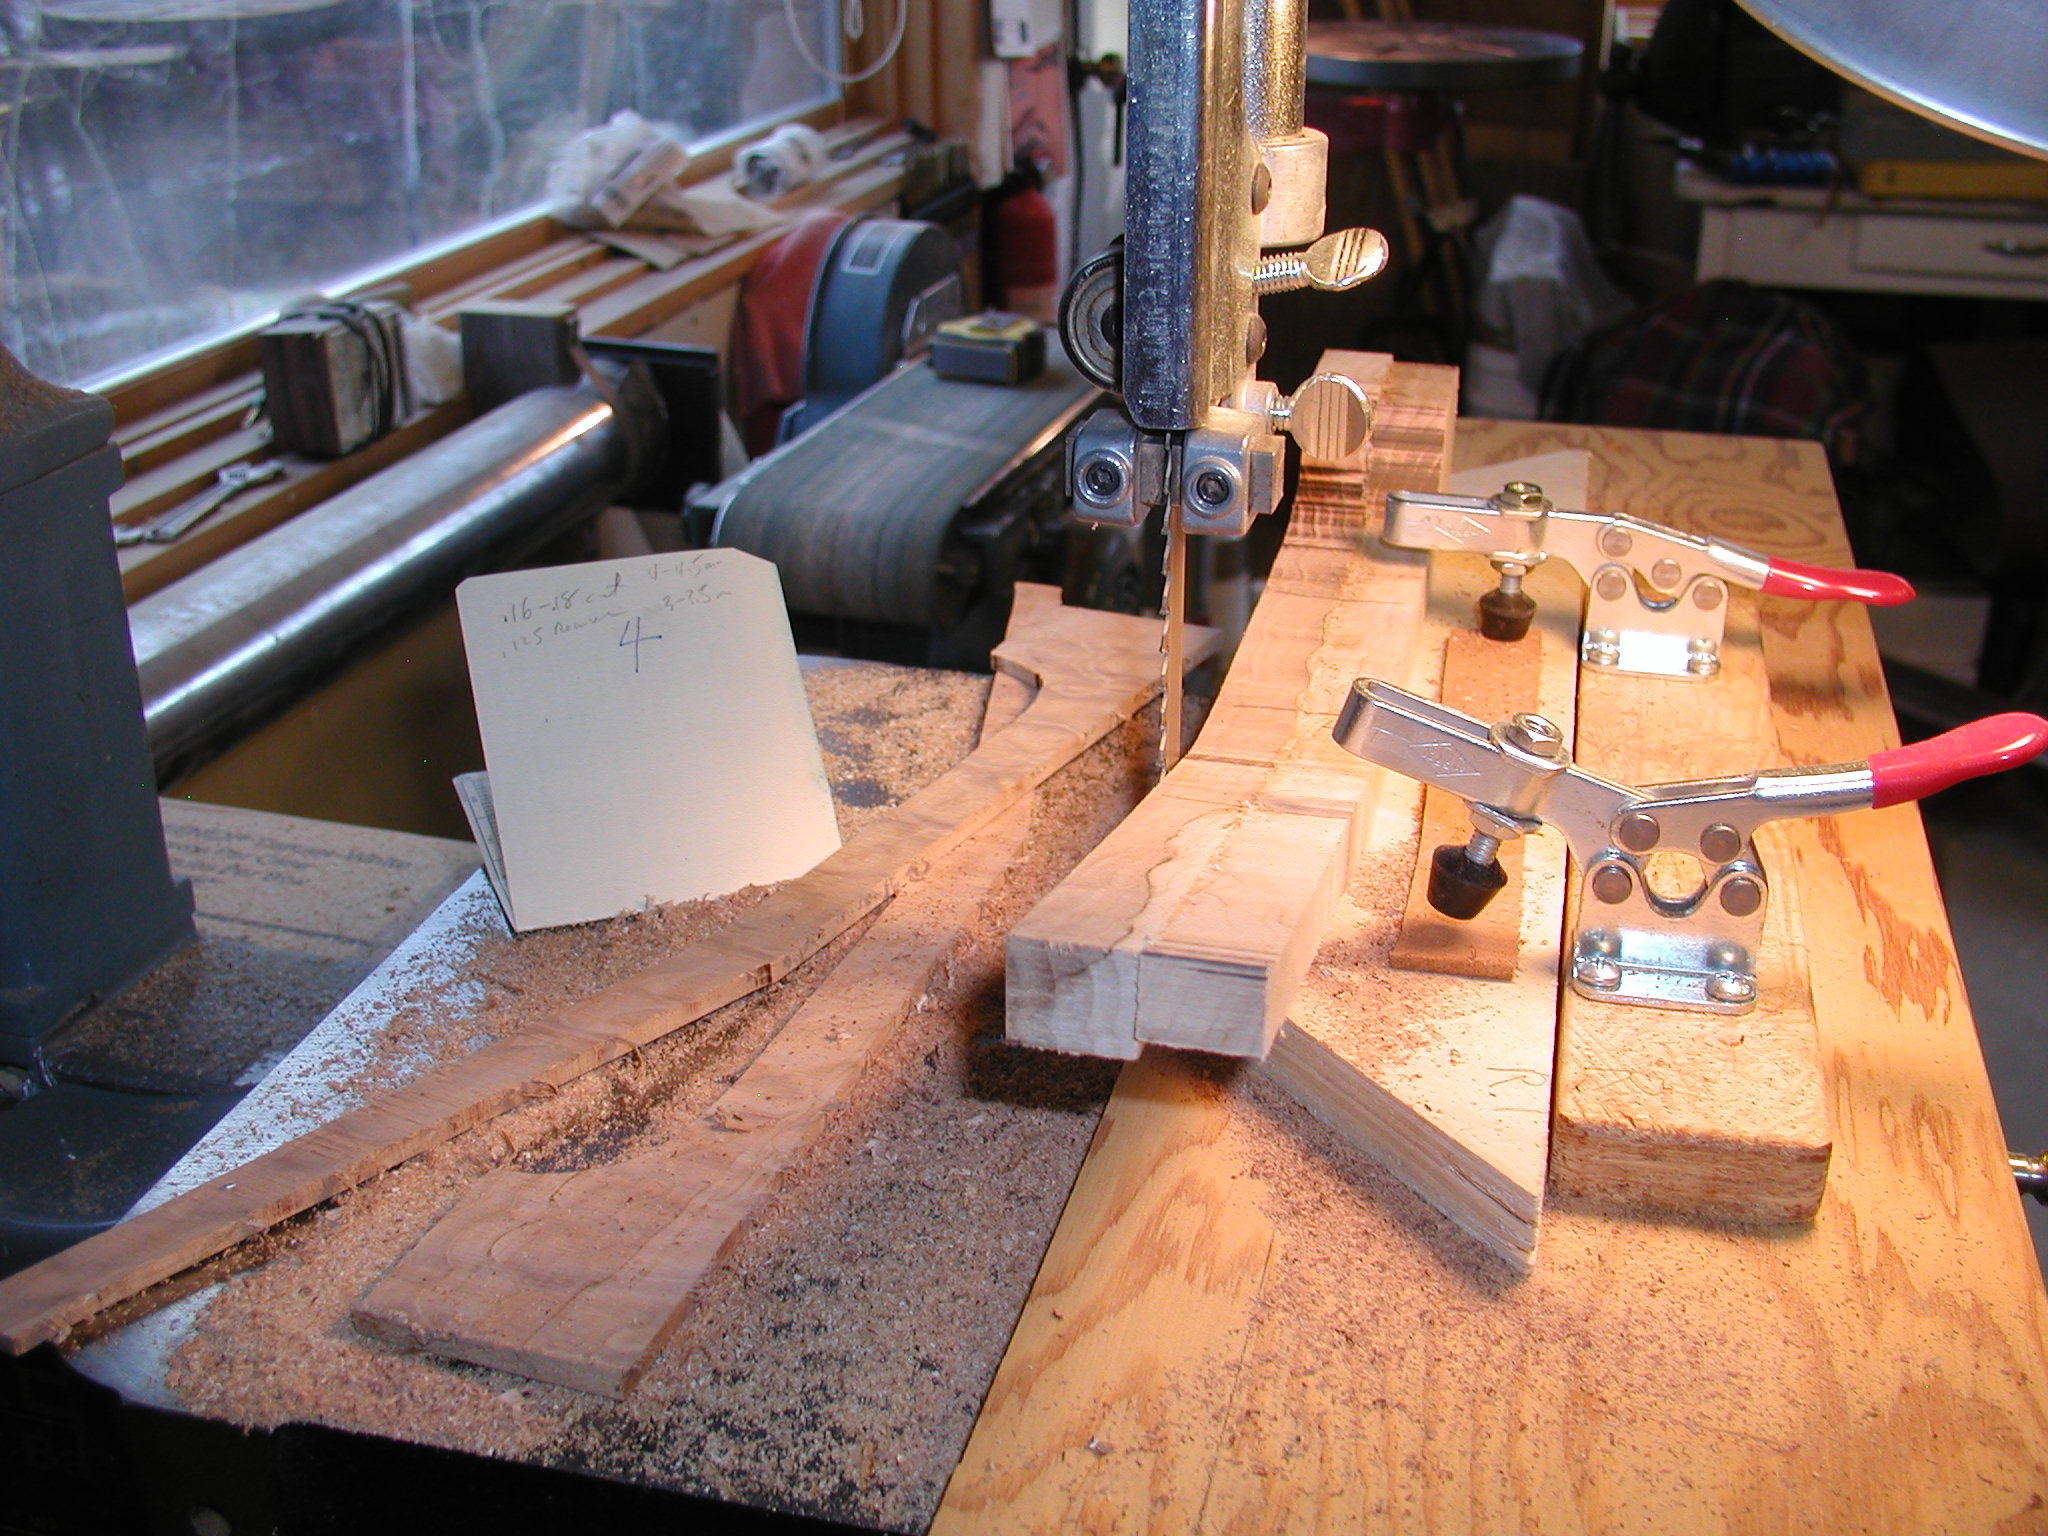
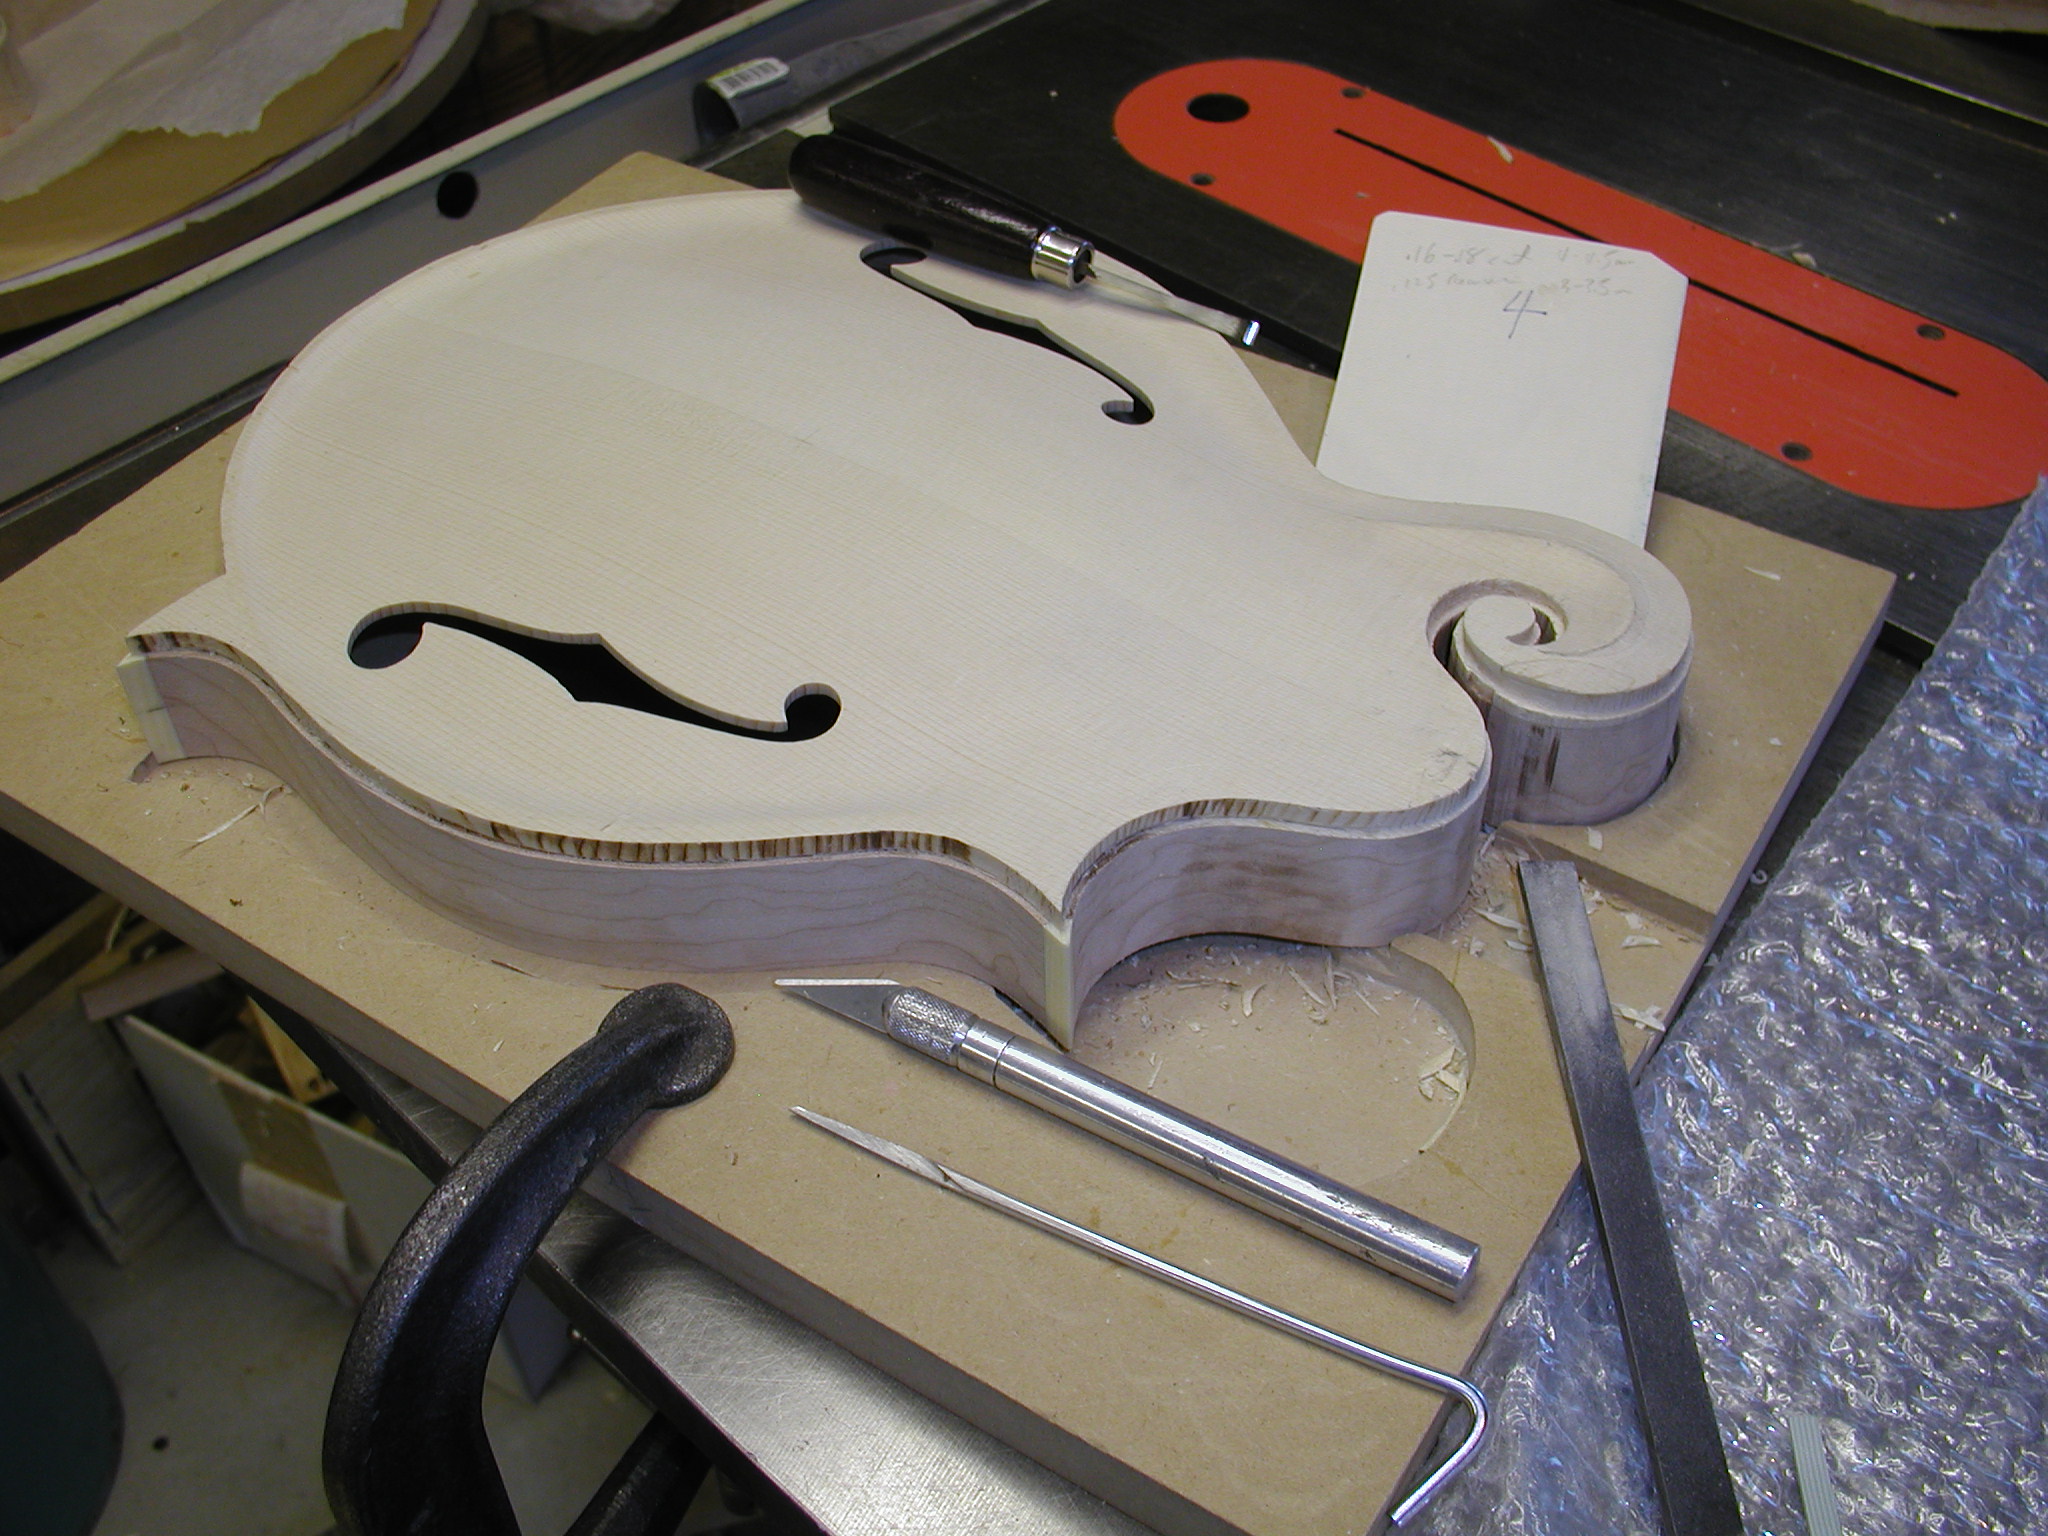
Back to the body work again. I use a spindle sander to trim the overhanging top wood flush with the ribs. Then using a bottom cutting file burr in a Dremel type tool I cut the binding slot. I have found that the usual carbide bits are too aggressive when cutting in the edge grain of the plates and make the tool hard to hold. With the file burr you can slowly cut the material away with multiple passes followed by a tight held close pass to cut fully to the depth. You can see the file burr better in the second binding photo. These are available individually or in sets. This one is from Dremel and is just high speed steel, after a while the corners get rounded off so it doesn't cut a nice square inside corner. Carbide ones are available from machine tool places like MSC Industrial. Last of all I take it to the bandsaw and carefully cut out the scroll slot very close to the line.

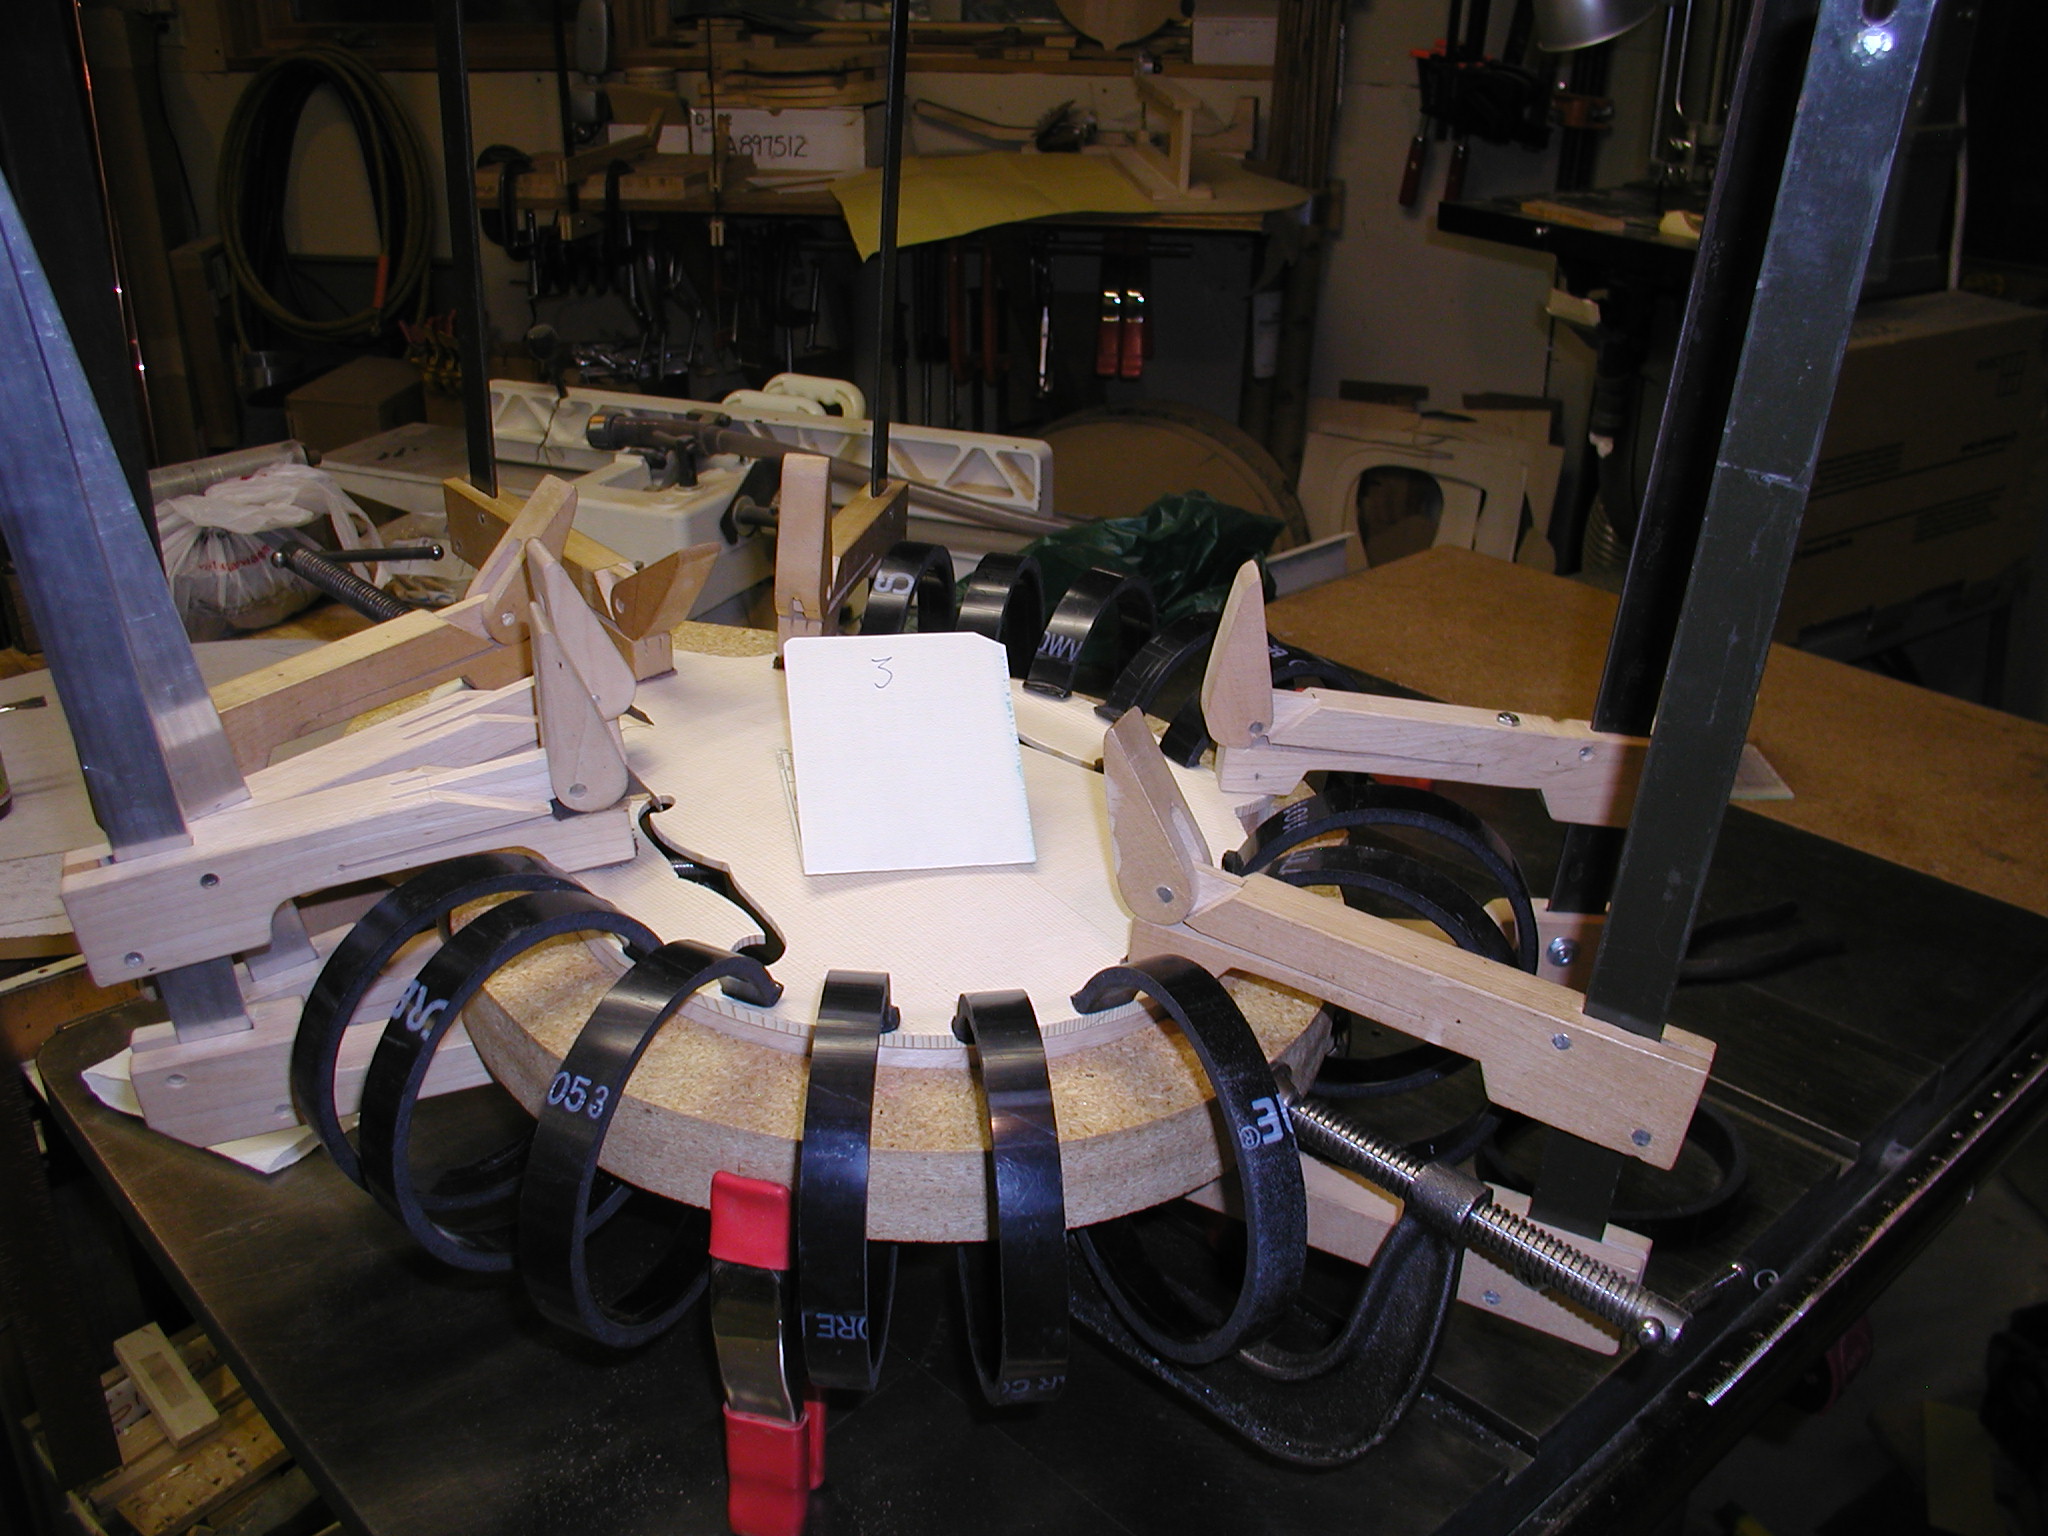
Back to the neck for a minute. Here I'm using a jig that trims the neck to even width either side of the center line. The jig sled has some 1/8" pins sticking up and I drill matching holes into the neck dead on the center line. Pin and clamp to the sled and trim off the excess on the sides. If you look carefully you can see this is the same sled I use for guitar necks, it just has a top piece that clamps on for mandolins.
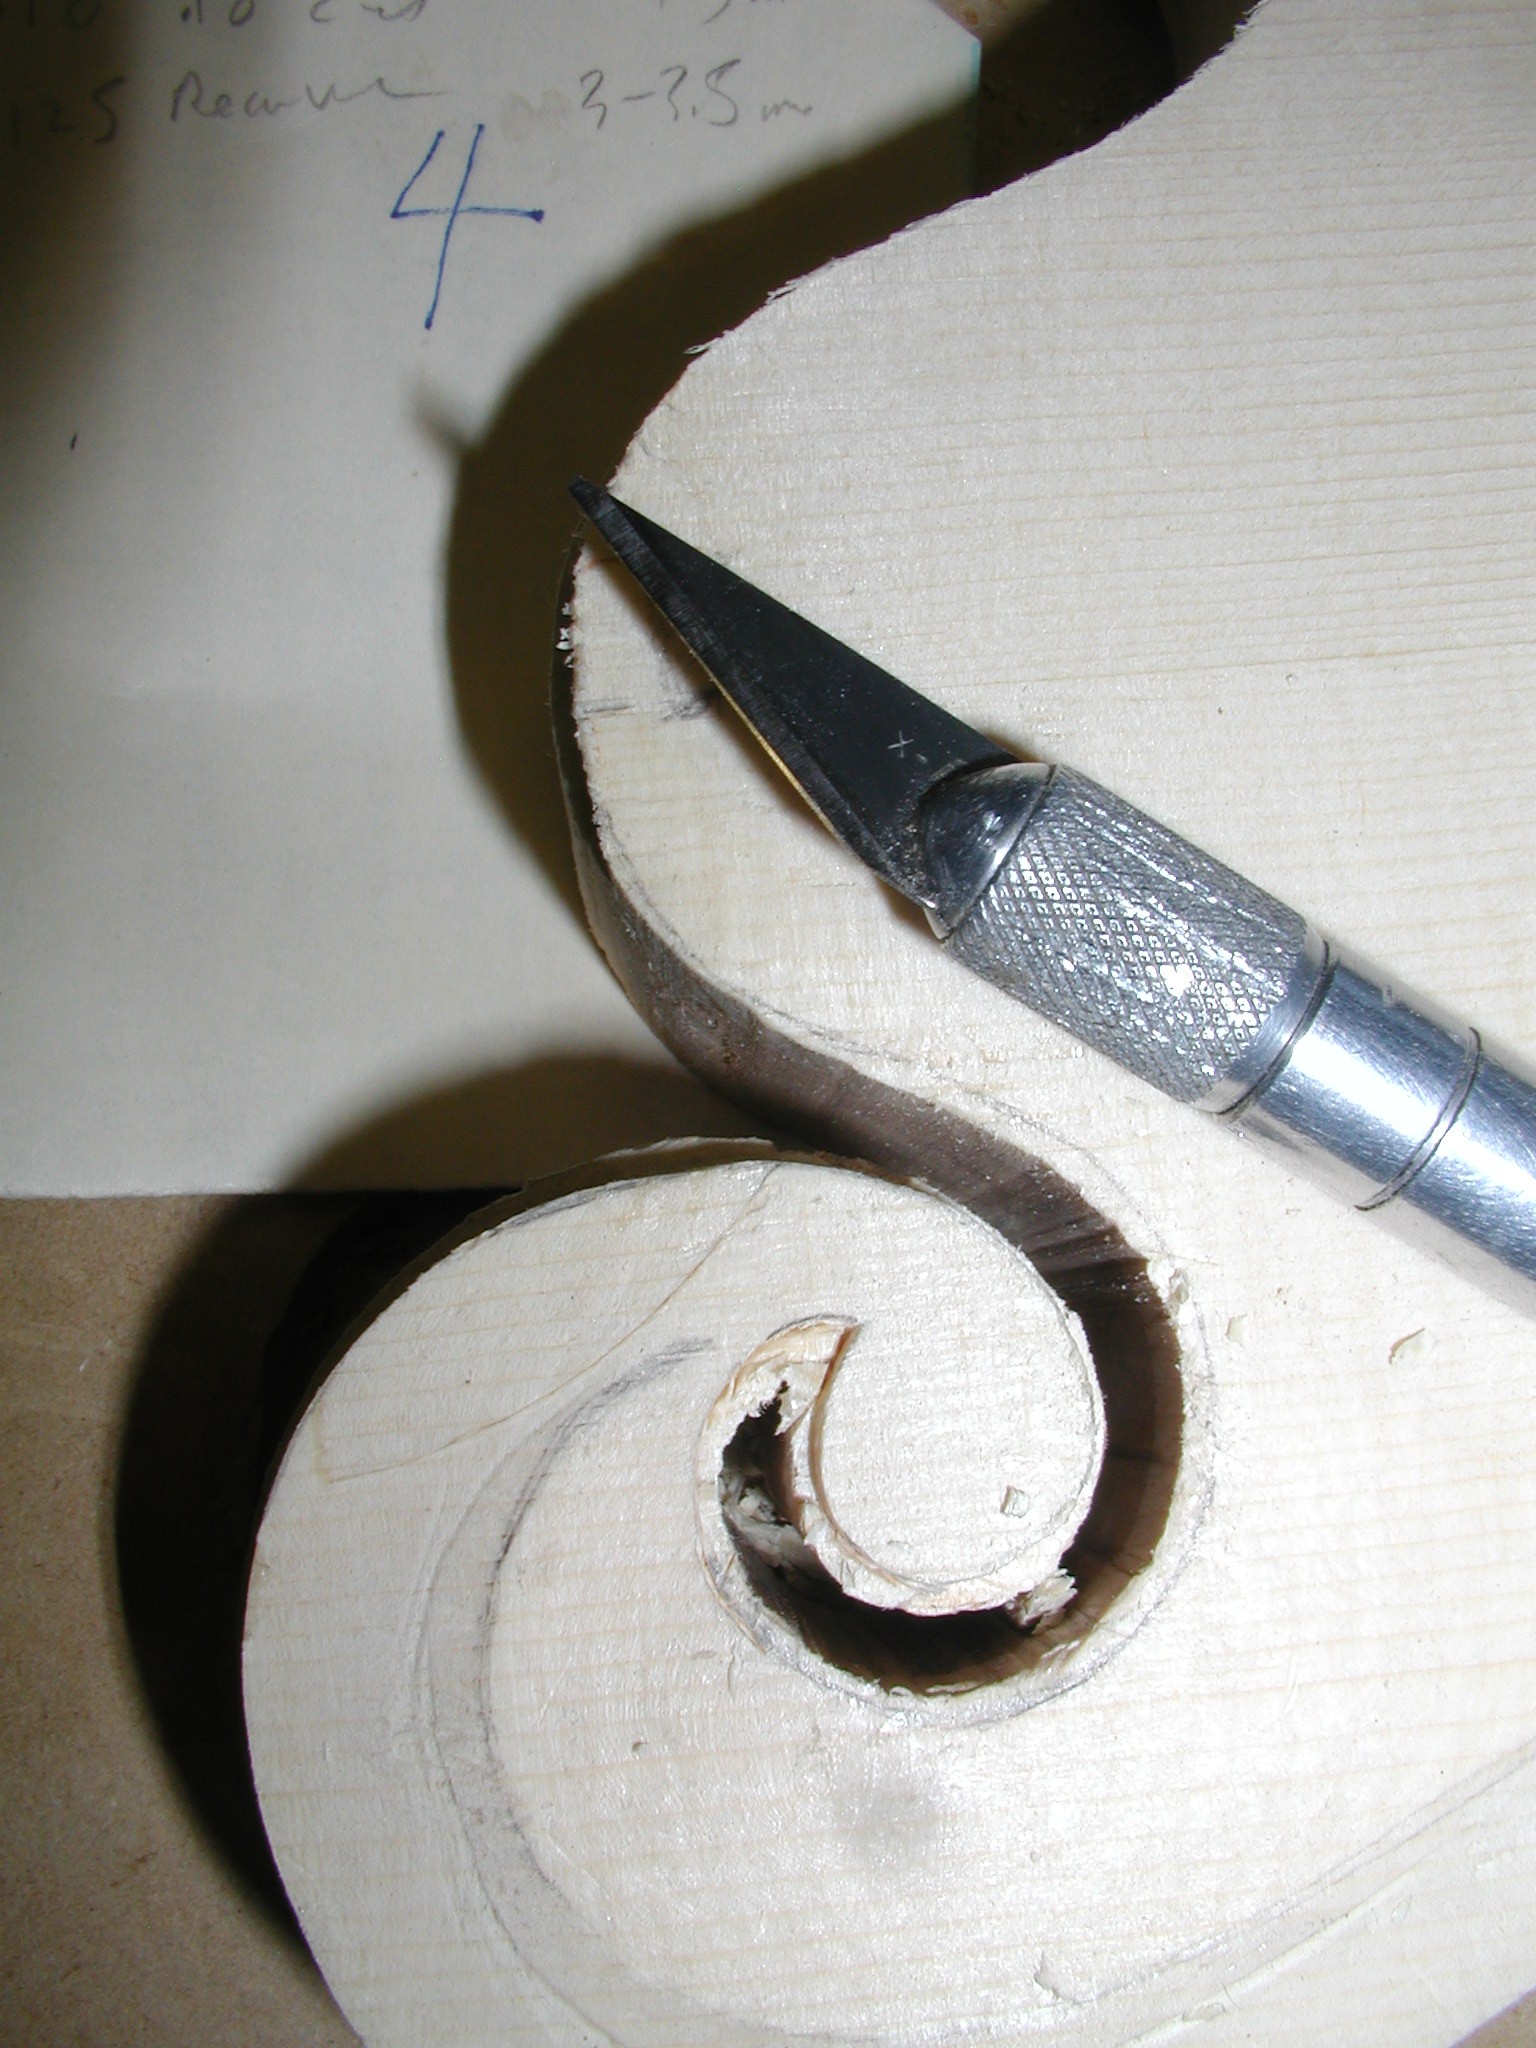
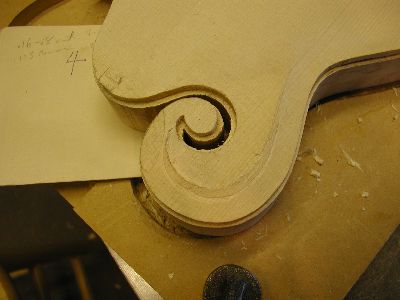
Time to finalize the scroll area. I use some rough rasp sheets of foil to clean up the slot a bit from the bandsaw cuts. Then the fiddly slow process of cutting back for the scroll binding. I use an Xacto knife with various blades and some small chisels, some of my own design. Not shown here is a little dog-leg one I made that is especially good for this process. You just need to put on some nice music and take your time. Use scrap pieces of binding to get the width and depth right. This process takes me over an hour on the top and longer on the maple back when I get to that. Last of all I go around the areas I can with a smooth file w/o any teeth on the edge to get it all square and clean where I can reach.

1 2 3 4 5 6 7 8 8a 9 10 11 11a 11b 12 12a 13 14 15 16 17 18 19 20