Let's Build A Guitar
Last Modified - November 6, 2012
These pages are a photo journal of the building process of a Double-top/Double-Back Minstrel guitar. I take these photos as I proceed through each instrument build. I will try to give a brief explanation as to what is happening in each photo. For greater detail just click on any photo to get a larger view. I have broken it up into multiple pages because there are so many images, almost 90 of them, and the pages take rather long to load. Click on the Next and Previous links to step through the pages or jump with the individual page numbers.
To help you in finding specific steps, the pages are listed here as to what happens in each:
Page 1 - Make Double Top and Double Back
Page 2 - Top/Back Bracing
Page 3 - Sides and Body Assembly
Page 4 - Binding/Purfling and End
Graft
Page 5 - Neck
Page 6 - Headstock and Fit Neck to
Body
Page 7 - Fretboard
Page 8 - Carve Neck, Bridge construction, Finishing
Page 9 - Bridge final and Glue-up,
Page 10 - Bridge Pins, End Pin, Tuners, Nut & Saddle, Setup
& Intonation, Final stuff


Here I am gluing up the two tops needed to be combined into the single composite top. Both are Adirondack Spruce. I use a simple method with small wedges to apply the joining force.
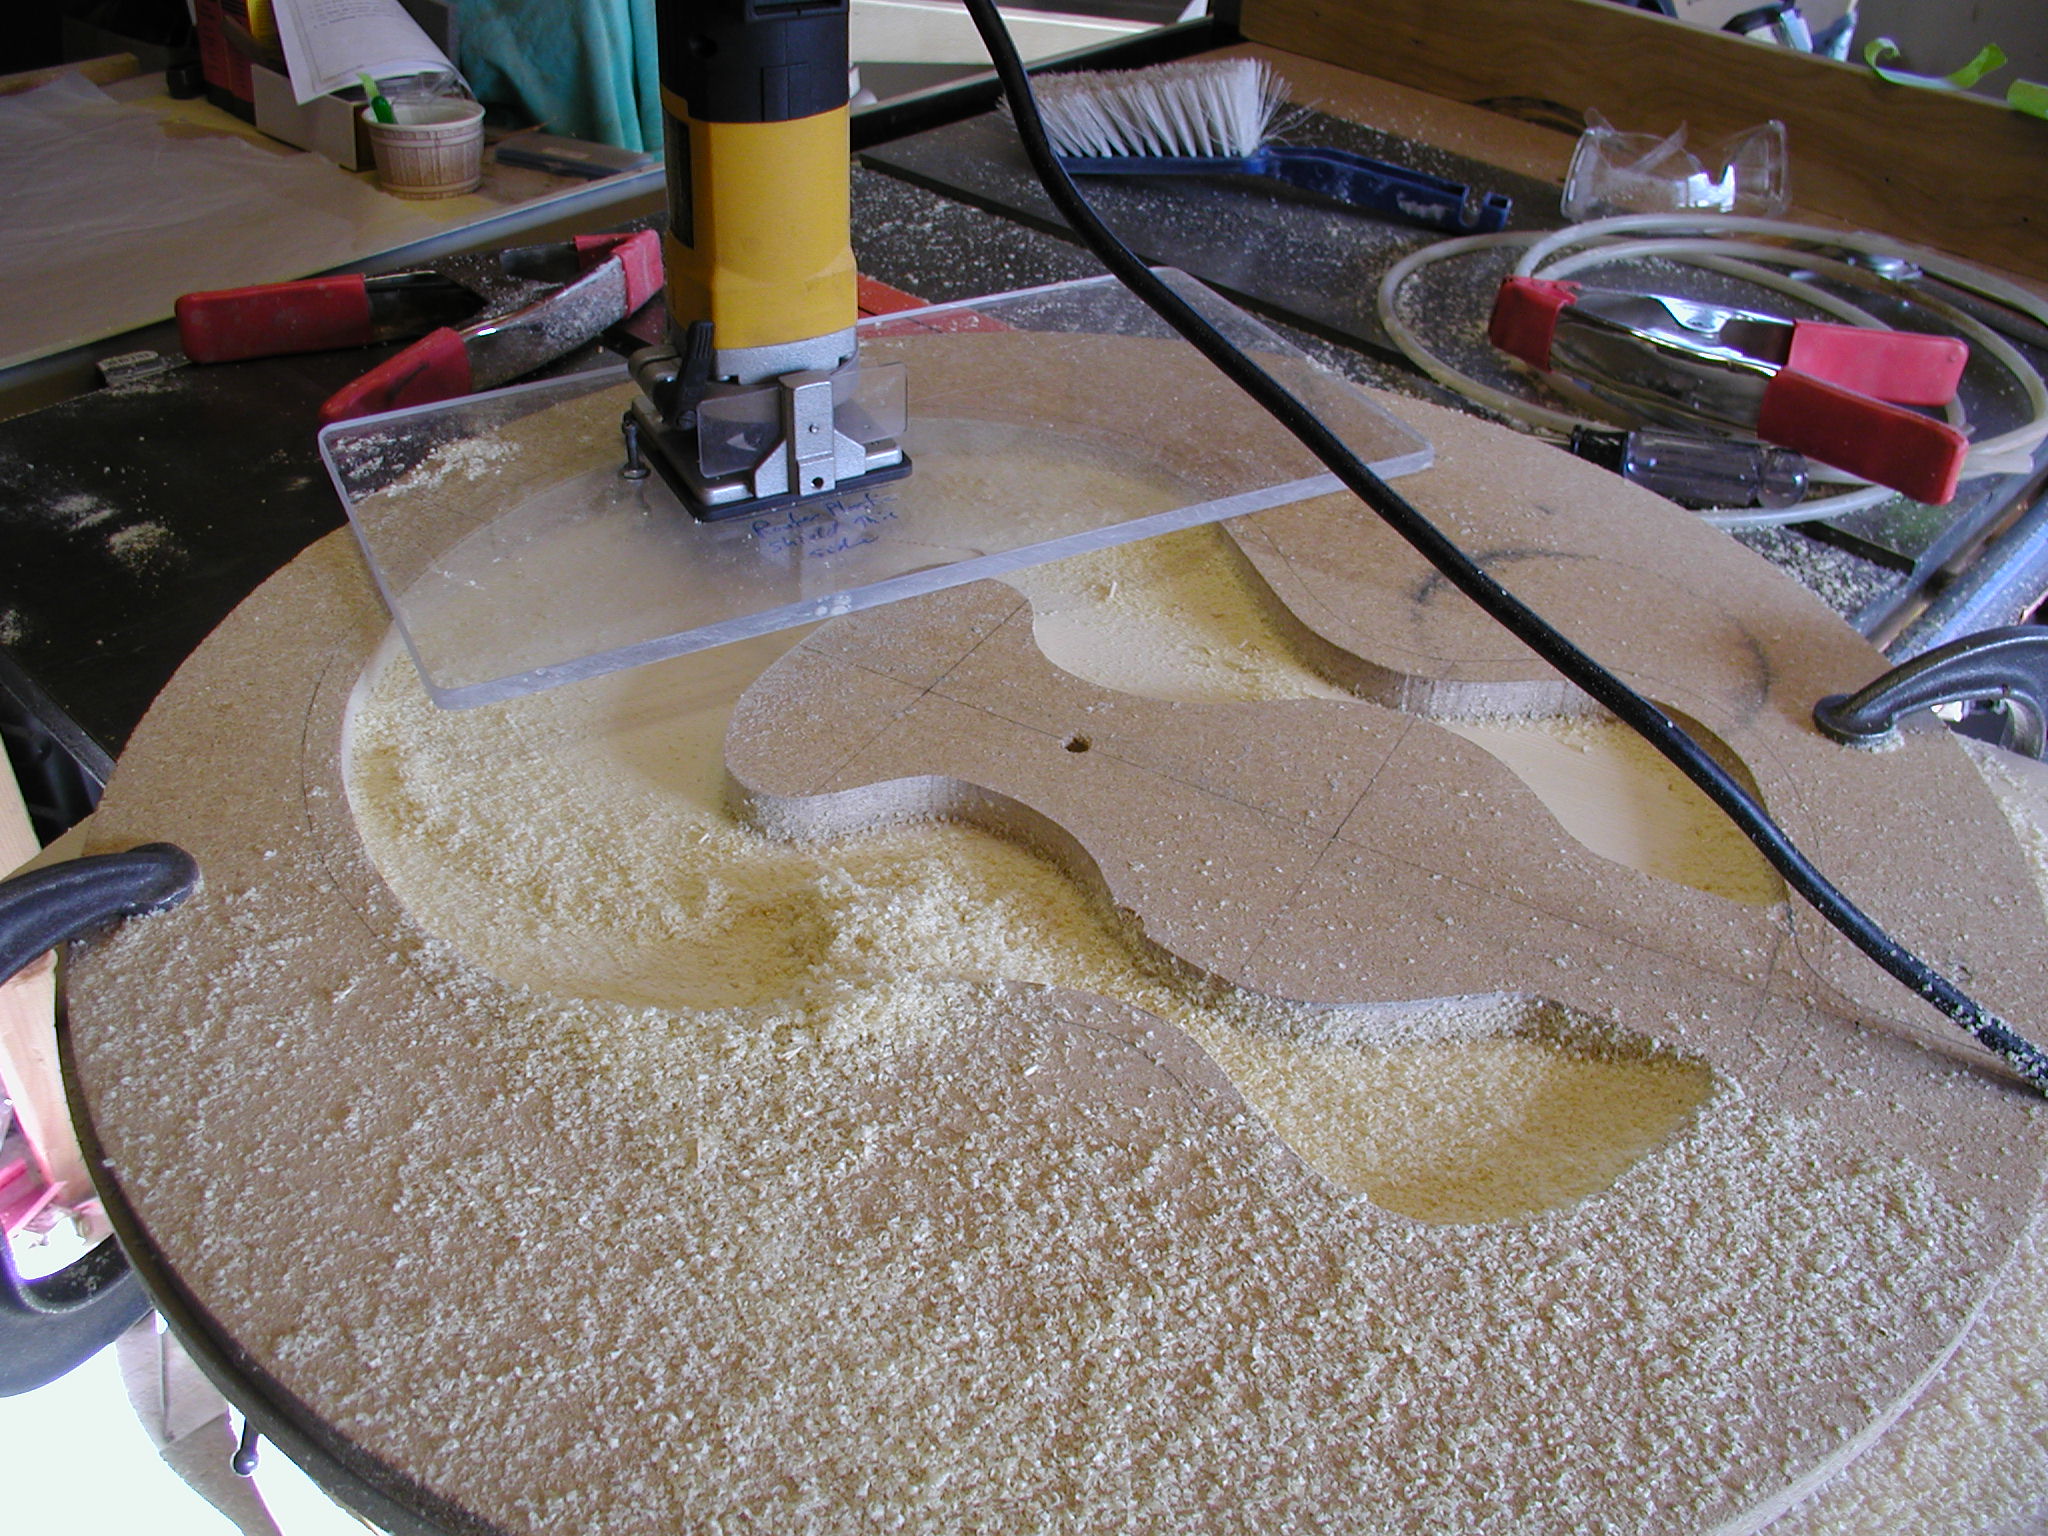
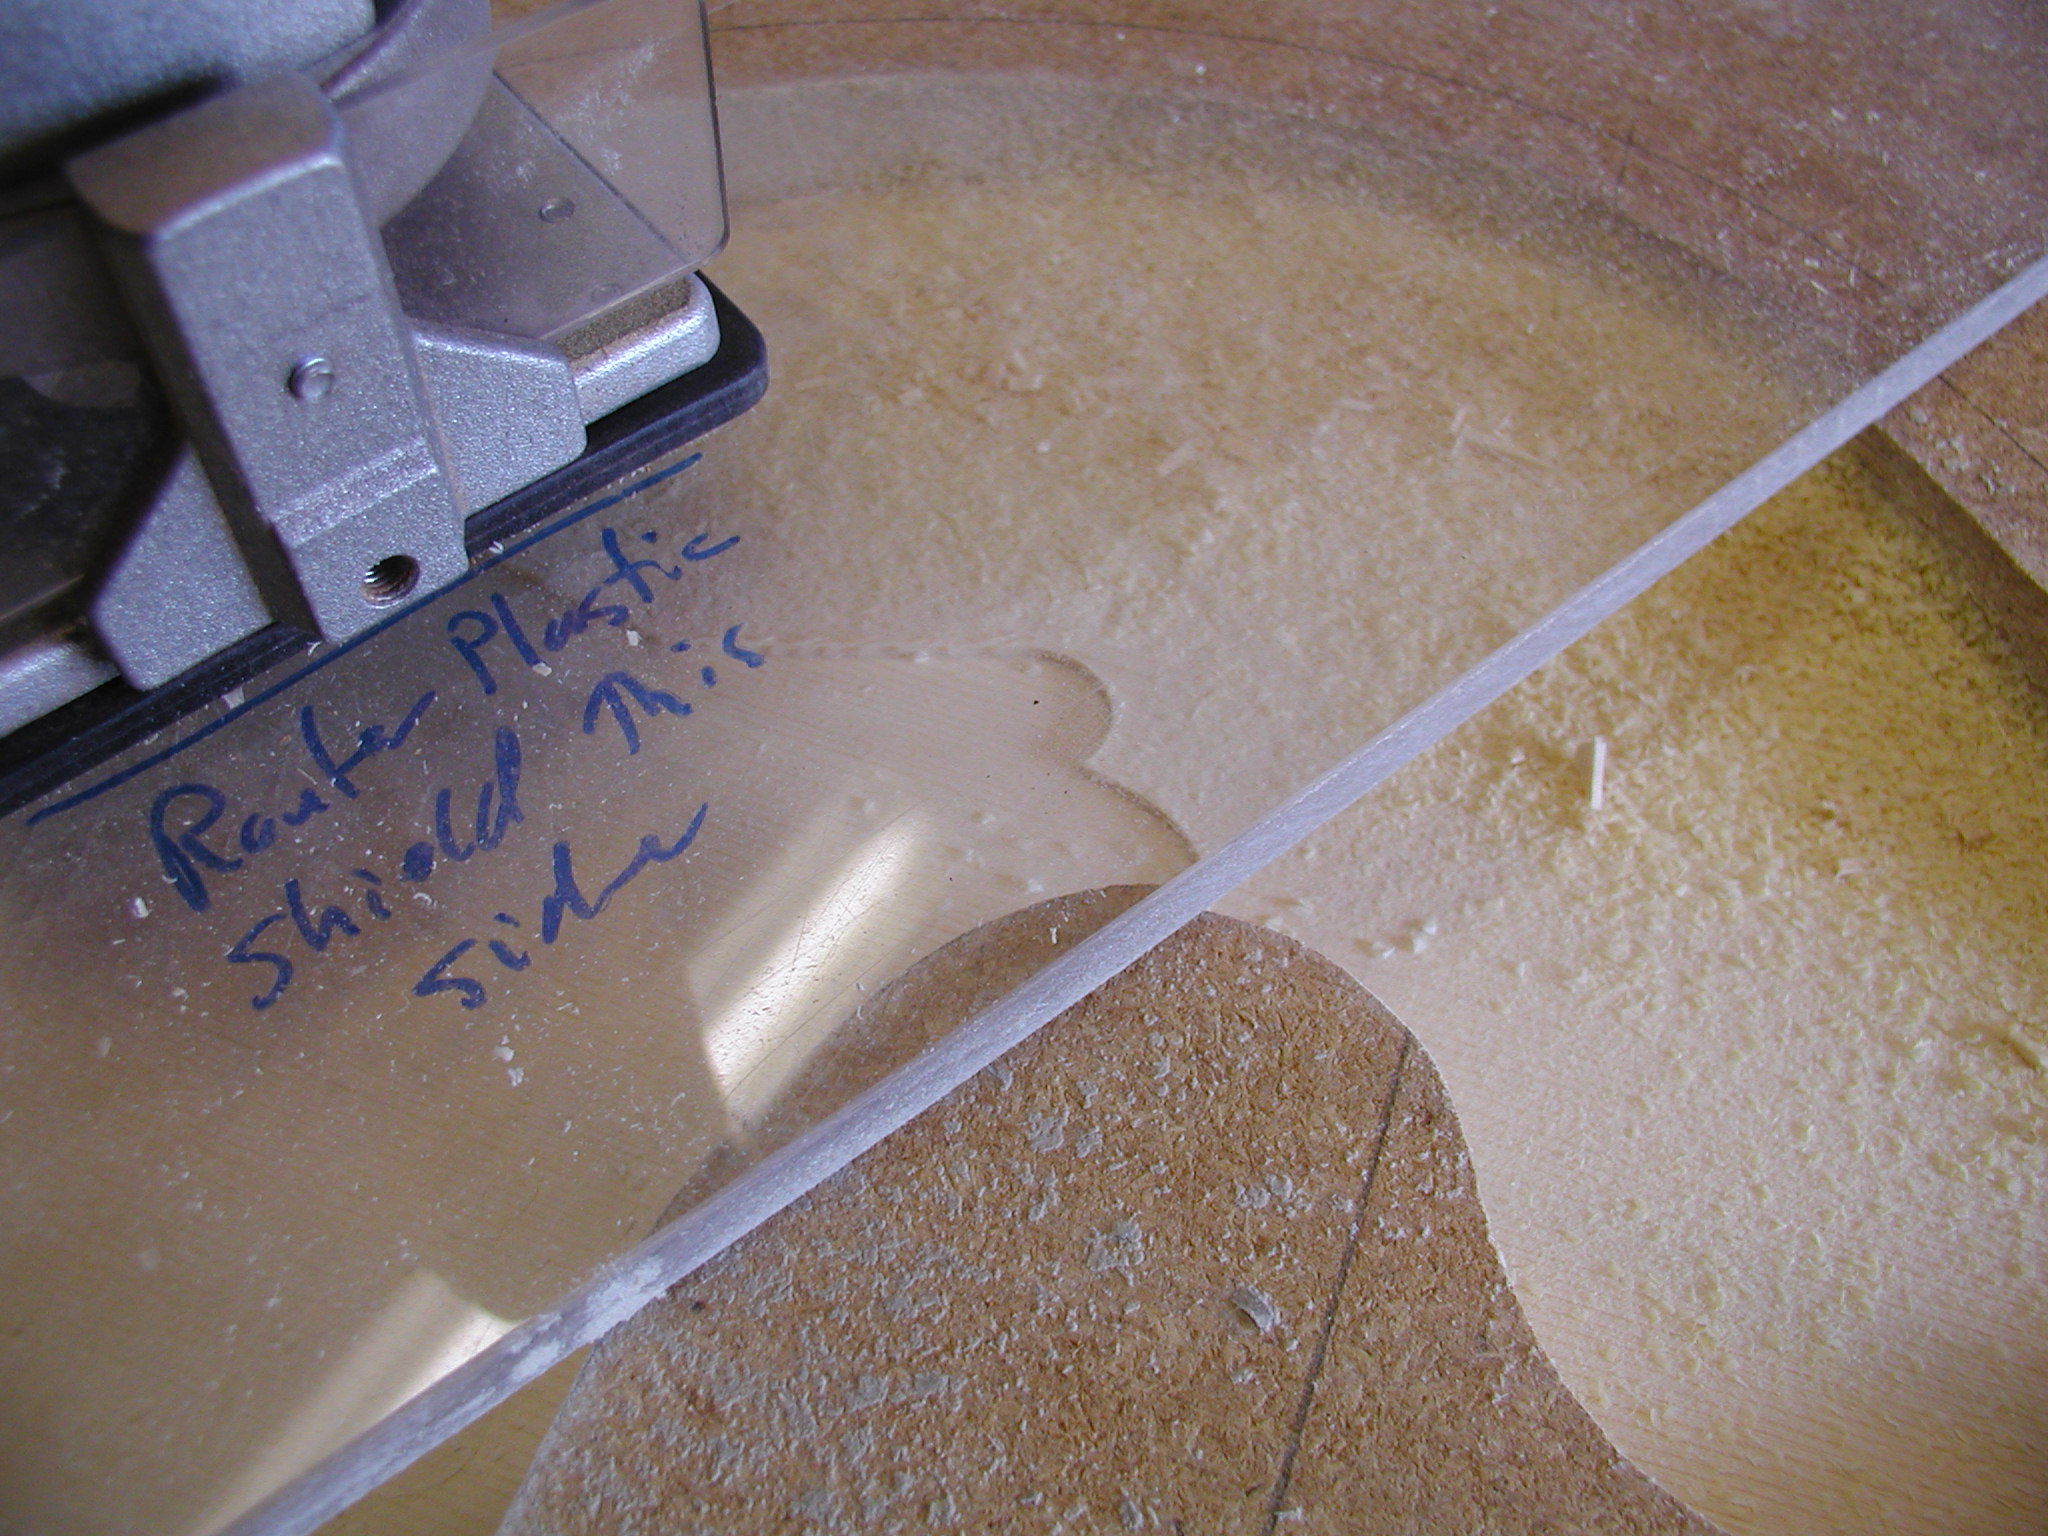
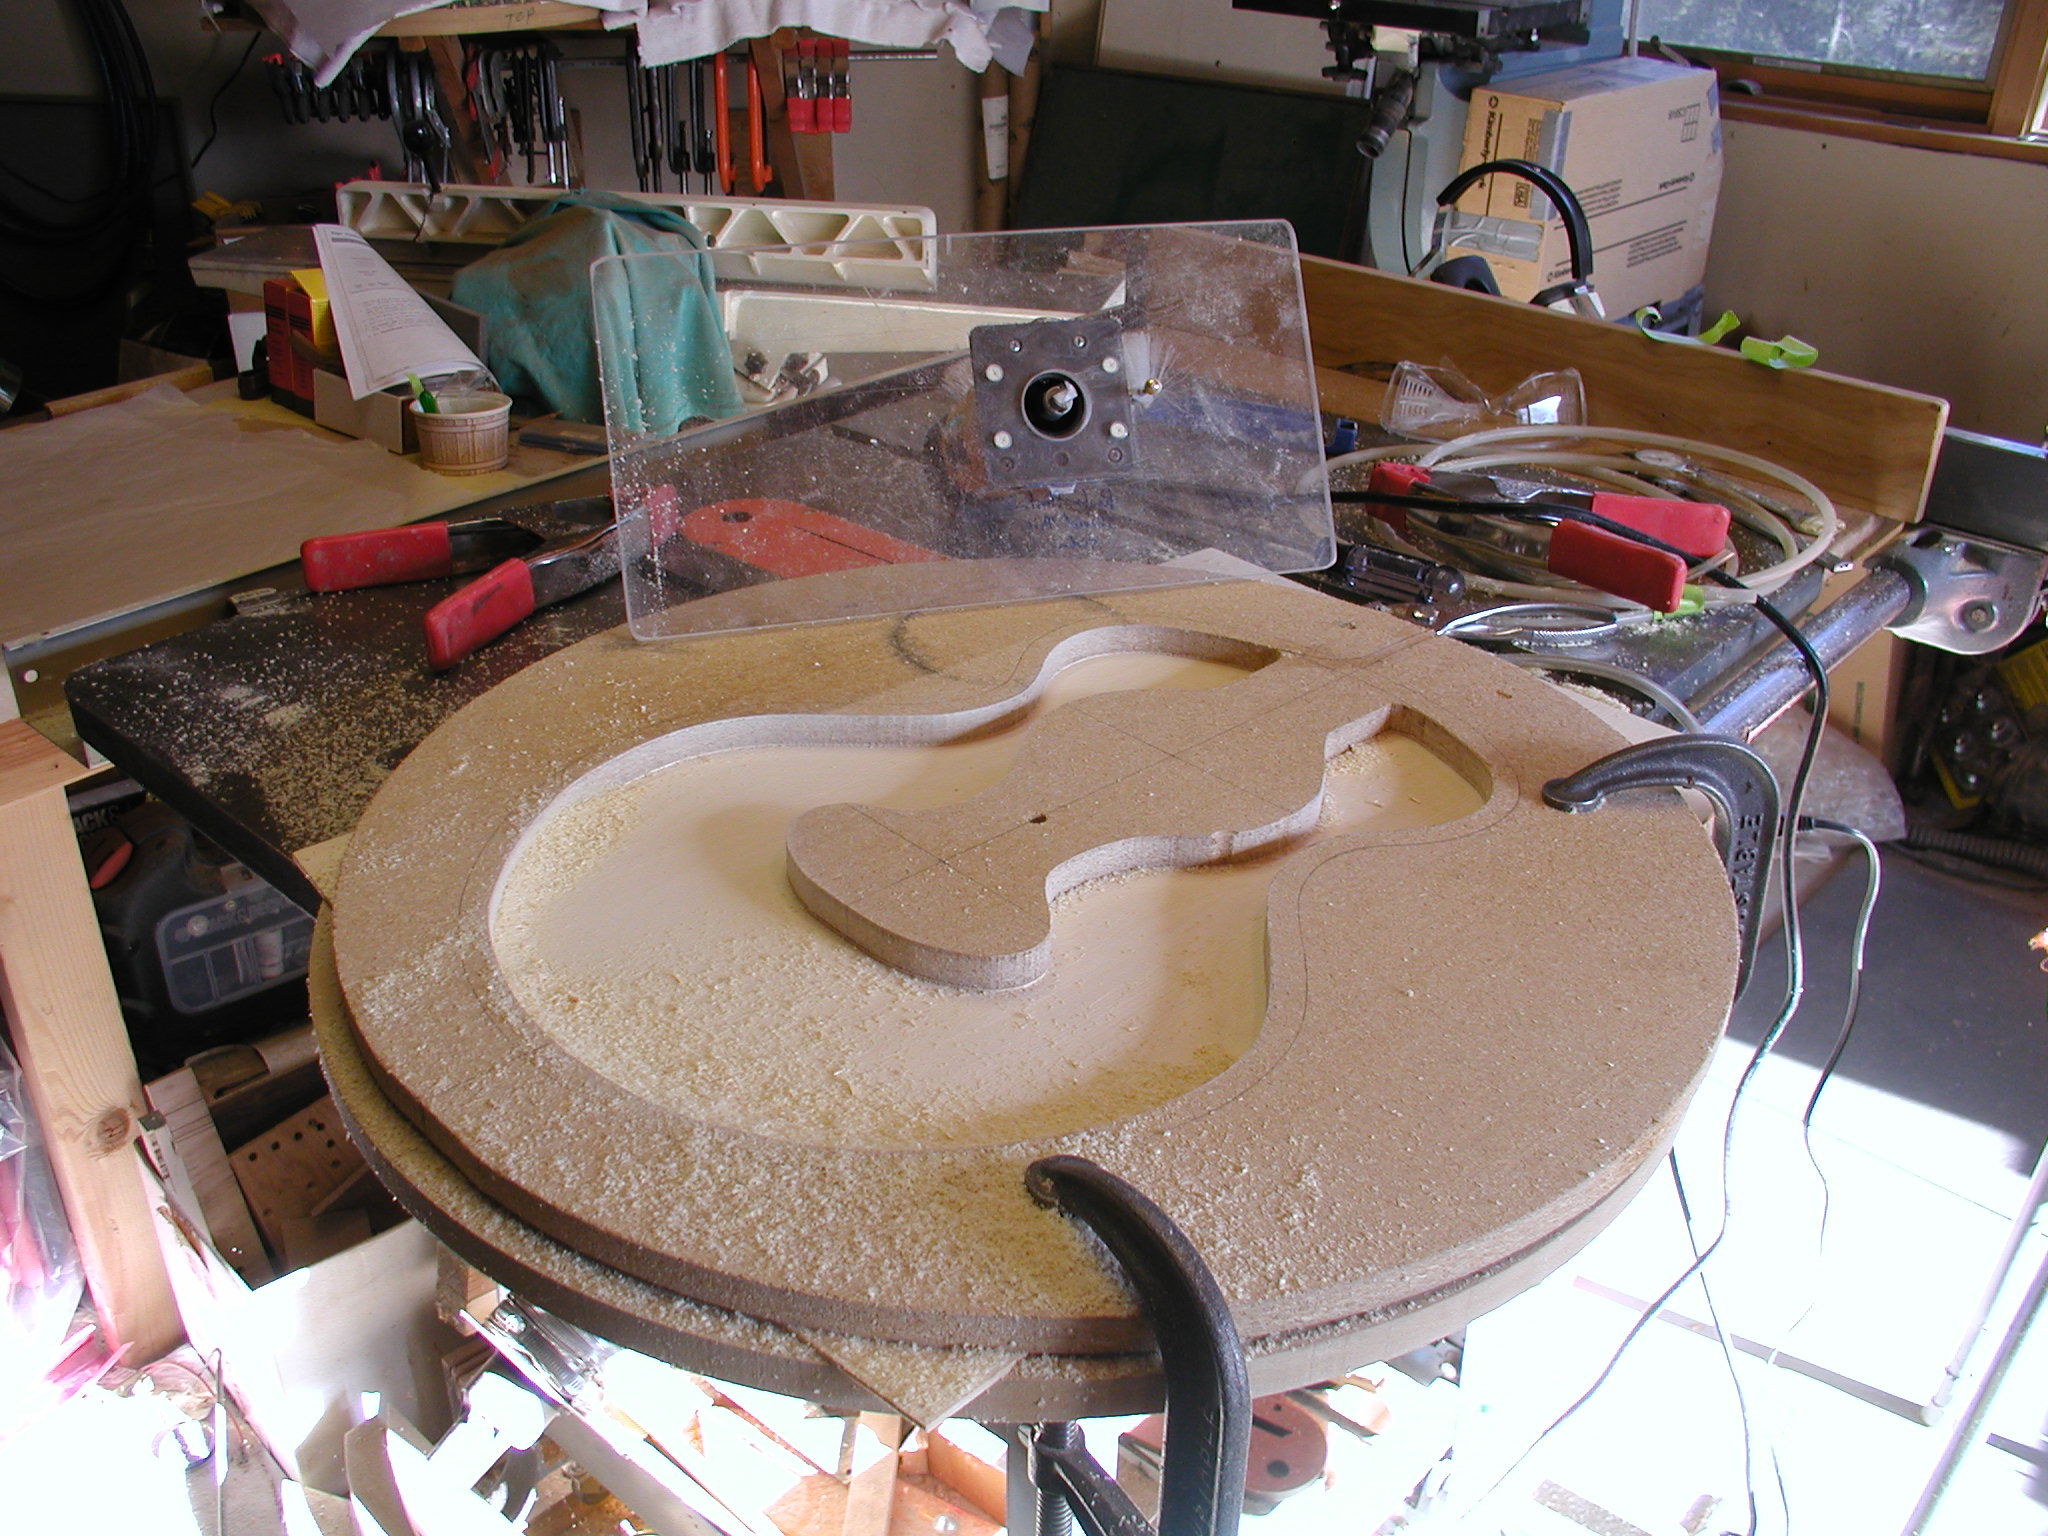
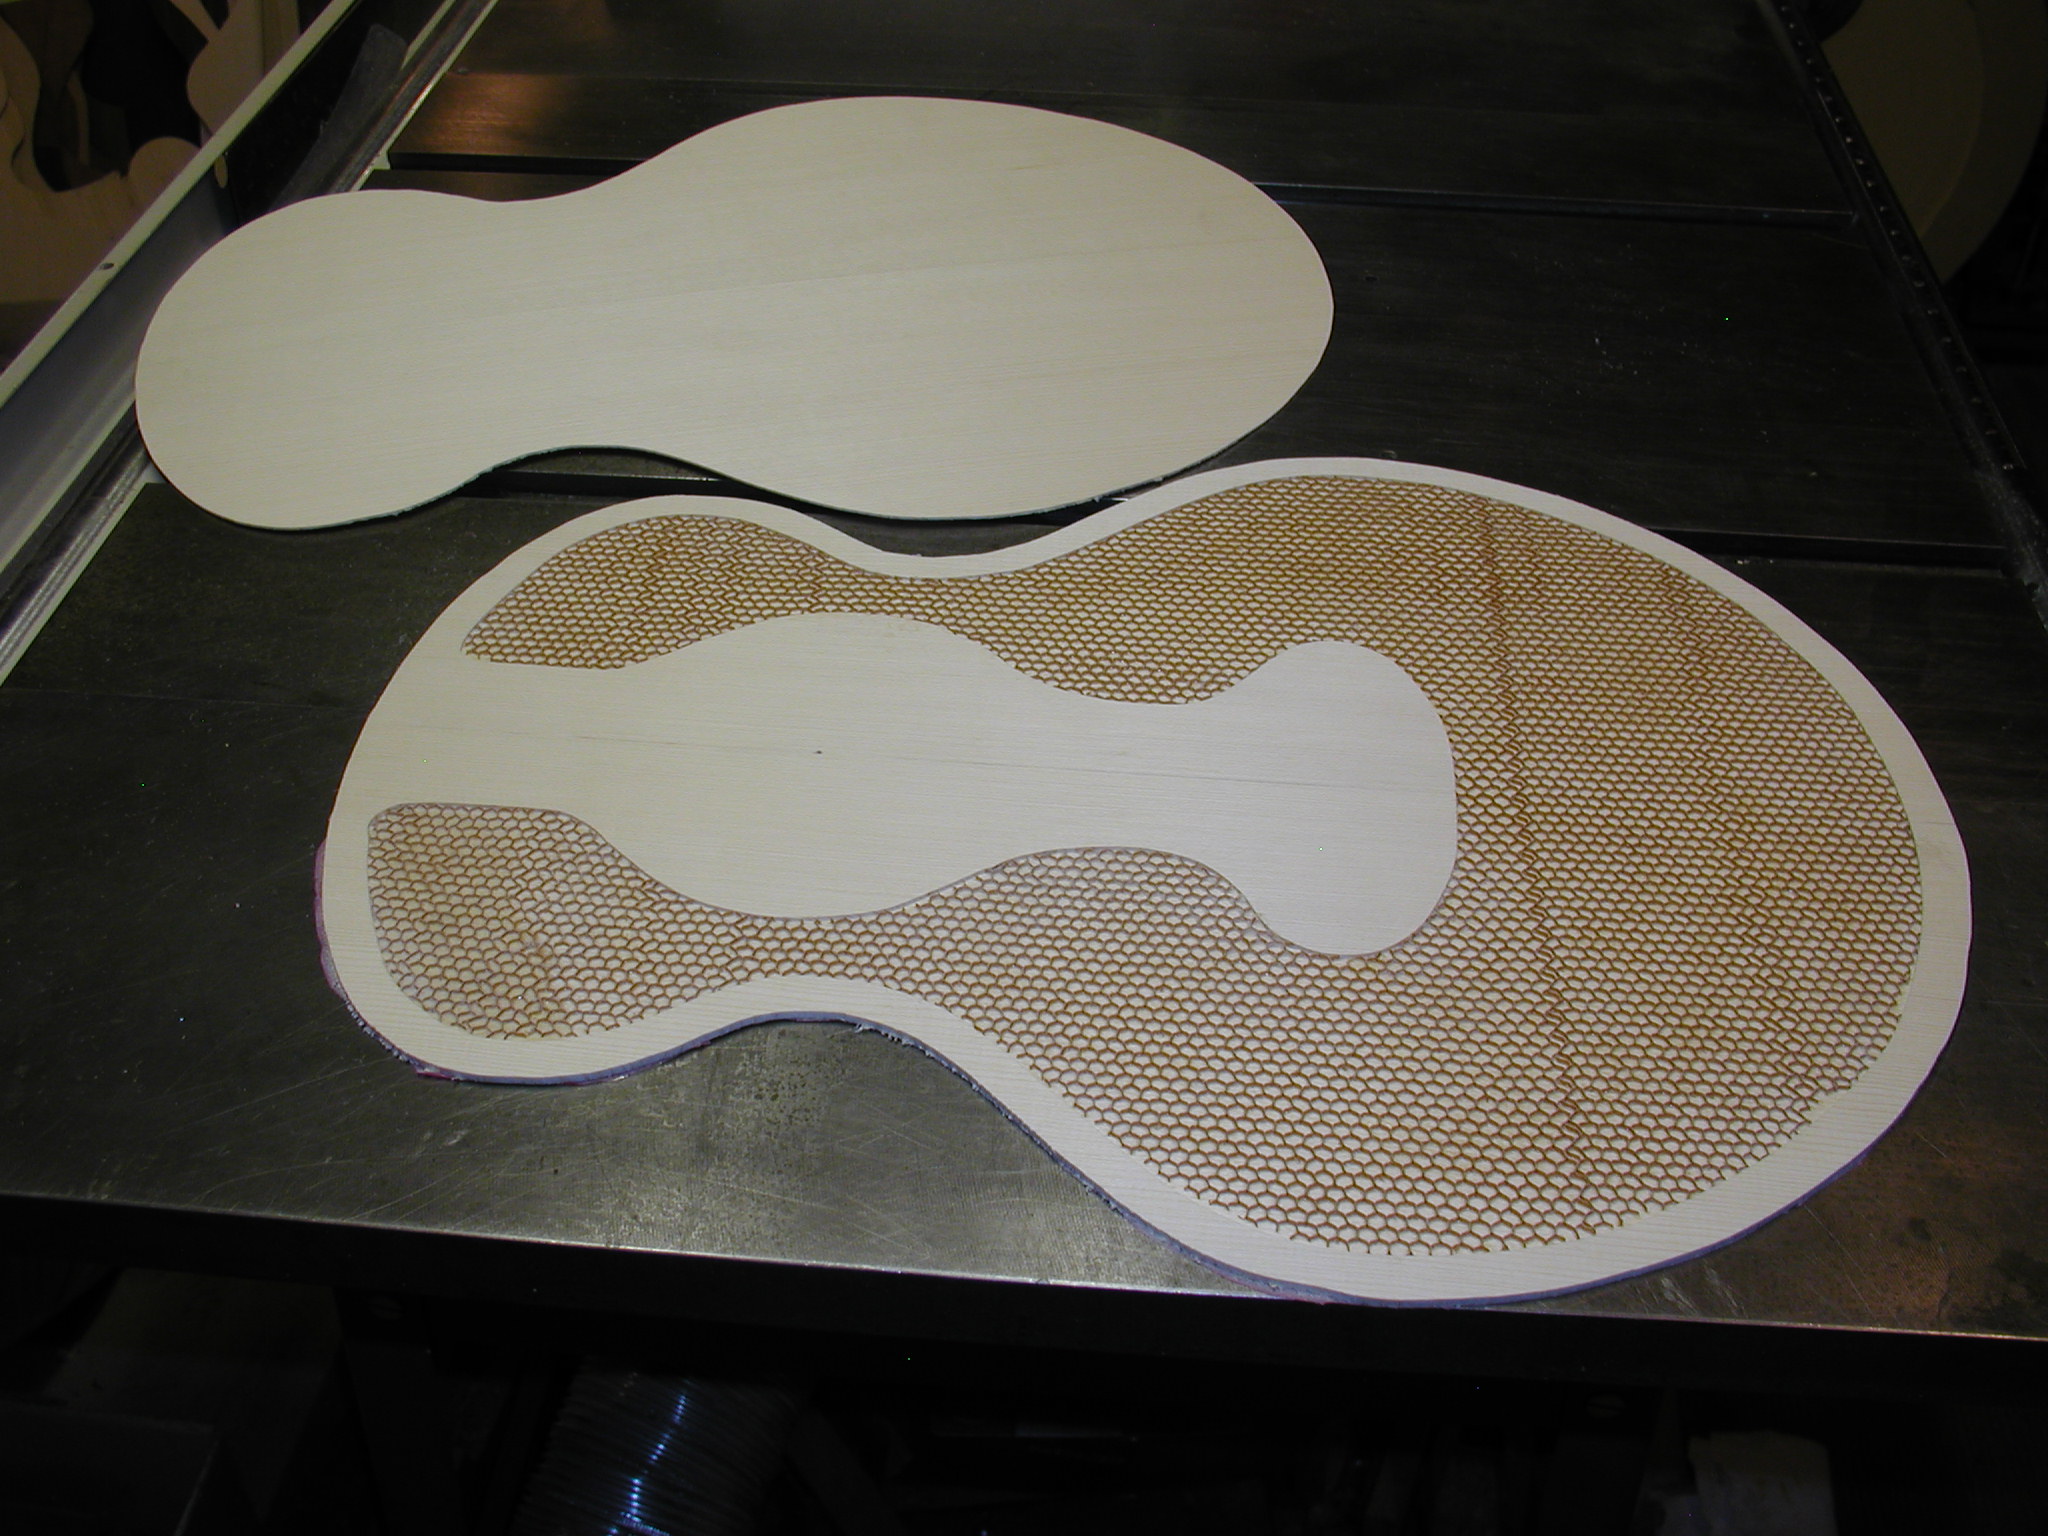
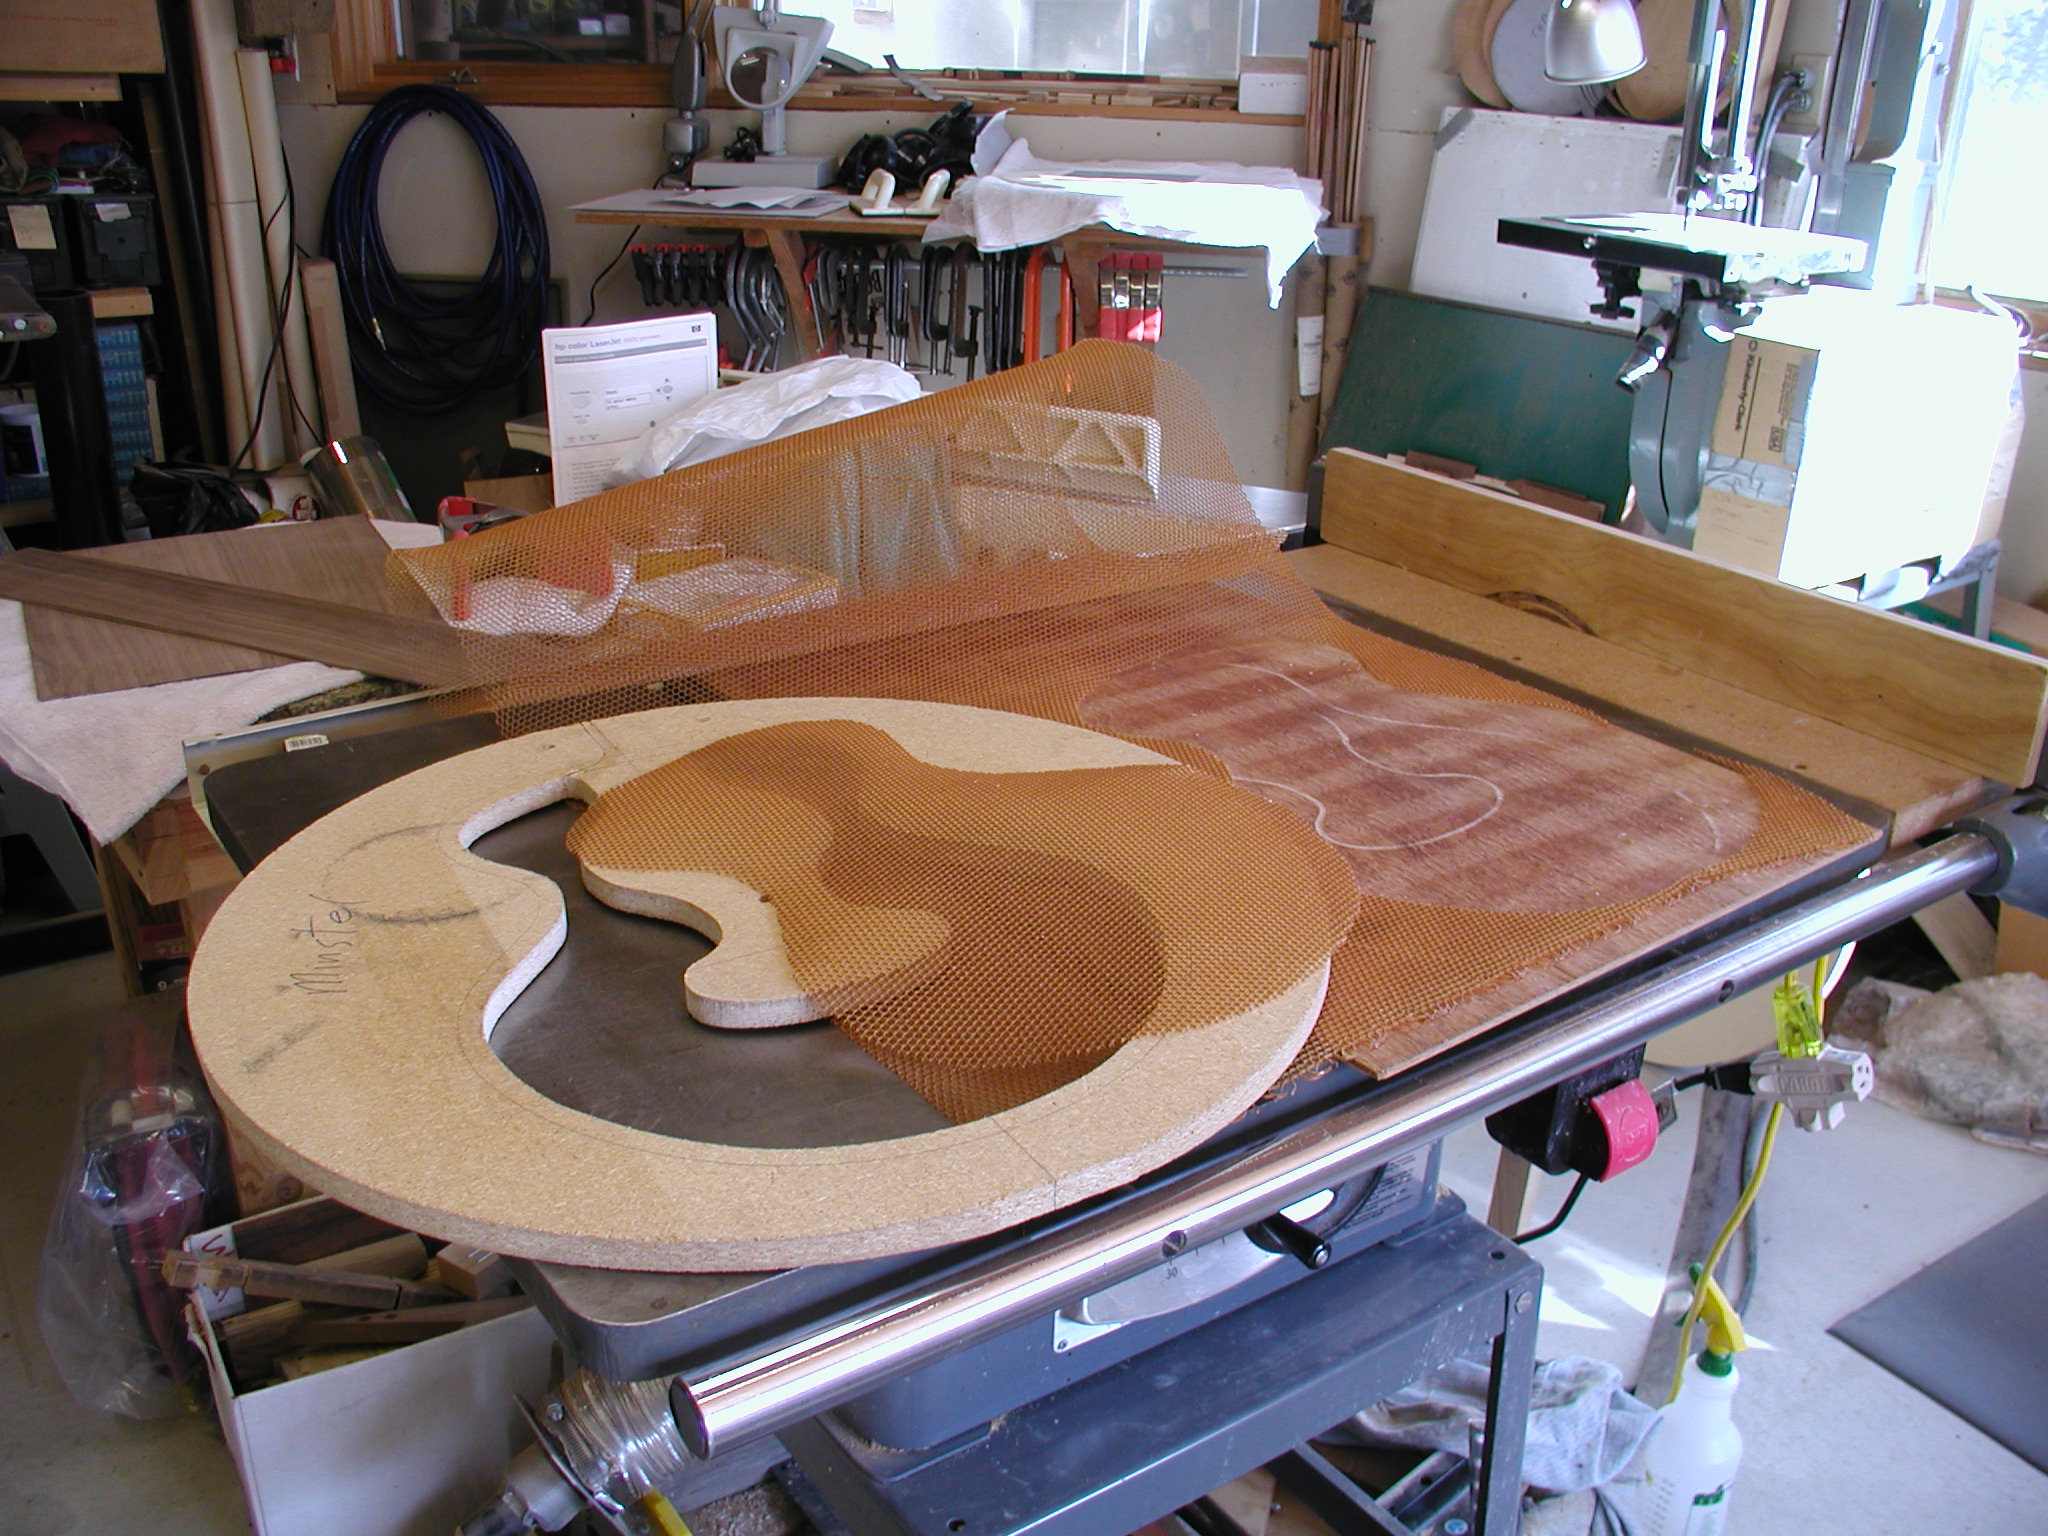
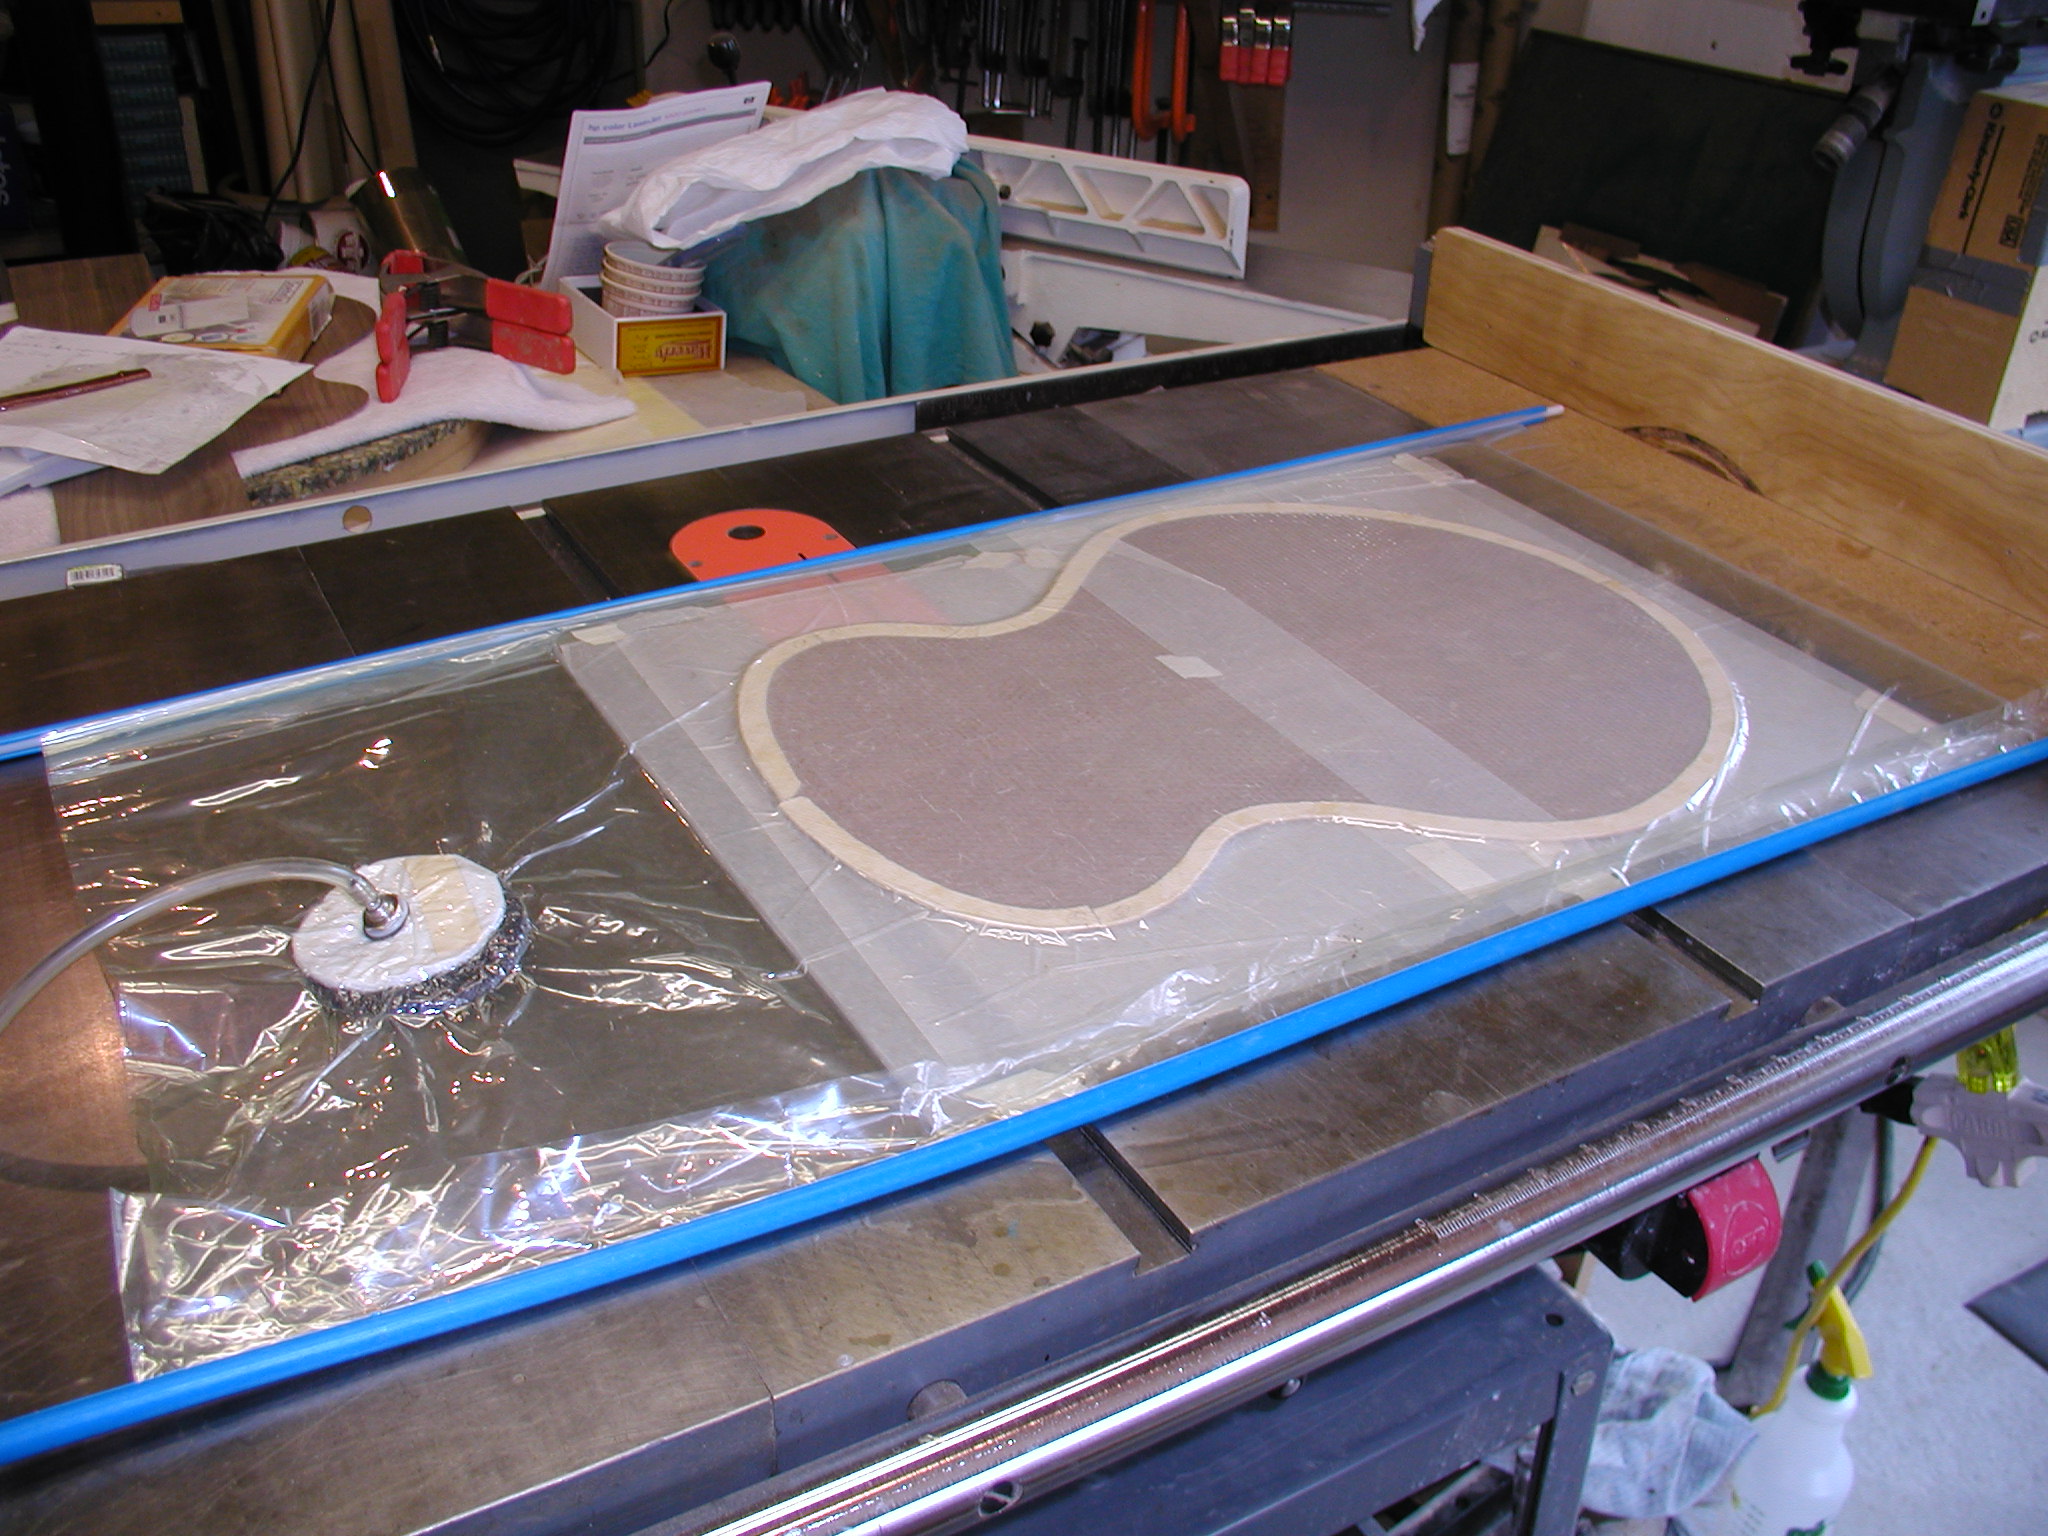
Here I am using the "Rout-it-out" method to create the space for the Nomex material. This allows me to use only two top lay-ups rather than having to make a third center top that gets cut up for the central hard parts. The top starts out at about 0.10" thick and then I rout out a 0.060" cavity leaving 0.040" face skin.
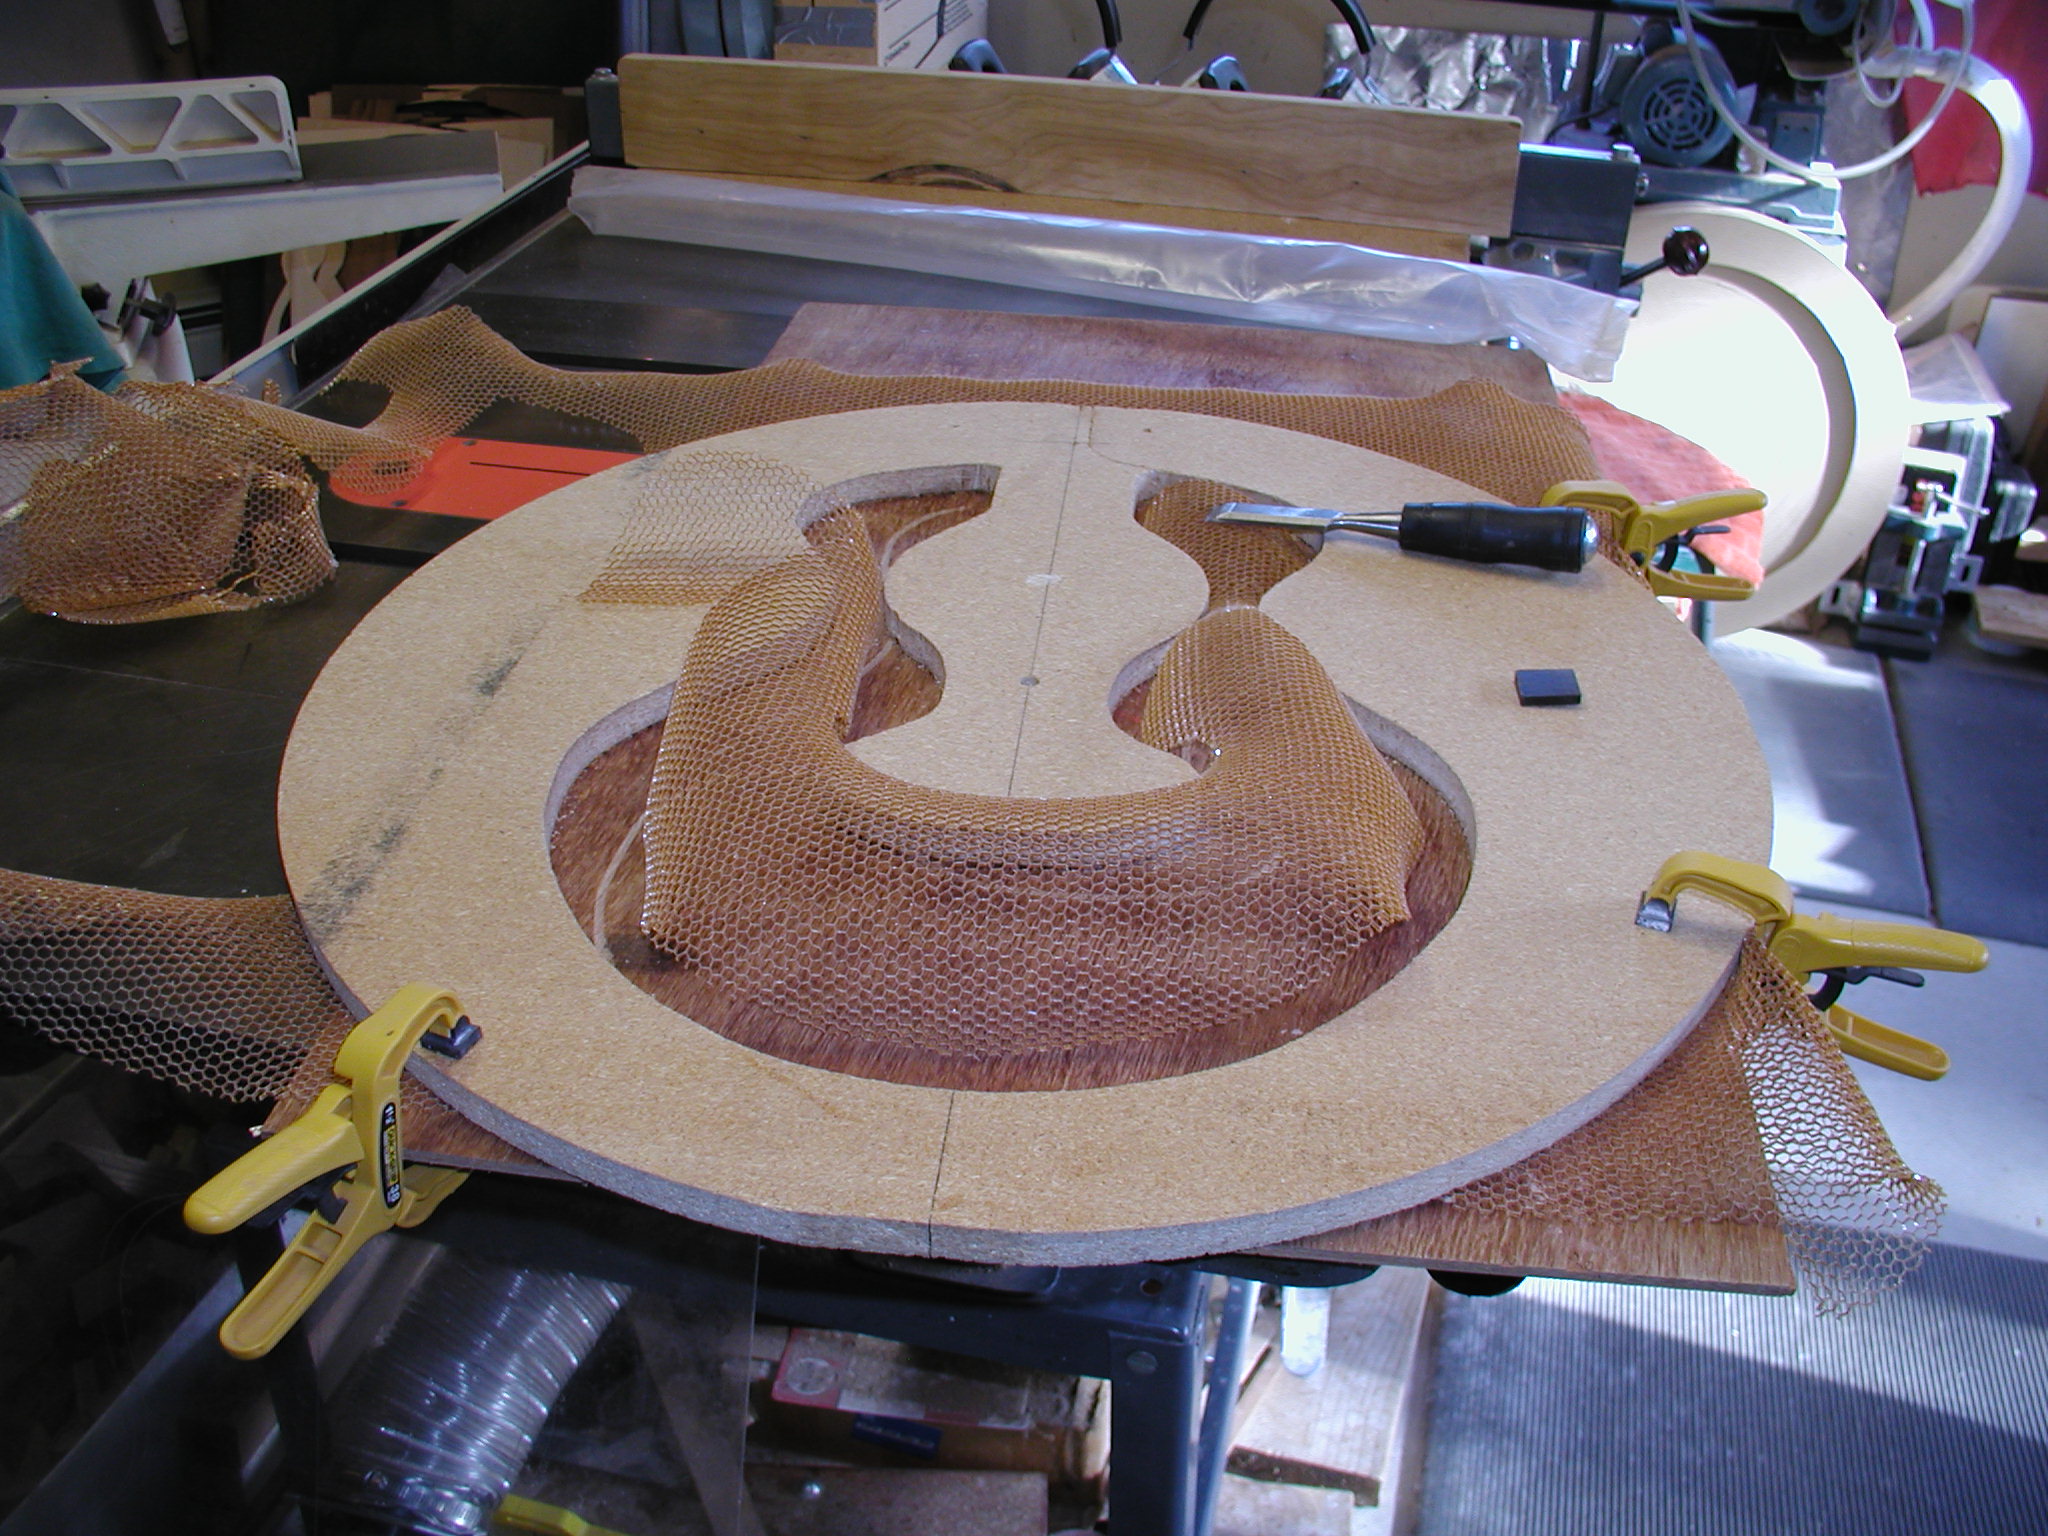
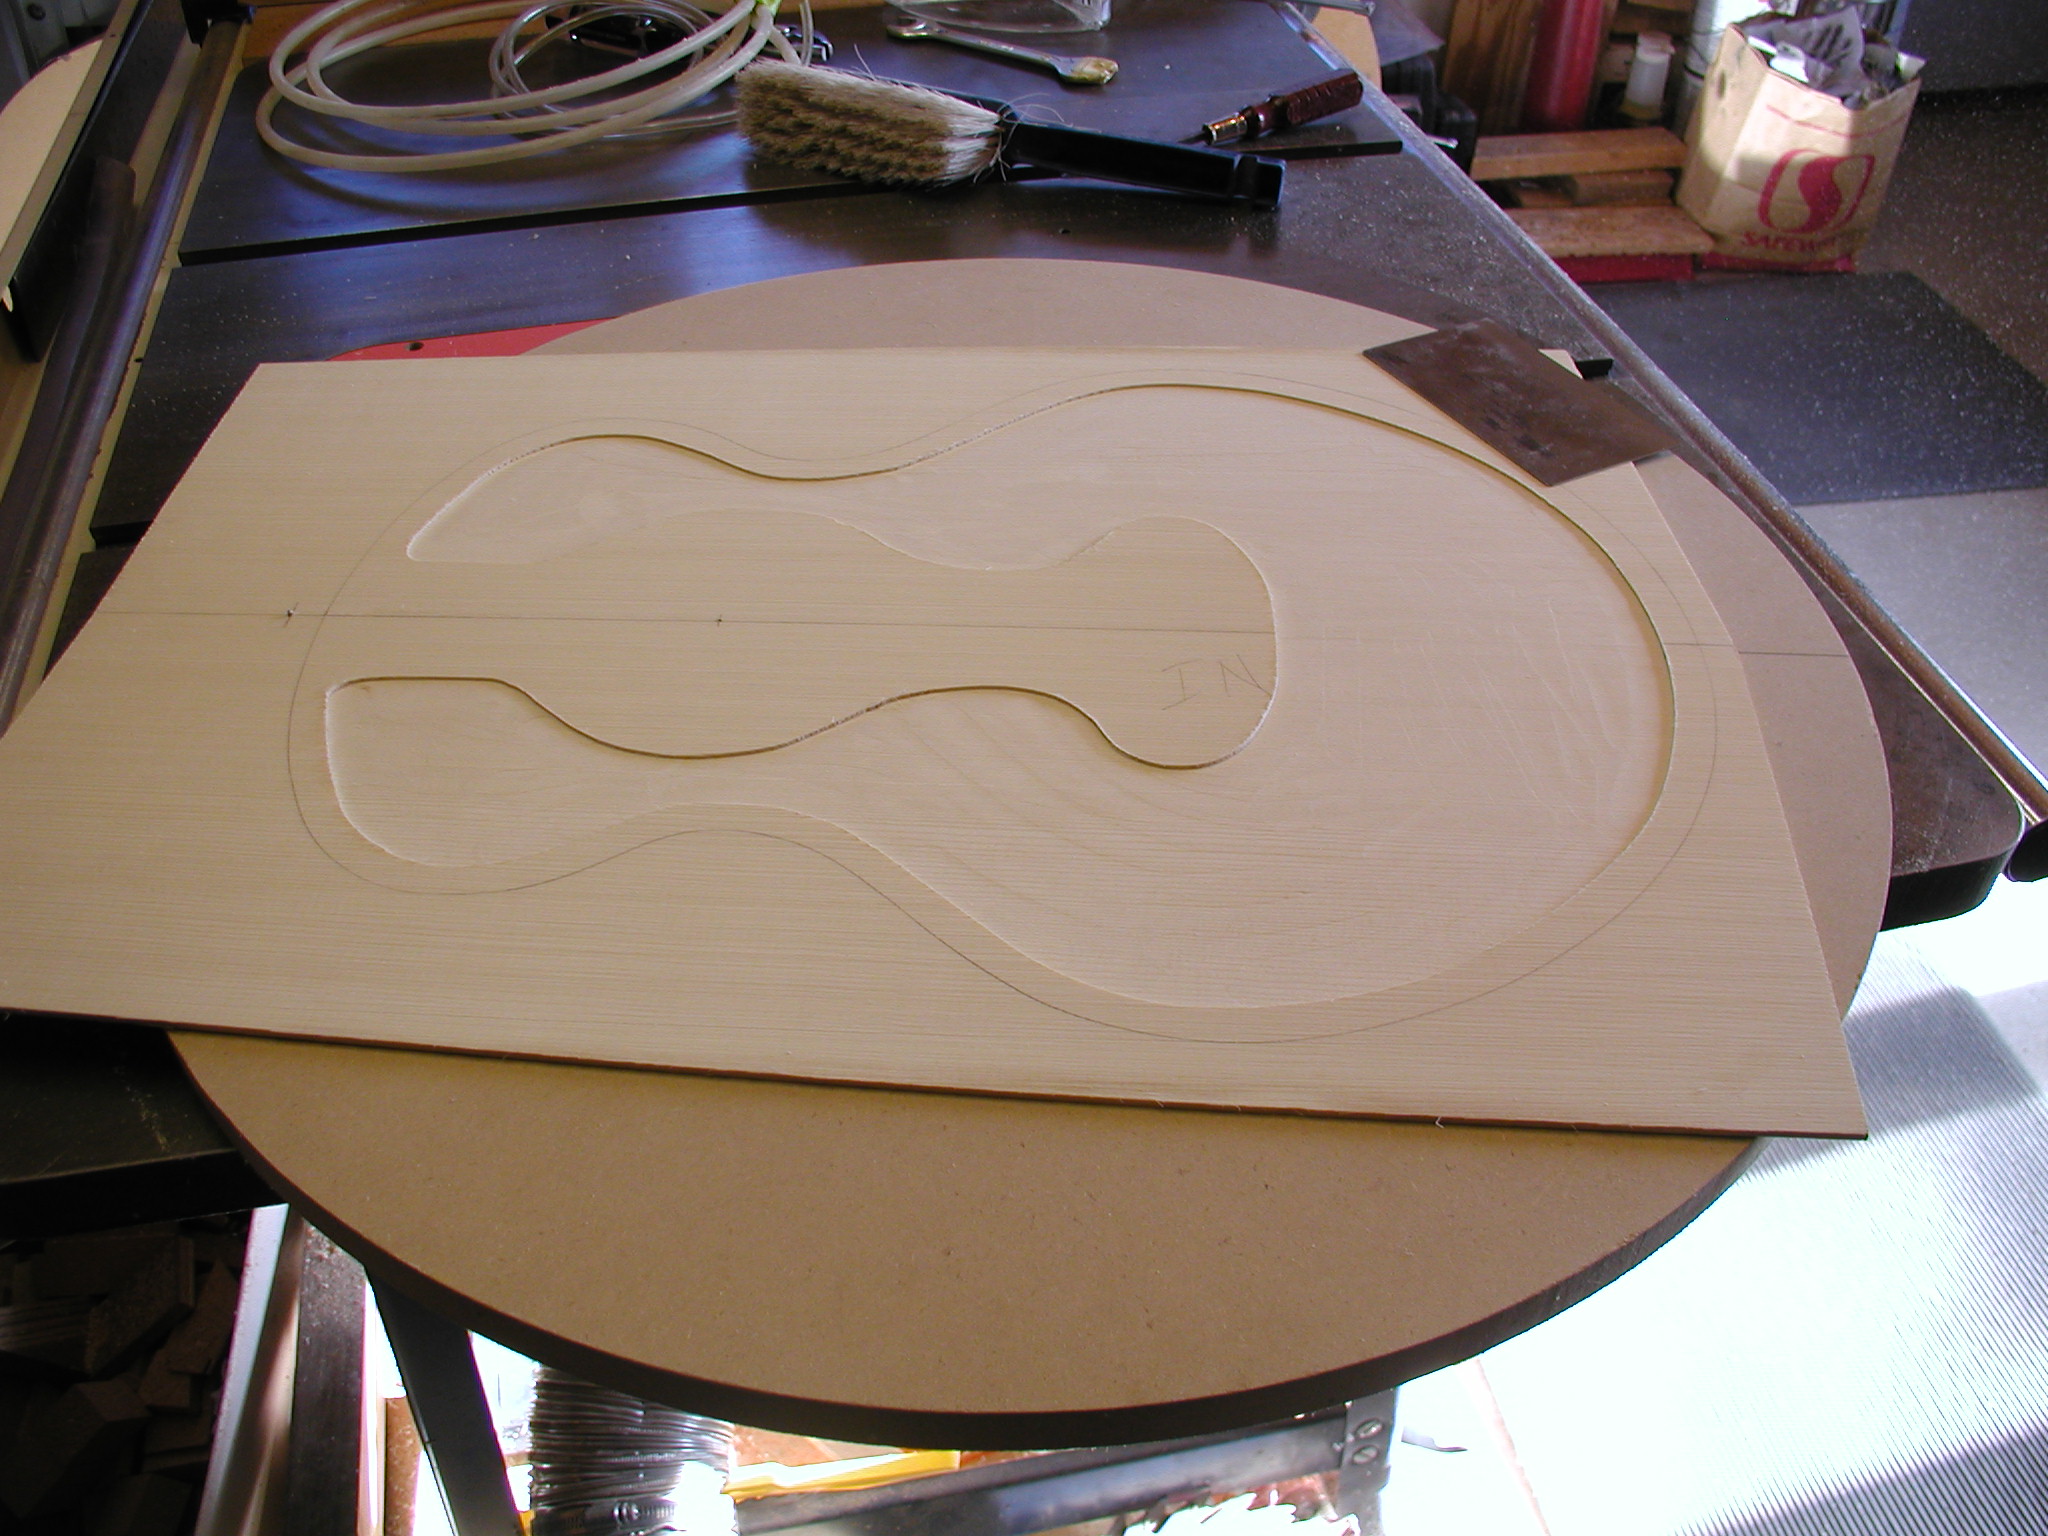
Next I use the same template used for the routing process to cut out the Nomex using a chisel. I just walk it around the template. You can also use a very sharp knife but it sometimes tends to tear the Nomex so I use the chisel. You can see that I have also cut the skins to the outside profile too.
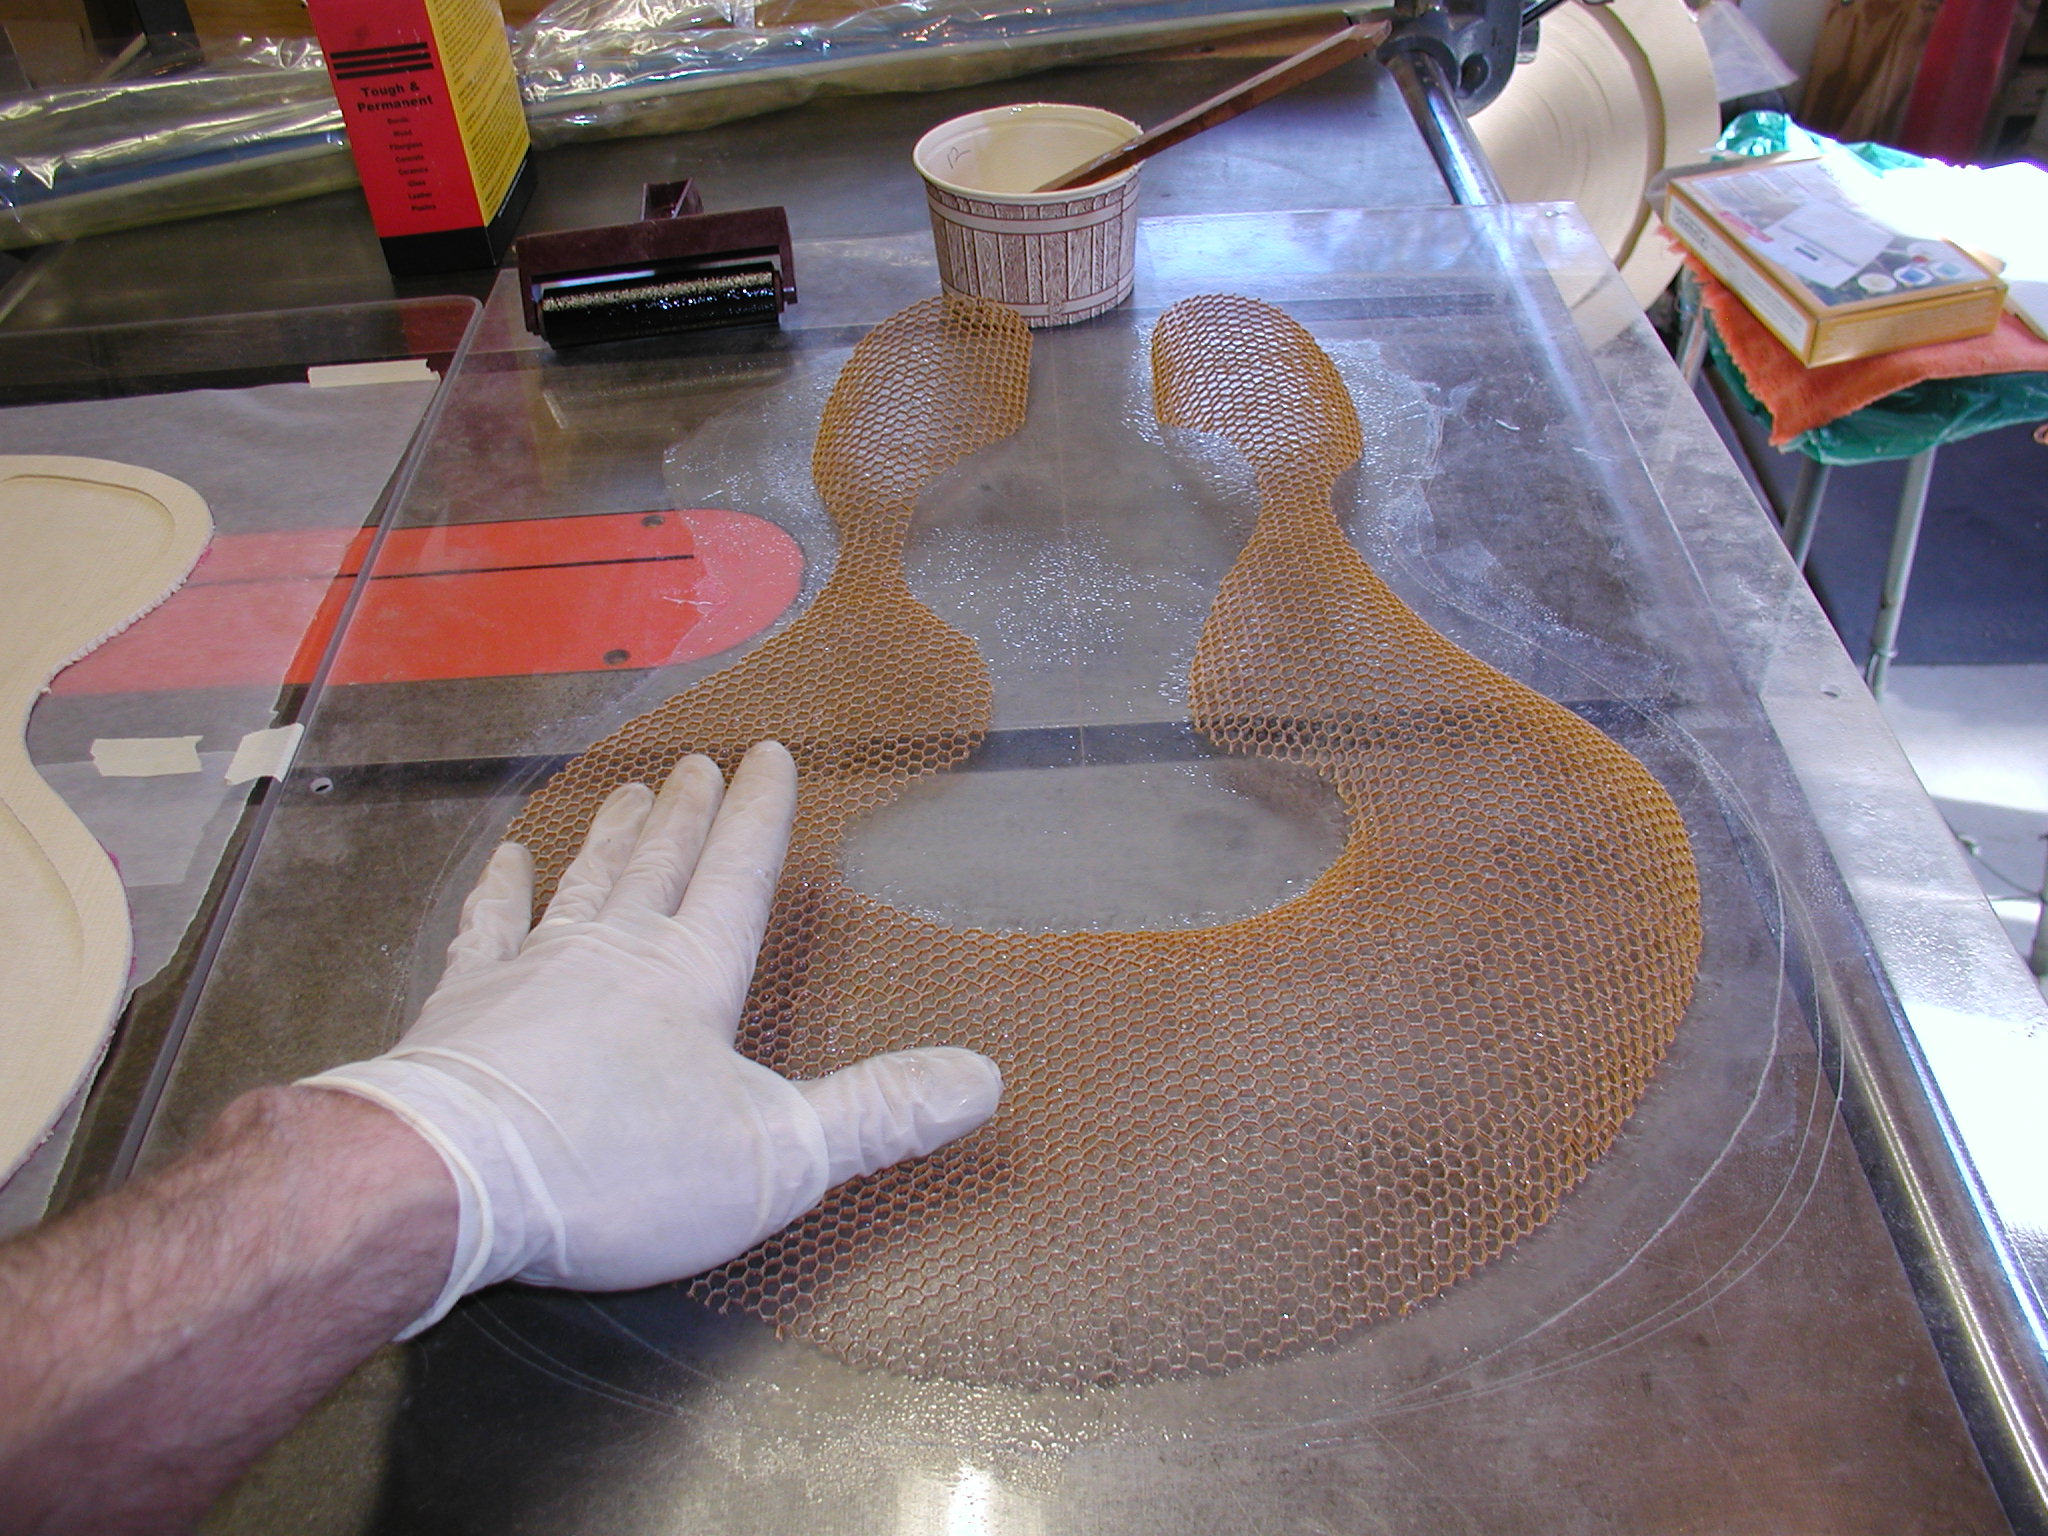
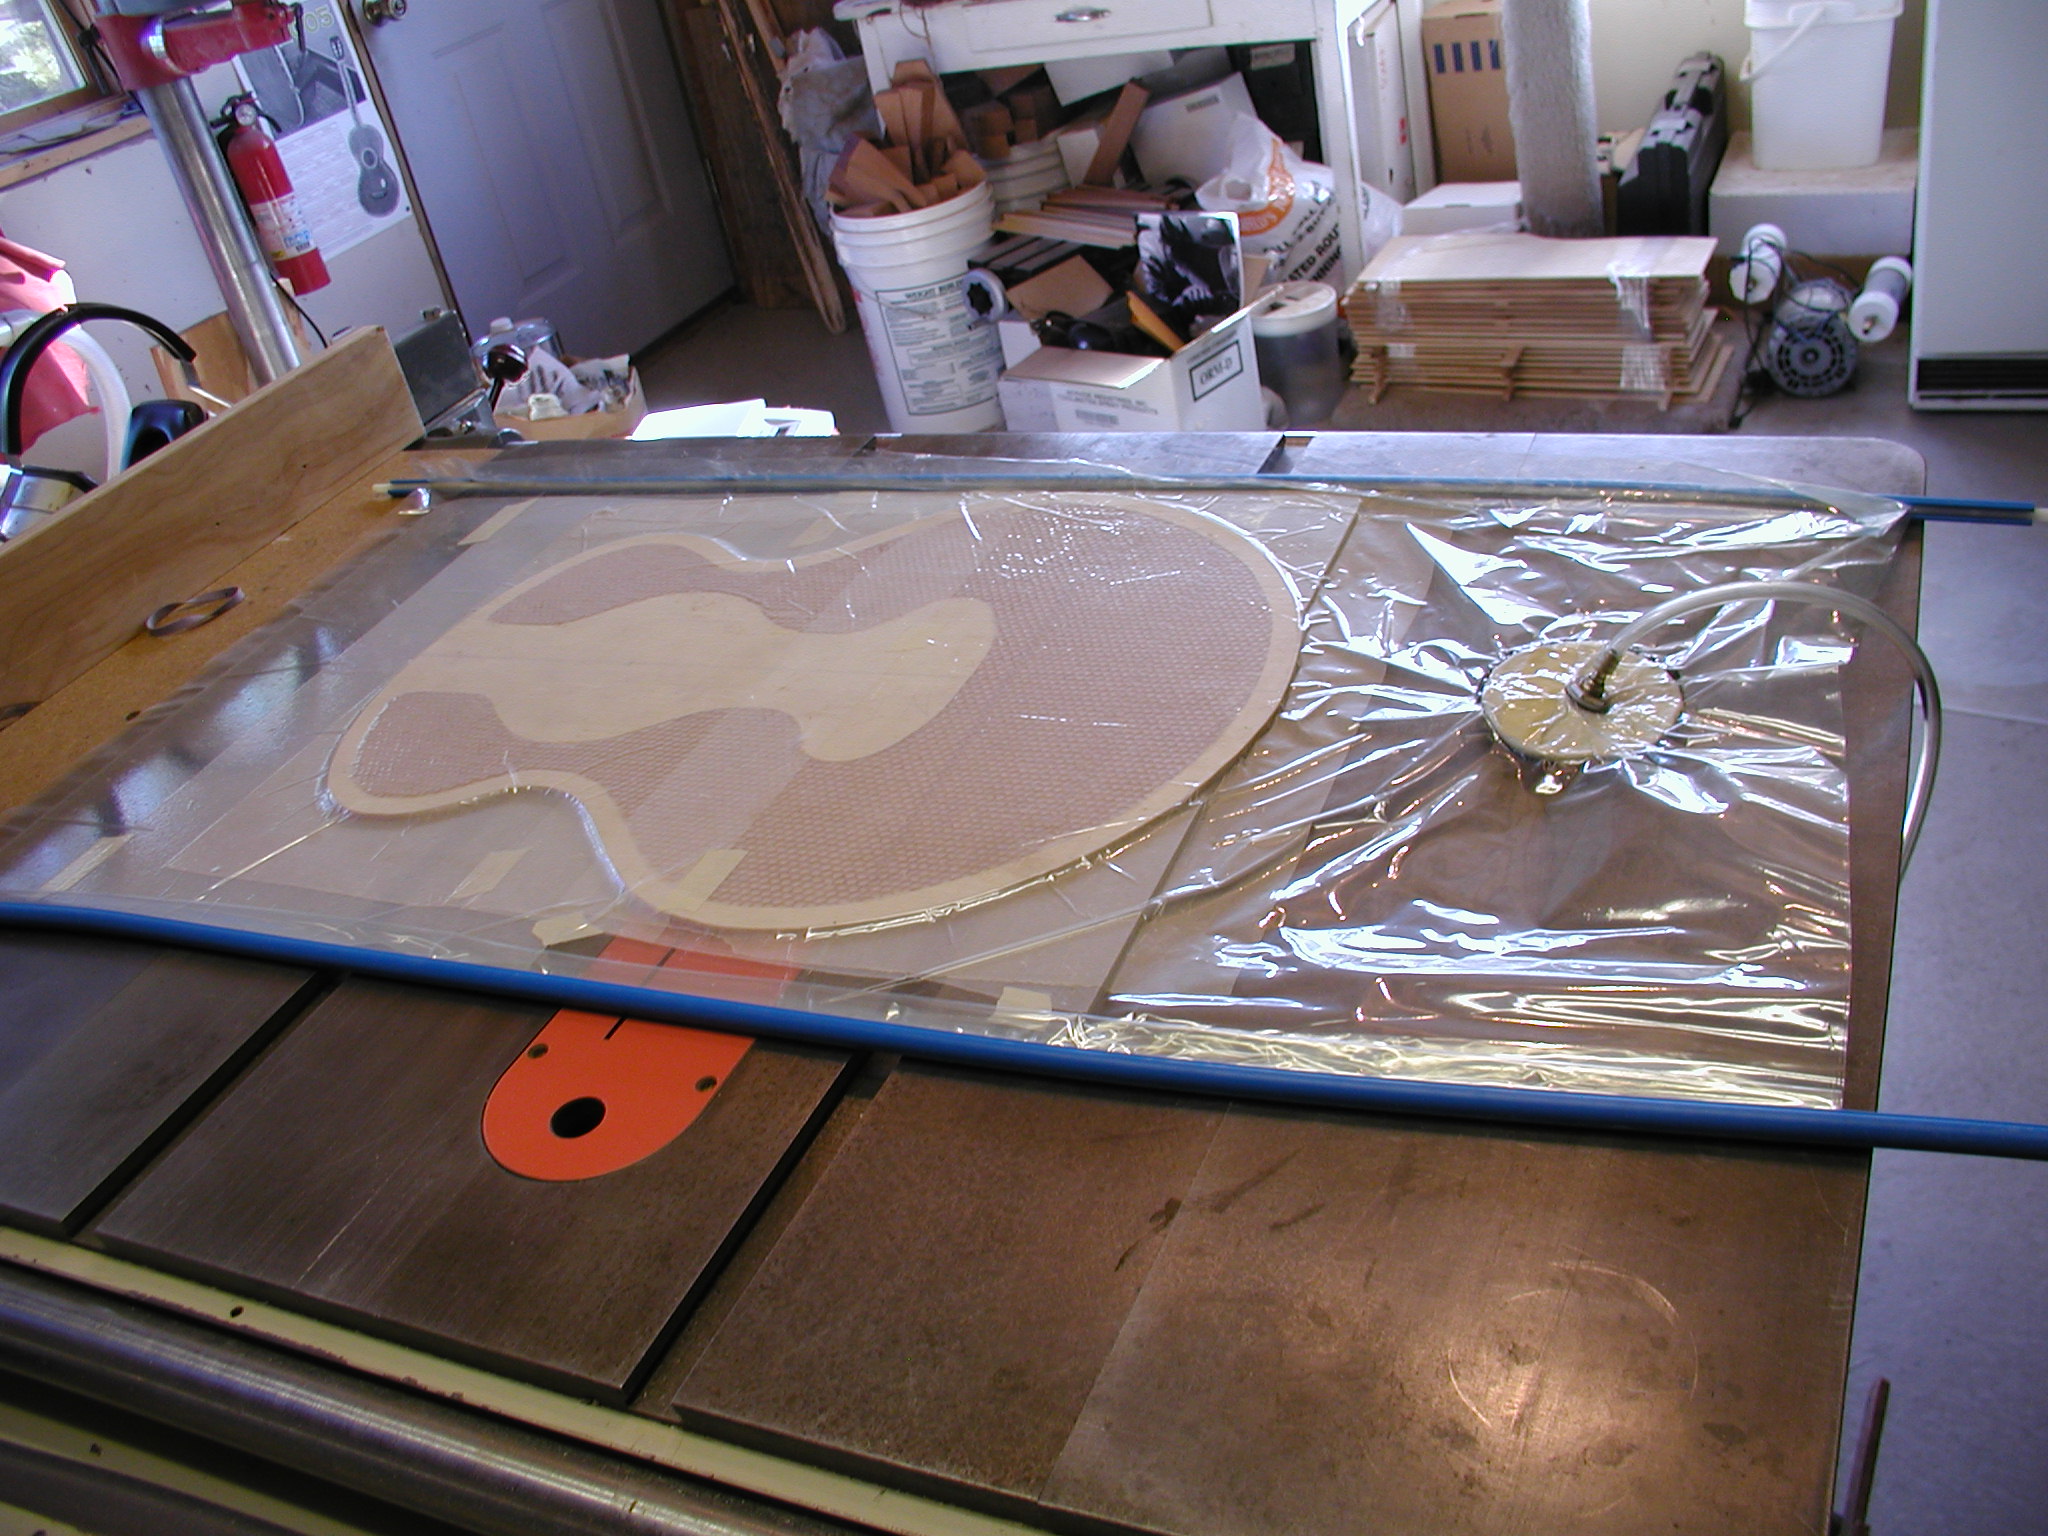
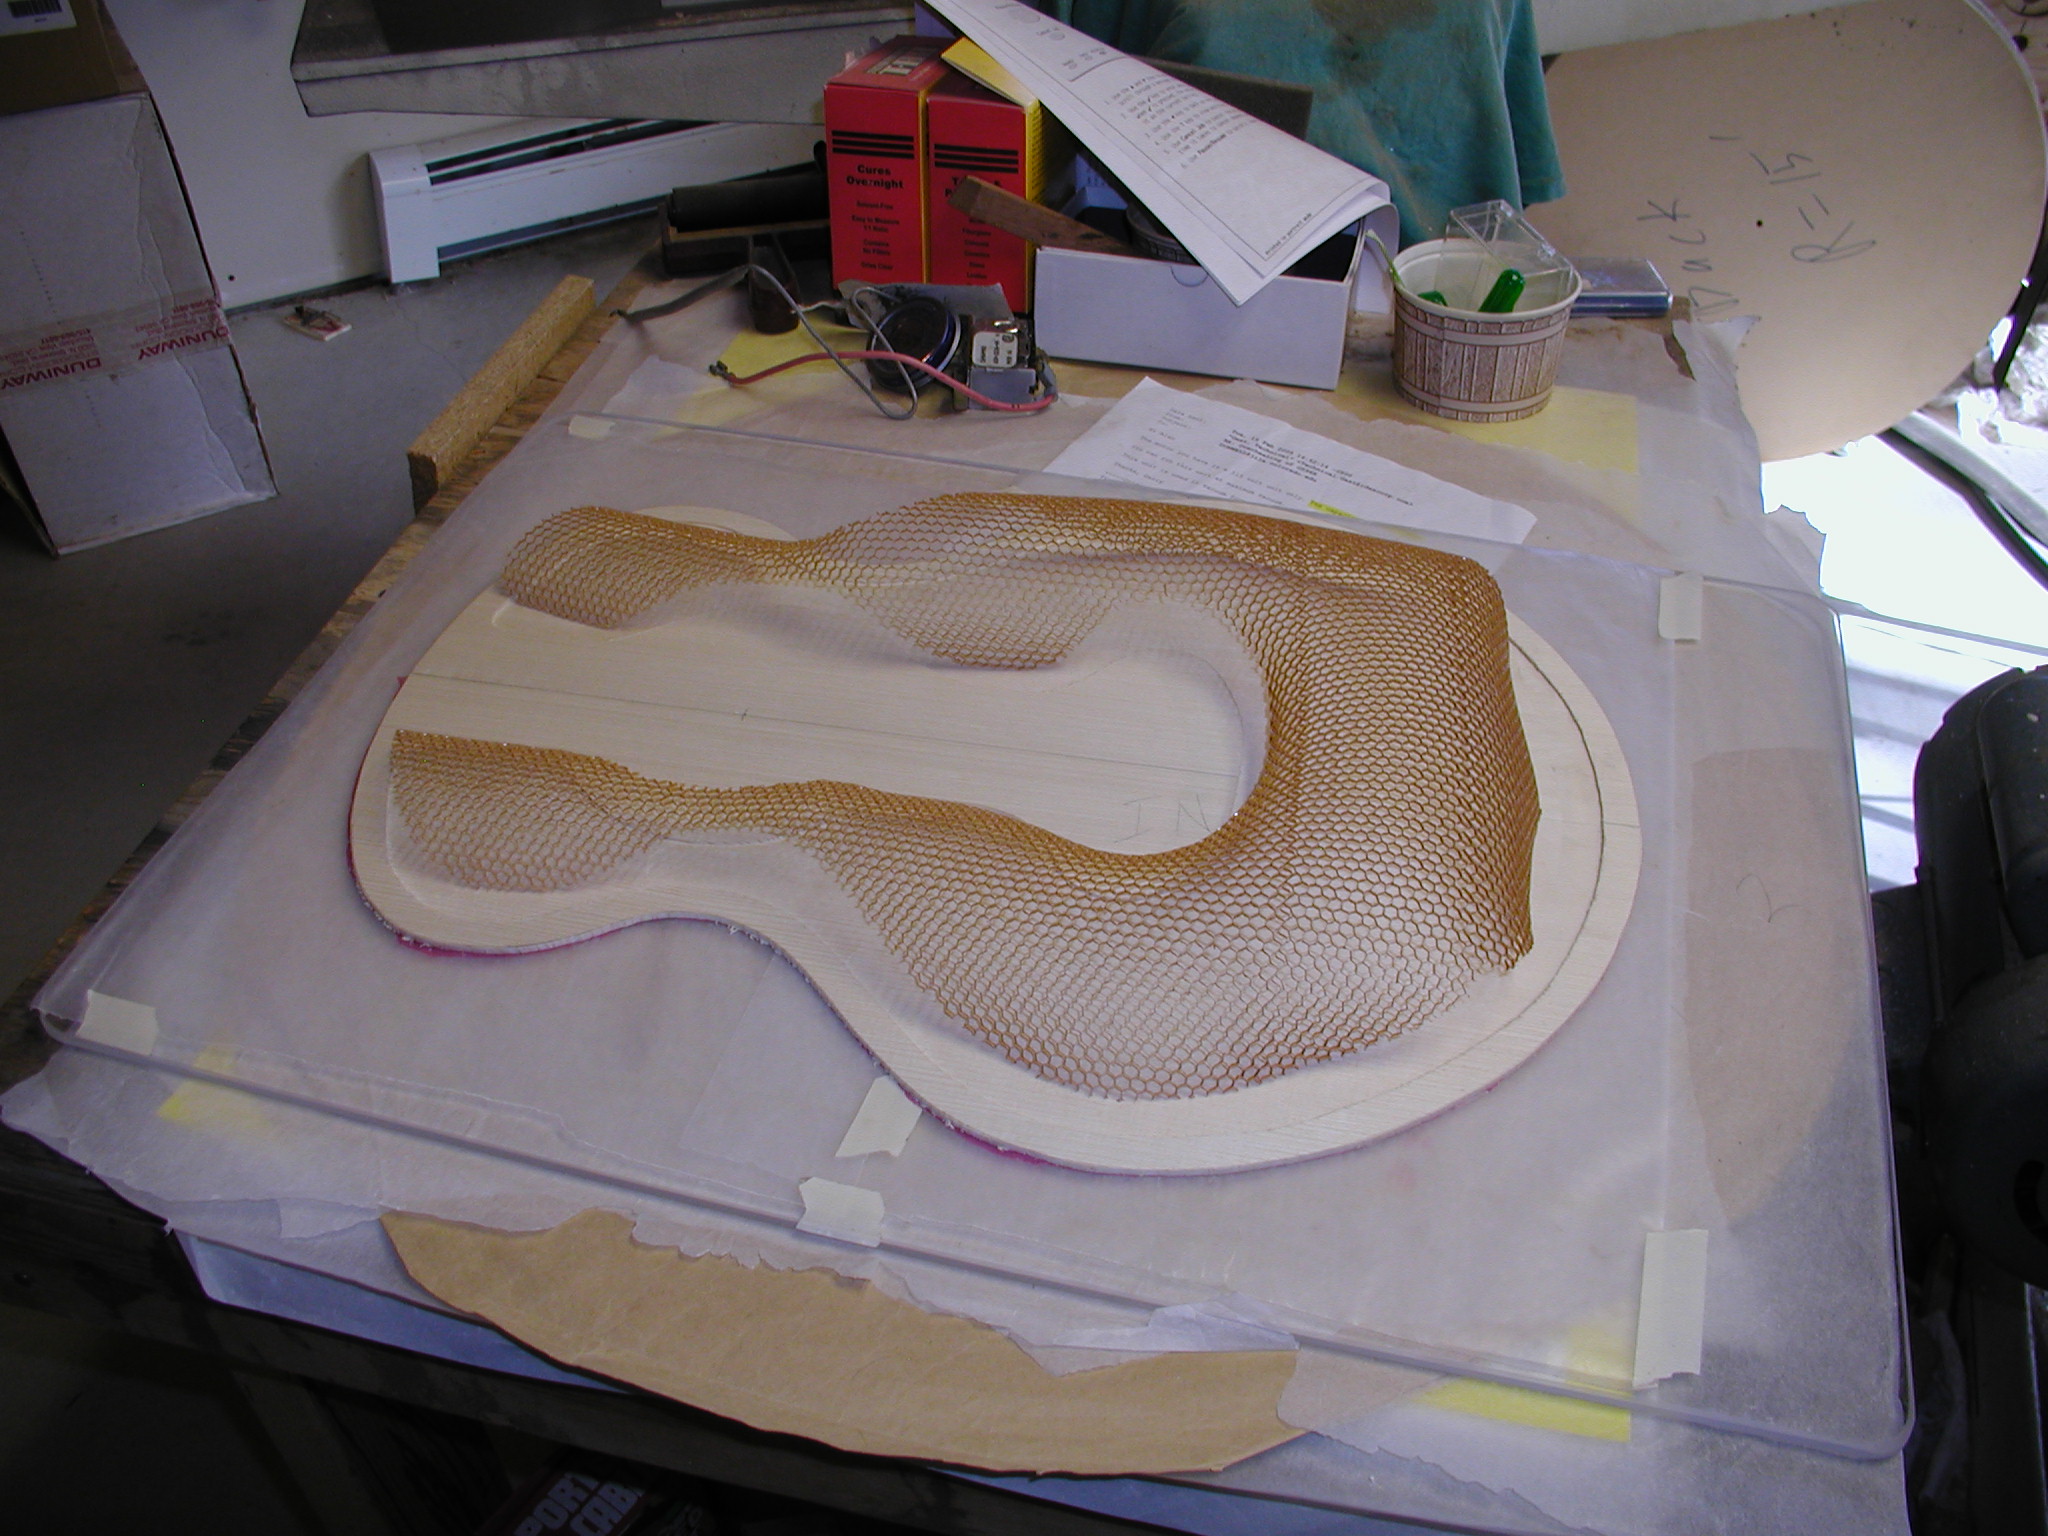
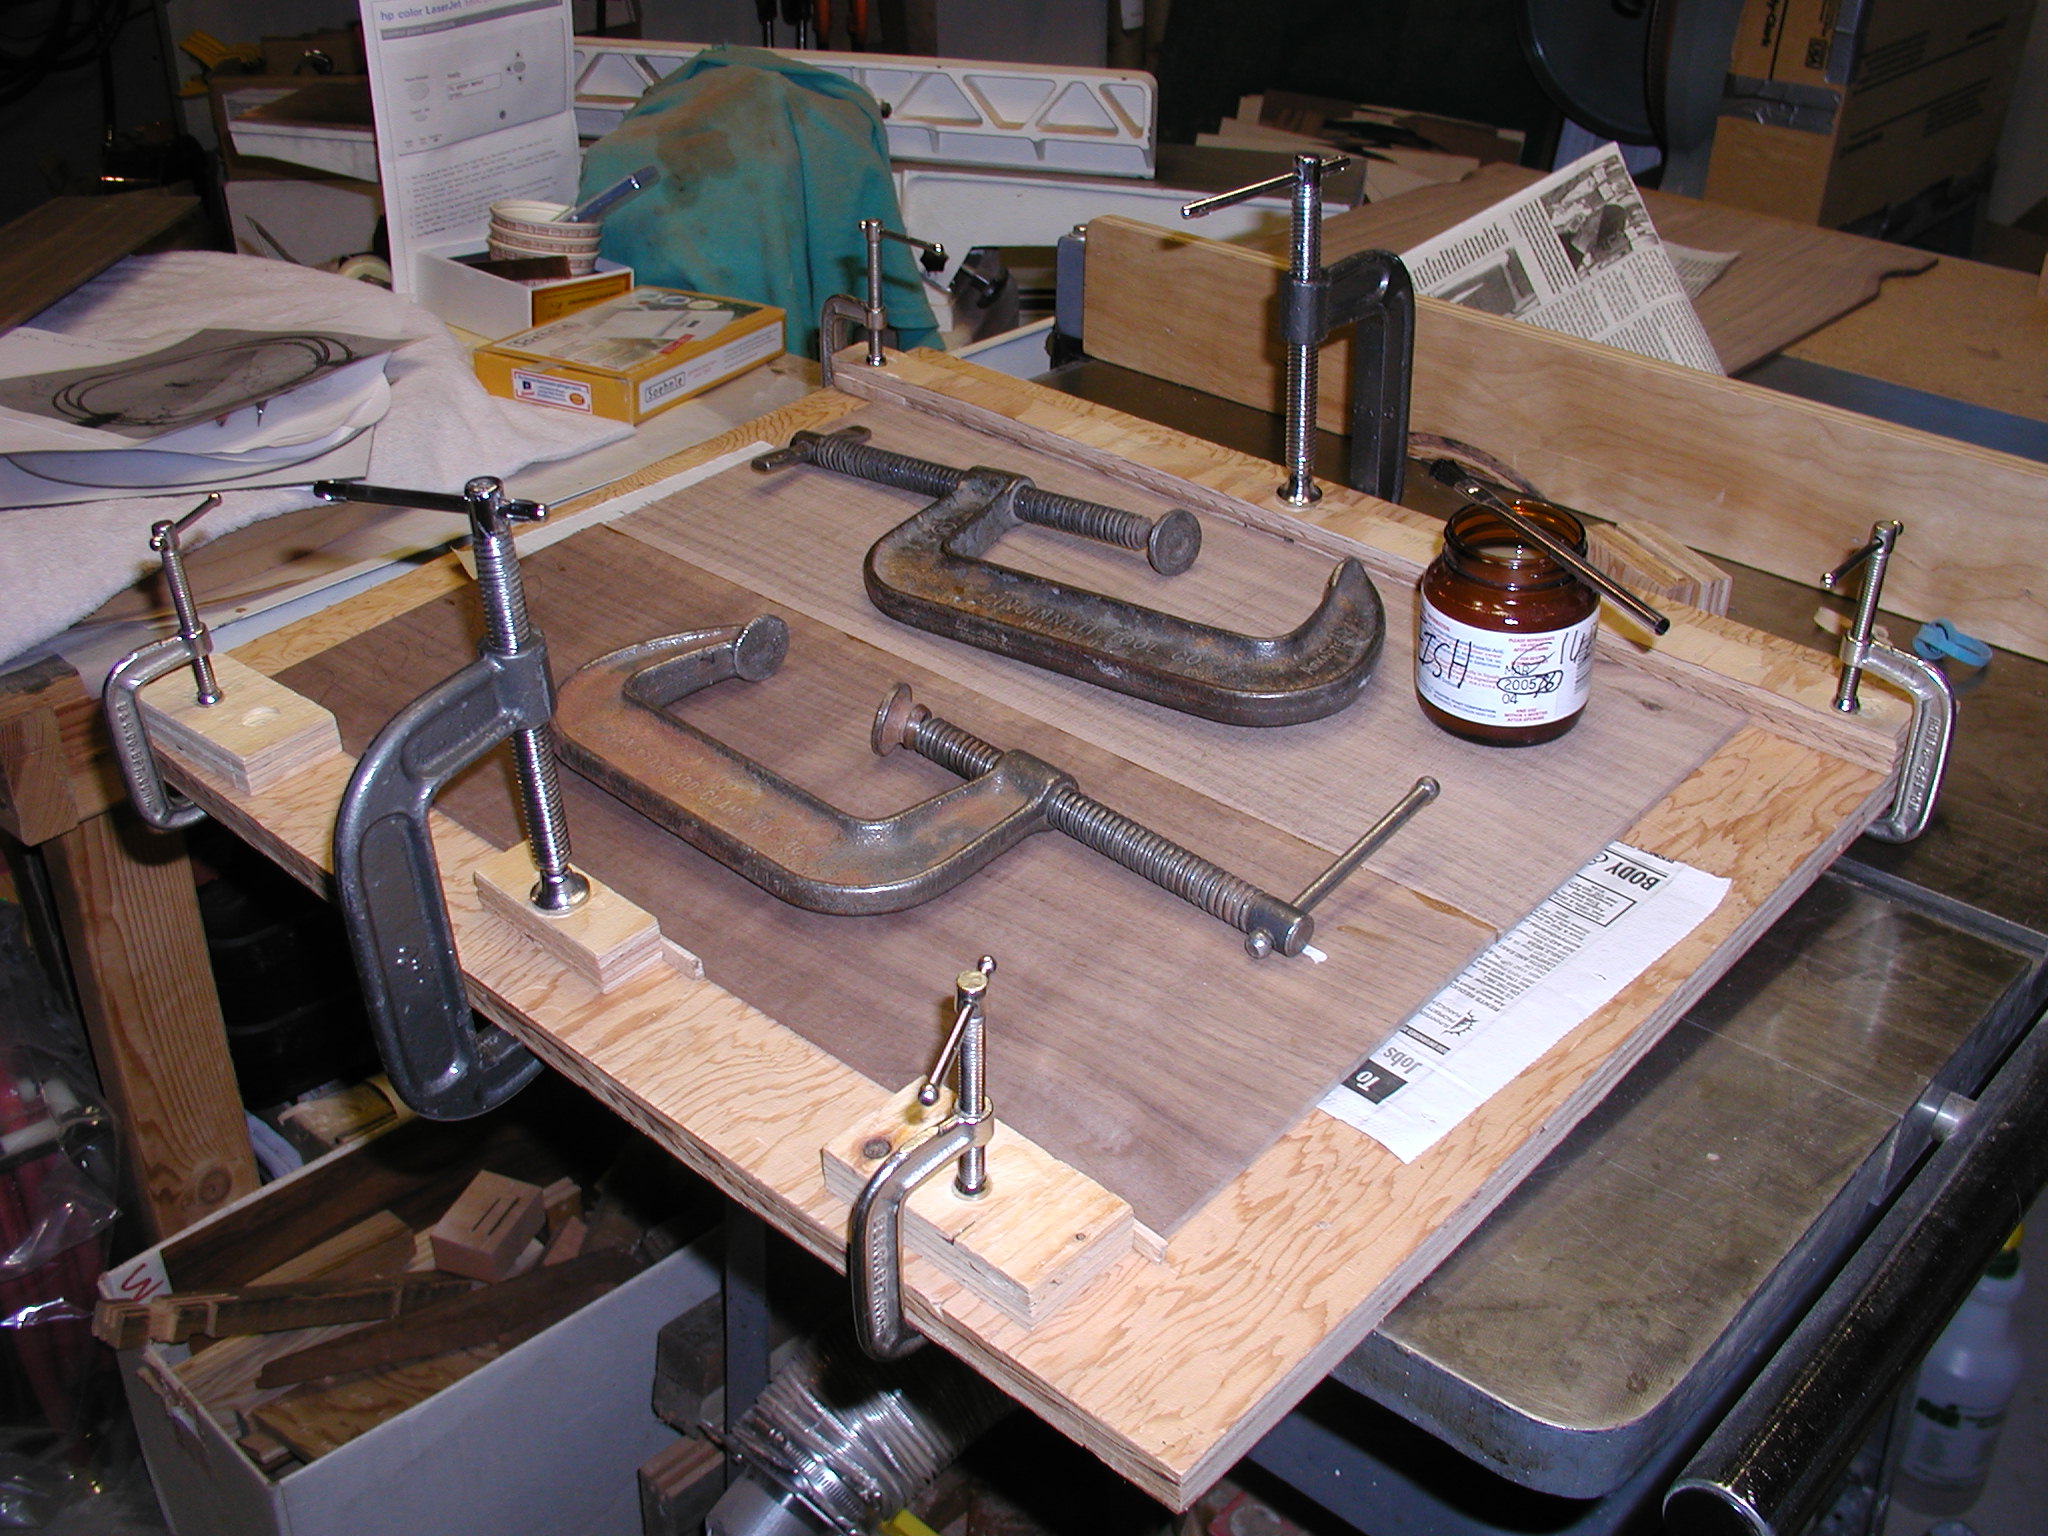
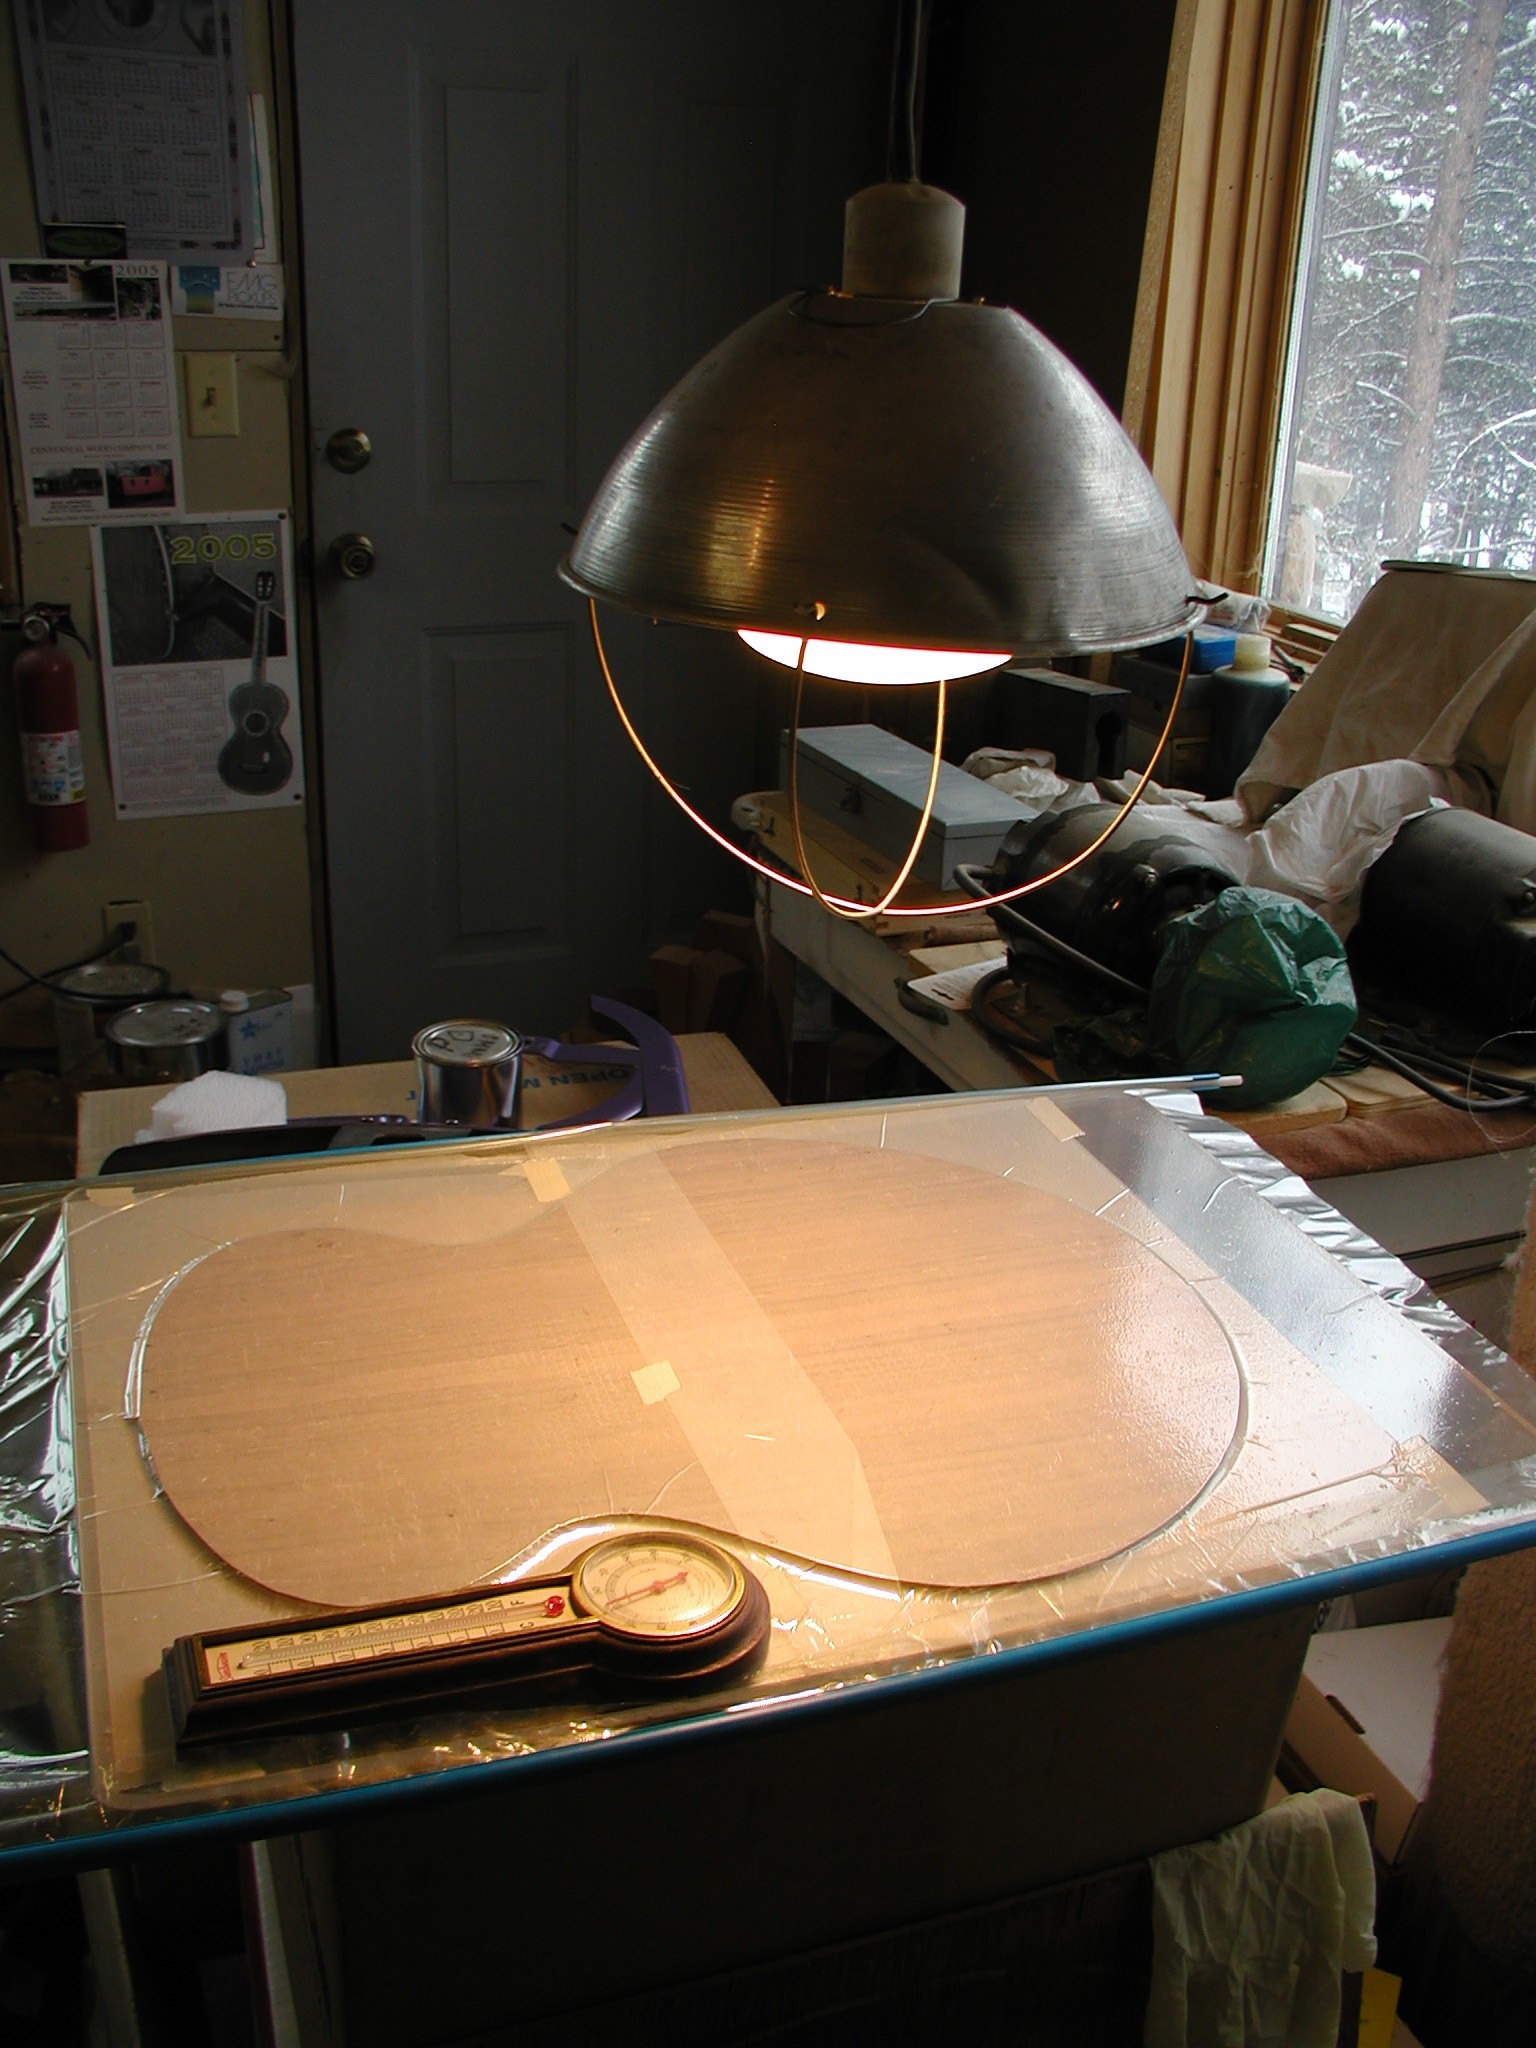
Glue up comes next. I use System Three T-88 slow set thixotropic epoxy for this. All that is needed is just enough glue in the Nomex to form little fillets where it joins the skin. Any more is wasted and just adds weight. I roll out the glue, press the Nomex down on it and let it sit for about 30 seconds, then lift it off and place it in the routed cavity. Top with some waxed paper and pop it into the vacuum bag and let it sit for about eight hours. I also use a heat lamp if the shop is cool to keep it up to around eighty degrees Fahrenheit. After removing it from the vacuum bag I usually leave it overnight before level sanding. The last photo shows it ready to receive the final skin which is glued on in a similar manner. For more detail on the double top process see my discussion here.
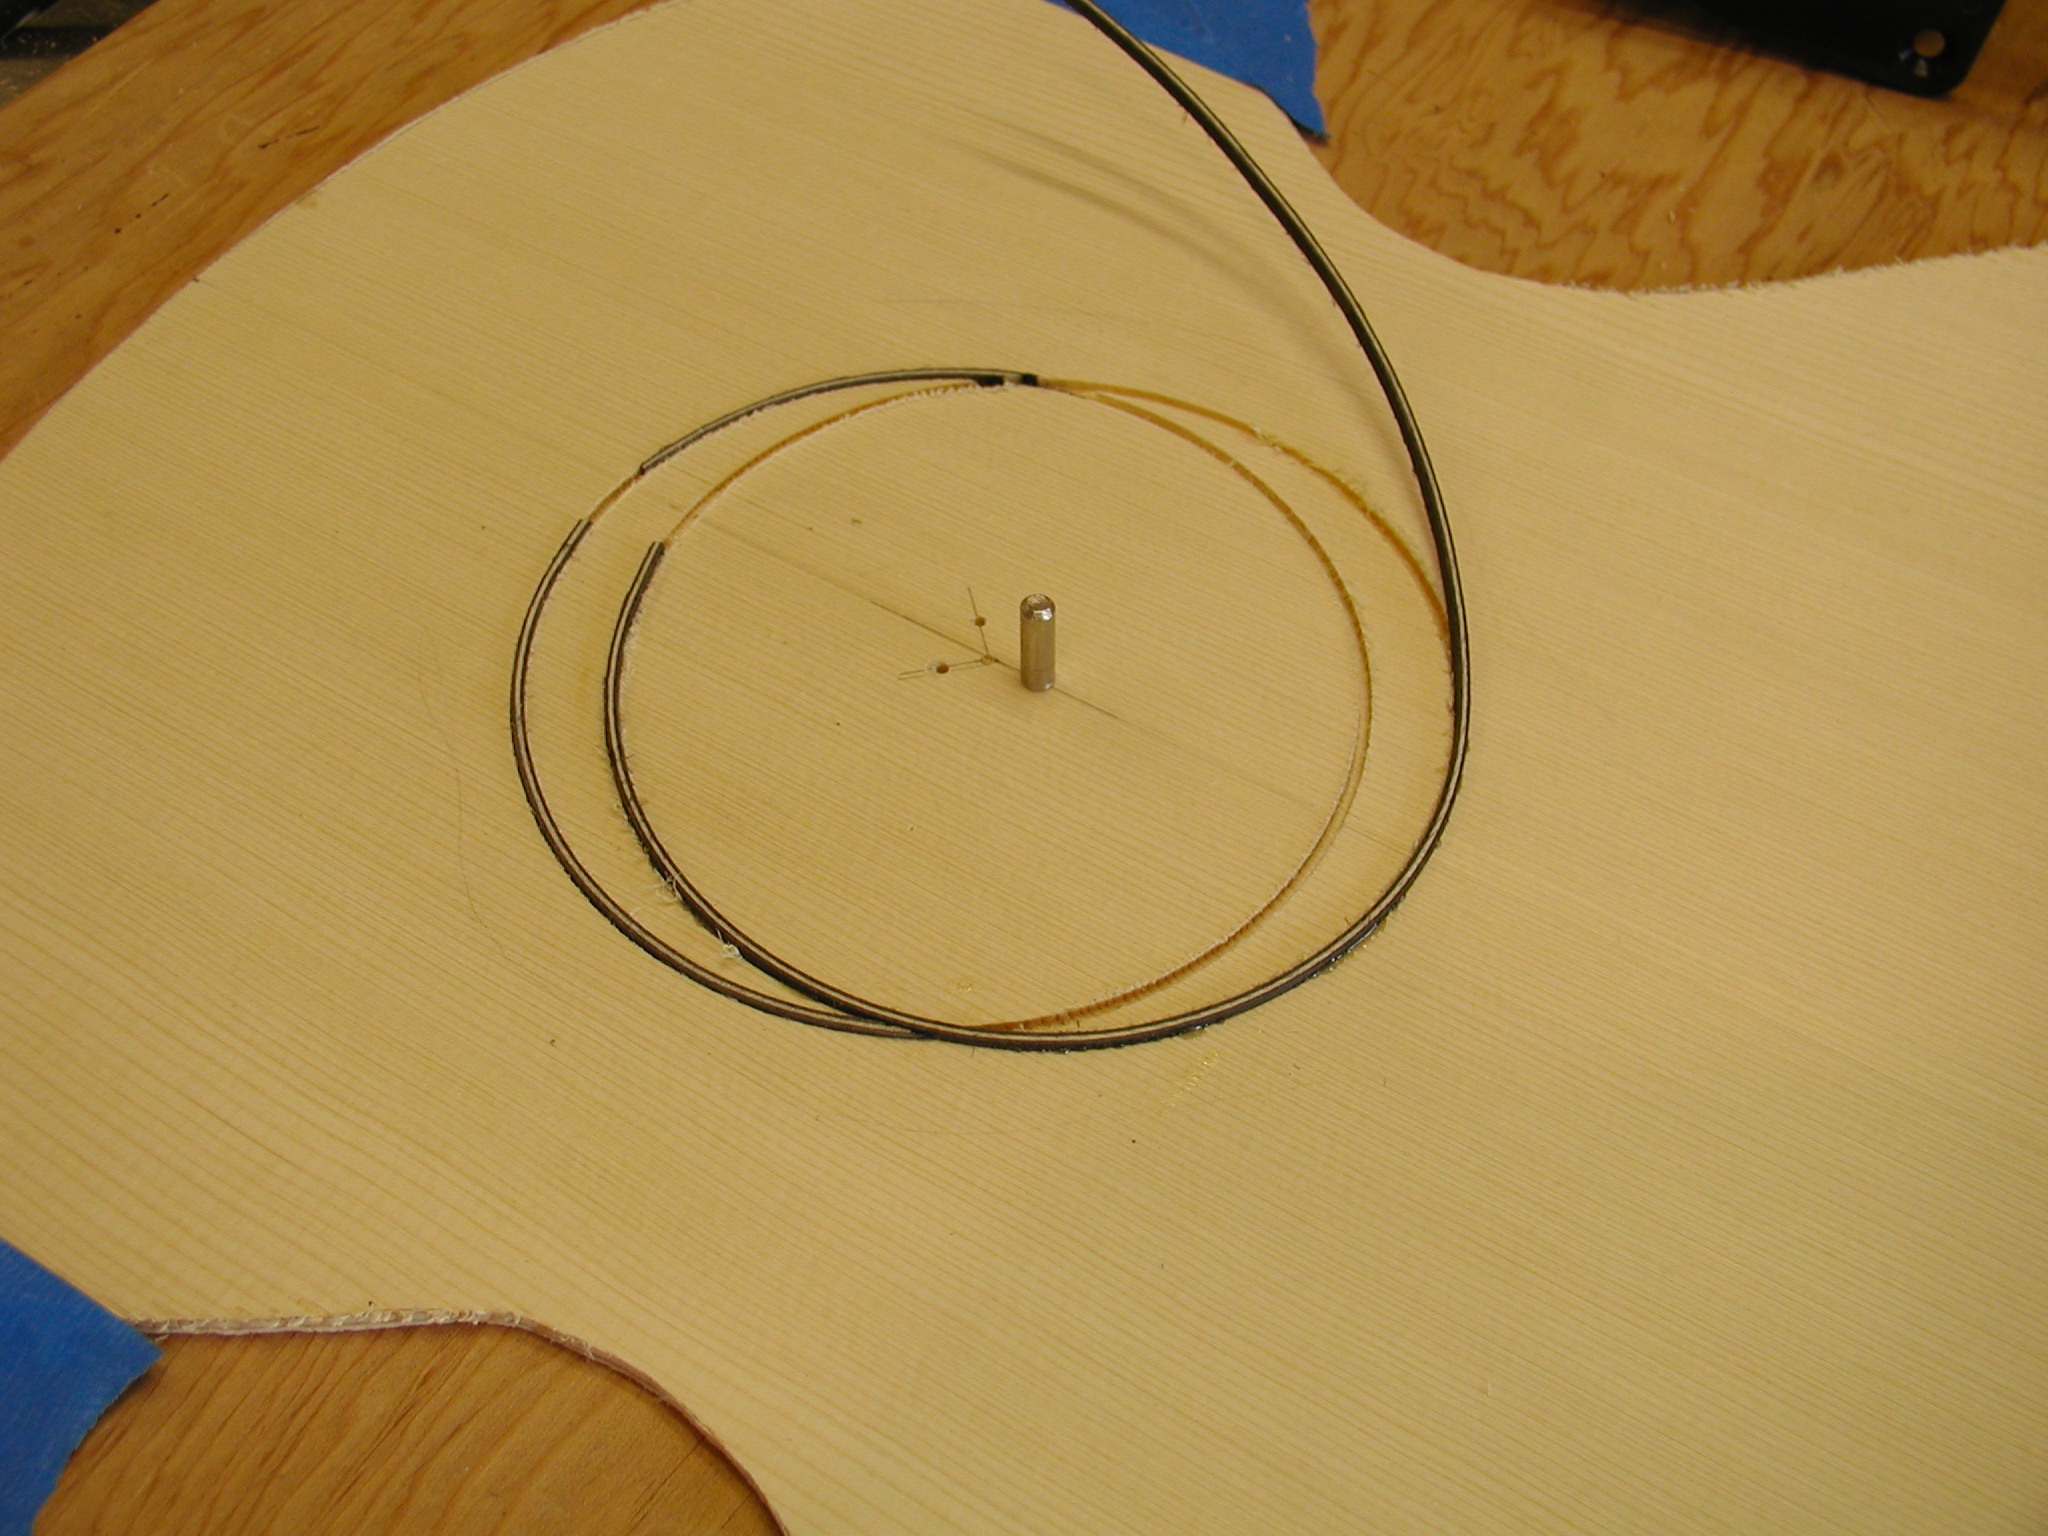


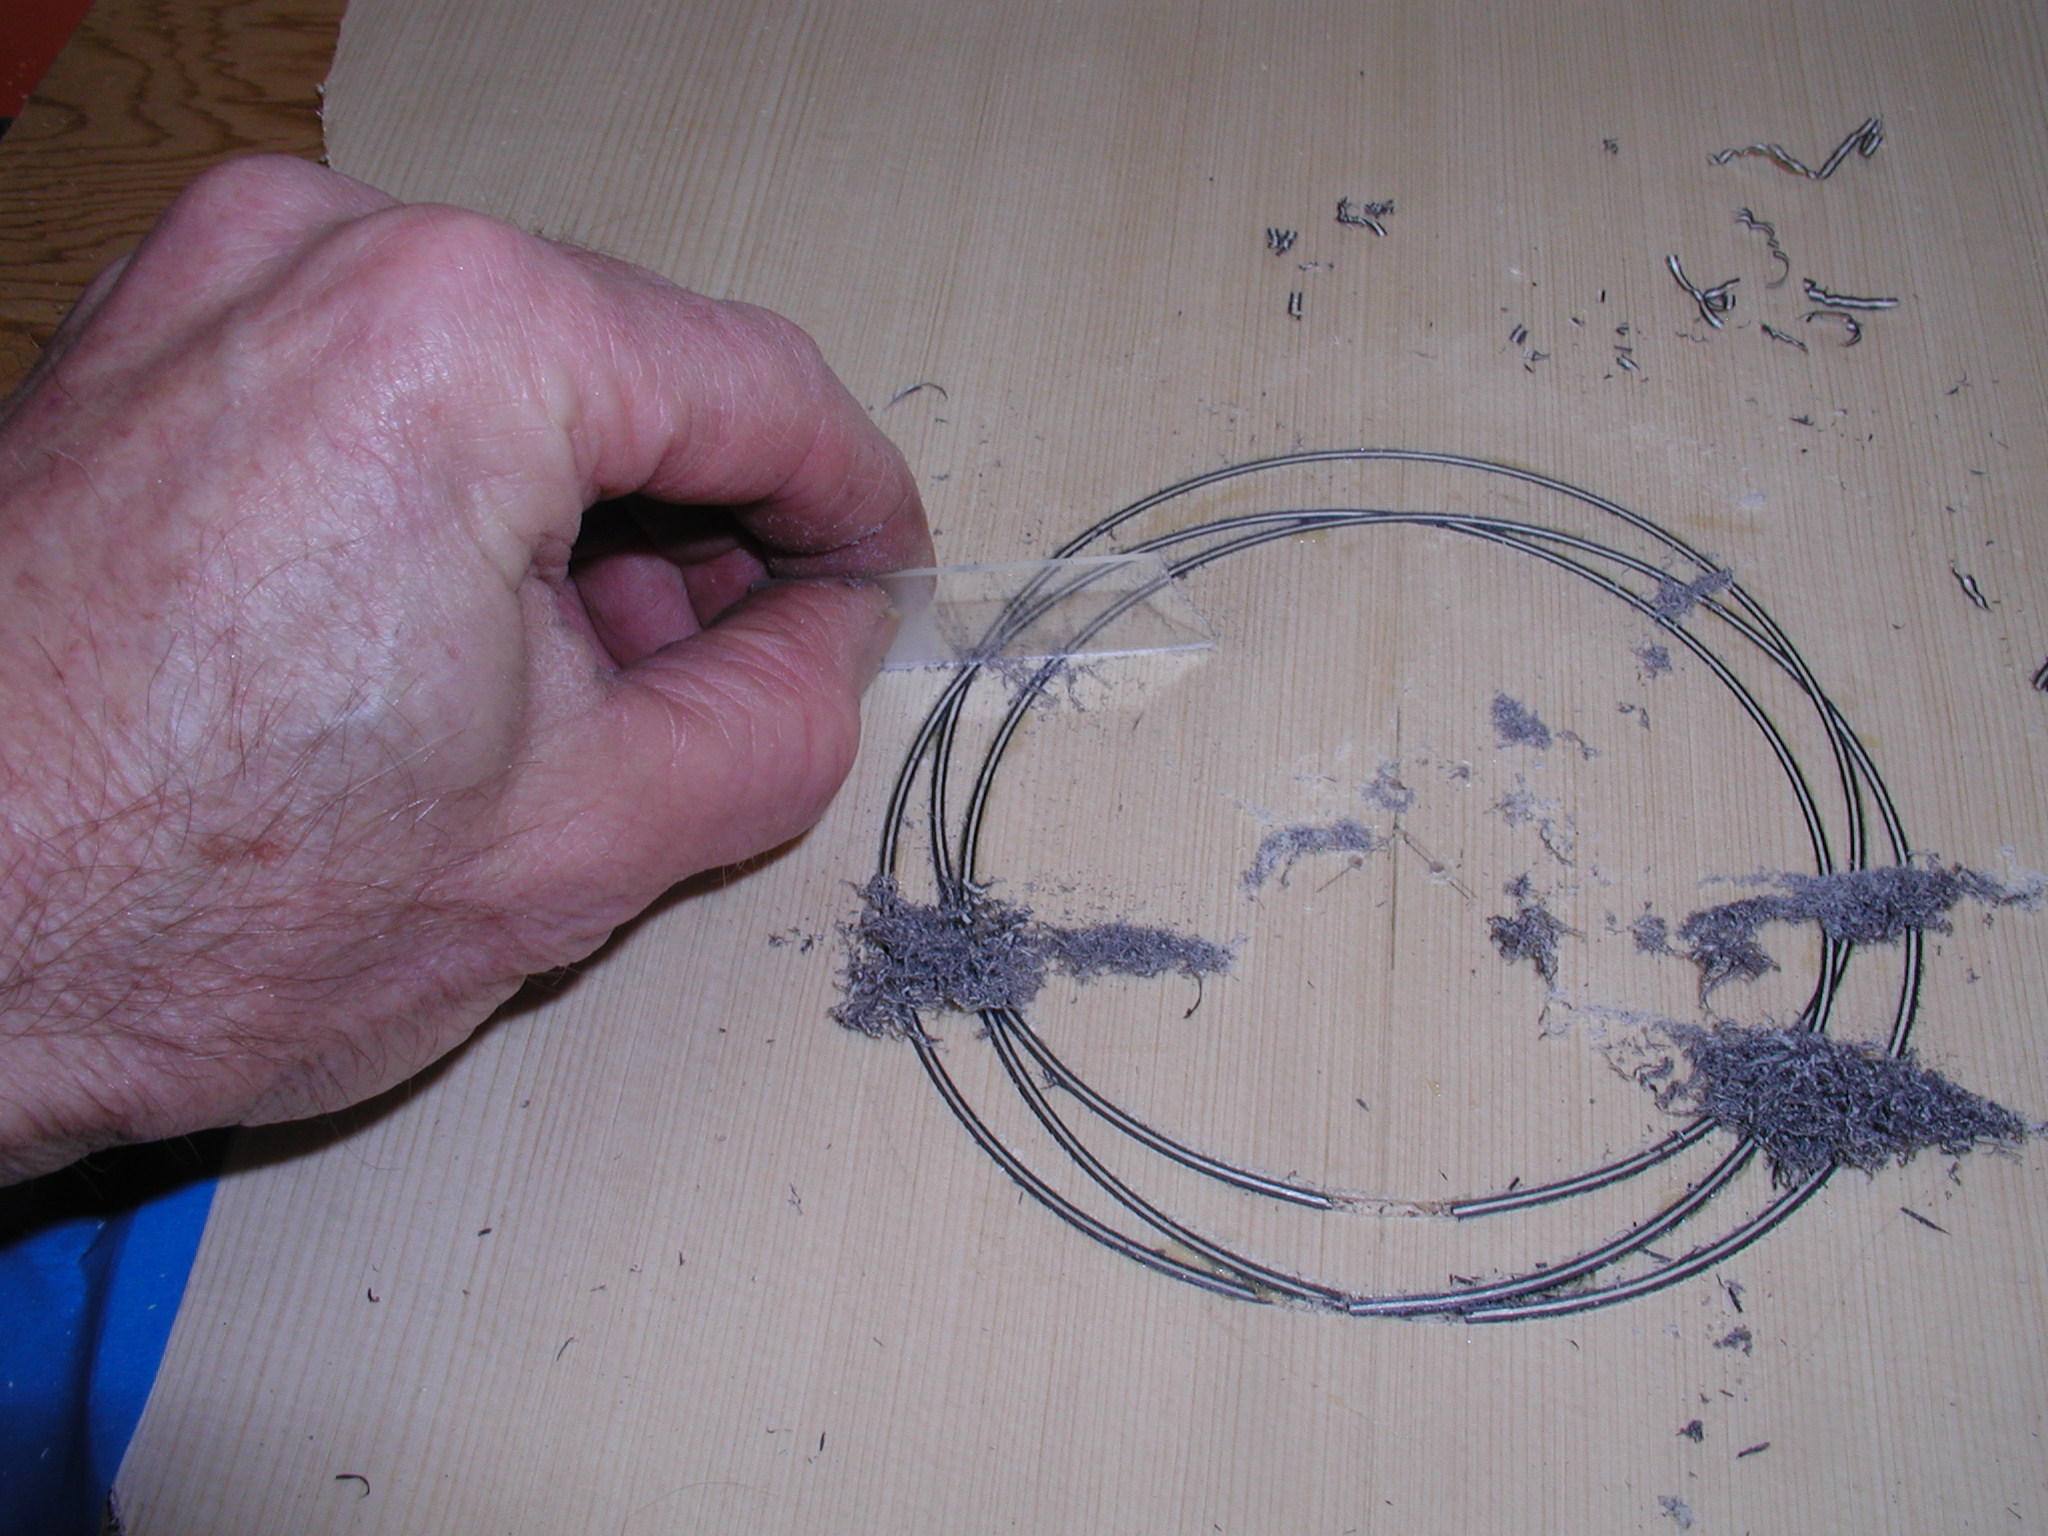
At this point I inlay my Three-Ring Rosette, this is kind of my logo for the double top instruments and so it is the one thing that I would rather that folks didn't "borrow" from these pages. It is made to look like the rings are interlocked and is a bit tricky to do. Once glued in place I plane them down close to the top and the scrape them true with a glass microscope slide with a ground edge.
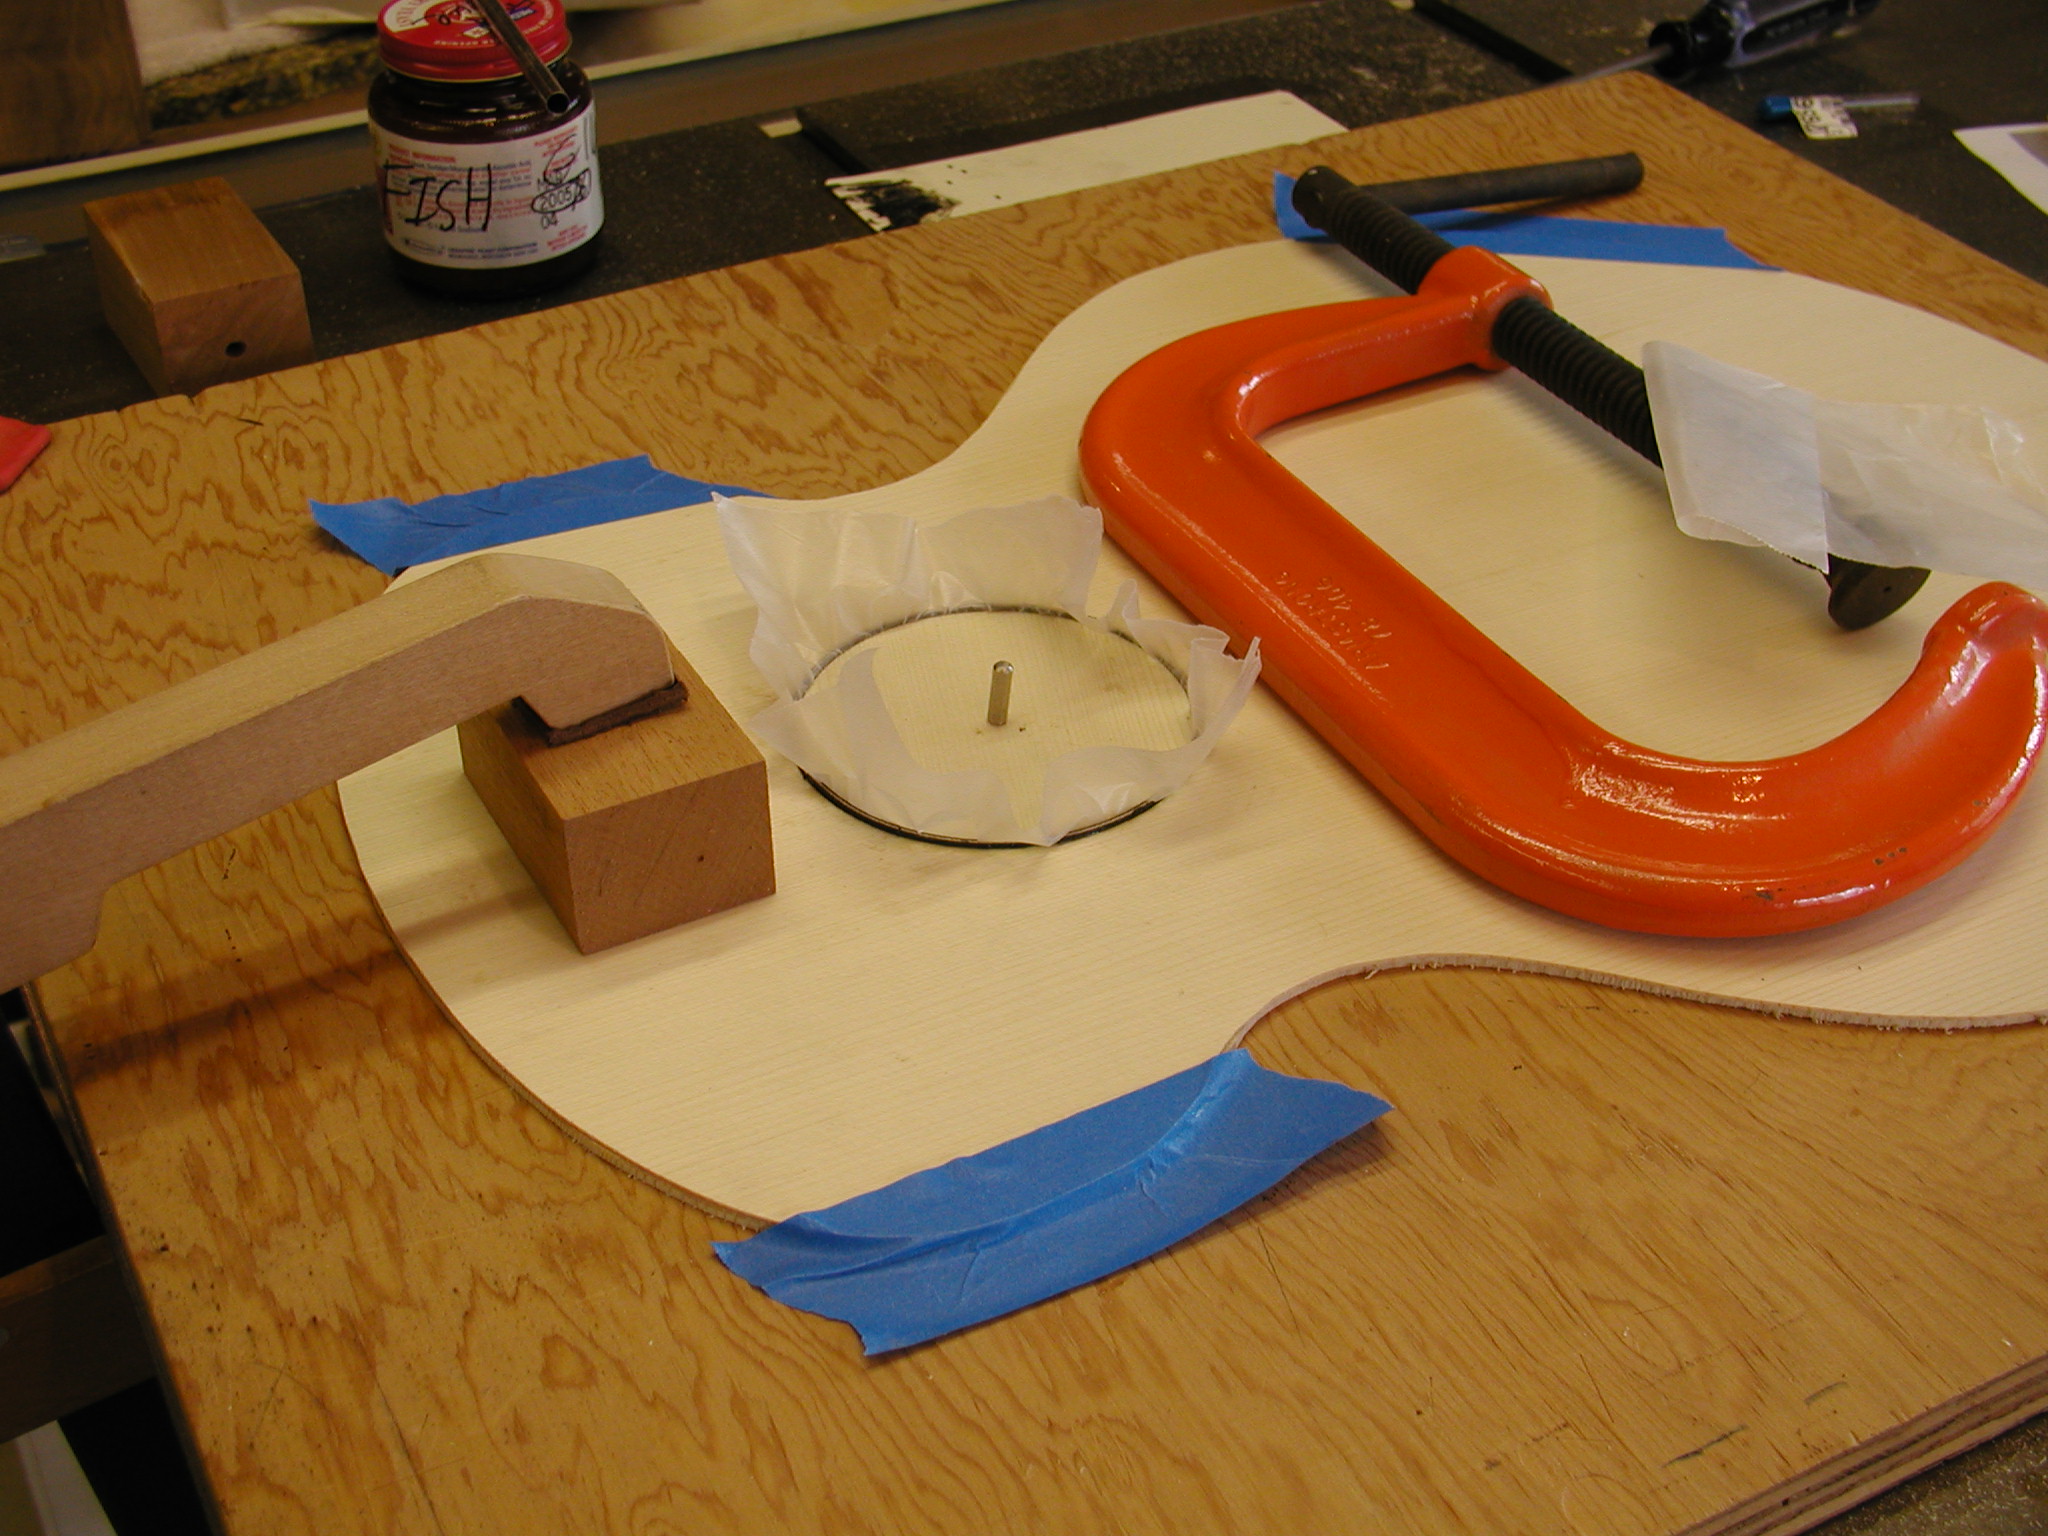

Since the top is made up of layers when the sound hole is cut it reveals these layers and may look like a plywood top to someone that doesn't know about double tops. It also is vulnerable to chipping along the end grain. So I like to glue in a ring of some sort. Here I have cut the sound hole out from the back side. Then I bend a decorative ring and fit it with an angled cut and apply glue to the top/ring interface. To hold it in place while the glue dries, I just insert the sound hole piece protected with waxed paper, this forces the ring out against the edge of the top. The sound hole cutout later becomes a coaster for the customer with a cork bottom and my logo branded in the top.
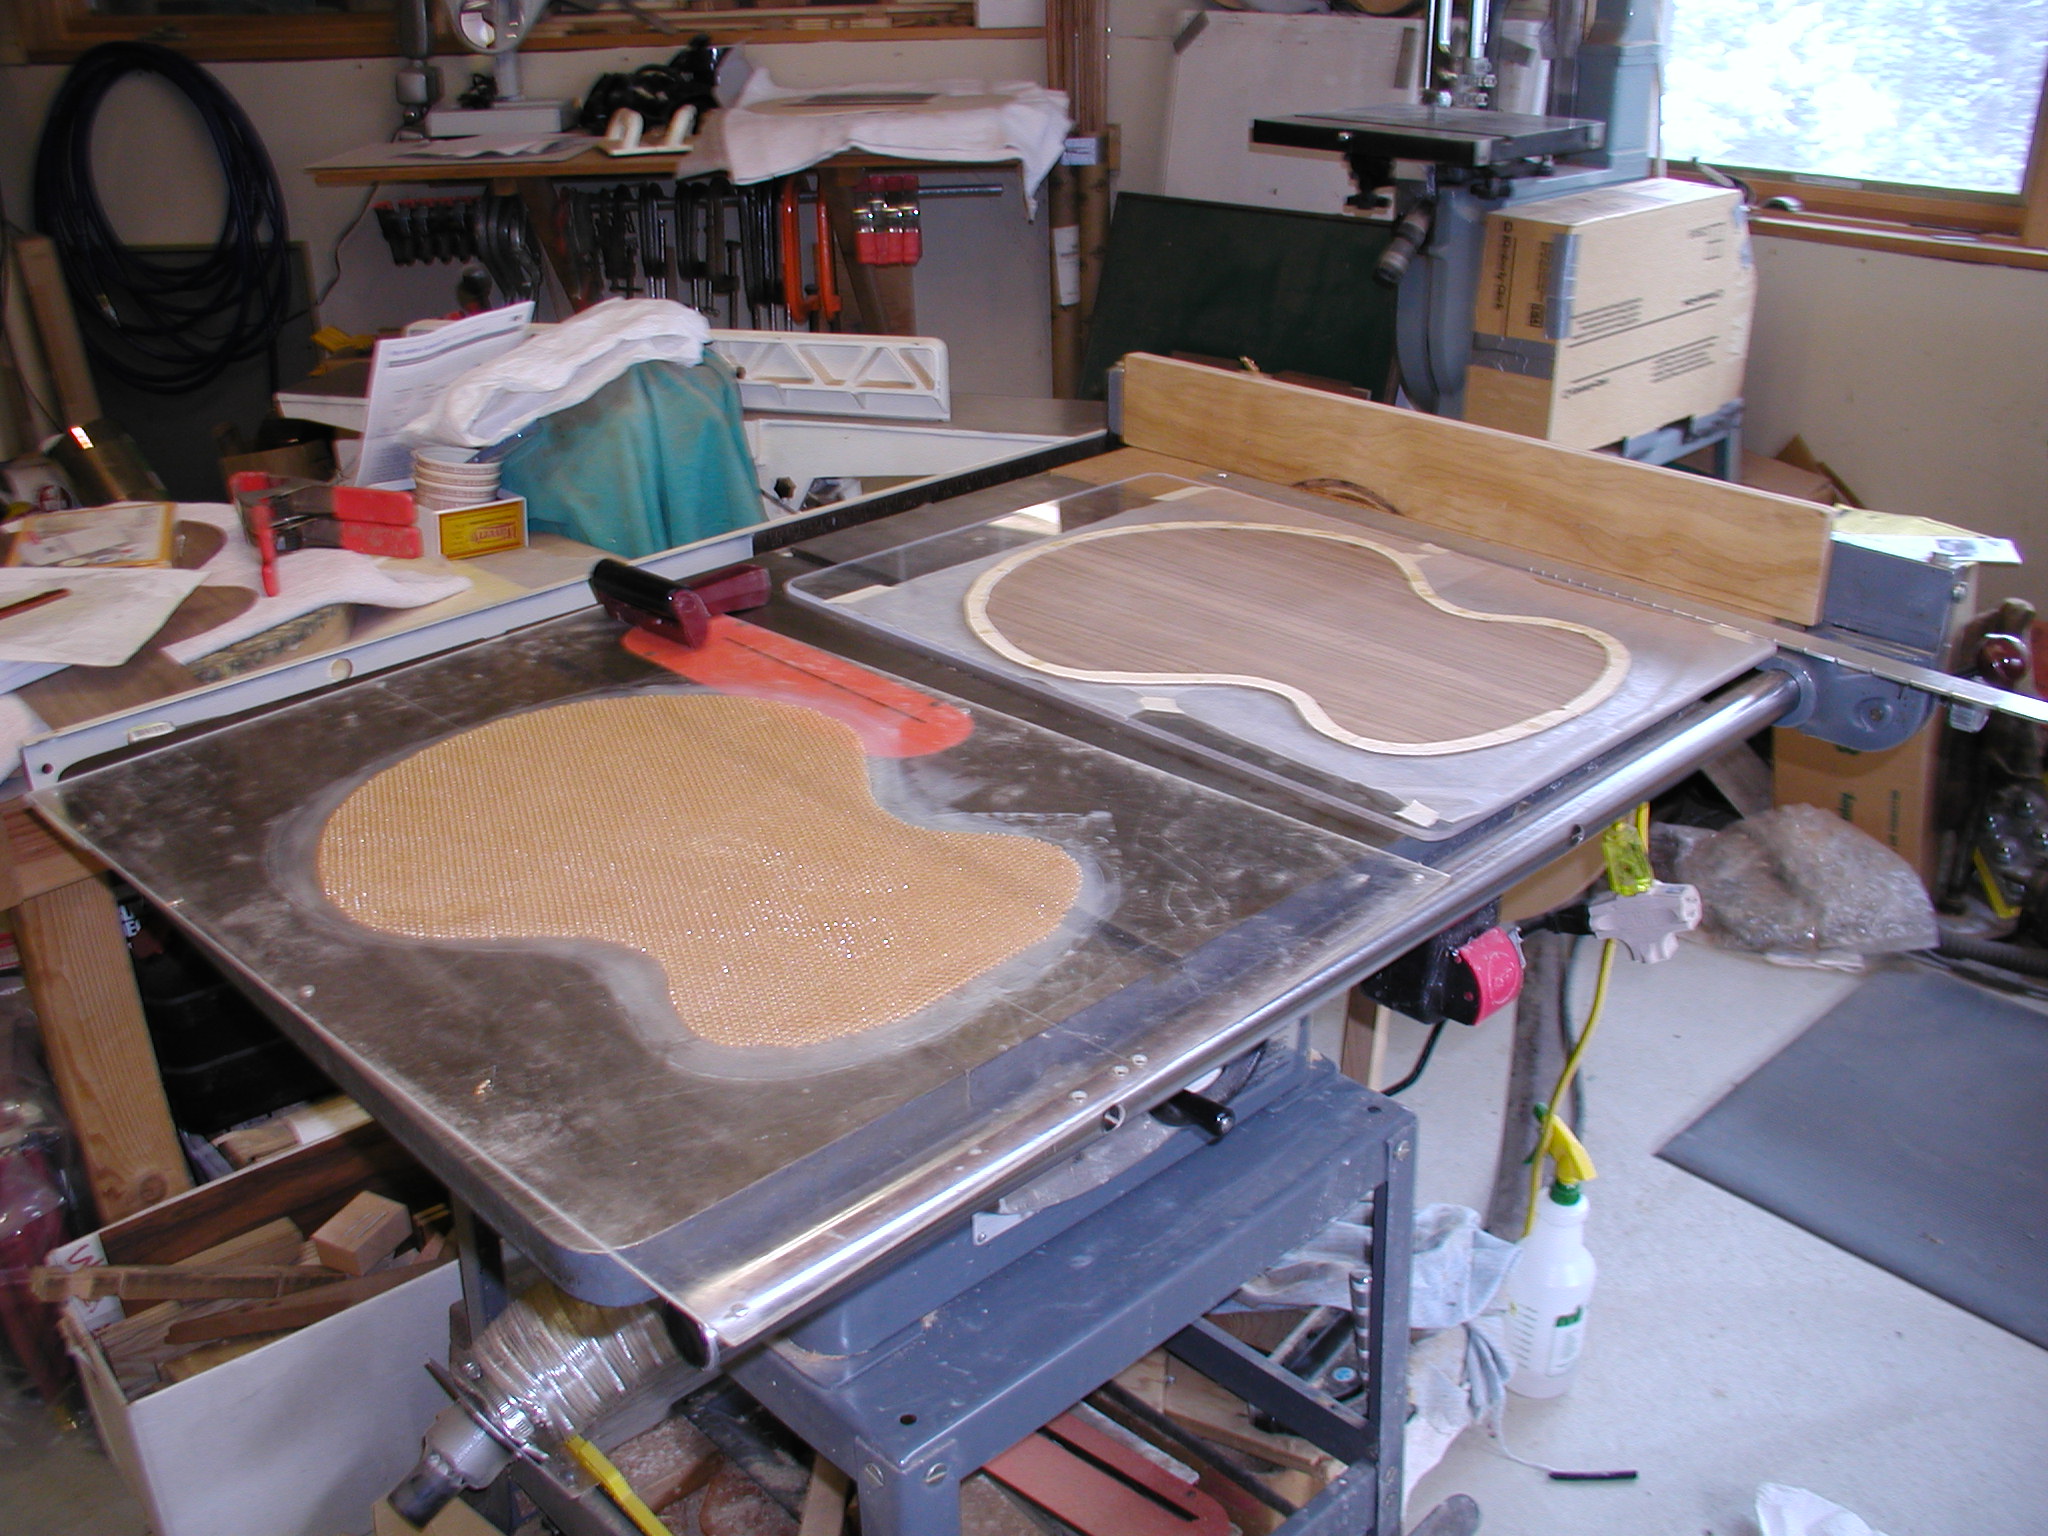
Making up the back is much the same as making the top plate. Here there is no central hard part needed, just the perimeter ring for binding, because the back is primarily in tension and none is needed.