Double Top Building
In addition to the following information you can also watch my Double To Construction YouTube Video with Robbie O'Brien of Red Rocks Community College.
Part I - http://www.youtube.com/watch?v=uIq-ExdmG5I
Part II - http://www.youtube.com/watch?v=hcXZRhJFu1M
The concept of so-called double top instruments is not new and has been used in classical instruments for over ten years. Its application to steel string flattop guitars is relatively a recent thing. I and several other steel string builders are now applying this type of construction.
You can always tell my double tops from solid by my interlocking ring rosette which I use only on the double tops, see an image near the bottom of this discussion. I first designed this rosette in 2003 and first showed it at the Colorado Custom Guitar Festival in 2004. Since then I have noticed that some other builders are using this design and although I didn't register or copyright it, I'd rather they did not. If someone can show prior design I will change mine. This is not a big issue but I'd like to keep using it as my double top logo.
First needed is a discussion of what constitutes a double top. The general idea is to make a composite sandwich usually involving standard top woods such as spruce or cedar and an aerospace composite called Nomex®. This is a honeycomb structured material made by Dupont (http://www.dupont.com/nomex/) and is primarily known for its use in fireproof clothing and has been used to make composites in spacecraft and aircraft construction. In instrument building it is used to reduce the weight of the top and/or back plates while keeping or increasing the stiffness of the resulting plate. Since the structure used is a honeycomb it results in open space in the top where material is removed resulting in a reduction of weight. Each little vertical piece of the honeycomb is bound to the inside and outside wood "skins" with slow cure high strength glue resulting in miniature I-beams. The plate retains an along-grain/cross-grain stiffness difference and the sound is very much a wood top. The advantages that are noticed are a clarity of the individual notes, much more sustain, better balance, and an improved projection in front of the instrument. Even small bodied instruments can fill a room with ease.
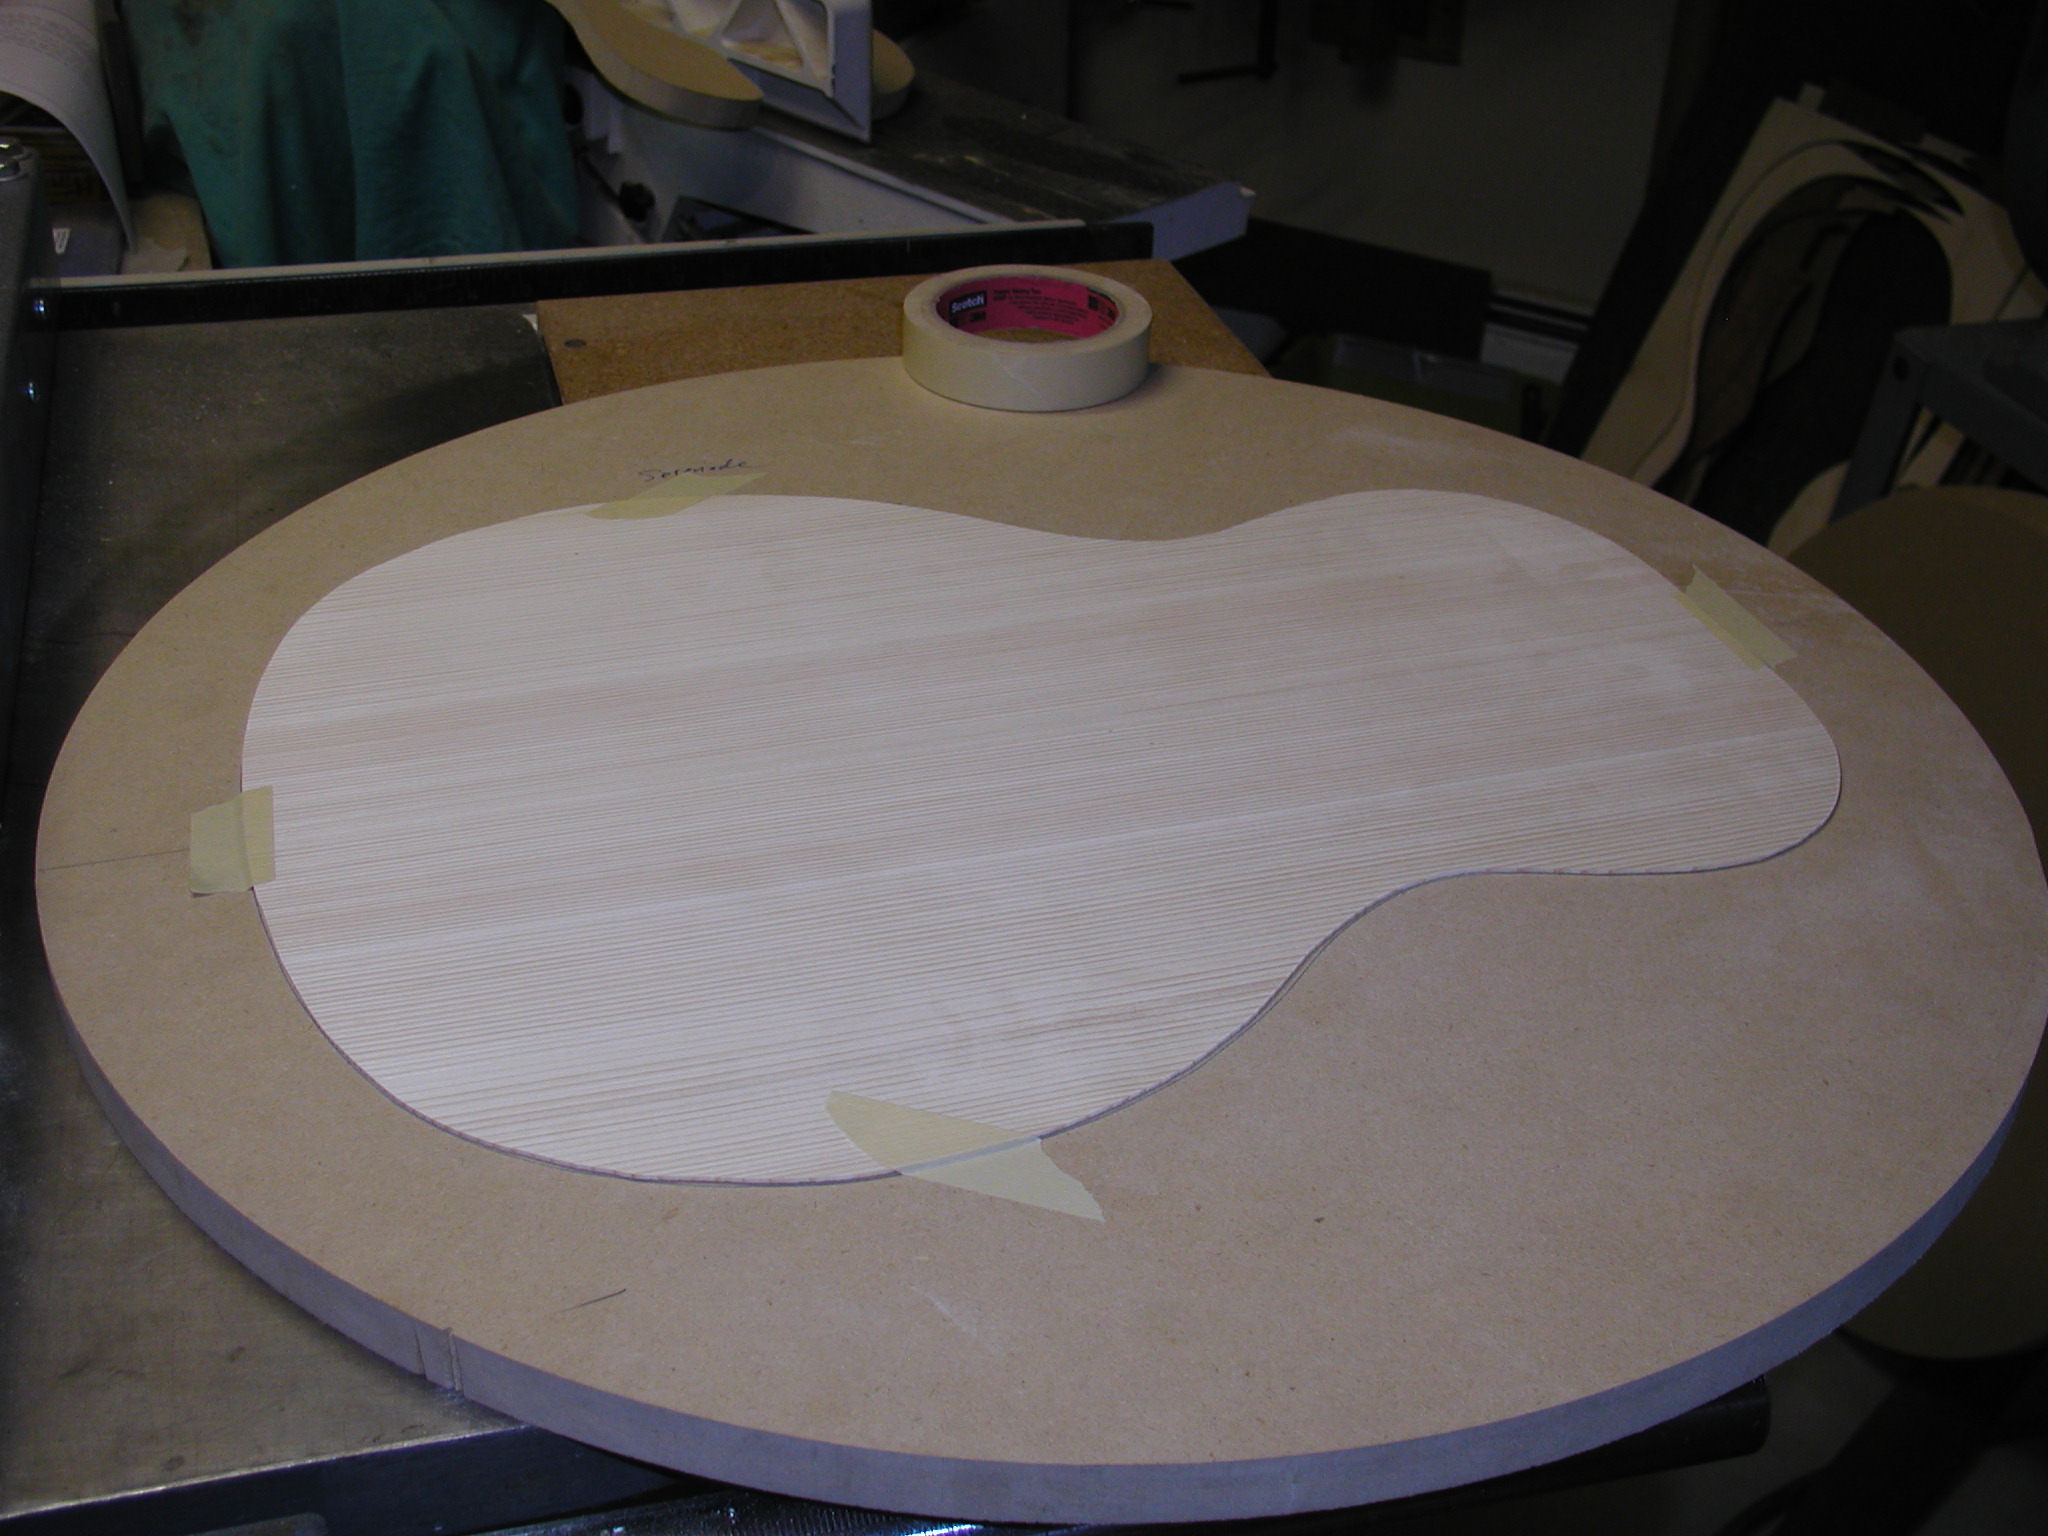
So let's go through the process of making a double top. Used here for example is the construction of a top for my Serenade style. Measurements used are in English inches. To see larger images of any photo, just double click on the photo.
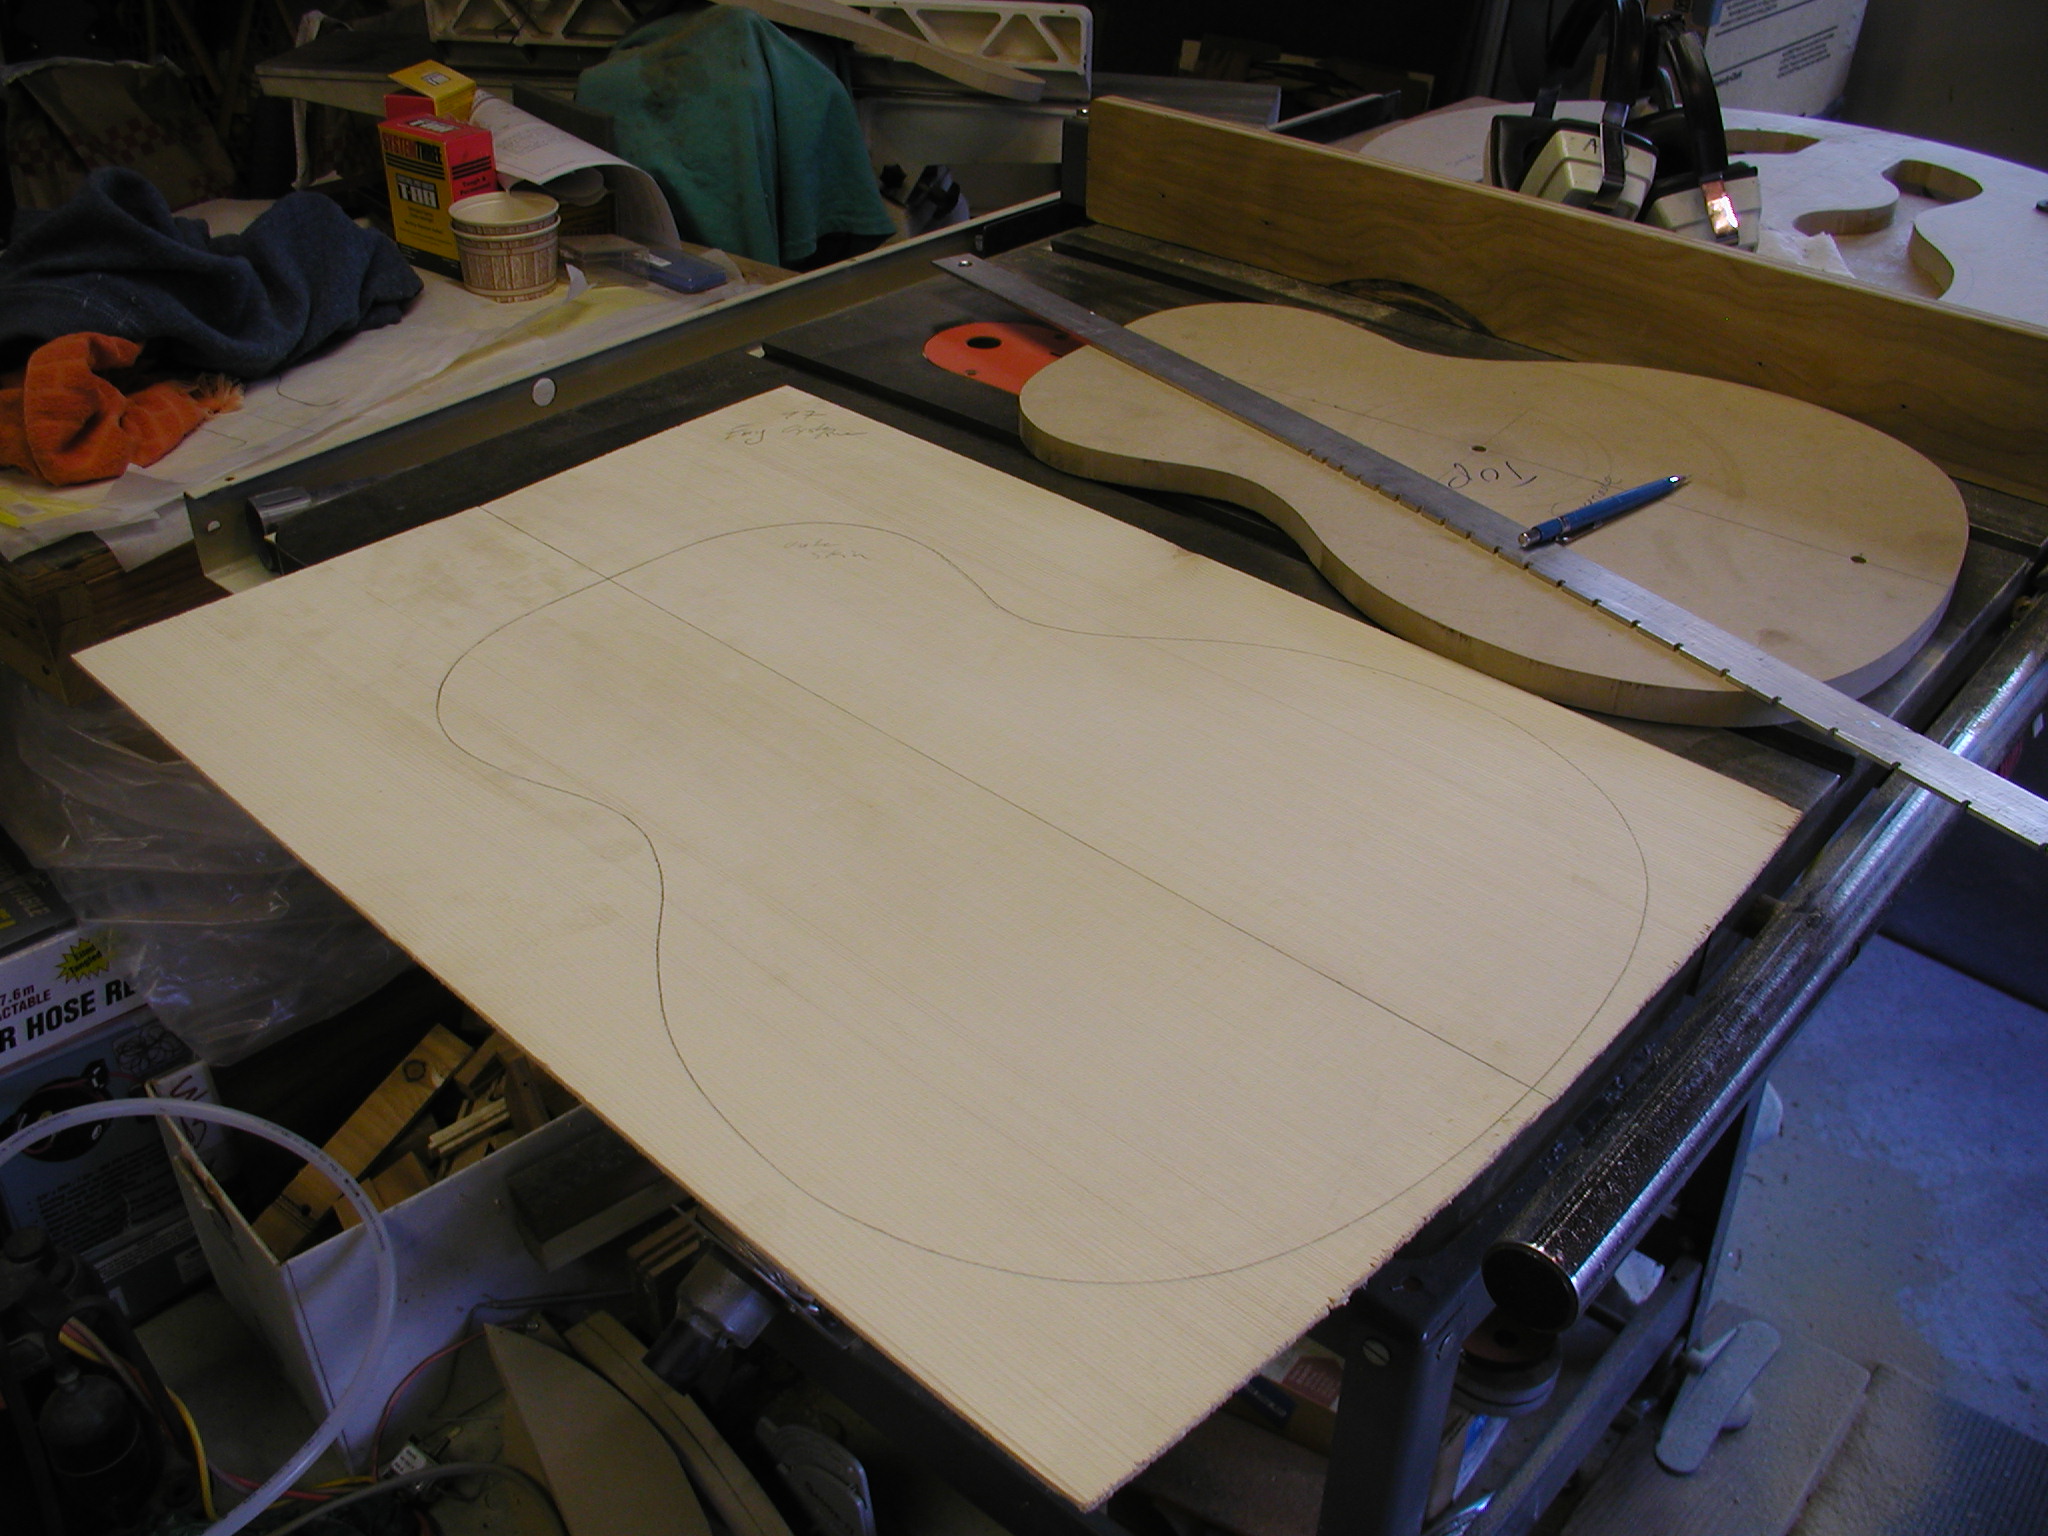
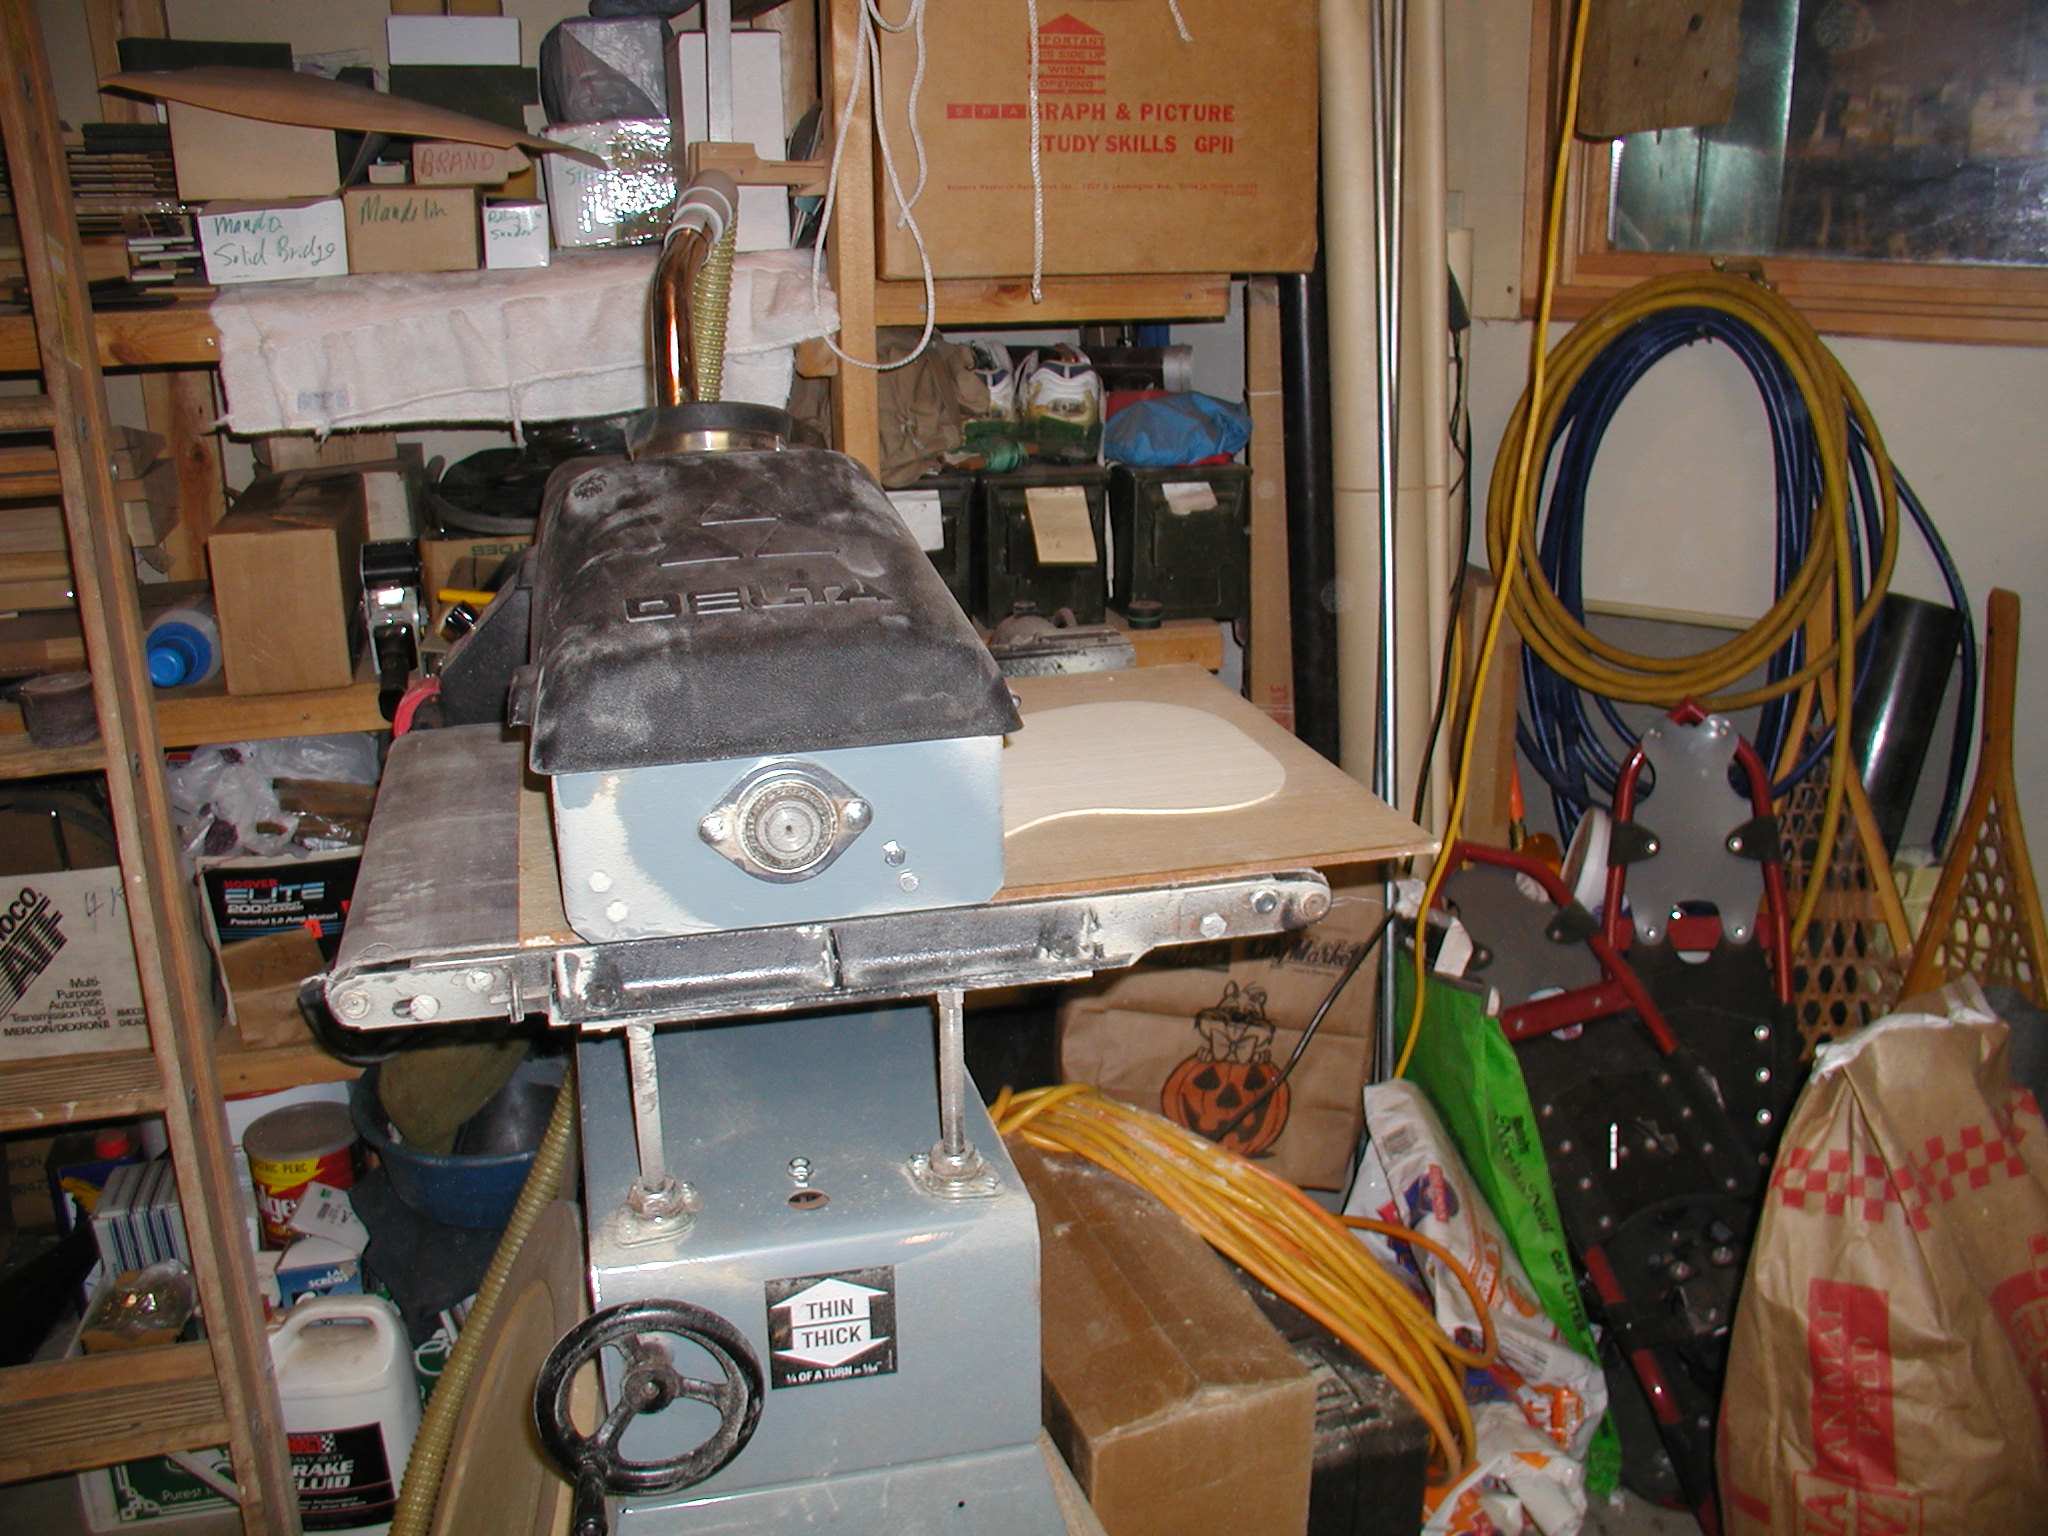
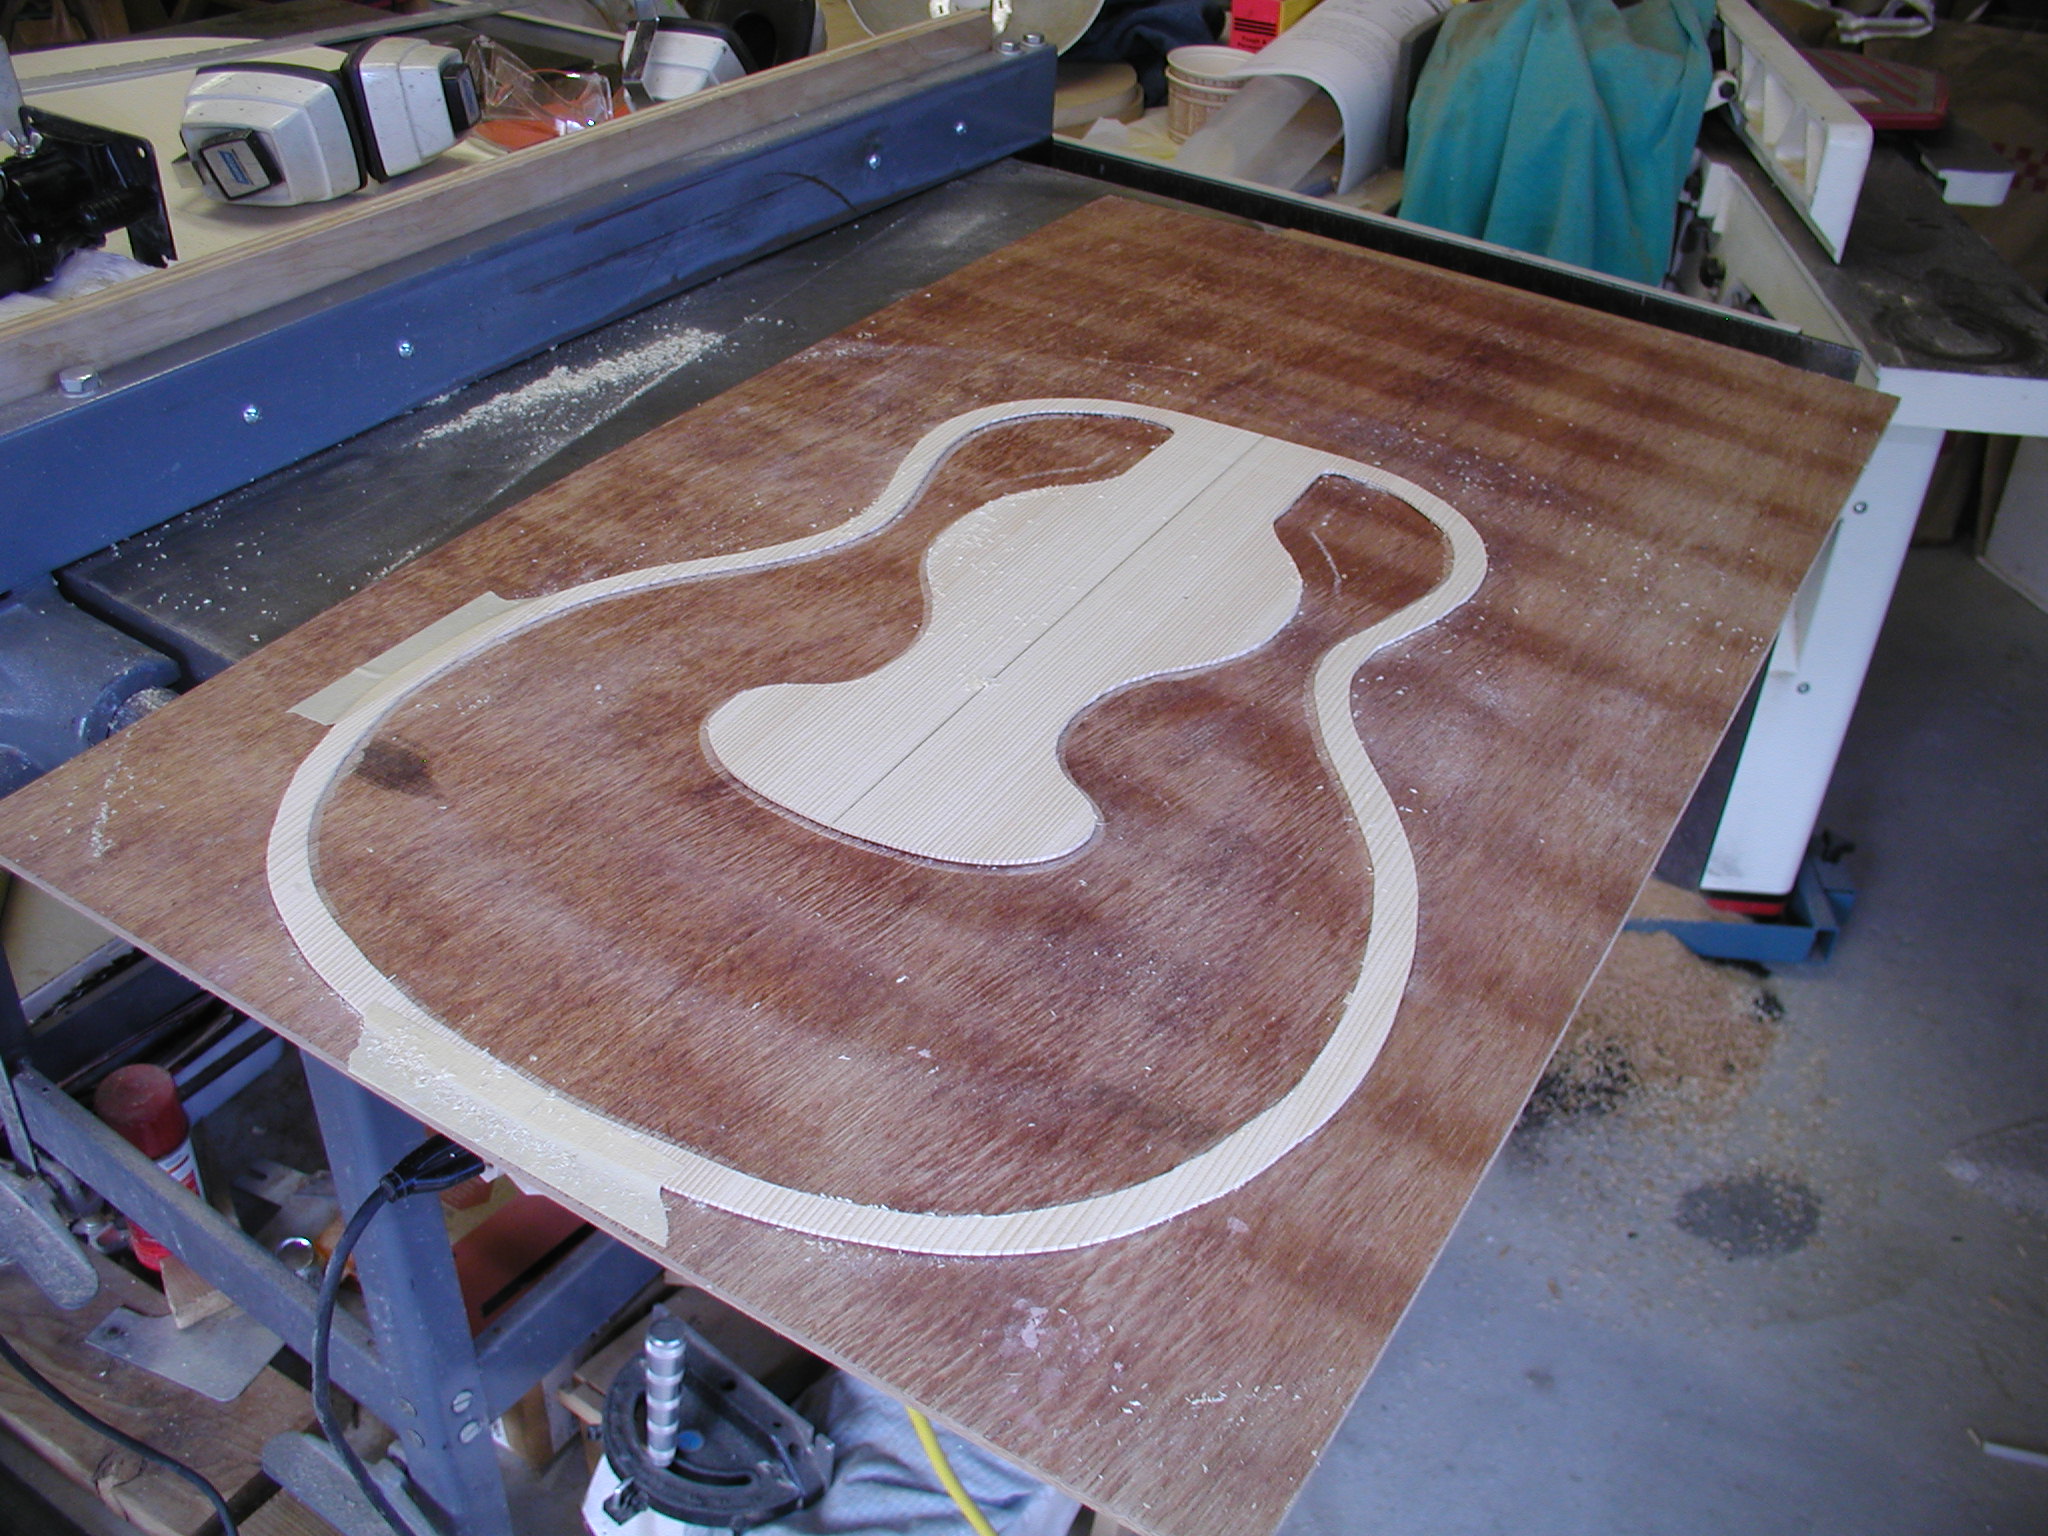
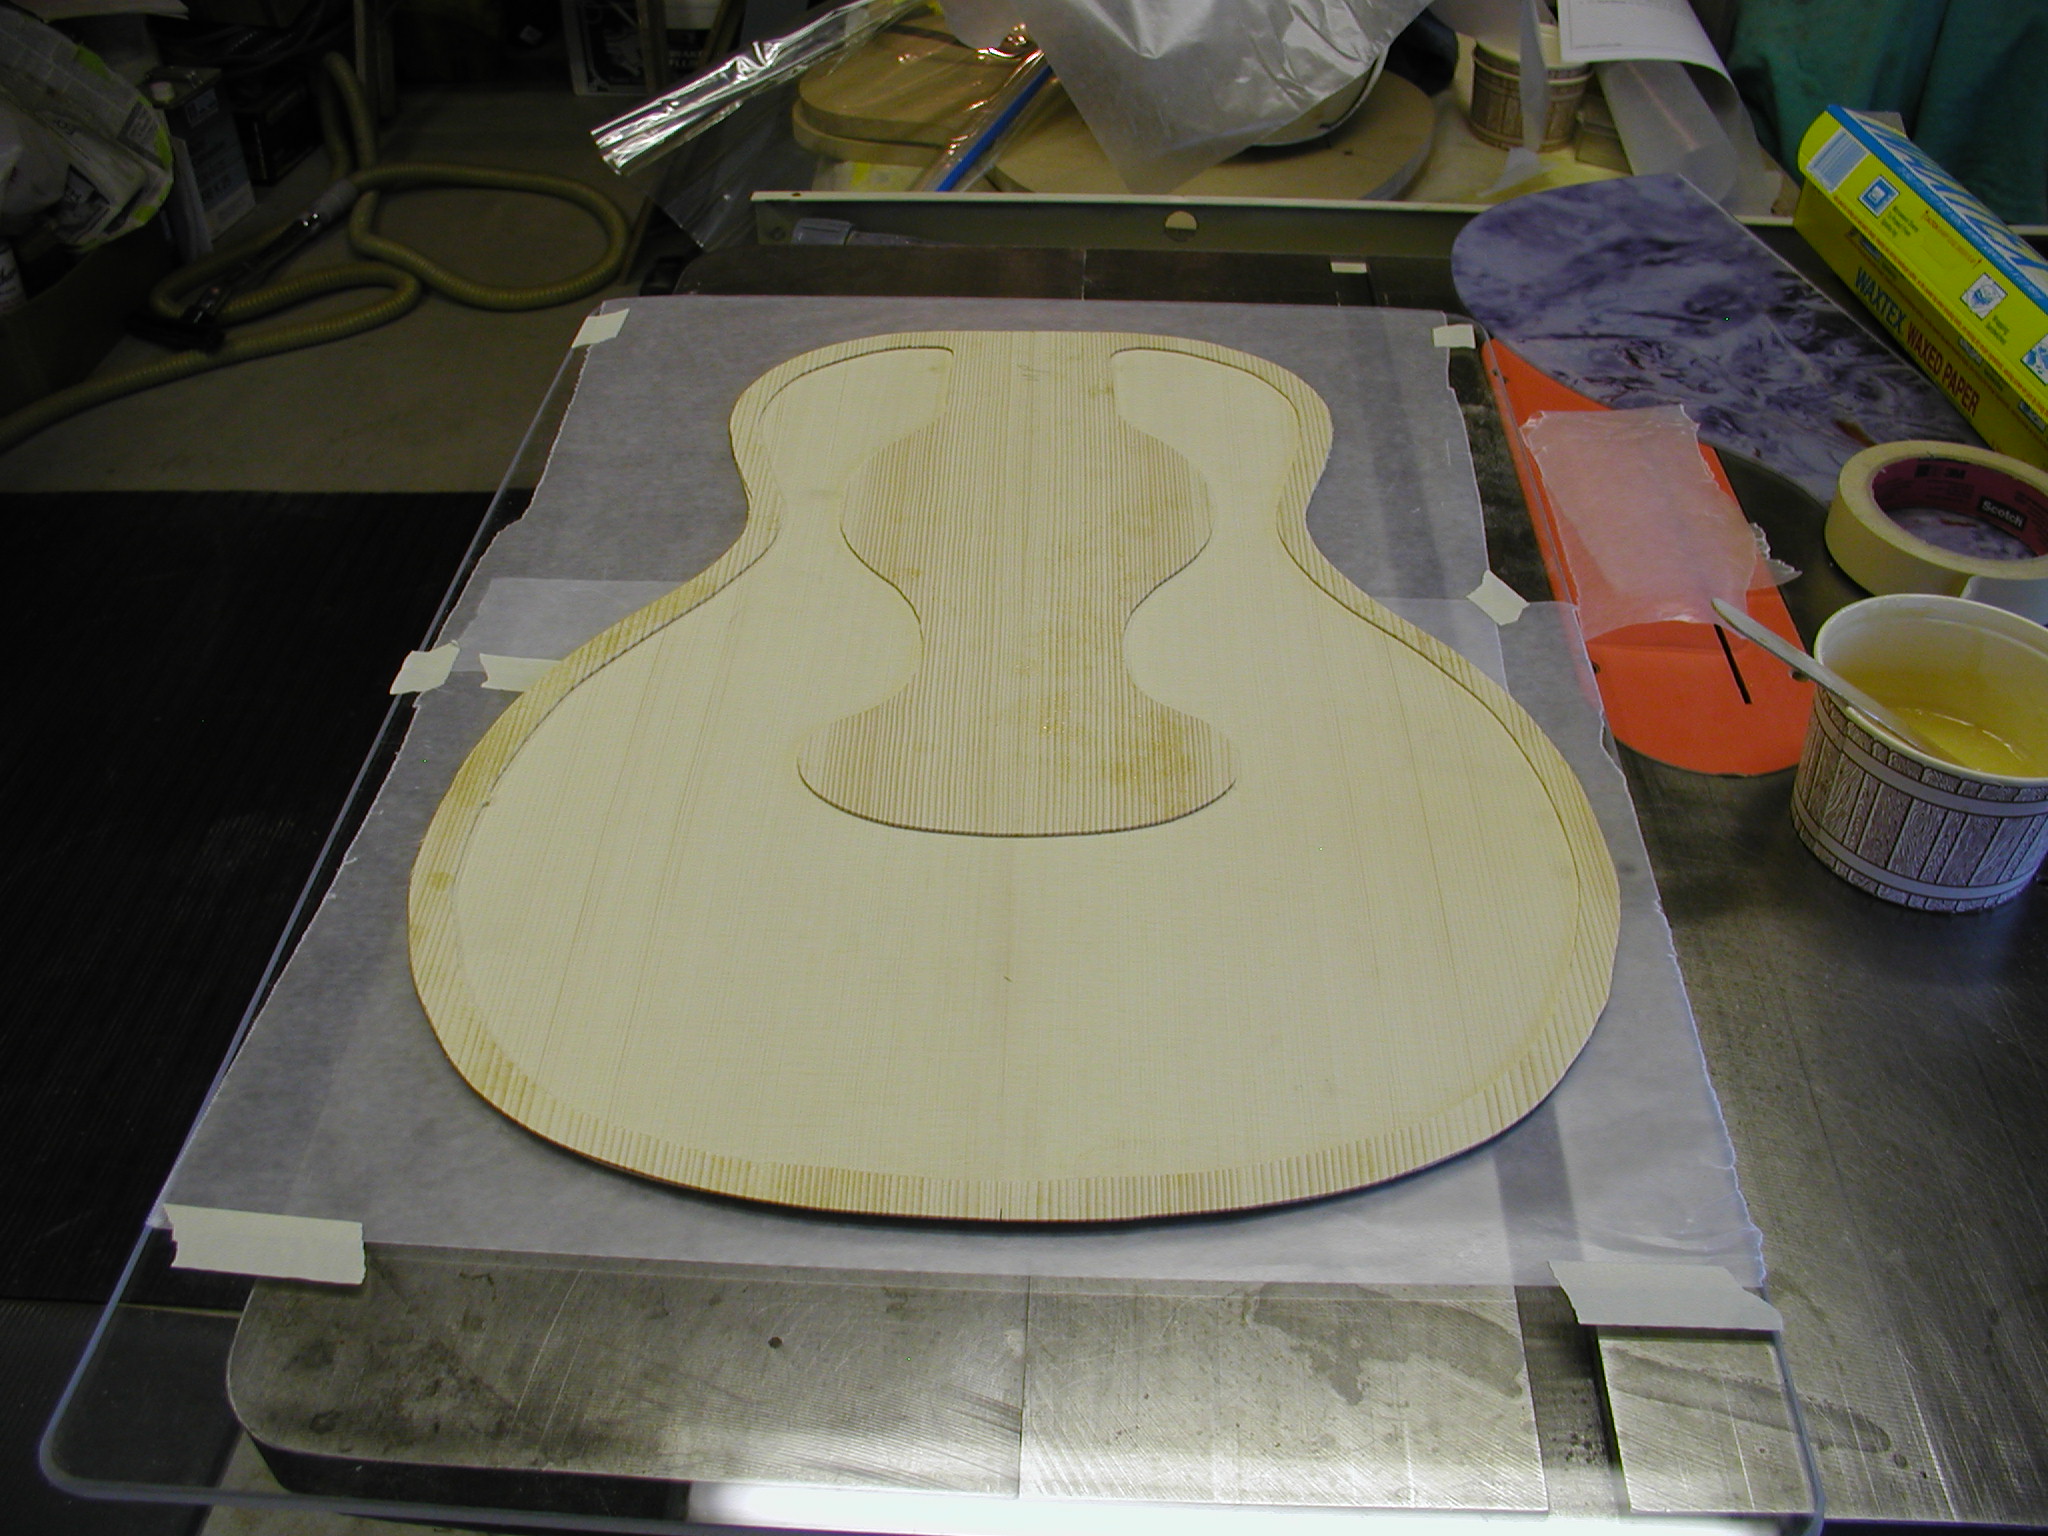
The top pieces start out in the usual way being around 1/4" in thickness and are glued up as usual. I have to make three of these tops but I'll be showing just the one for the process photos. So you can see where we are going I've included the layout design for the cutting template in MDF. Using my pattern I trace the outside profile and cut out the three tops. So far, these are just a regular tops. At this point they are then thinned in my drum sander. Two are reduced to 0.040" or 40 thousandths of an inch, and one to 0.060", the same thickness of the Nomex® that I use.

What I end up with is two skins and and one center piece.

Notice that although it is necessary to make three tops that get combined into one, the cosmetic quality of the inside skin and the center piece can be pretty low. As long as they are sound acoustically they are fine, only the face skin needs to be visually pretty. This helps keep the cost down.
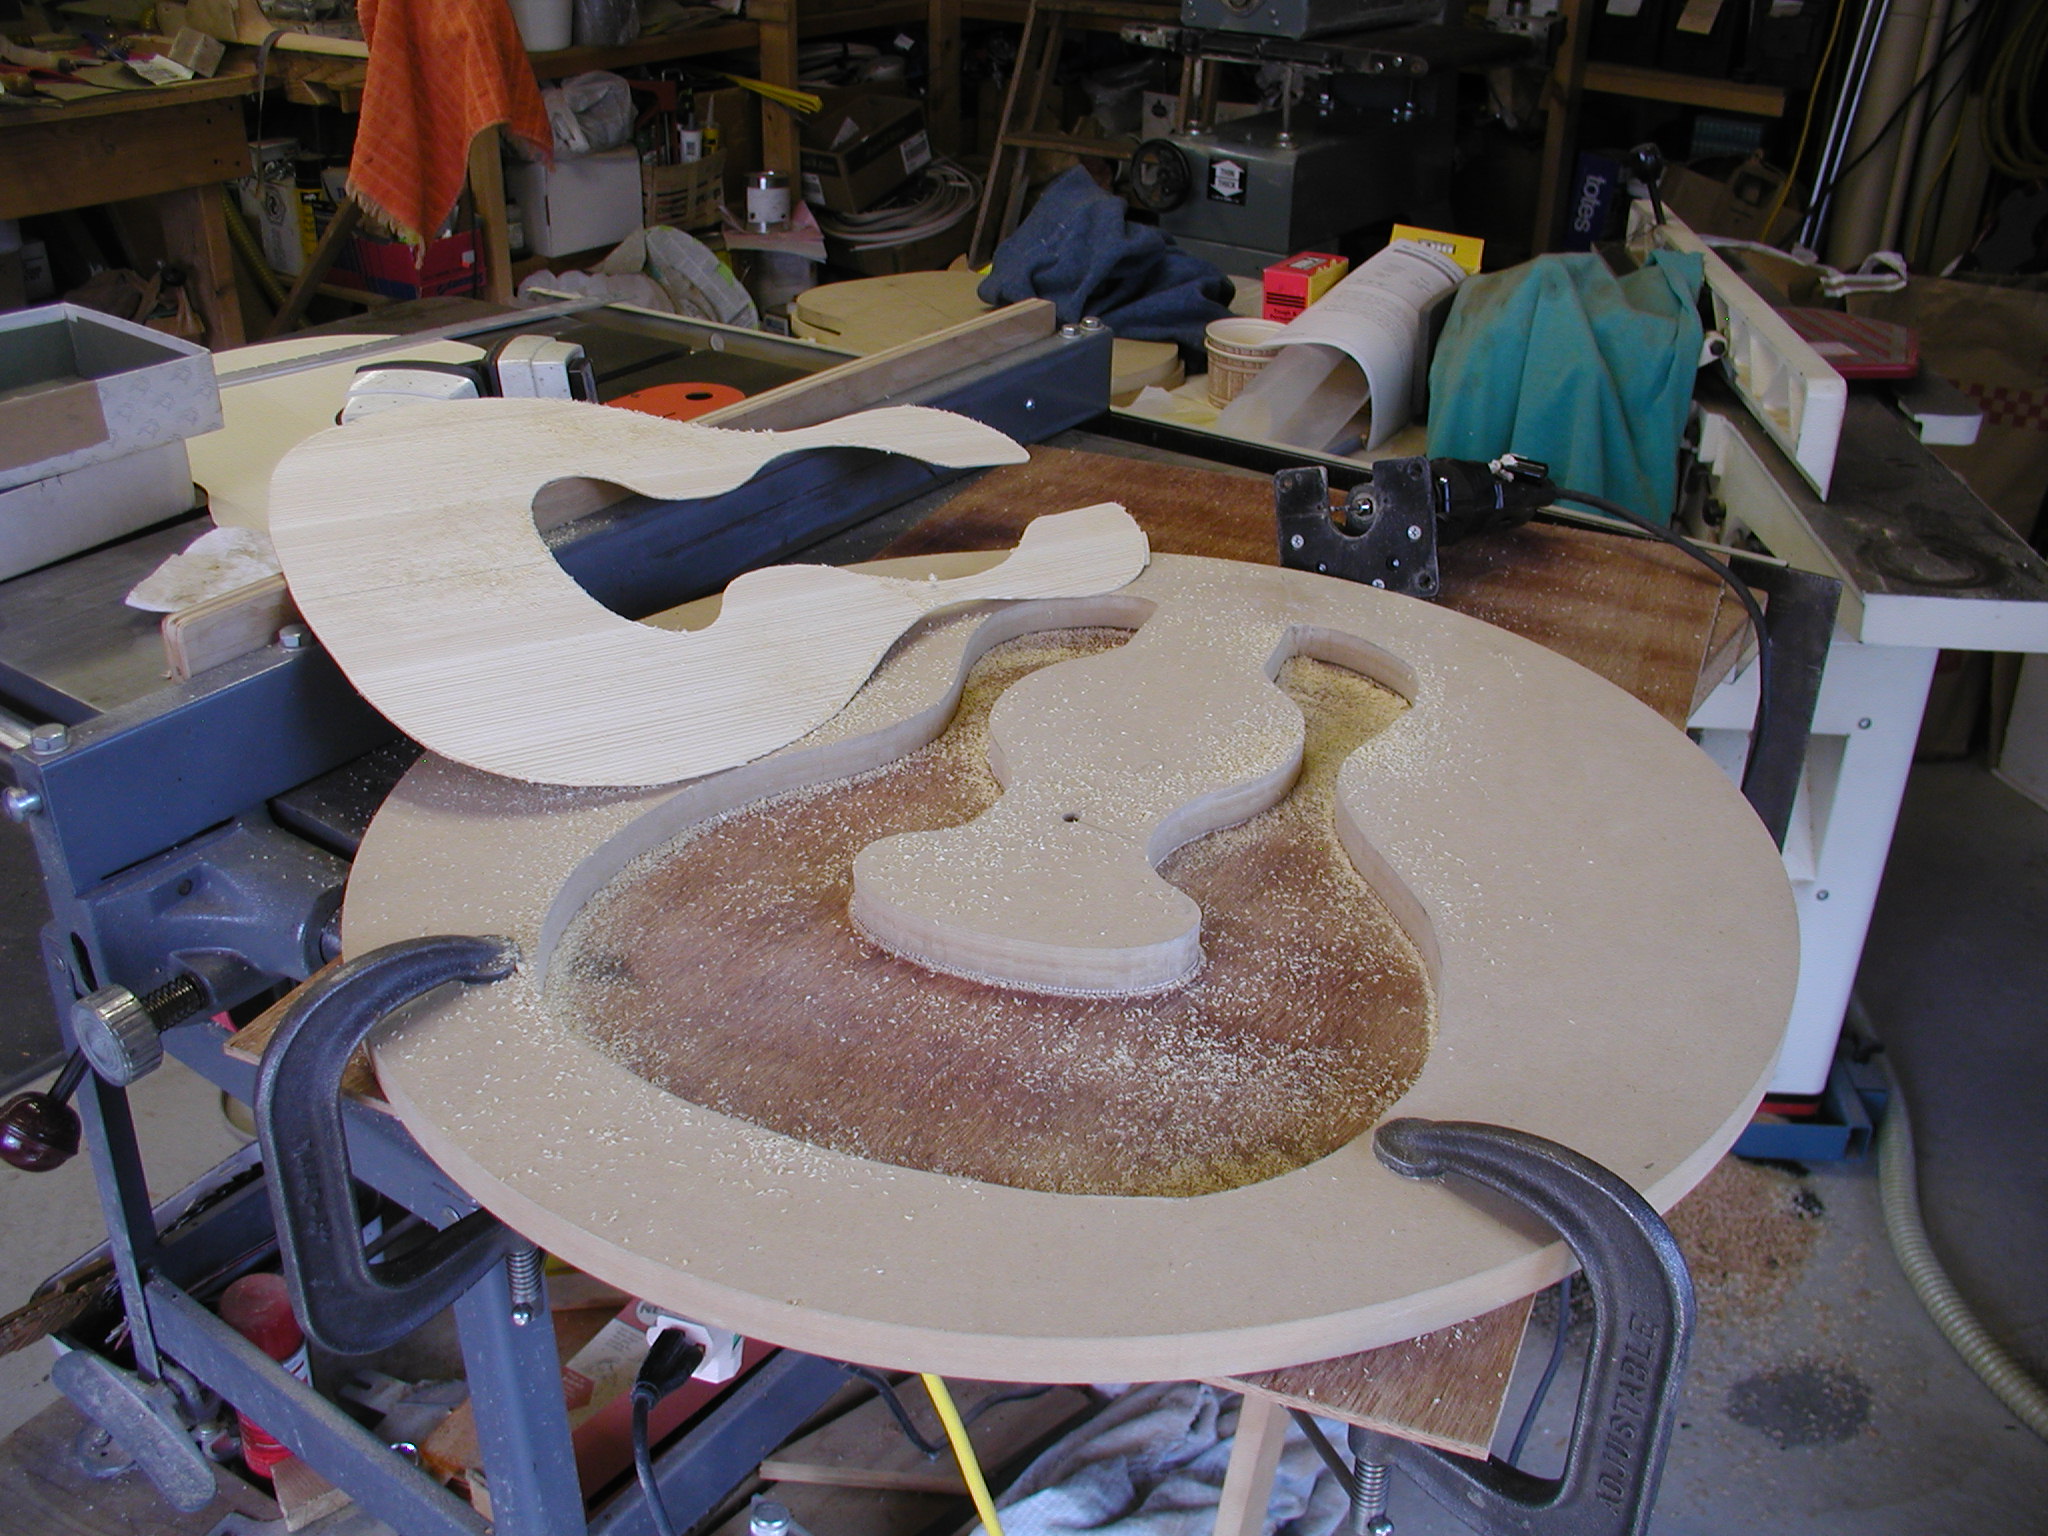
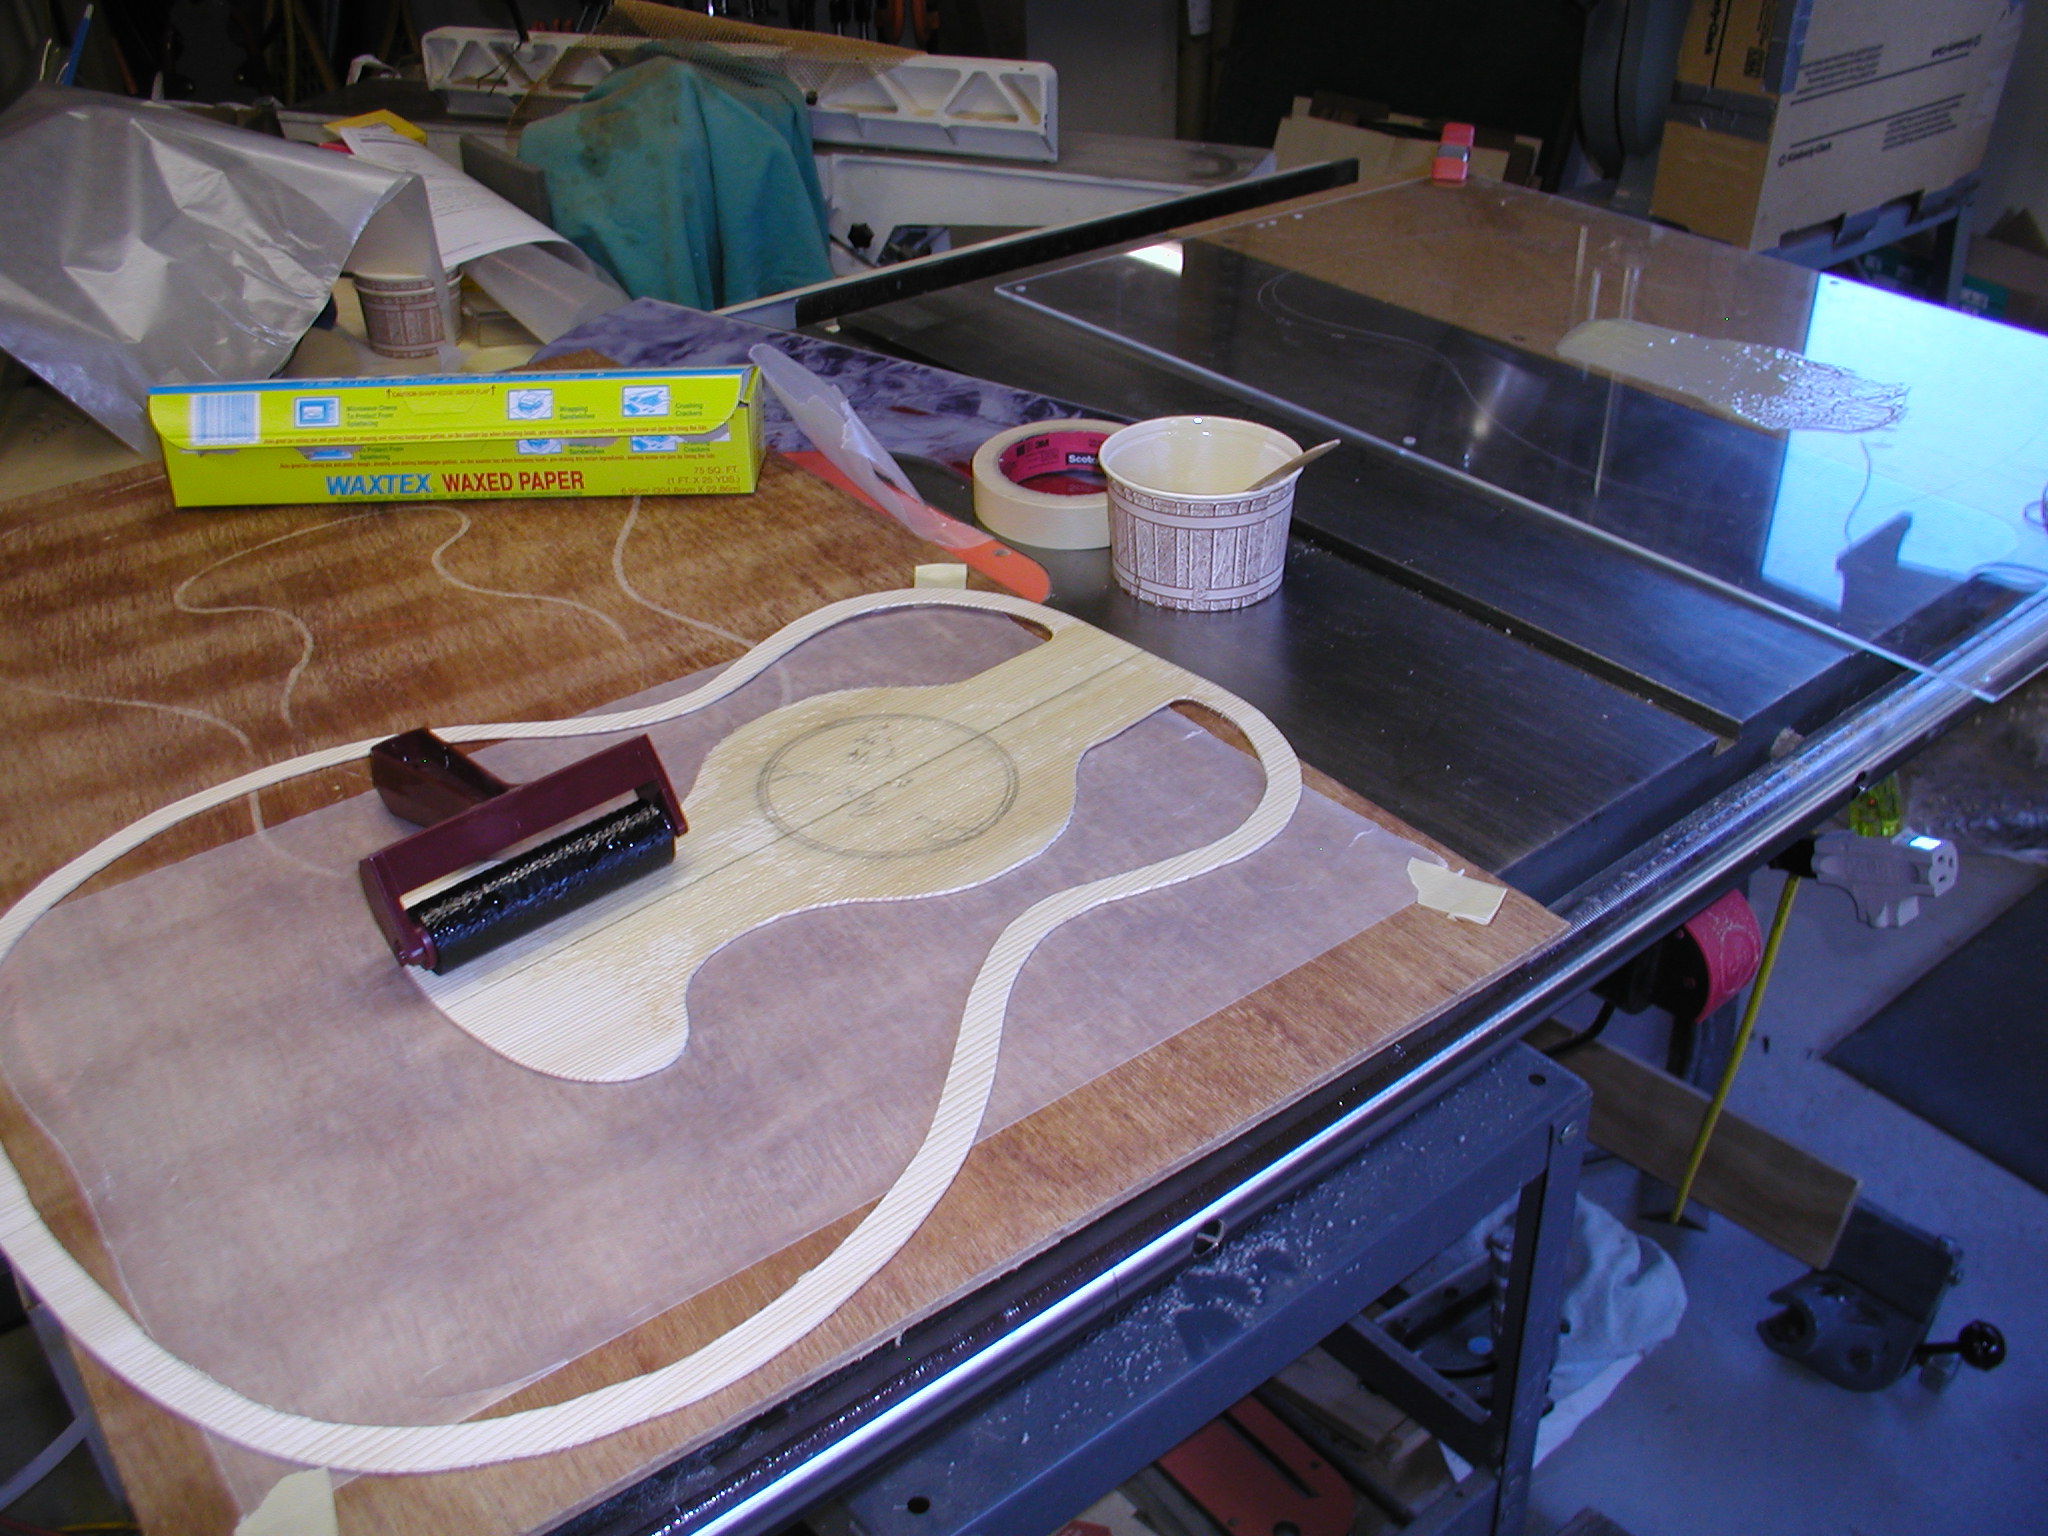
Now it is necessary to make space in the center piece for the Nomex®. First I take the 0.060" thick center piece and trace the profile of where it will be cut out.
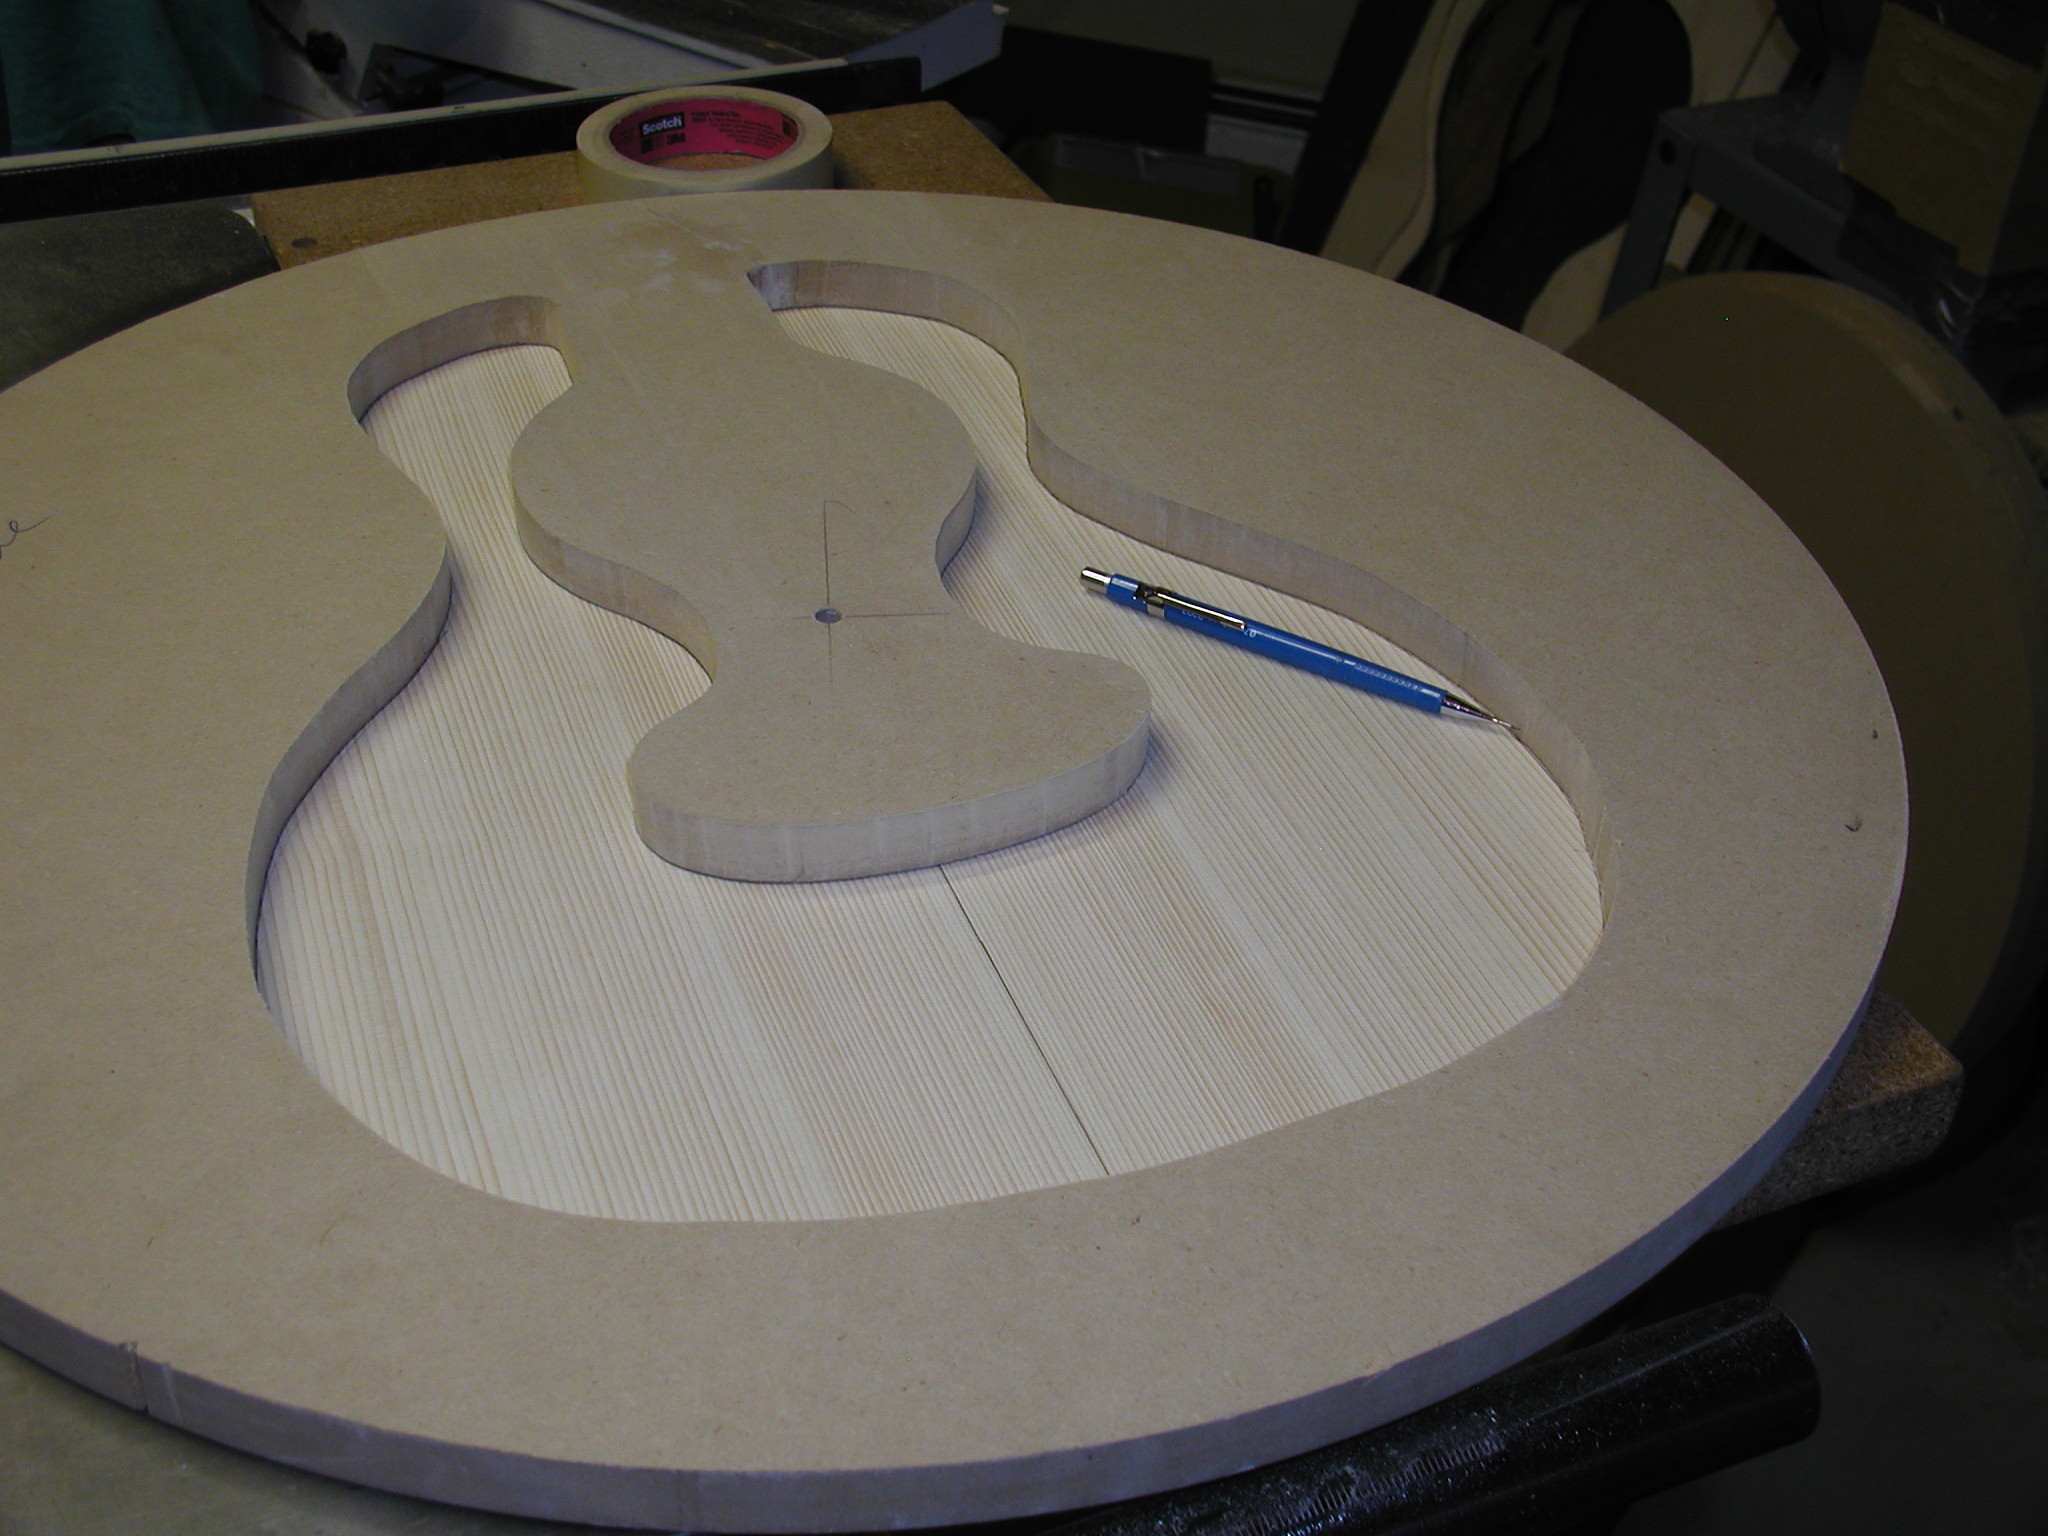
This isn't strictly necessary but I do it to make sure I am located correctly should I need to remove and replace the center from the form.
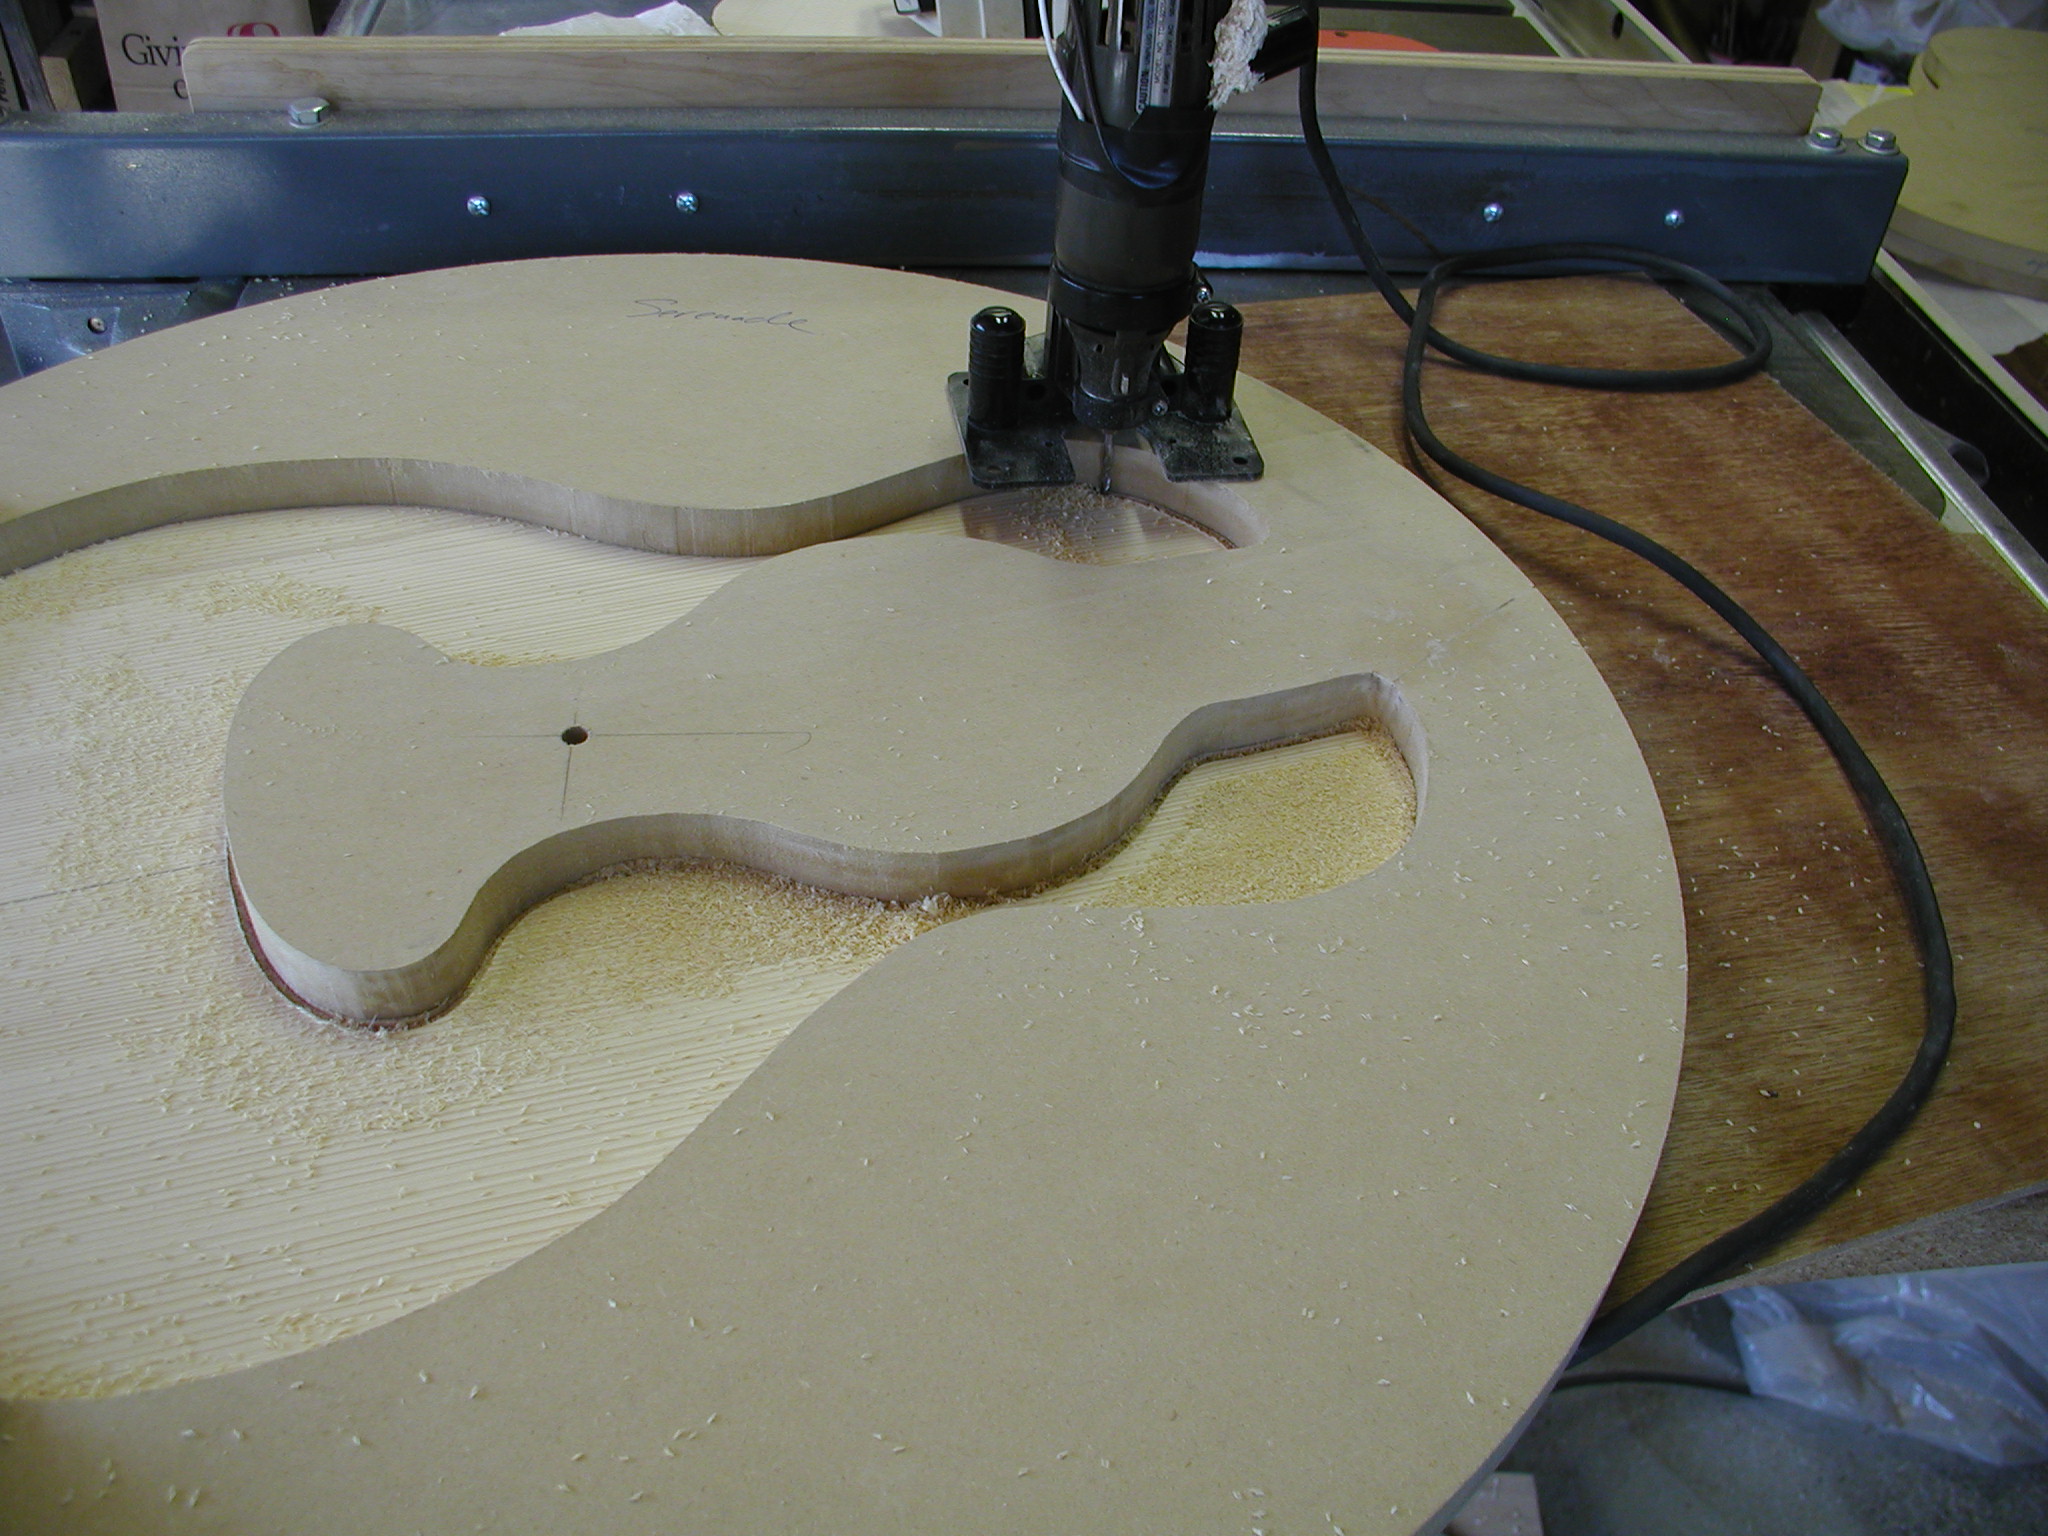
Then I use a 1/8" milling bit in a Dremel tool to follow the sides of the form. The sides of the bit are smooth so it can be brought right up to the MDF form without damage. The result is a "rim" that it 1/2" wide around the edges and a center hard-part core that supports the bridge and sound hole area.
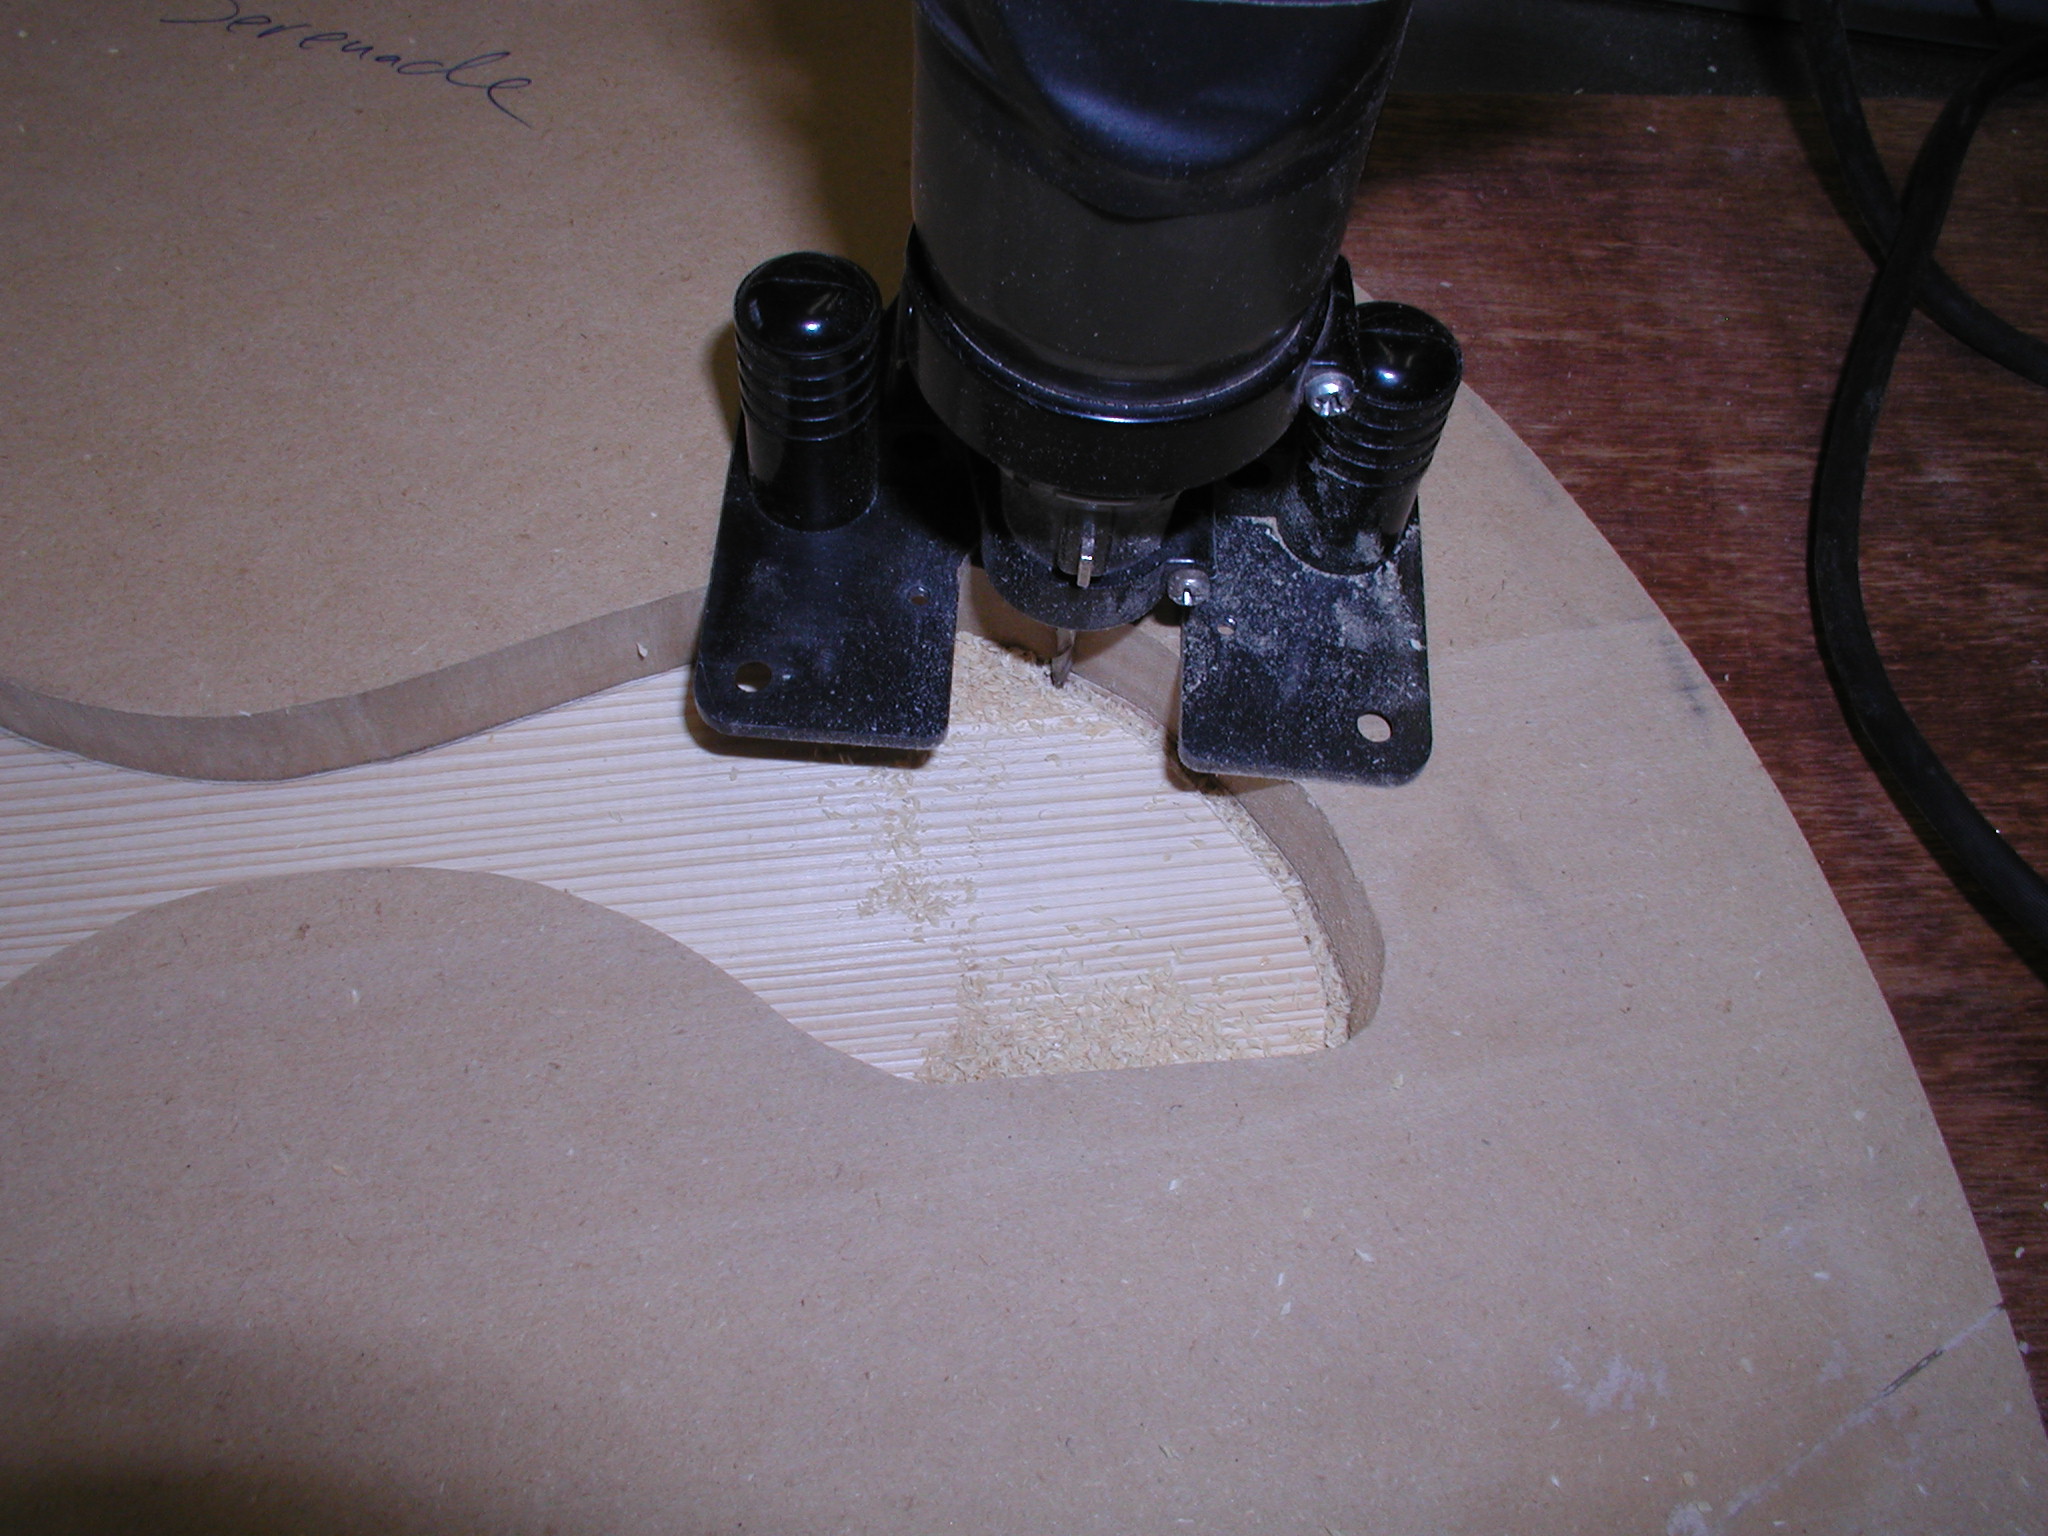
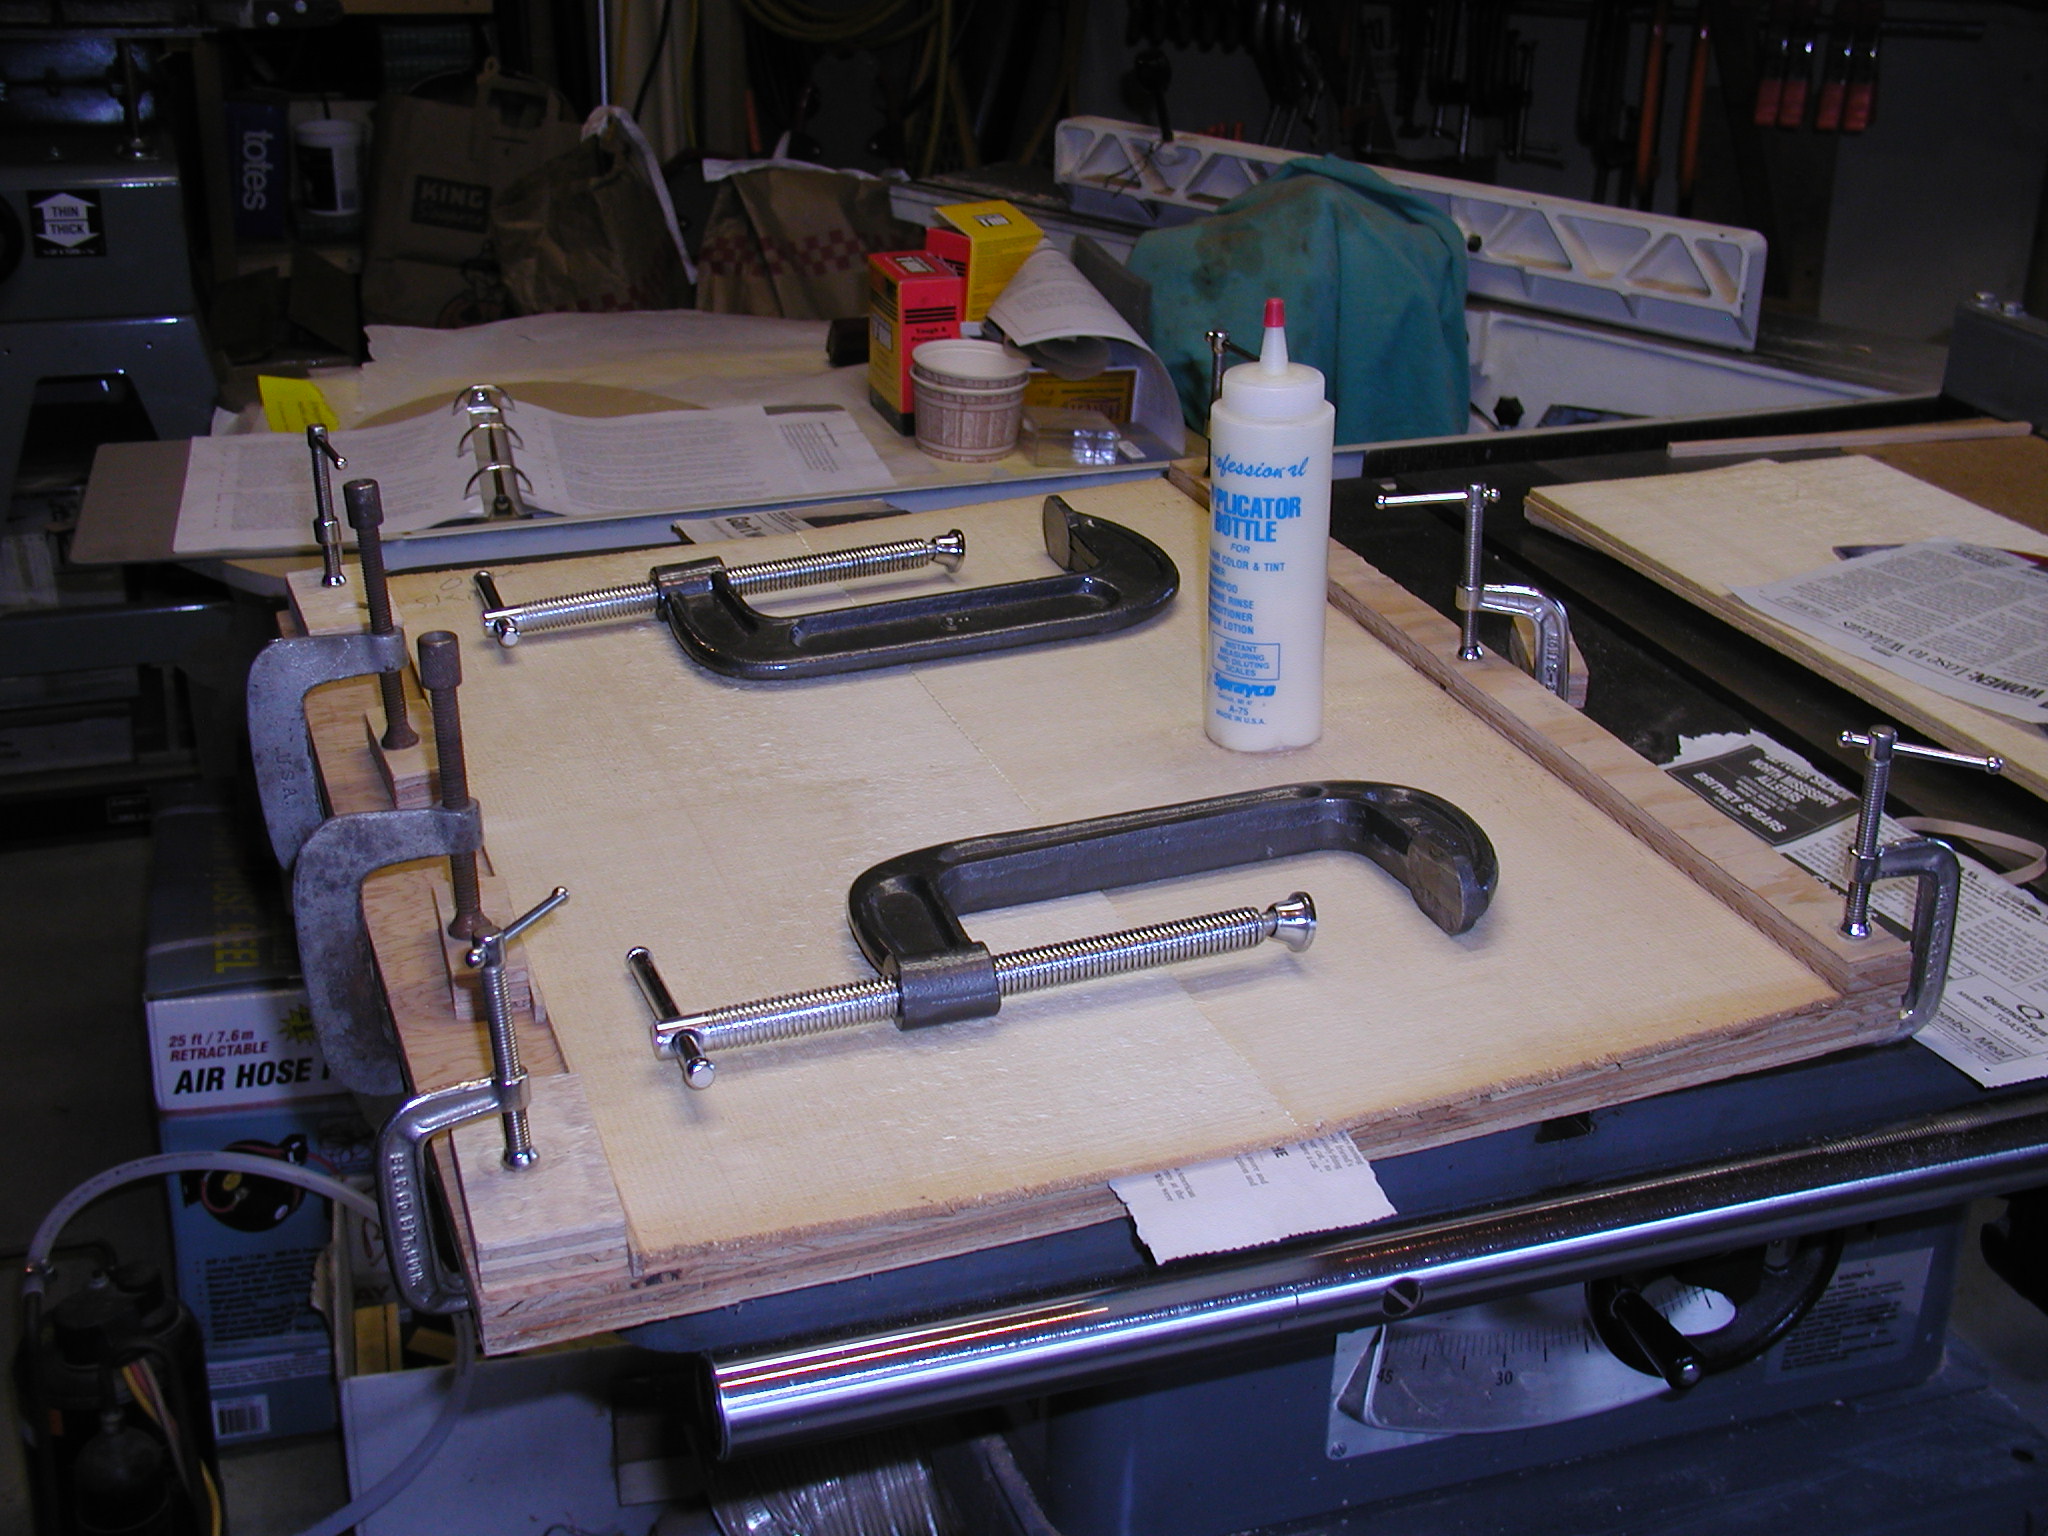
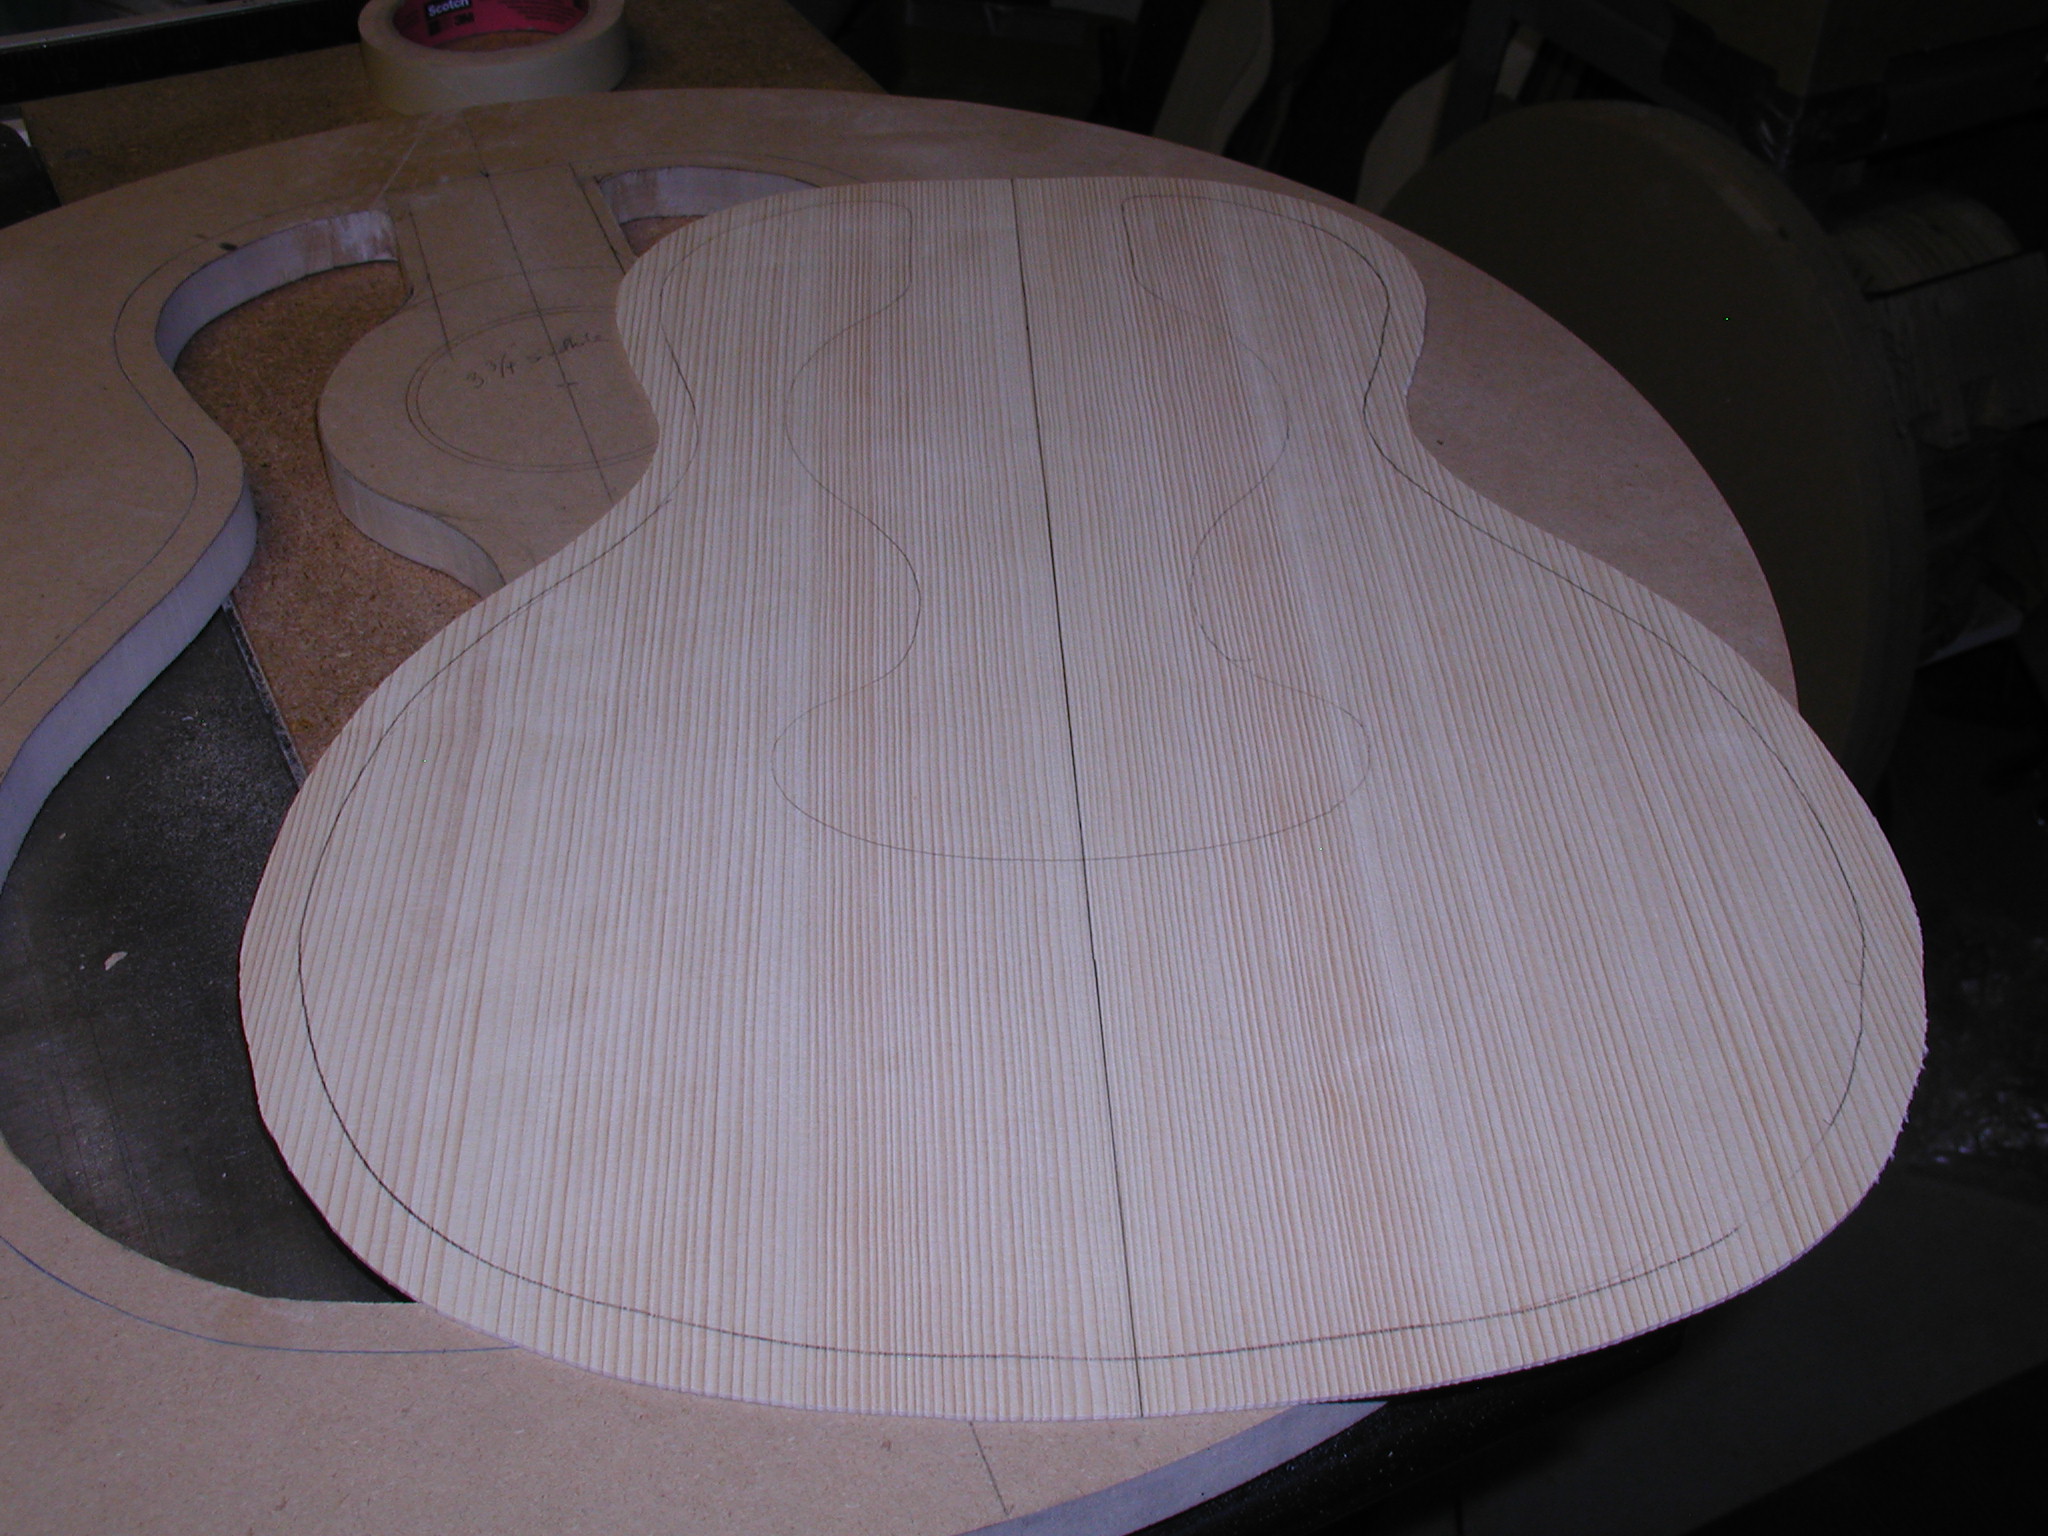
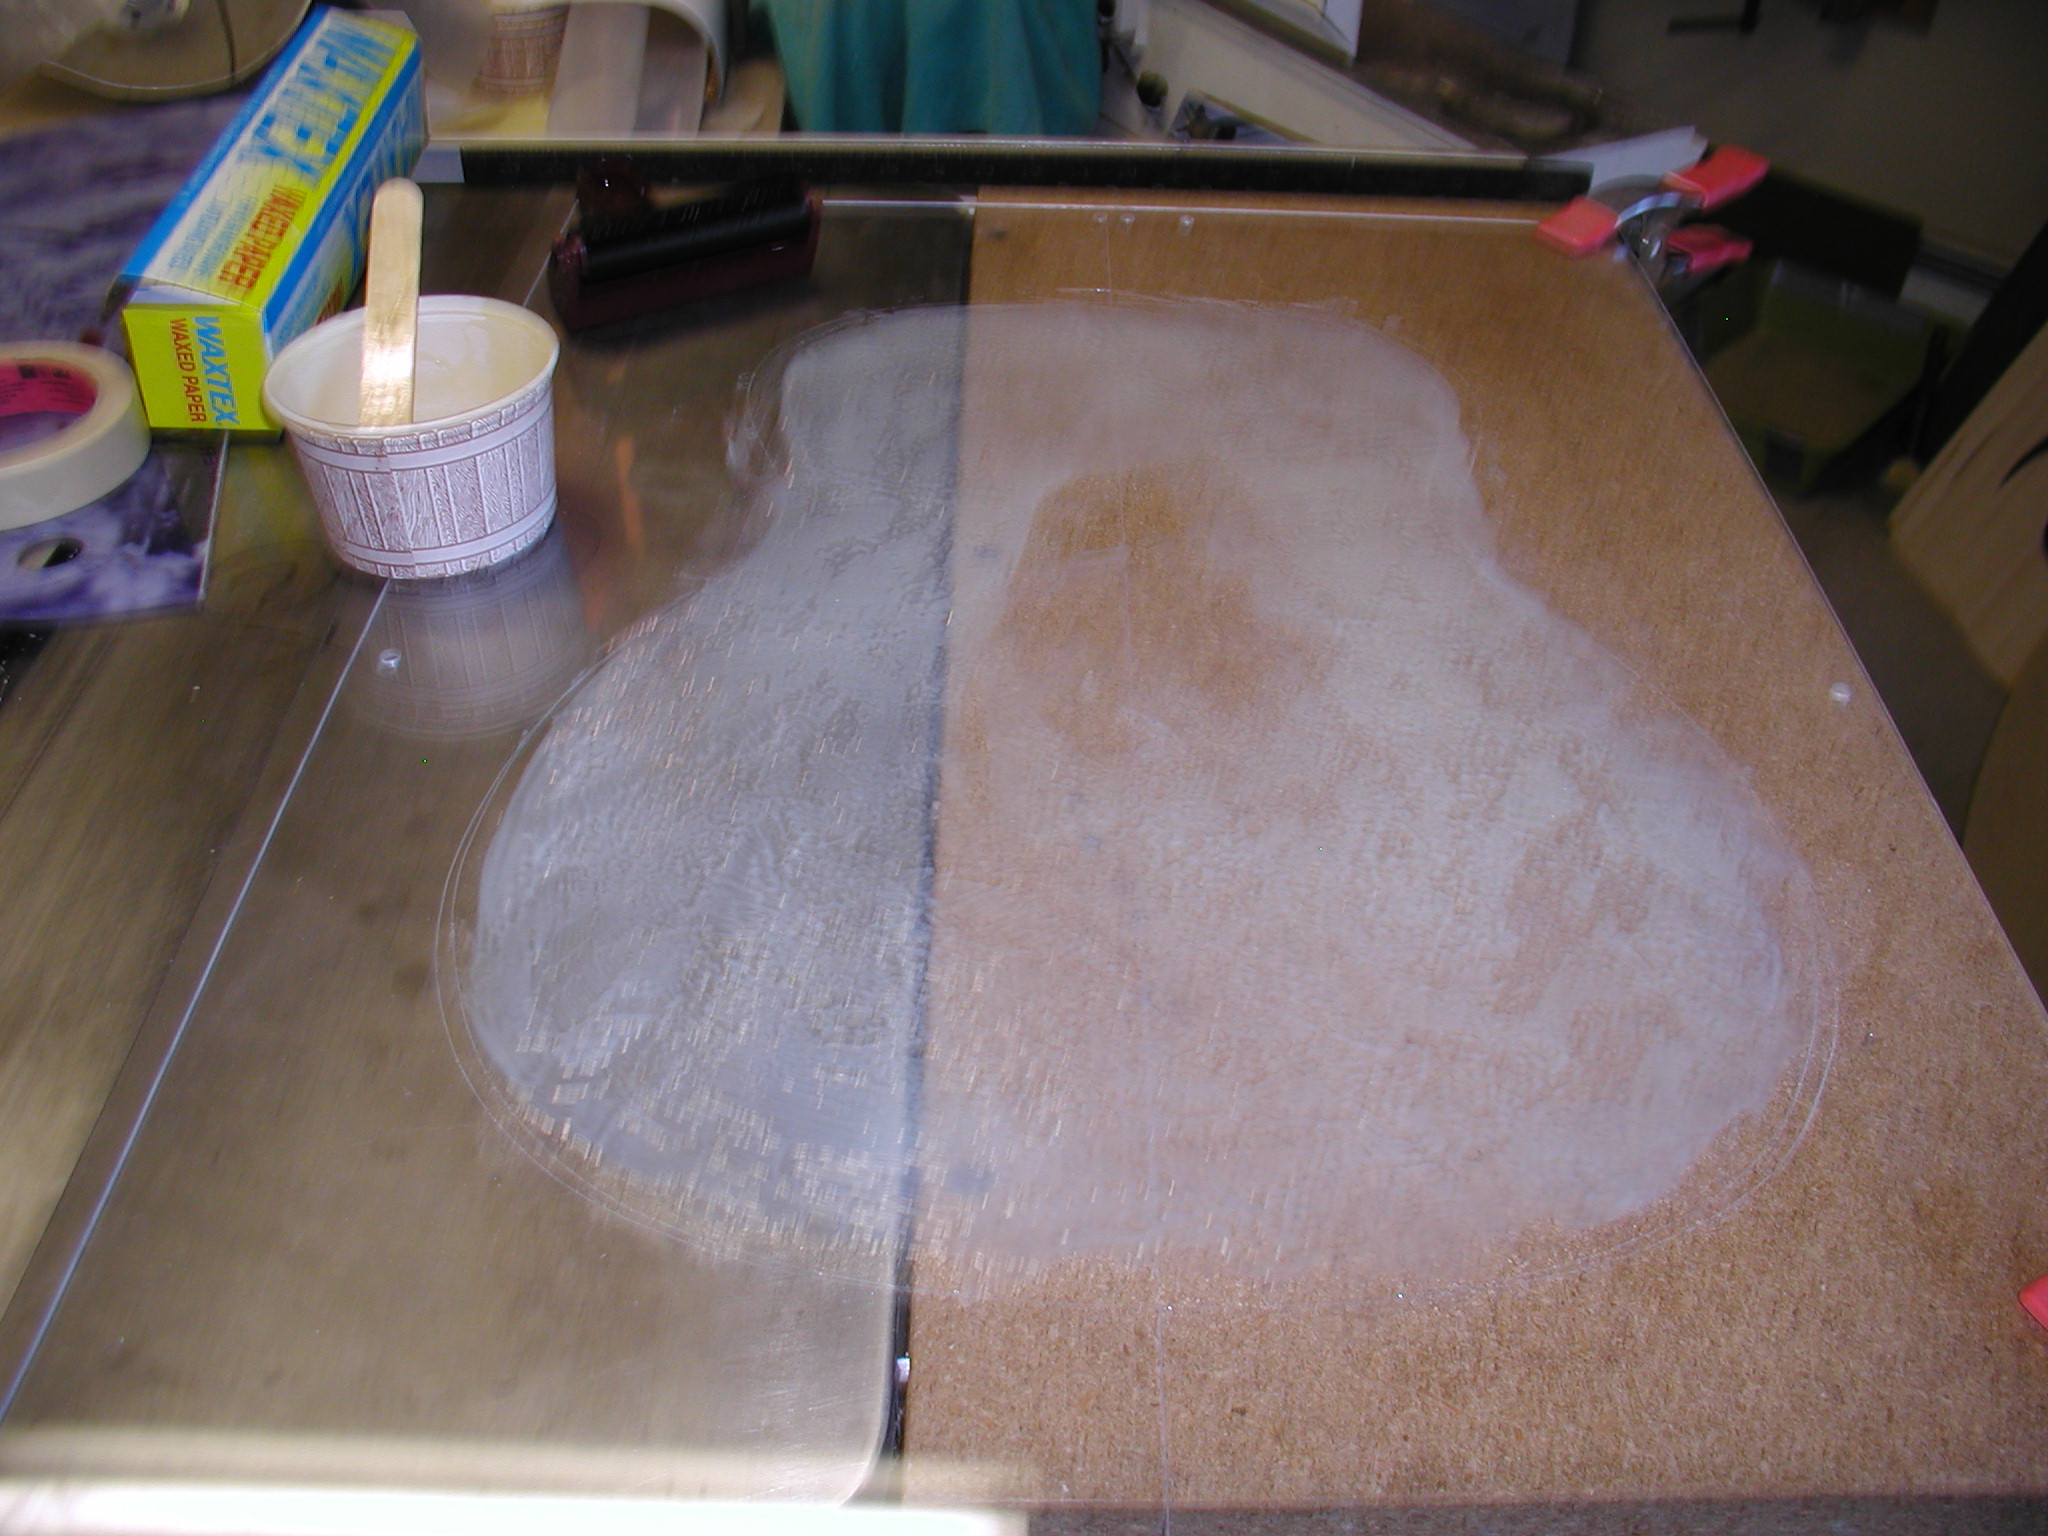
I need to also describe here an alternate method that uses only two tops rather than three. As before there is an interior skin of 0.040" thick, but then there is a combined center and face skin that is 0.100" thick. Instead of cutting out the center piece as we did above, instead the 0.100" piece is placed in the form and then fly cut with a larger diameter router bit using a laminate trimmer. This routs away a cavity that is 0.060" deep.
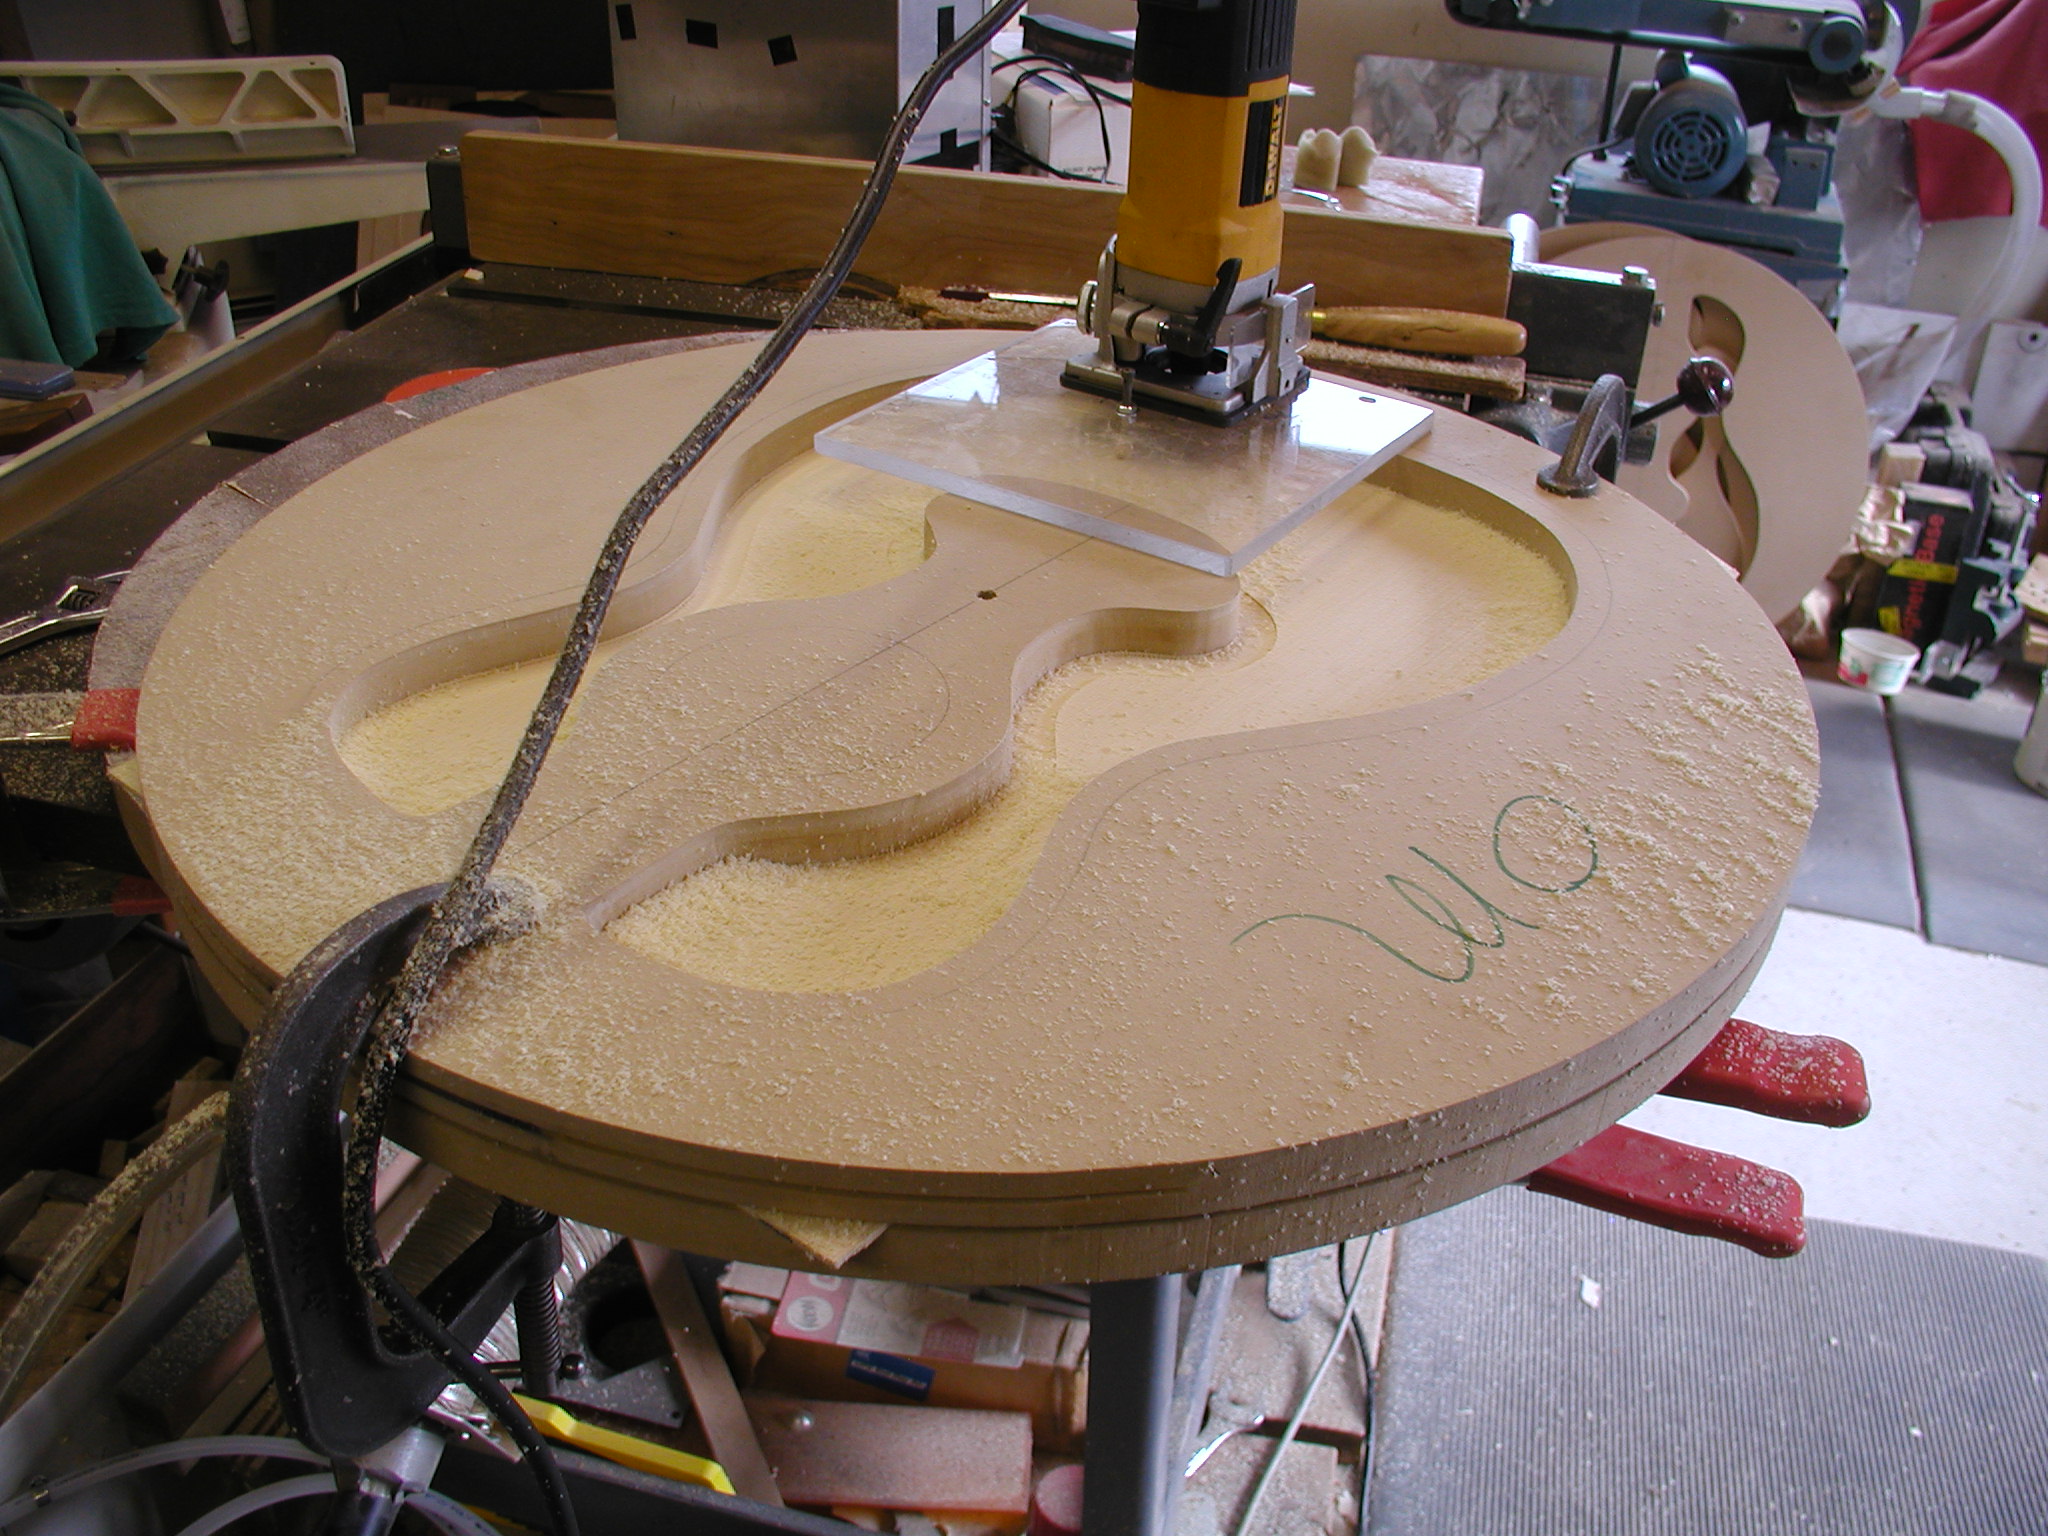
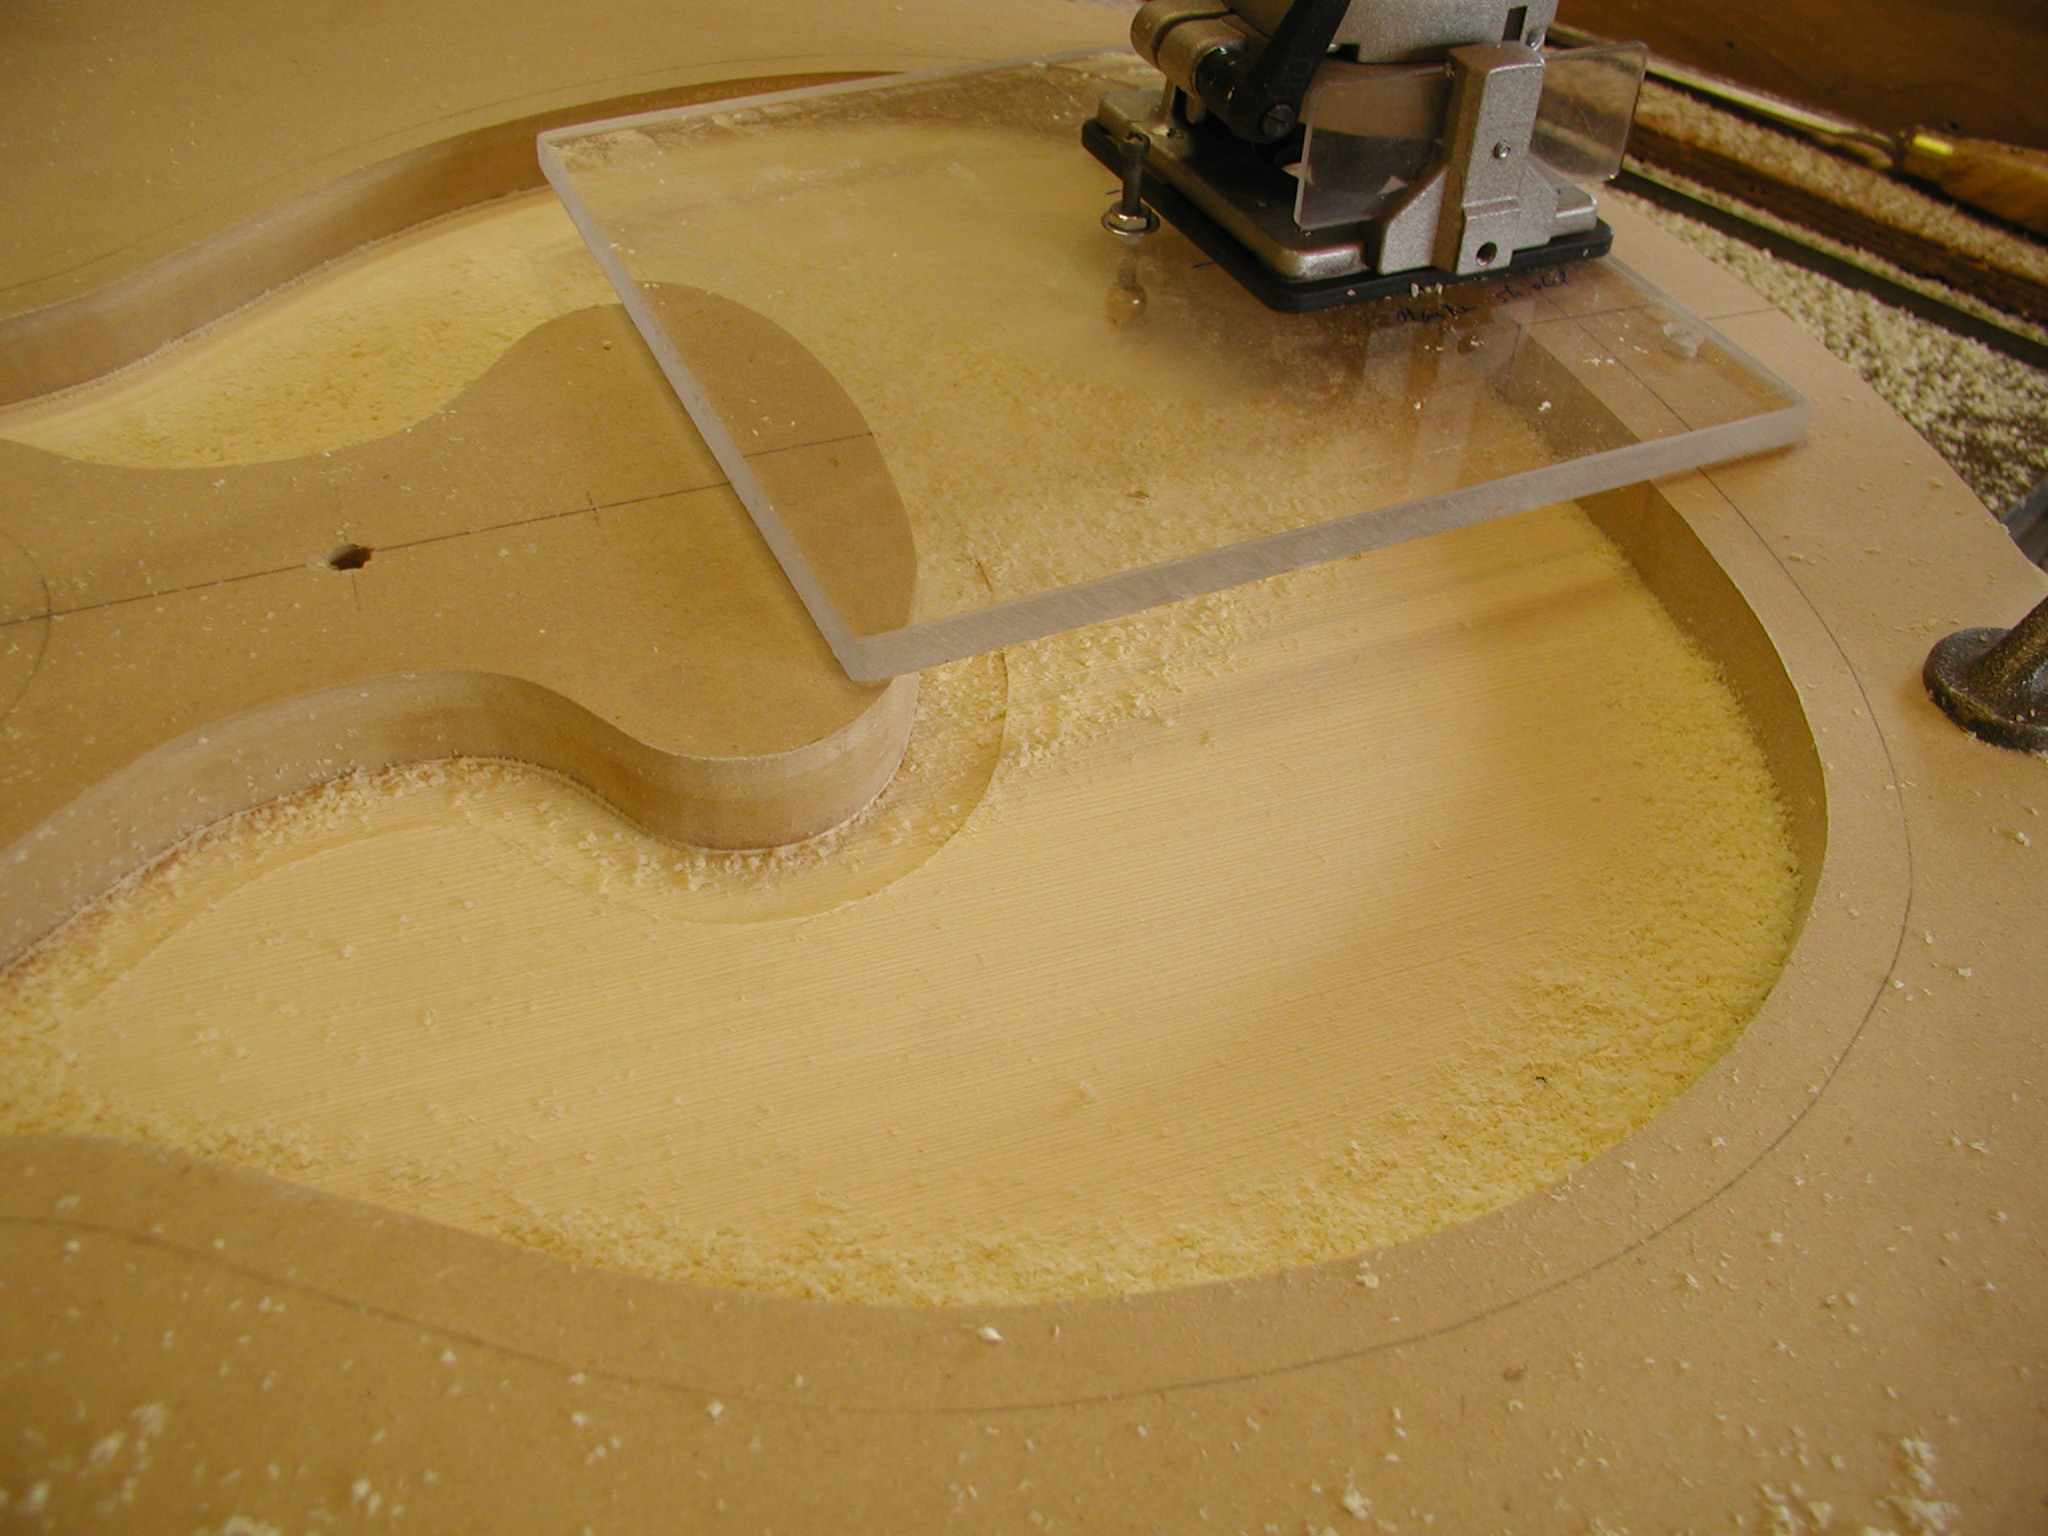
Initially this seems like a good way to go, but it is tricky. Notice in the second photo that there is a screw with a ball end in the center of the Plexiglas that is holding down the spruce. The fly cutter tends to create a vacuum that wants to suck the top up and let the milling bit cut right through the top. In addition, not seen in the photo, is a baseboard with slots in it that acts as a vacuum clamping jig on the whole spruce piece to hold it down. Now that I have the process worked out, the two piece method is what I use by default. I also tend to rout it as the inside/middle piece combo rather than outside/middle. That also allows me to make the top skin to about 0.050" to allow for some final sanding of dings and such at final finishing time.
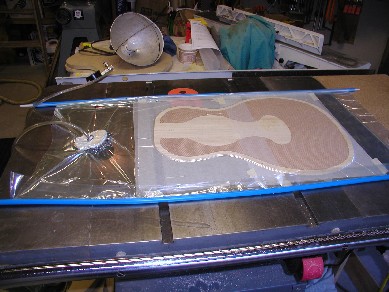
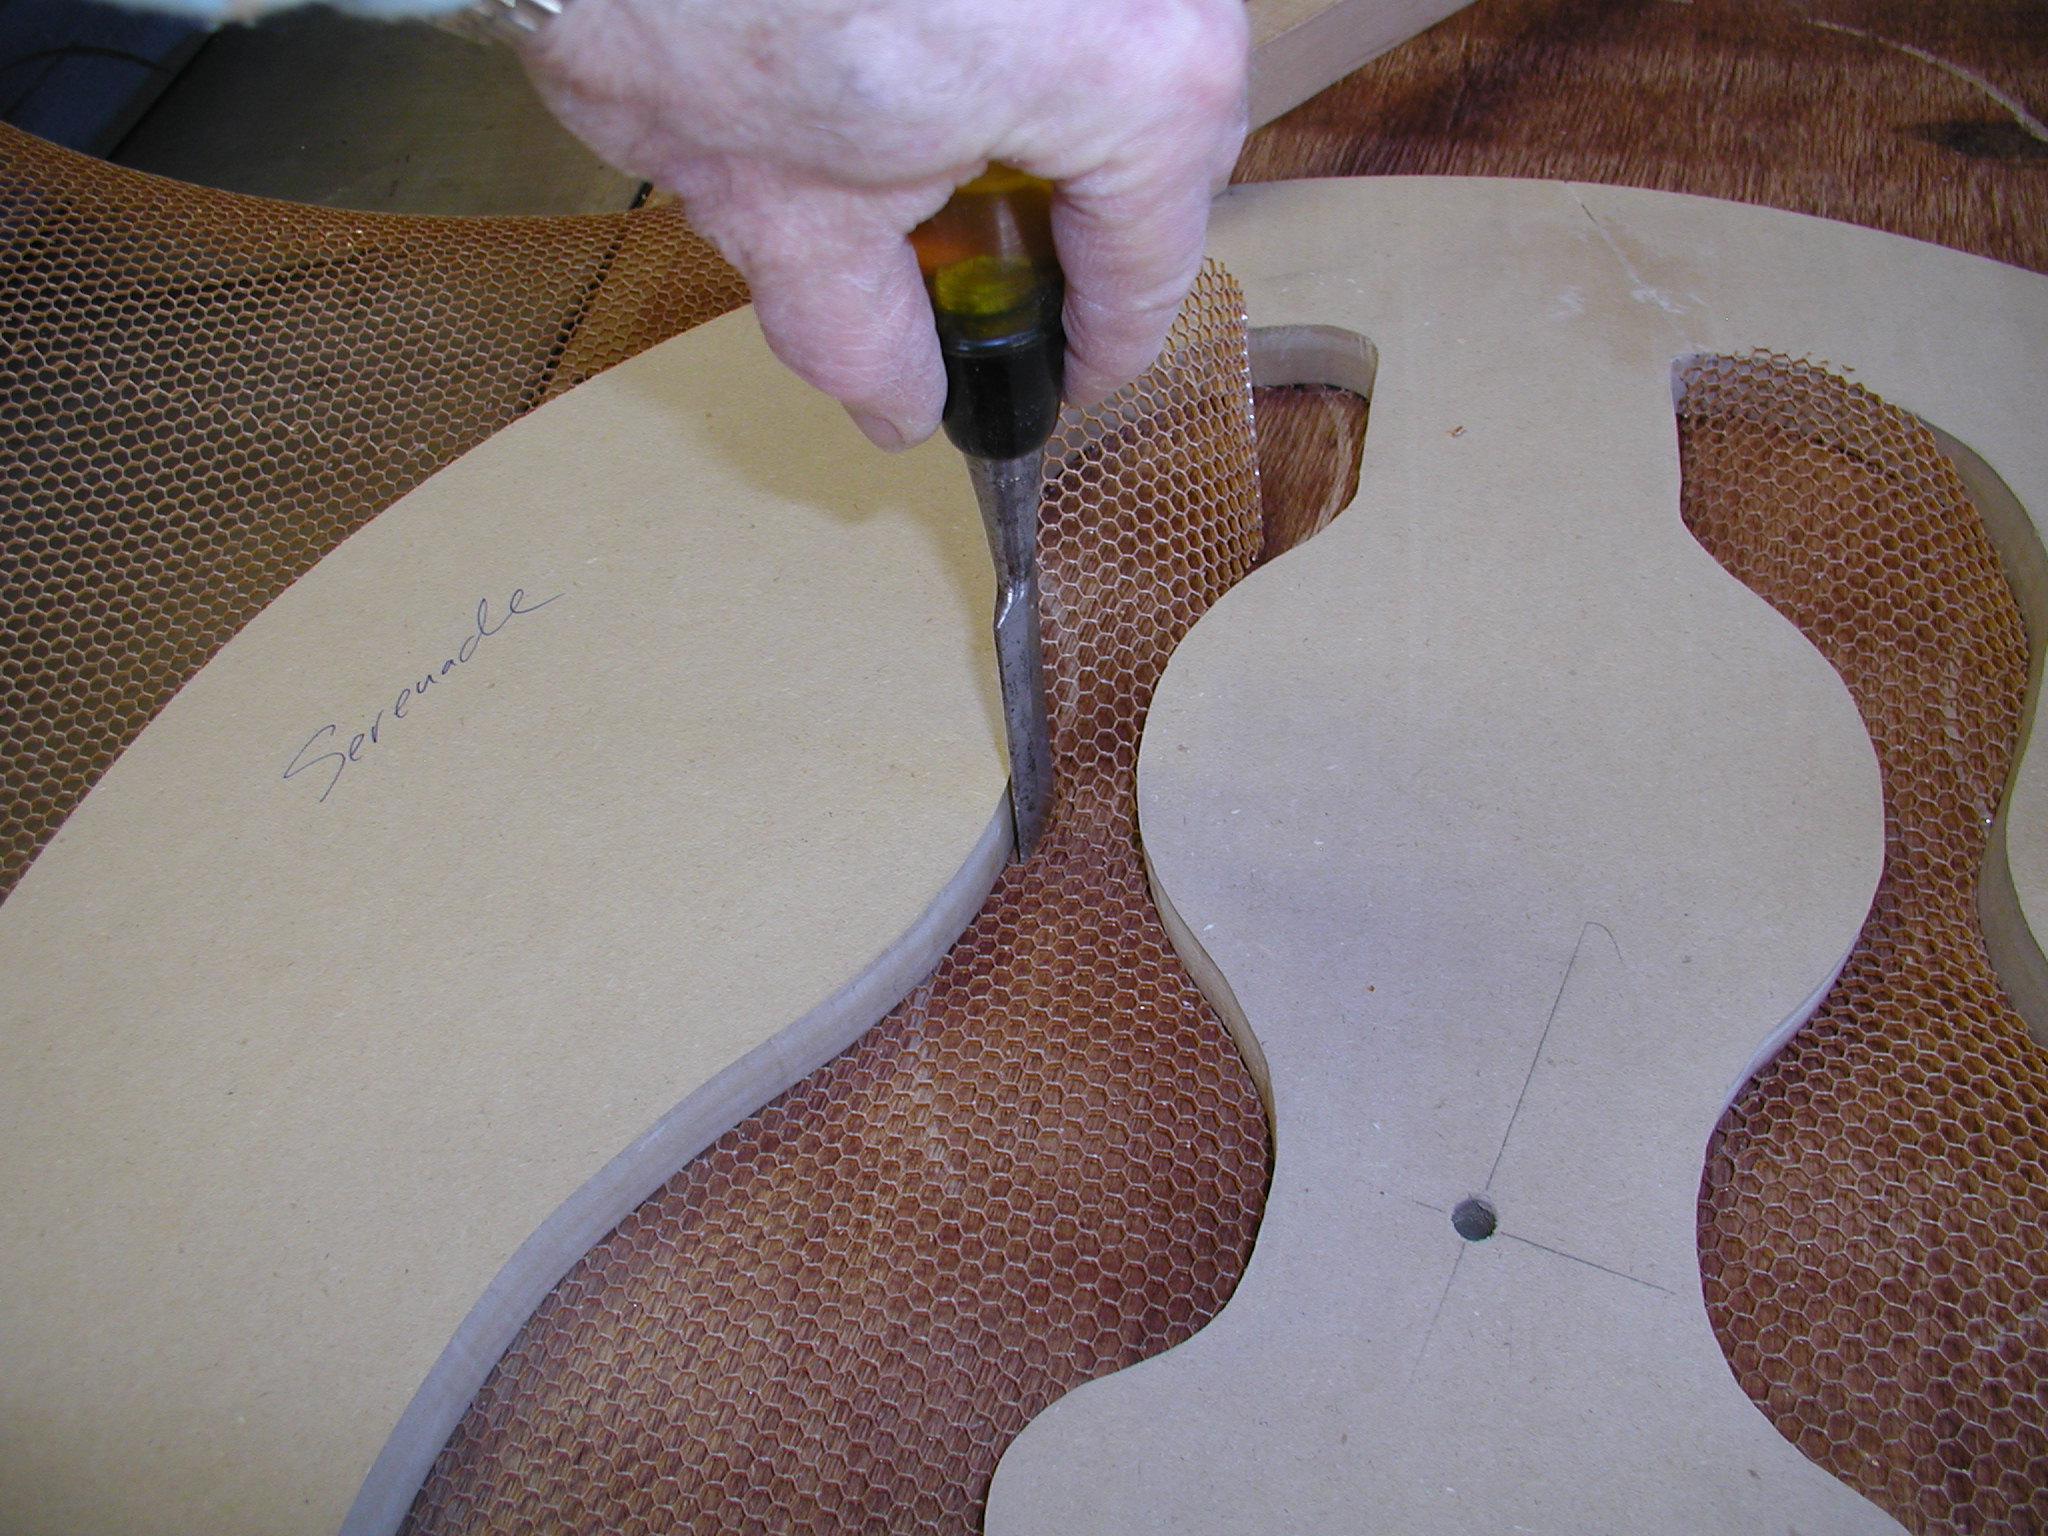
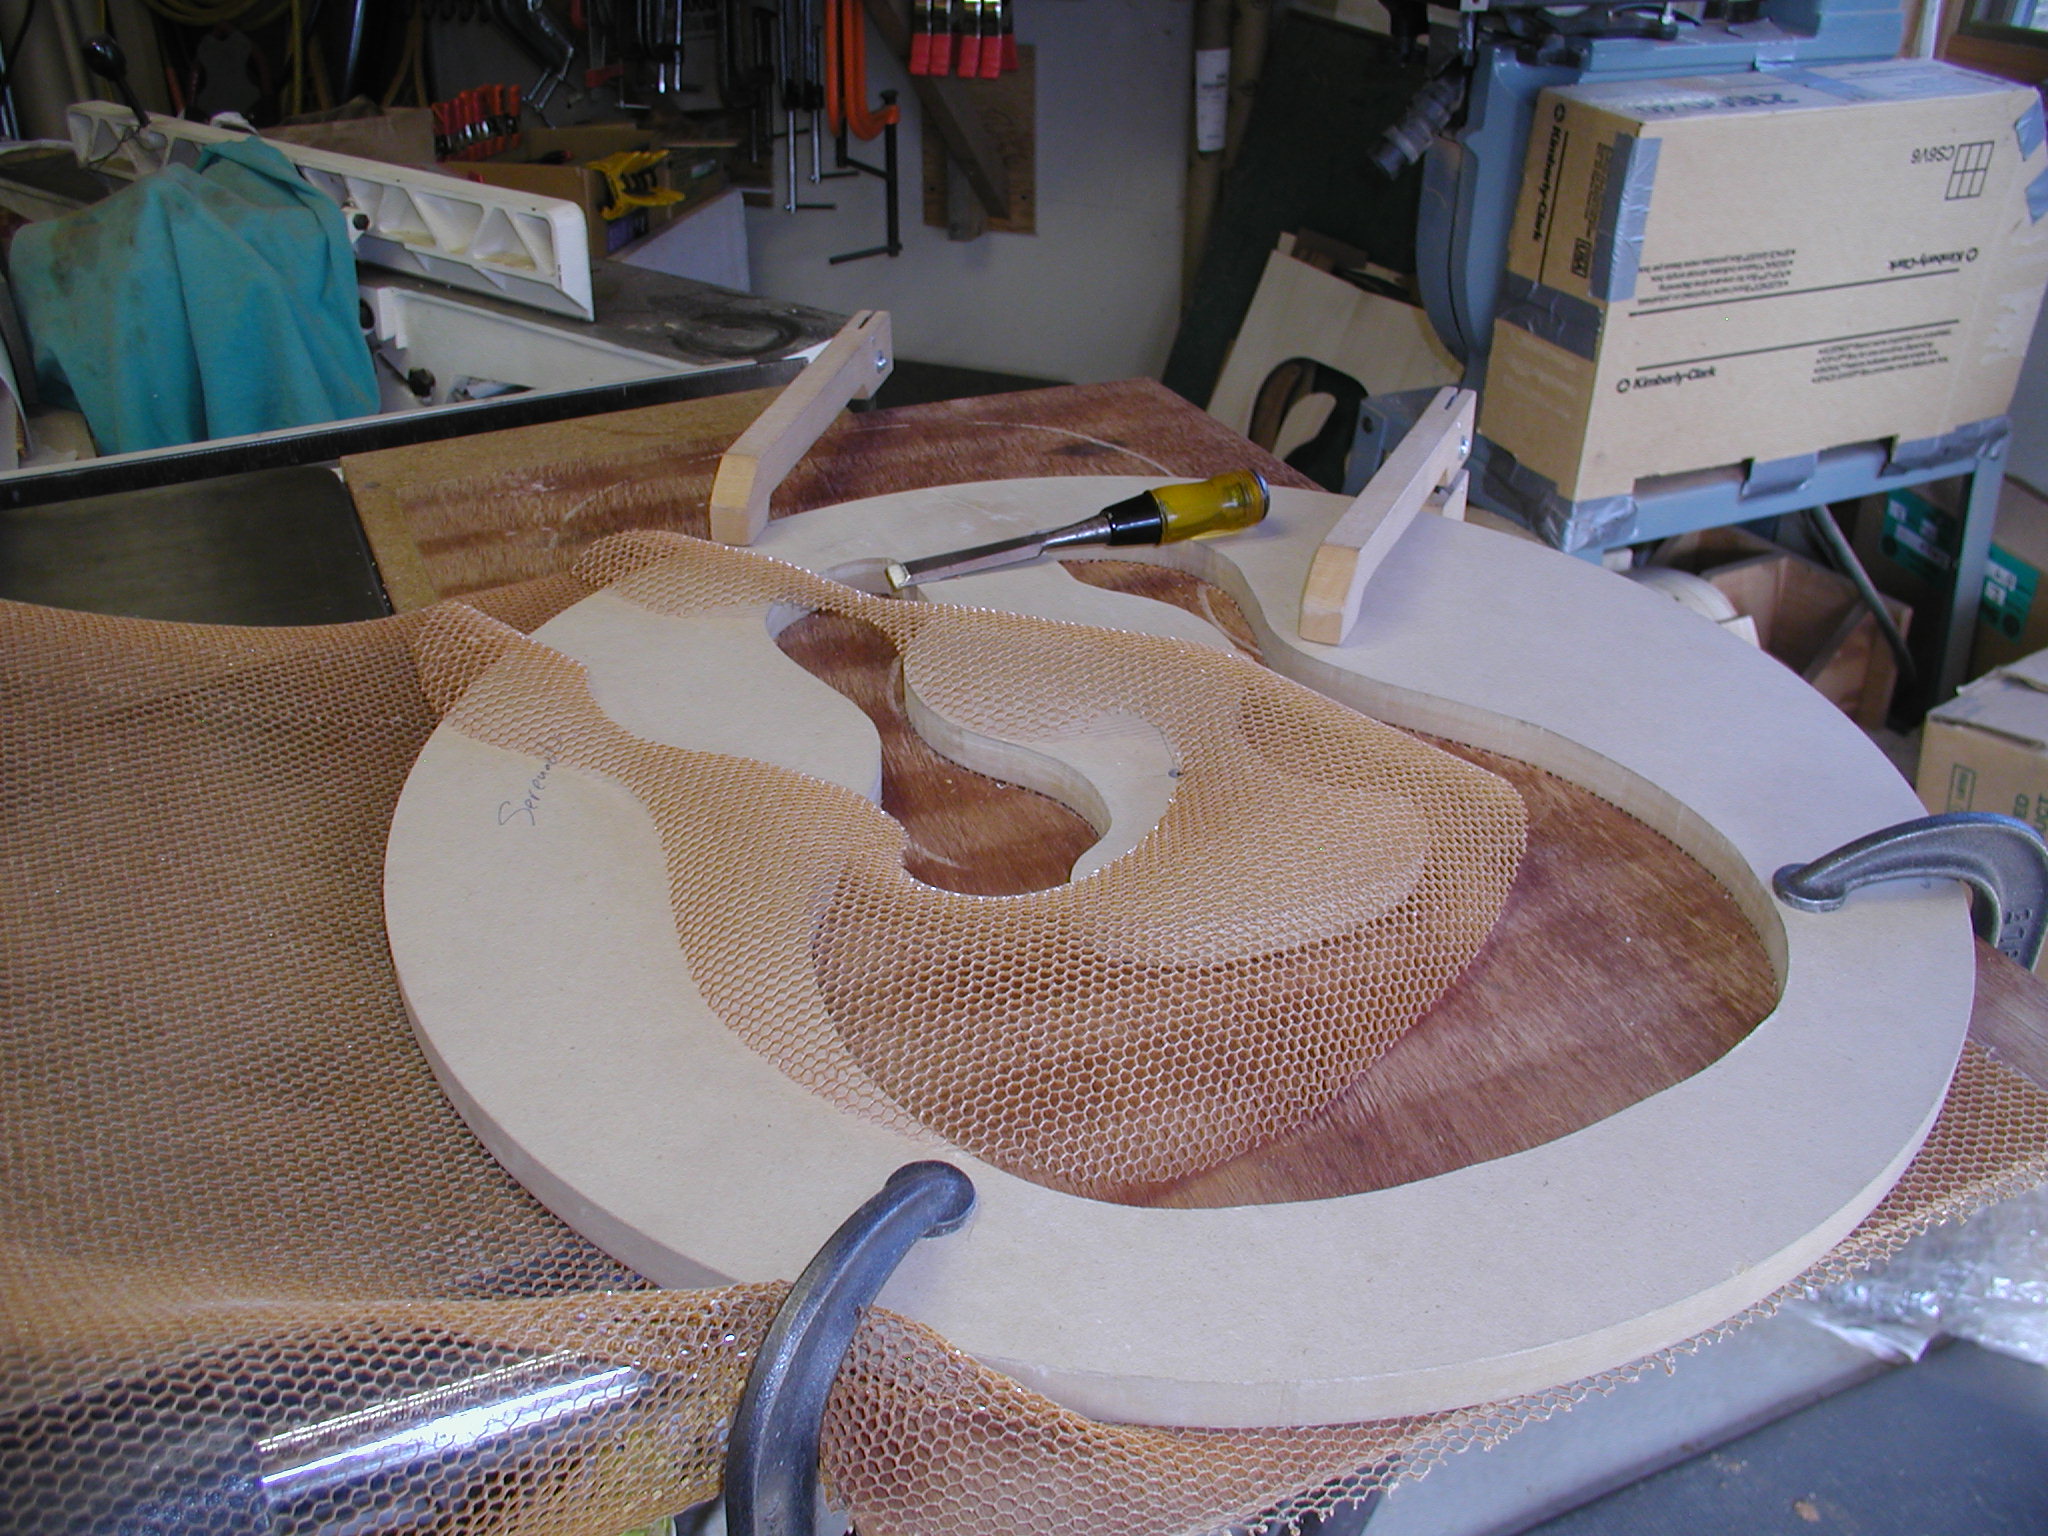
Great, now what? The next step is to make a piece of Nomex® to fit into the cavity. I use the same form but lay it over the Nomex® as a pattern for the cutting. One can cut it with an Exacto knife but it tends to tear sometimes so I just used a sharp chisel and walked it around the edges. Out comes our insert piece.
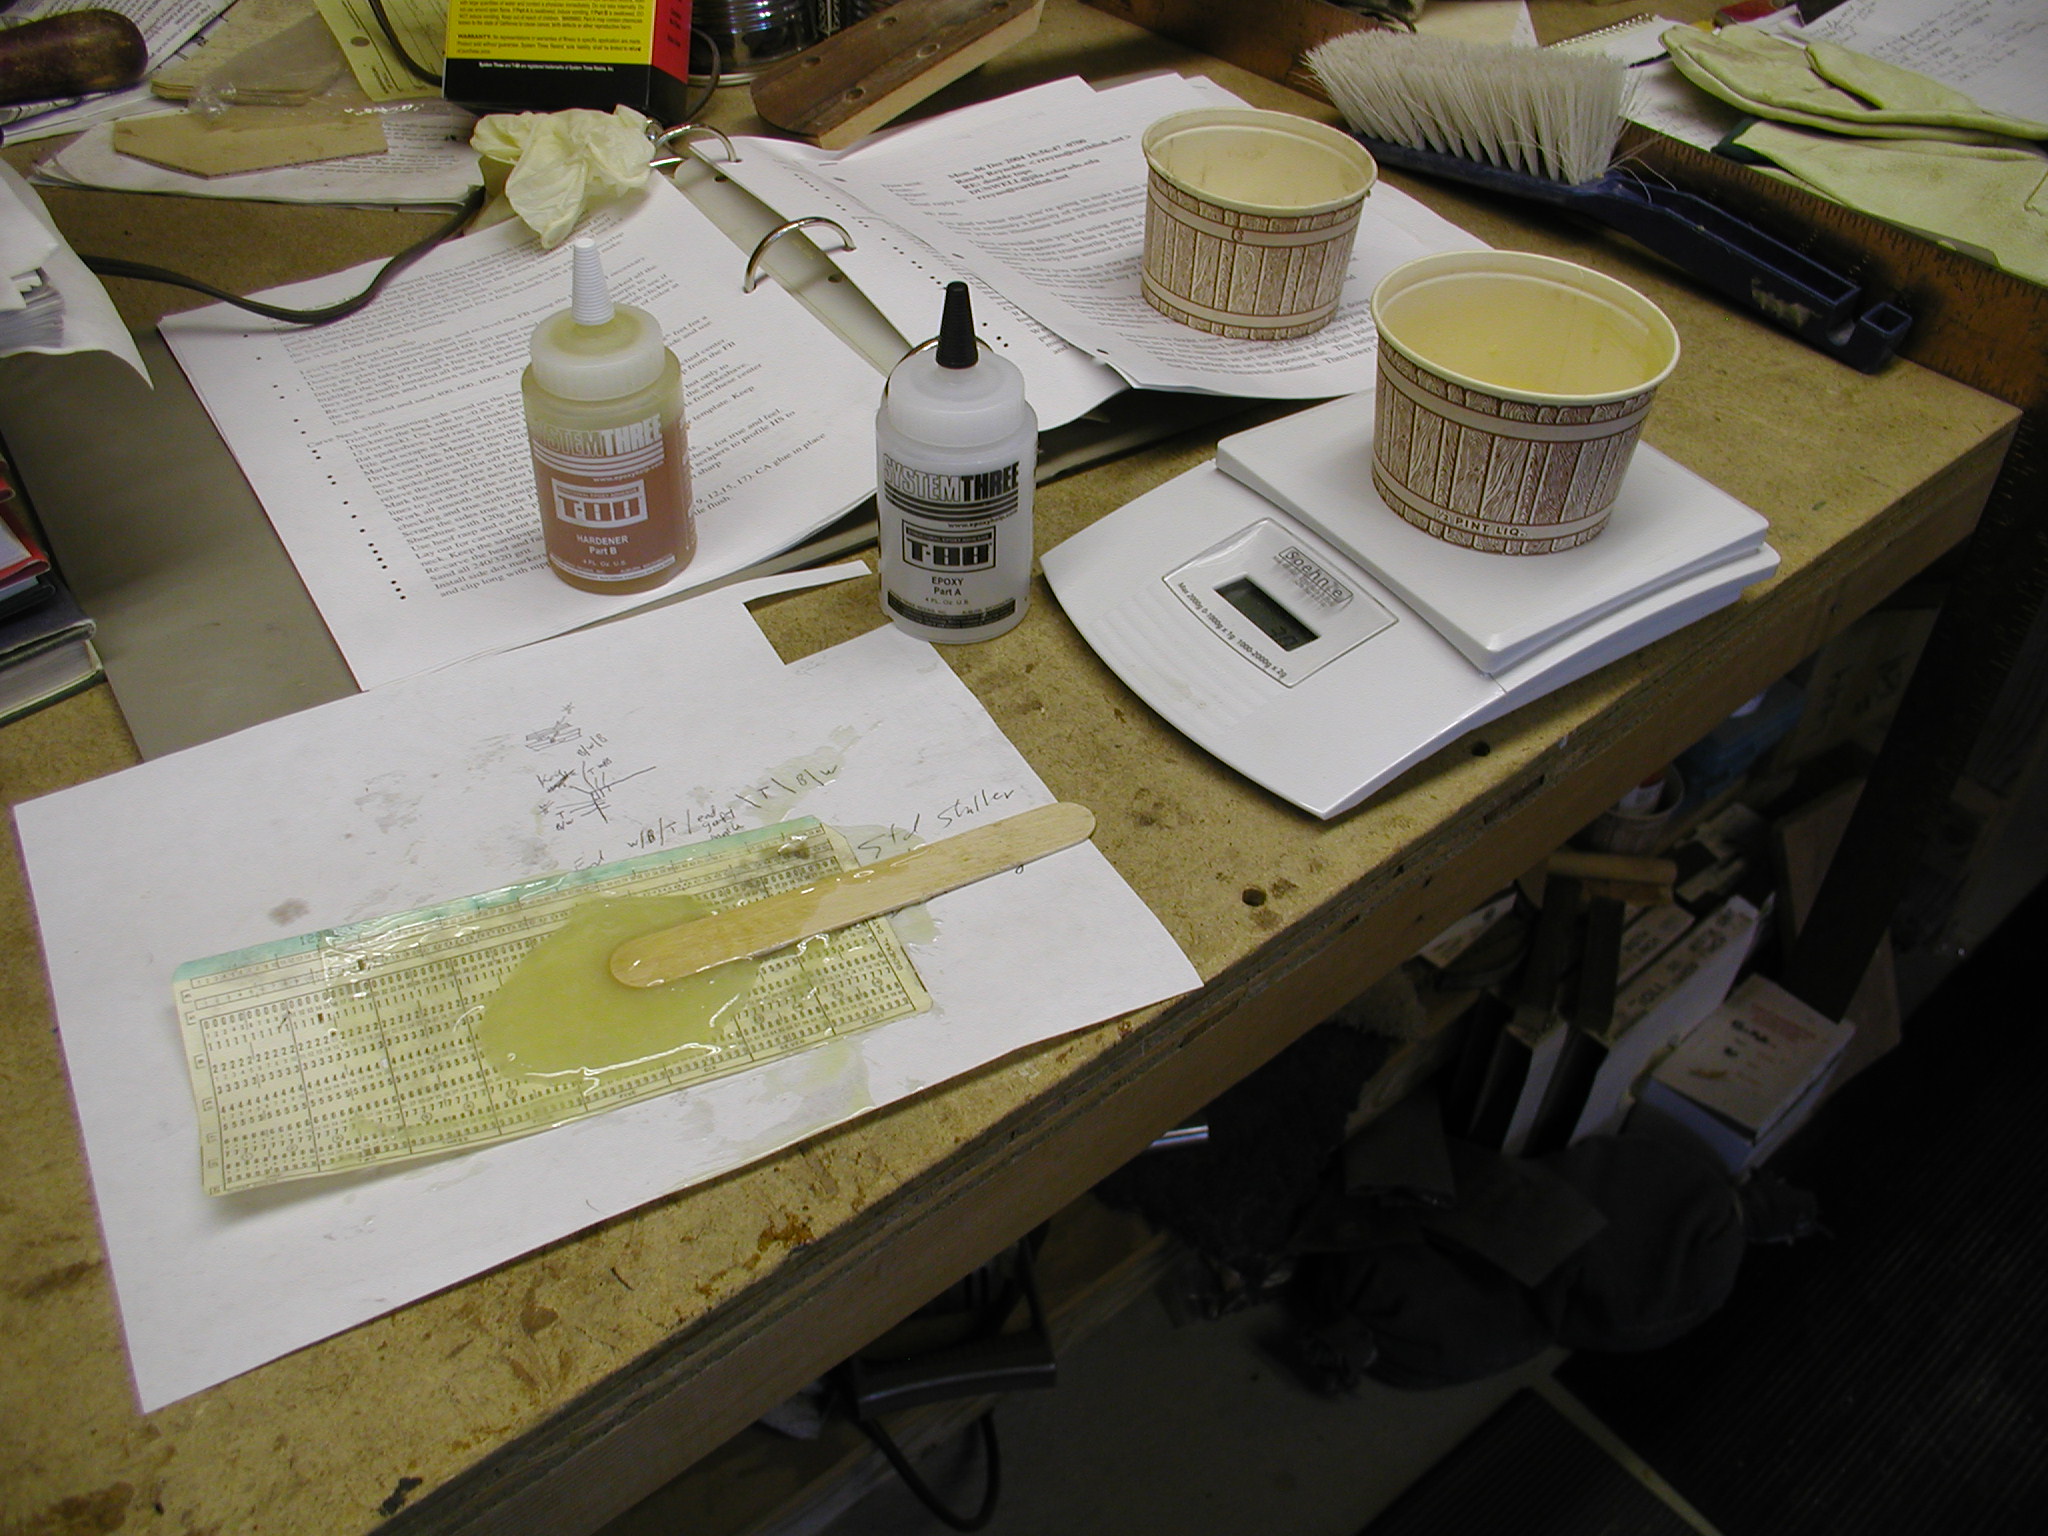
At this point we have all the pieces, now they just need to be combined. I am using an epoxy from System Three that was recommended to me by a classical builder but polyurethane glues are also used for double tops. Since we have gone to all this trouble to remove weight in the top we don't want to now goober great globs of glue on. All that is needed is just enough to glue the small vertical pieces of the Nomex® to the skins and enough left over to form small fillets along the joint. The small fillet adds great strength to the bond in the same way it does on a weld joint in metals. Through trial and error and communication with other builders the right amount of glue is determined for a given body size. I do this by weight. However epoxies are mixed by volume, so I have to mix some up, dump it in the cup and weigh it, mix more, etc. After a few tries you get a good feel for how much is about enough.
The glue up is done on a flat surface. One could do it in a hollow form to pre-stress the top, but I have been trying to treat it in the same way as a regular top until I have further data. We don't want to coat the face skin because we don't need any glue in the open spaces, just on the bond joint areas. So first some glue is applied with a rubber brayer to the center piece and rolled out evenly. This is then placed glue-down onto the face skin.
Hmmm, how do we get just a little glue onto the Nomex®? We use the brayer again and roll out the rest of the glue onto a Plexiglas palette that has the outline of the body style. If one uses sheets of self-adhesive protective plastic over the Plexiglas first, clean up is a non-issue. Then the piece of Nomex® is pressed down onto this glue surface and let stand for about 30 seconds. It is very tempting to want to wiggle it around or scoot it to make it pick up the glue, but that will make it end up with too much glue.


This is then lifted up and placed into the cavity formed by the center piece with the glue side down to the face skin. Notice that the base piece of Plexiglas is covered in waxed paper so it won't get glued down.

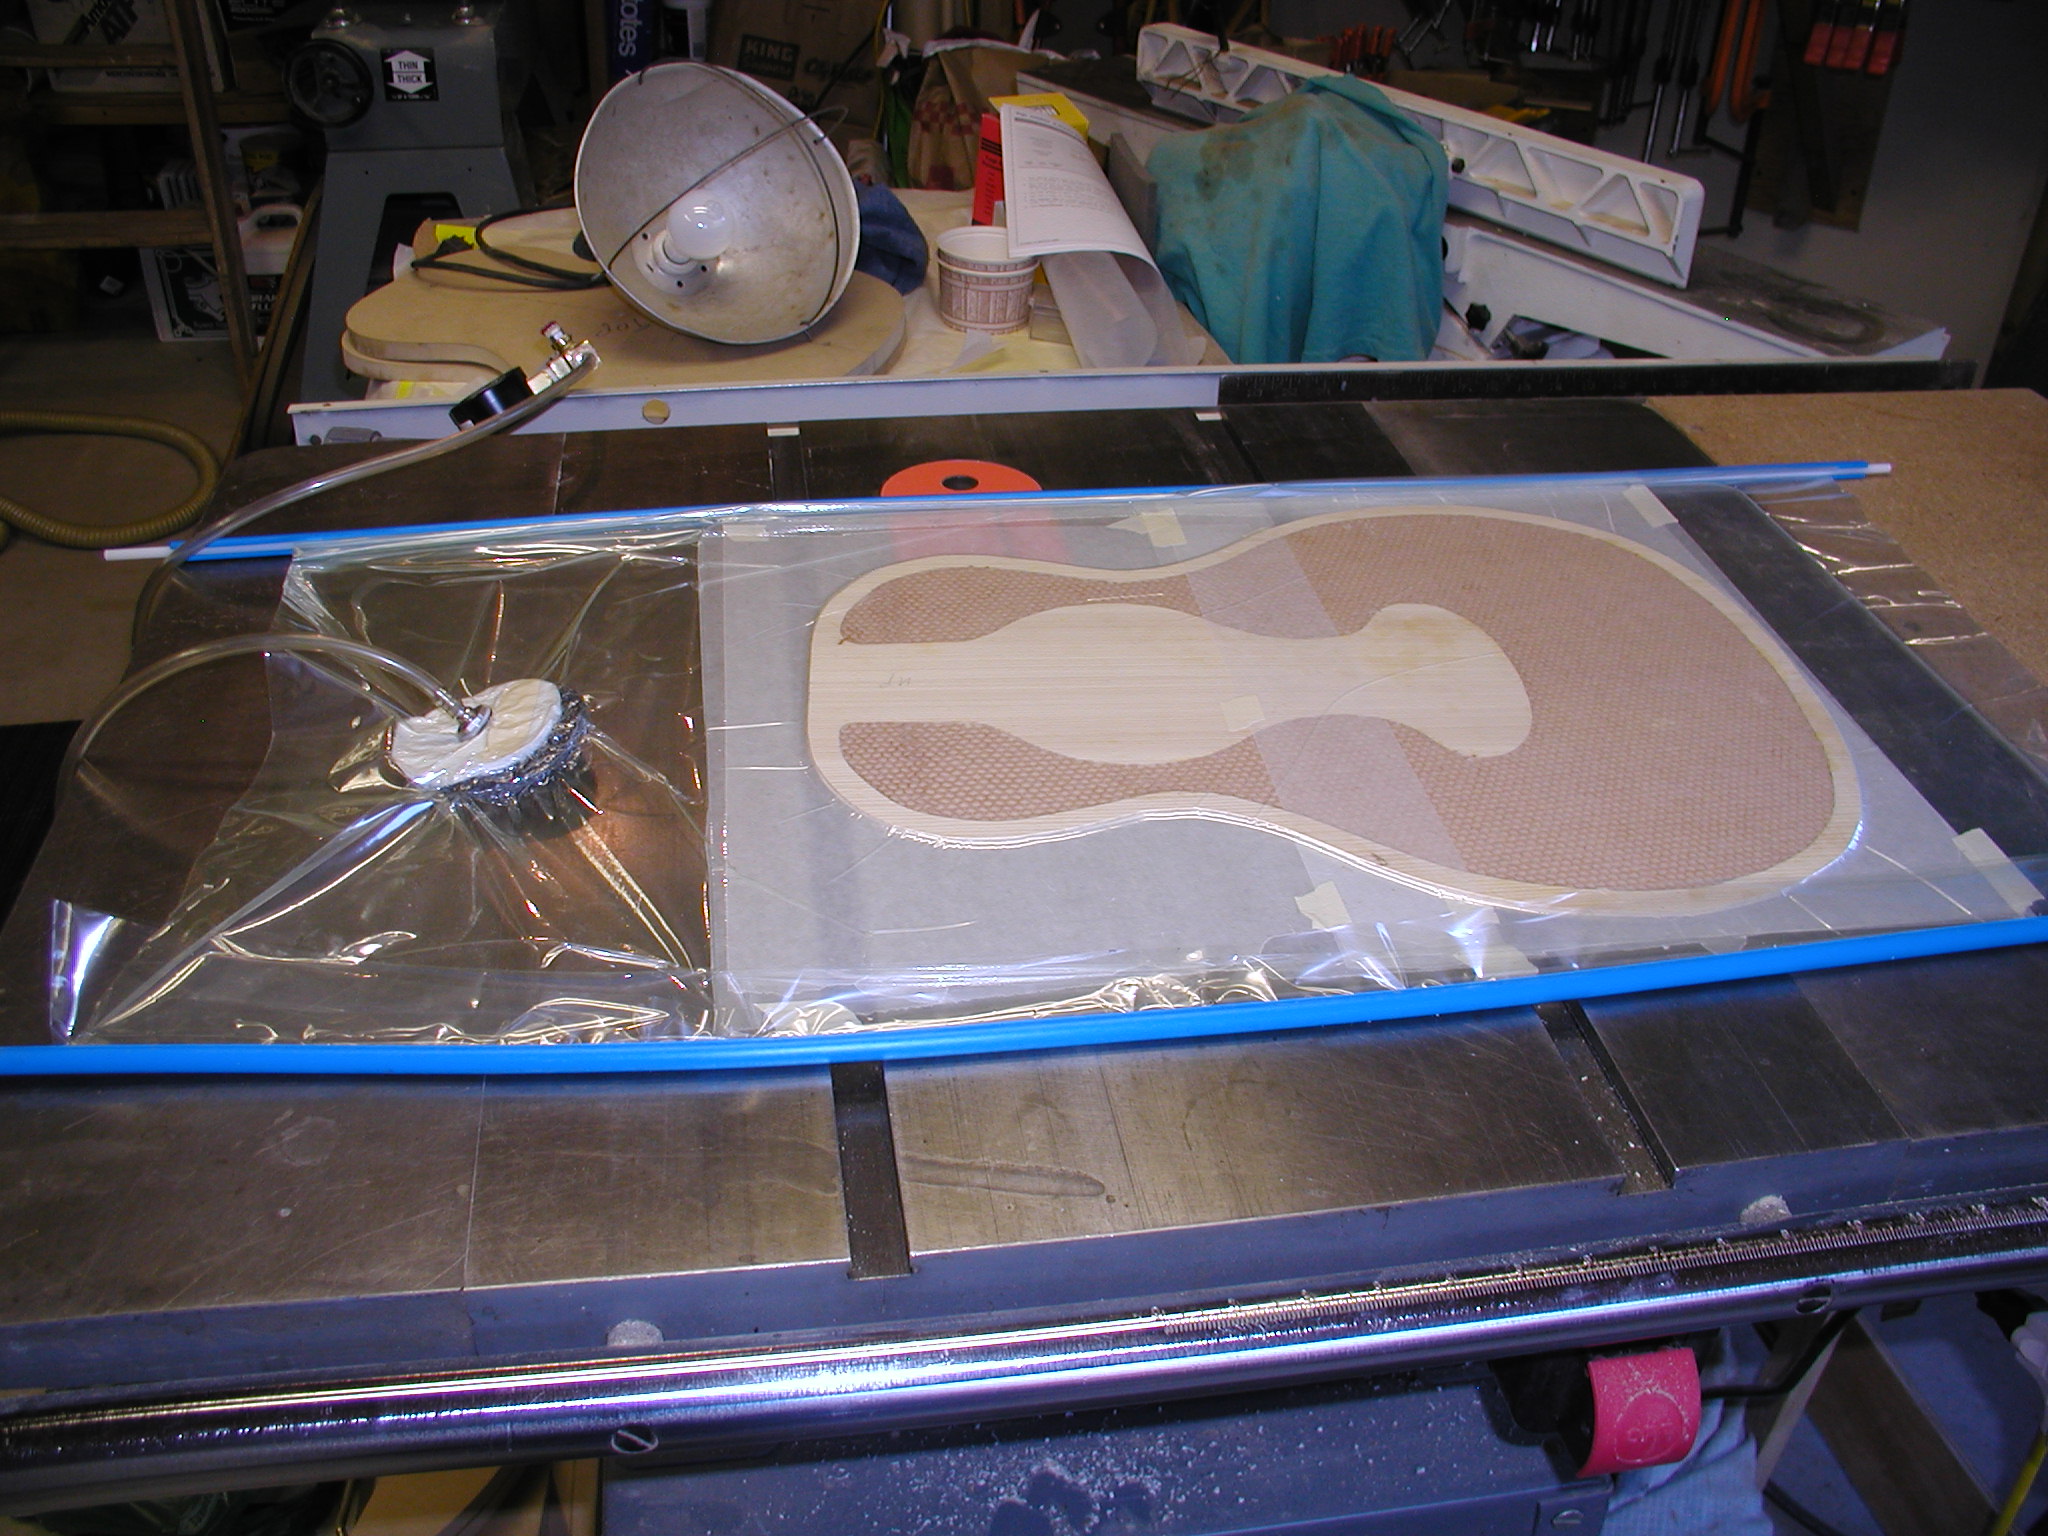
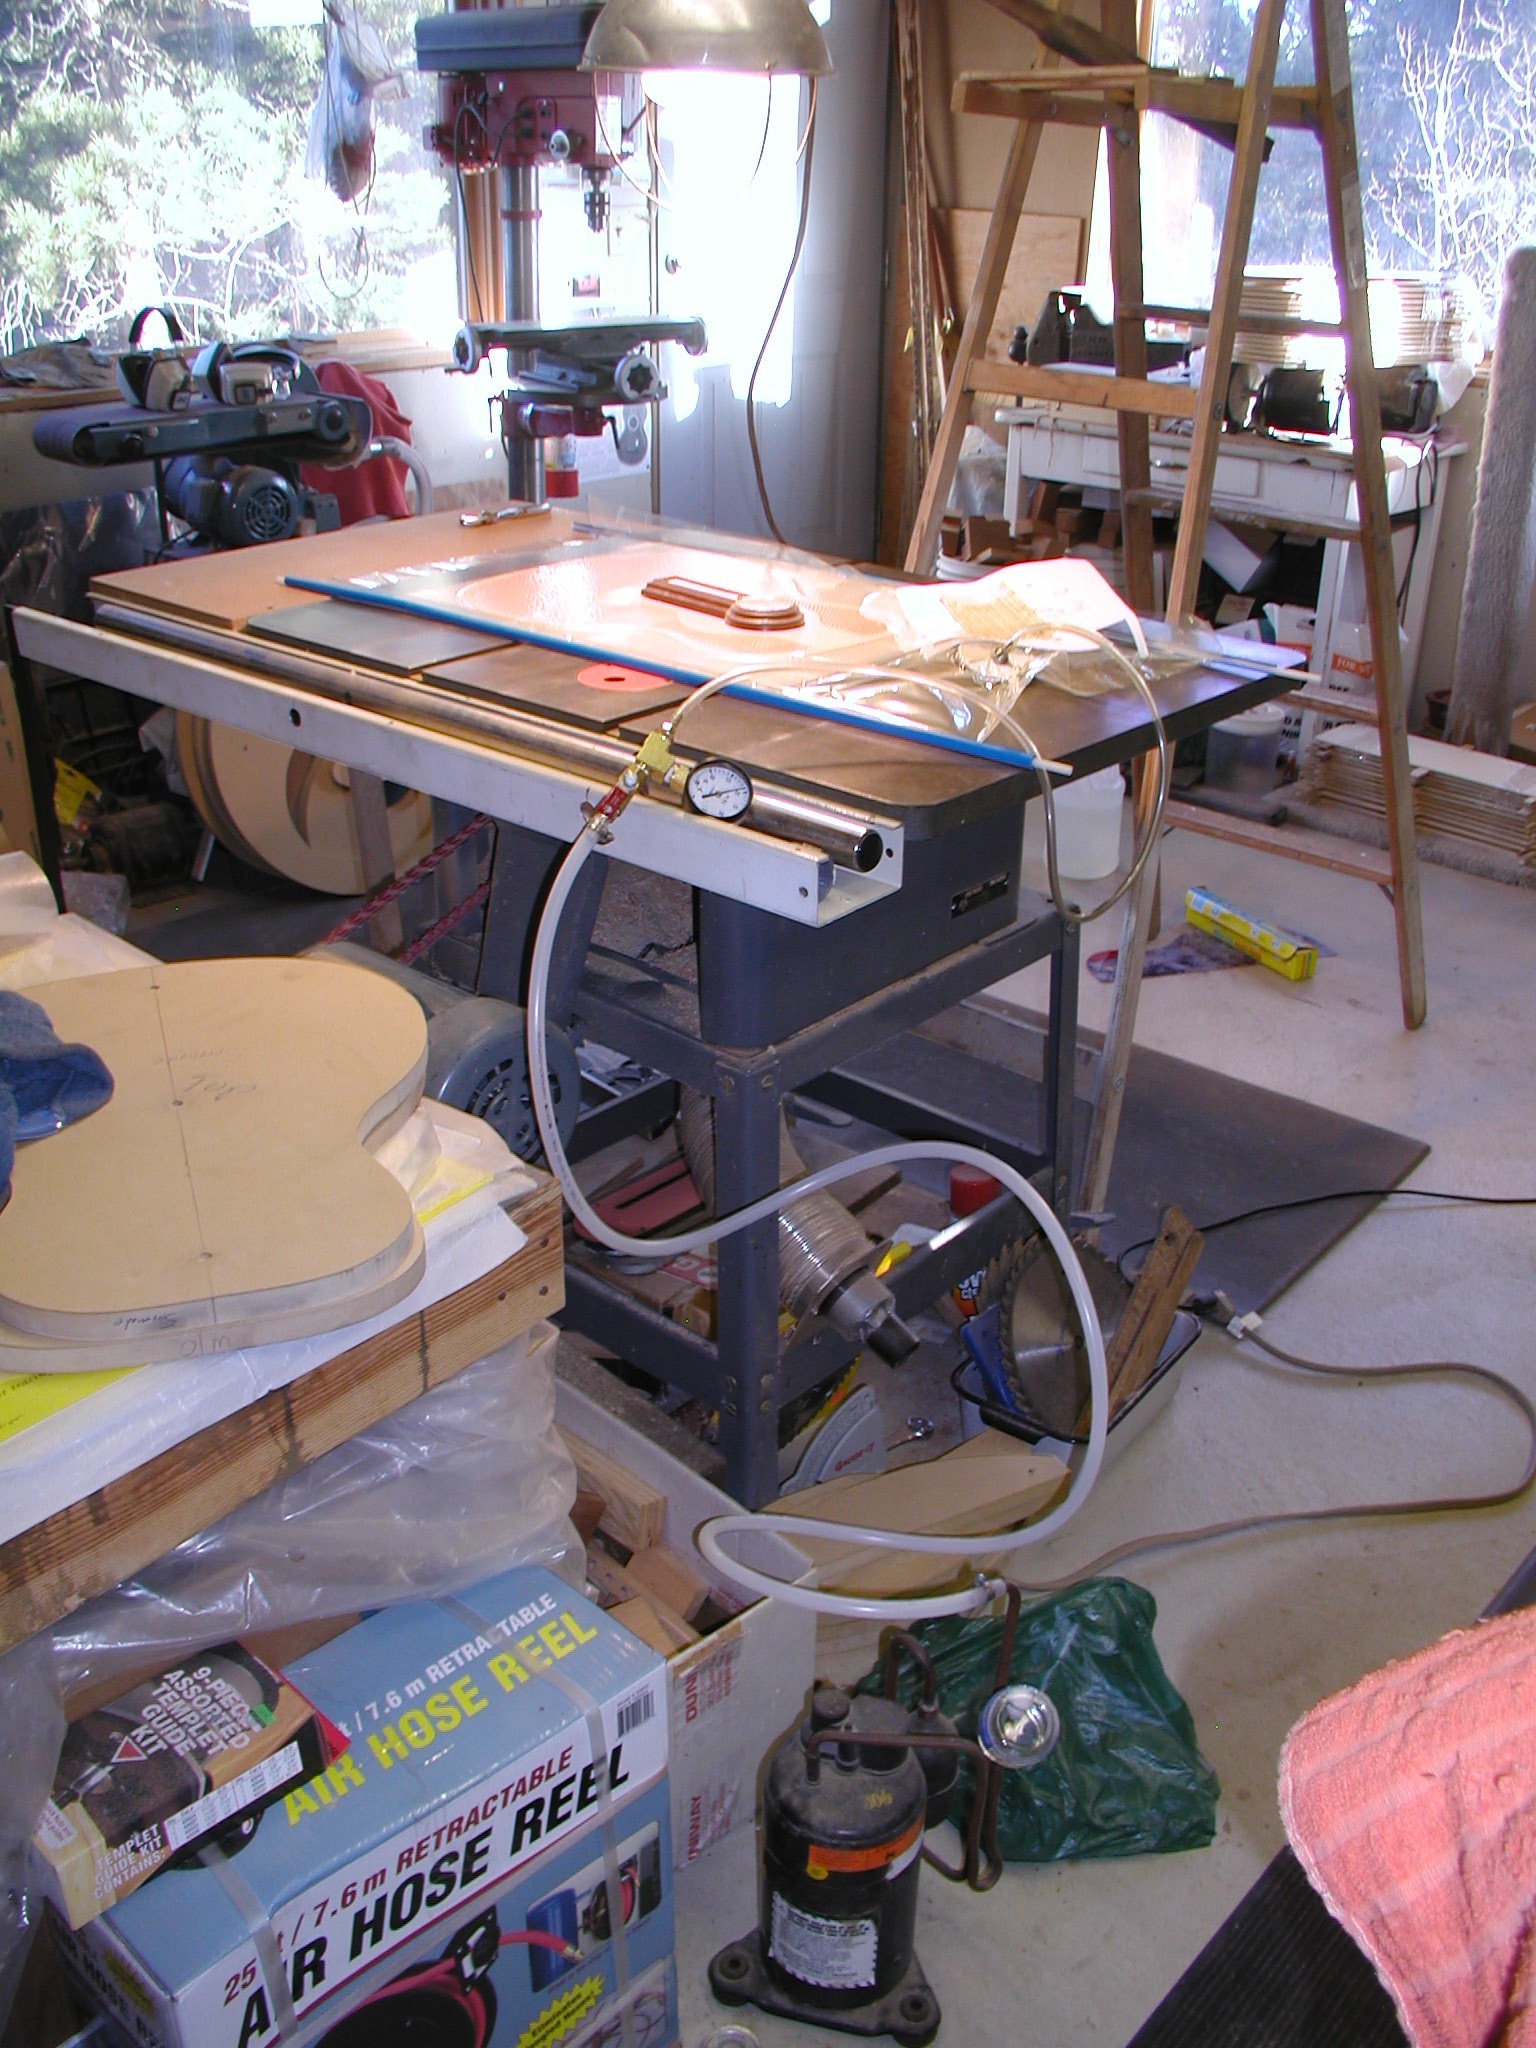
This all gets topped by more waxed paper and slipped into a vacuum clamping bag. Vacuum is applied, and since the shop was cool I also used an overhead heat lamp for the first hour. The whole mess is left overnight or at least for eight hours which is the cure time for this particular glue. Here is a long shot of my OSHA approved vacuum clamping system. It is just a compressor from the cooling system from an old water fountain and pulls about 23 inches of mercury for vacuum at our elevation of 8200 feet. It worked quite well, but I have gone to a larger whole-shop system with a Gast vane type pump to use for other vacuum clamping applications as well.

A similar process is used to glue the resultant spruce/Nomex® combo to the the inside skin. First it is passed through the drum sander to get it completely even and re-thickness if necessary. The Nomex® sands very nicely and one can even perimeter sand the top at this stage if desired to make it thinner at the edges. In addition, experiments with samples indicate that if you have an area that is not glued well enough you find out right away on the first pass through the sander! Not only does the Nomex® detach, it also tends to wrap around the sanding drum and pull the top with it. Needless to say this can ruin your day, or at least that top. Then glue is once again measured out and rolled out on the palette and the combo piece is pressed down onto the glue. This is then pried off and set on top of the inside skin and vacuum clamped as we did before.
The tops when done are very strong and some builders do not use any bracing at all. I use symmetrical scalloped bracing which is quite light and tuned to the top with tap tuning and Chladni modes.
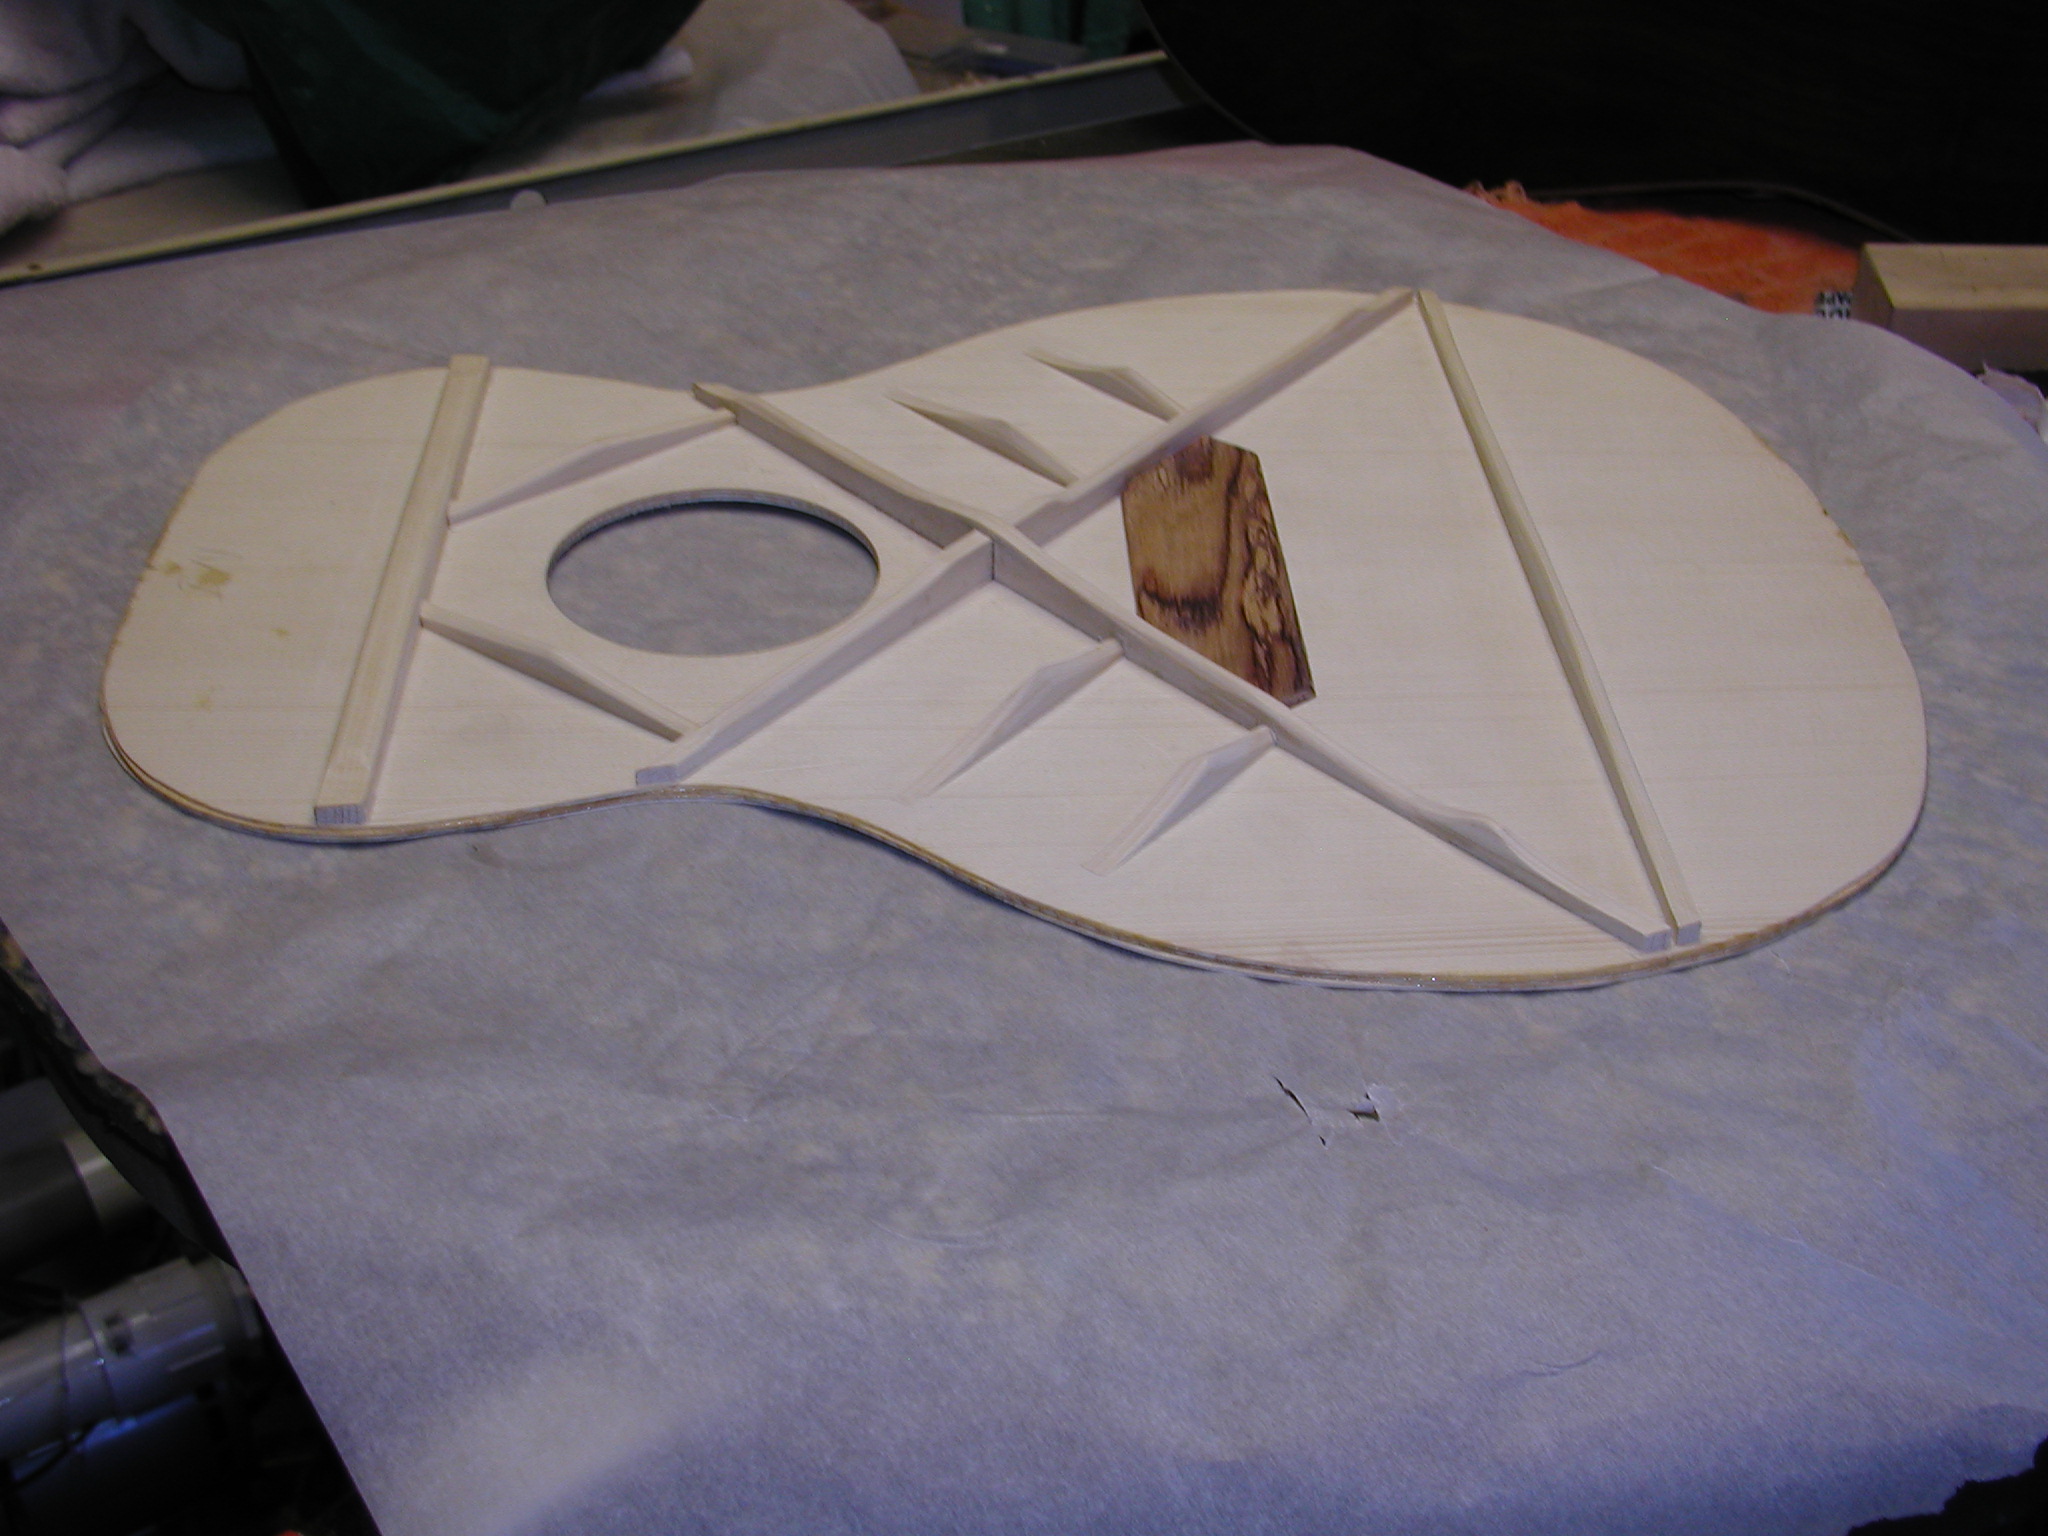
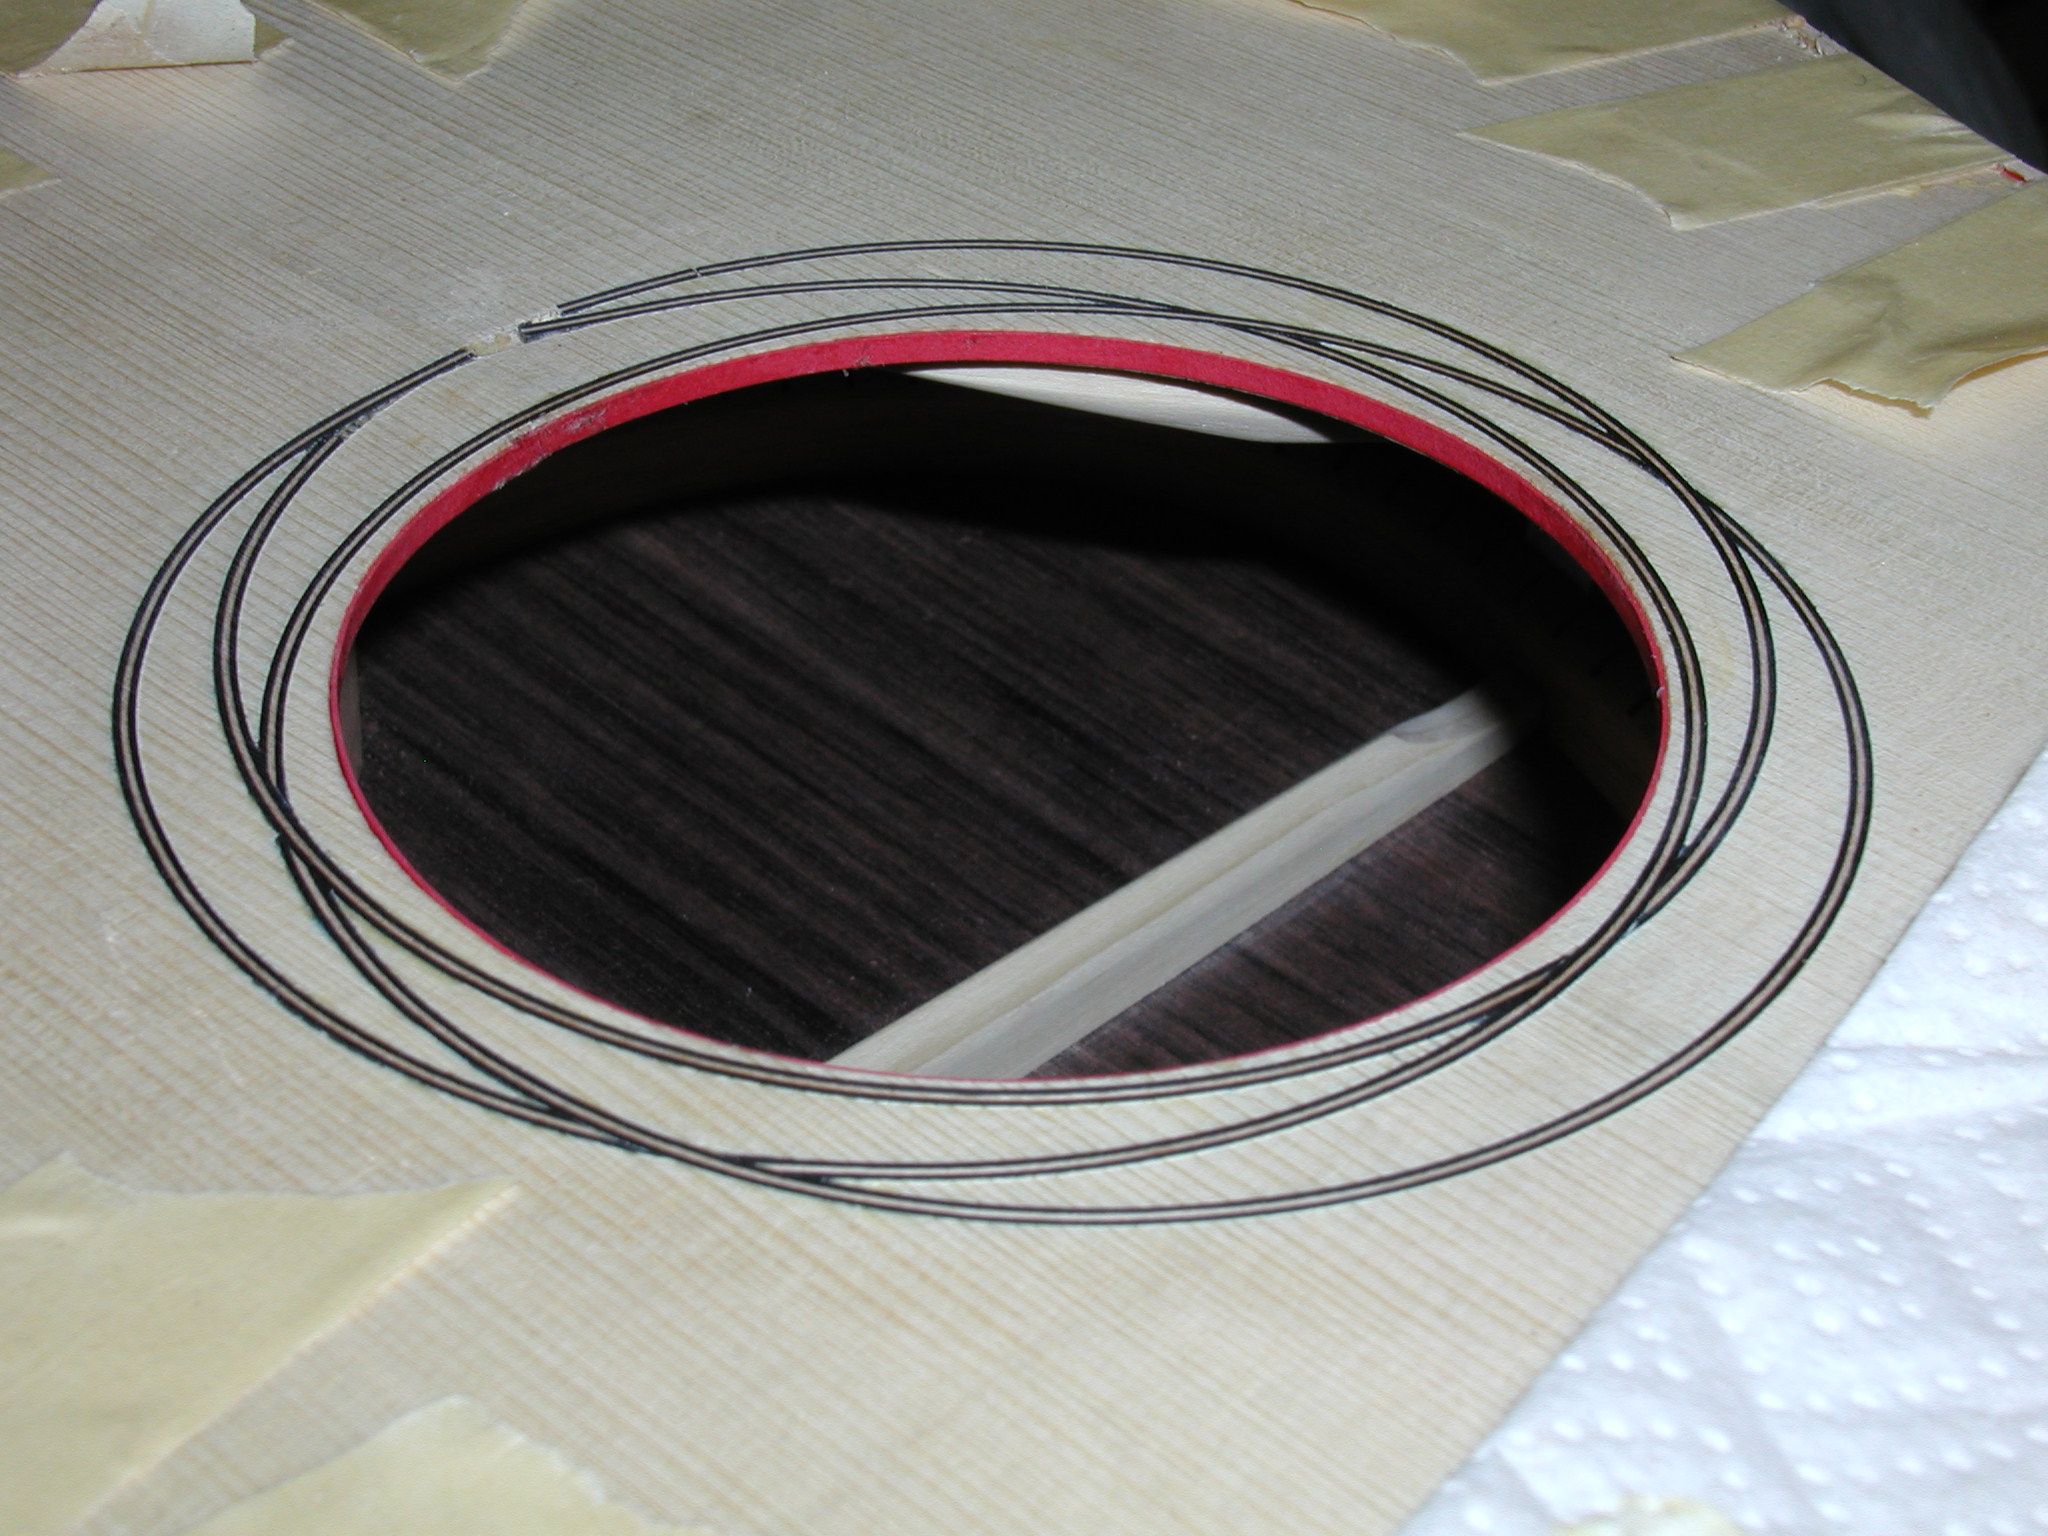
In the bracing photo it shows only one tone bar. I later added a second bar just below the bridge plate which improved the balance and the Chladni modes. The sound hole cutout shows the three (or two) layers, so I add in a piece of purfling strip as a decoration to cover up that end grain. Others make a full insert that is put in from the back and is part of the sound hole reinforcement. You can always tell my double tops from solid by my interlocking ring rosette which I use only on the double tops.