Let's Build A Bouzouki (Page 2)
Last Modified - February 2009 (©Alan Dunwell 2009)
In Page 1 we completed the top. Now it is time to build the box starting with the ribs.
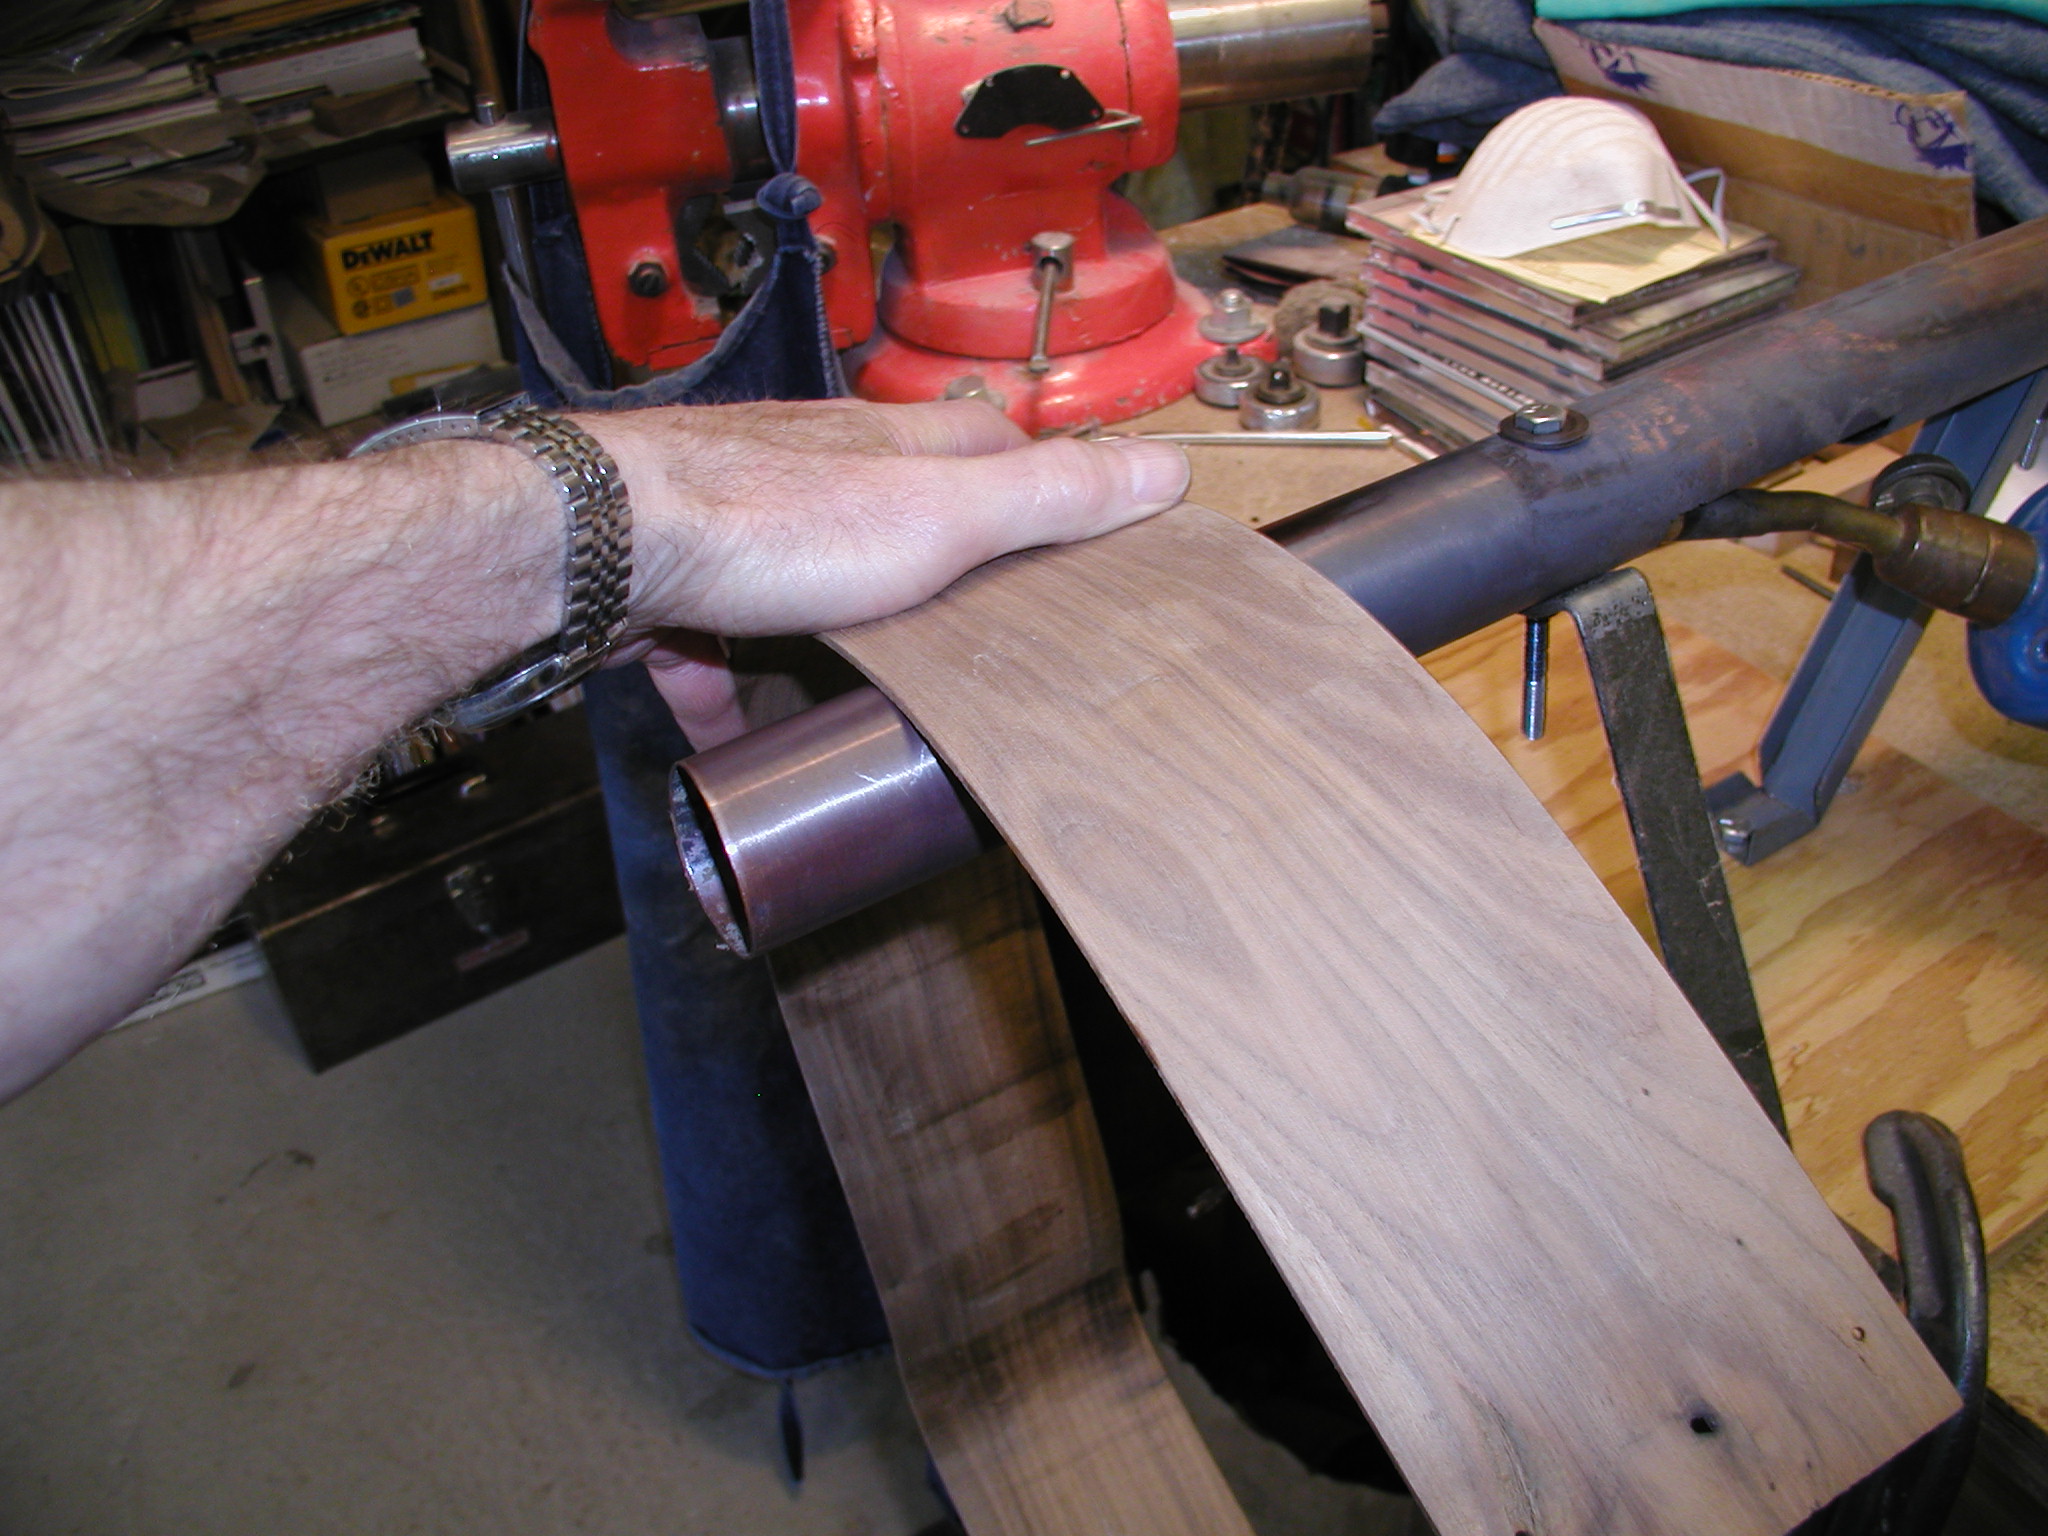
The box is made of American Black Walnut, one of the many great indigenous North American woods available for instruments. Tonally it falls somewhere between Indian Rosewood and Maple, brighter than H. Mahogany but with nice note separation. Here I'm pipe bending the ribs to match the Plexiglas template. Then I pop them into the outside form and do a second heating with a heat blanket to completely stabilize them. The curved nose part near the headblock likes to spring back a bit and this locks it in. The Fox bender machine in the background is there just because it has the electric controls for the heat blanket being used in the form in front of it.

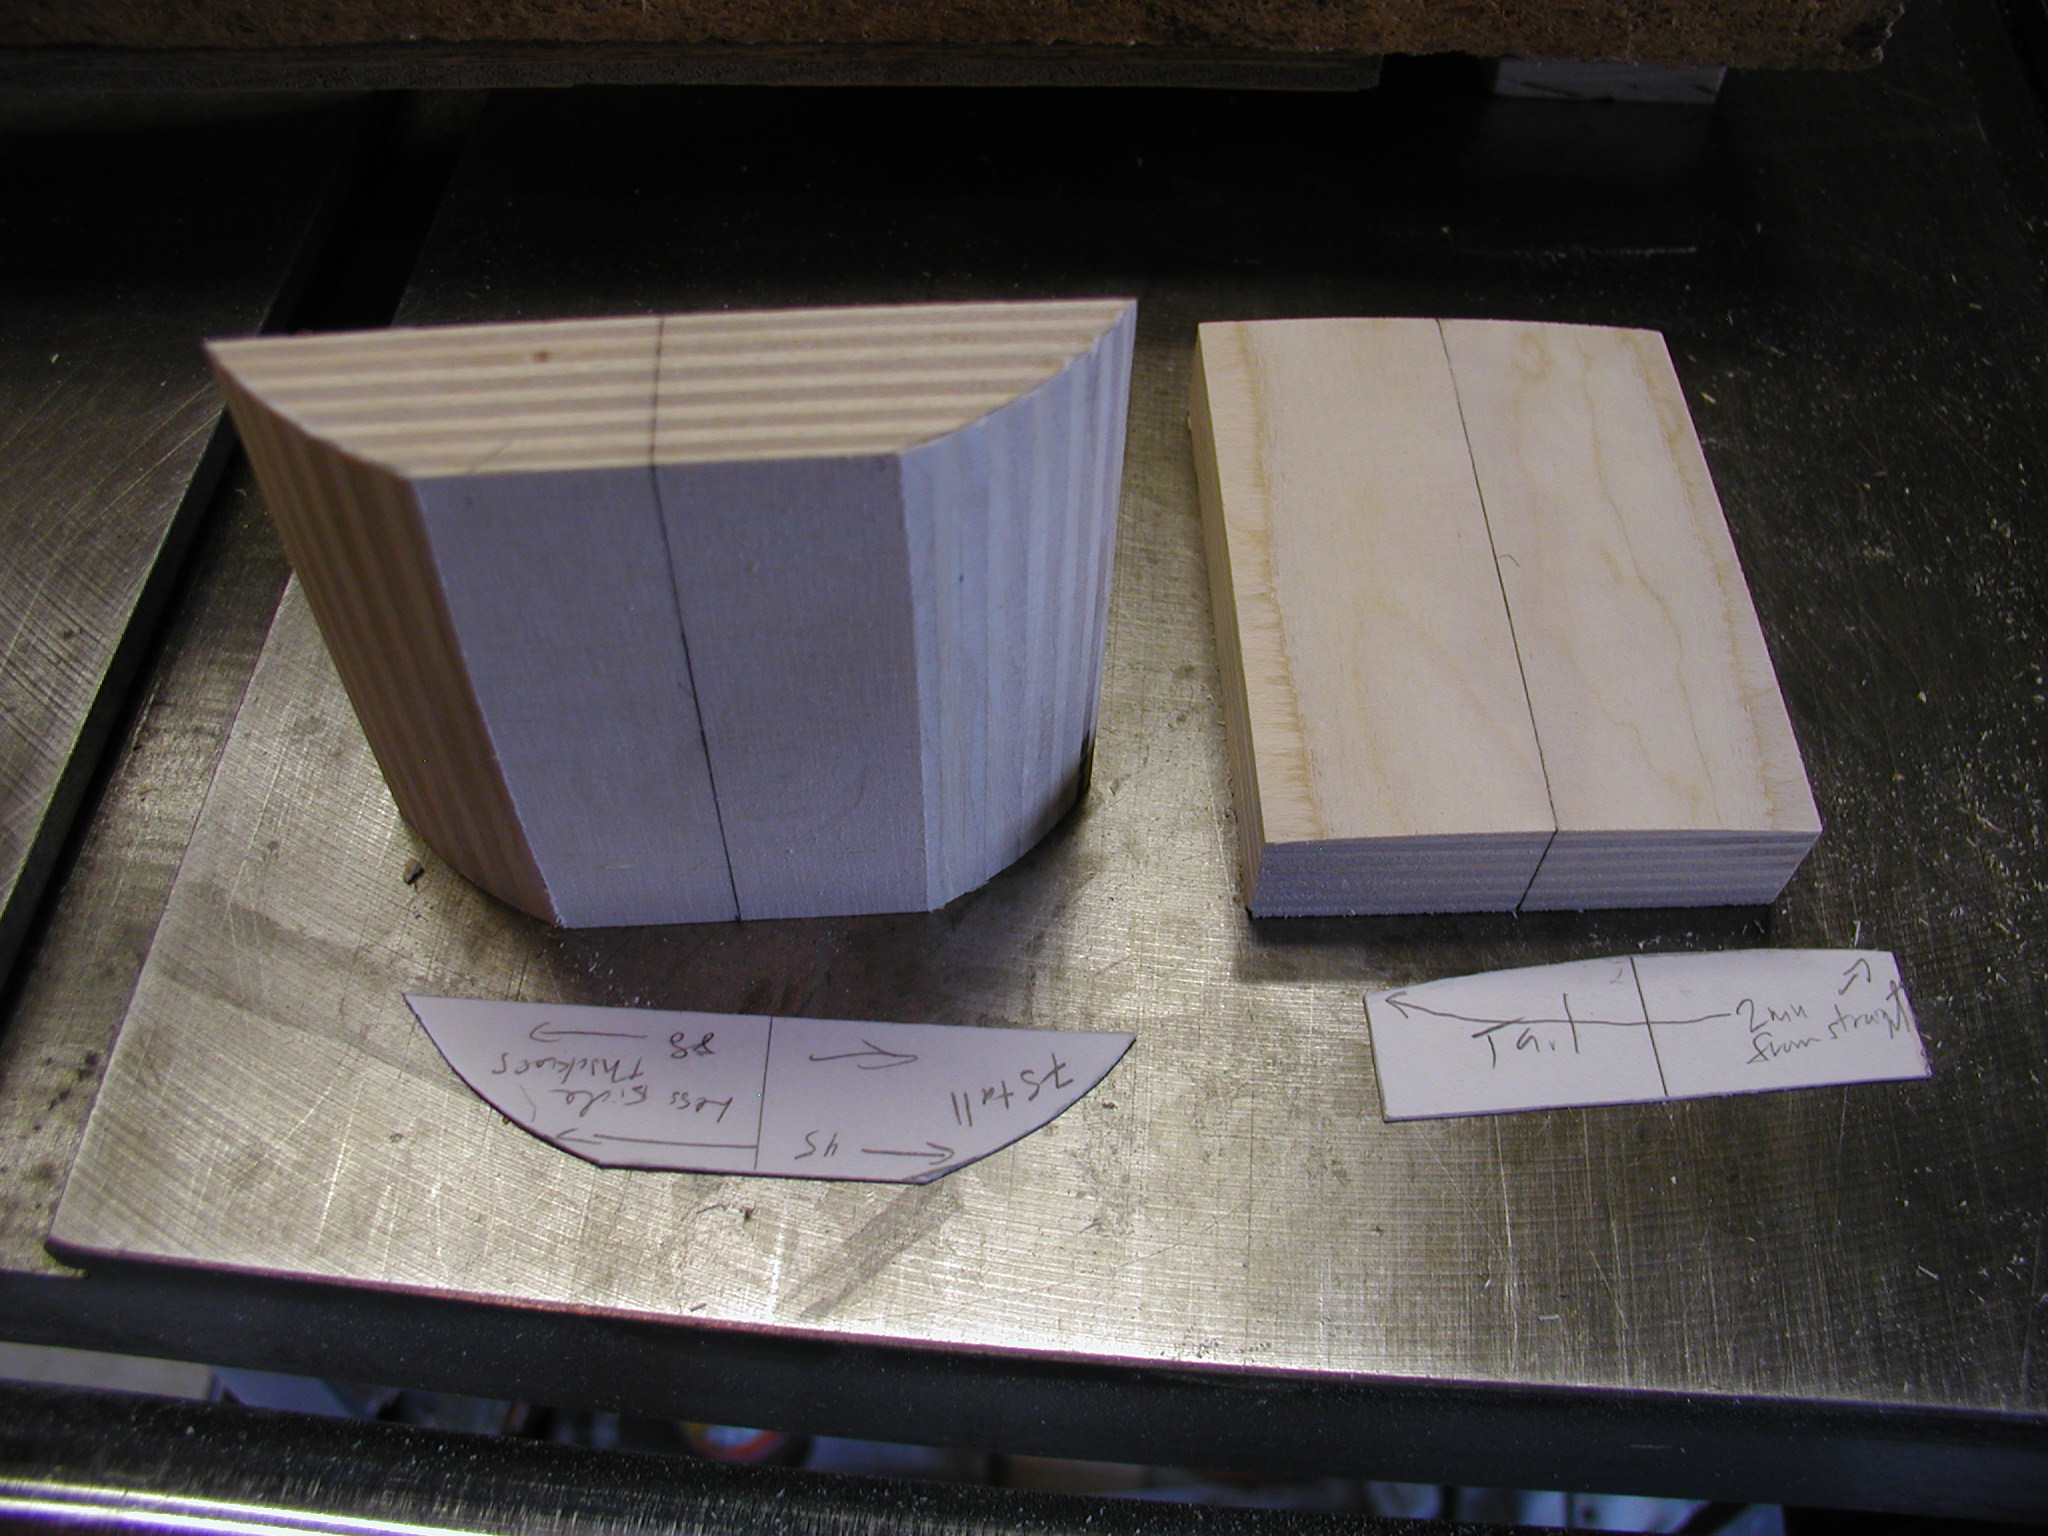
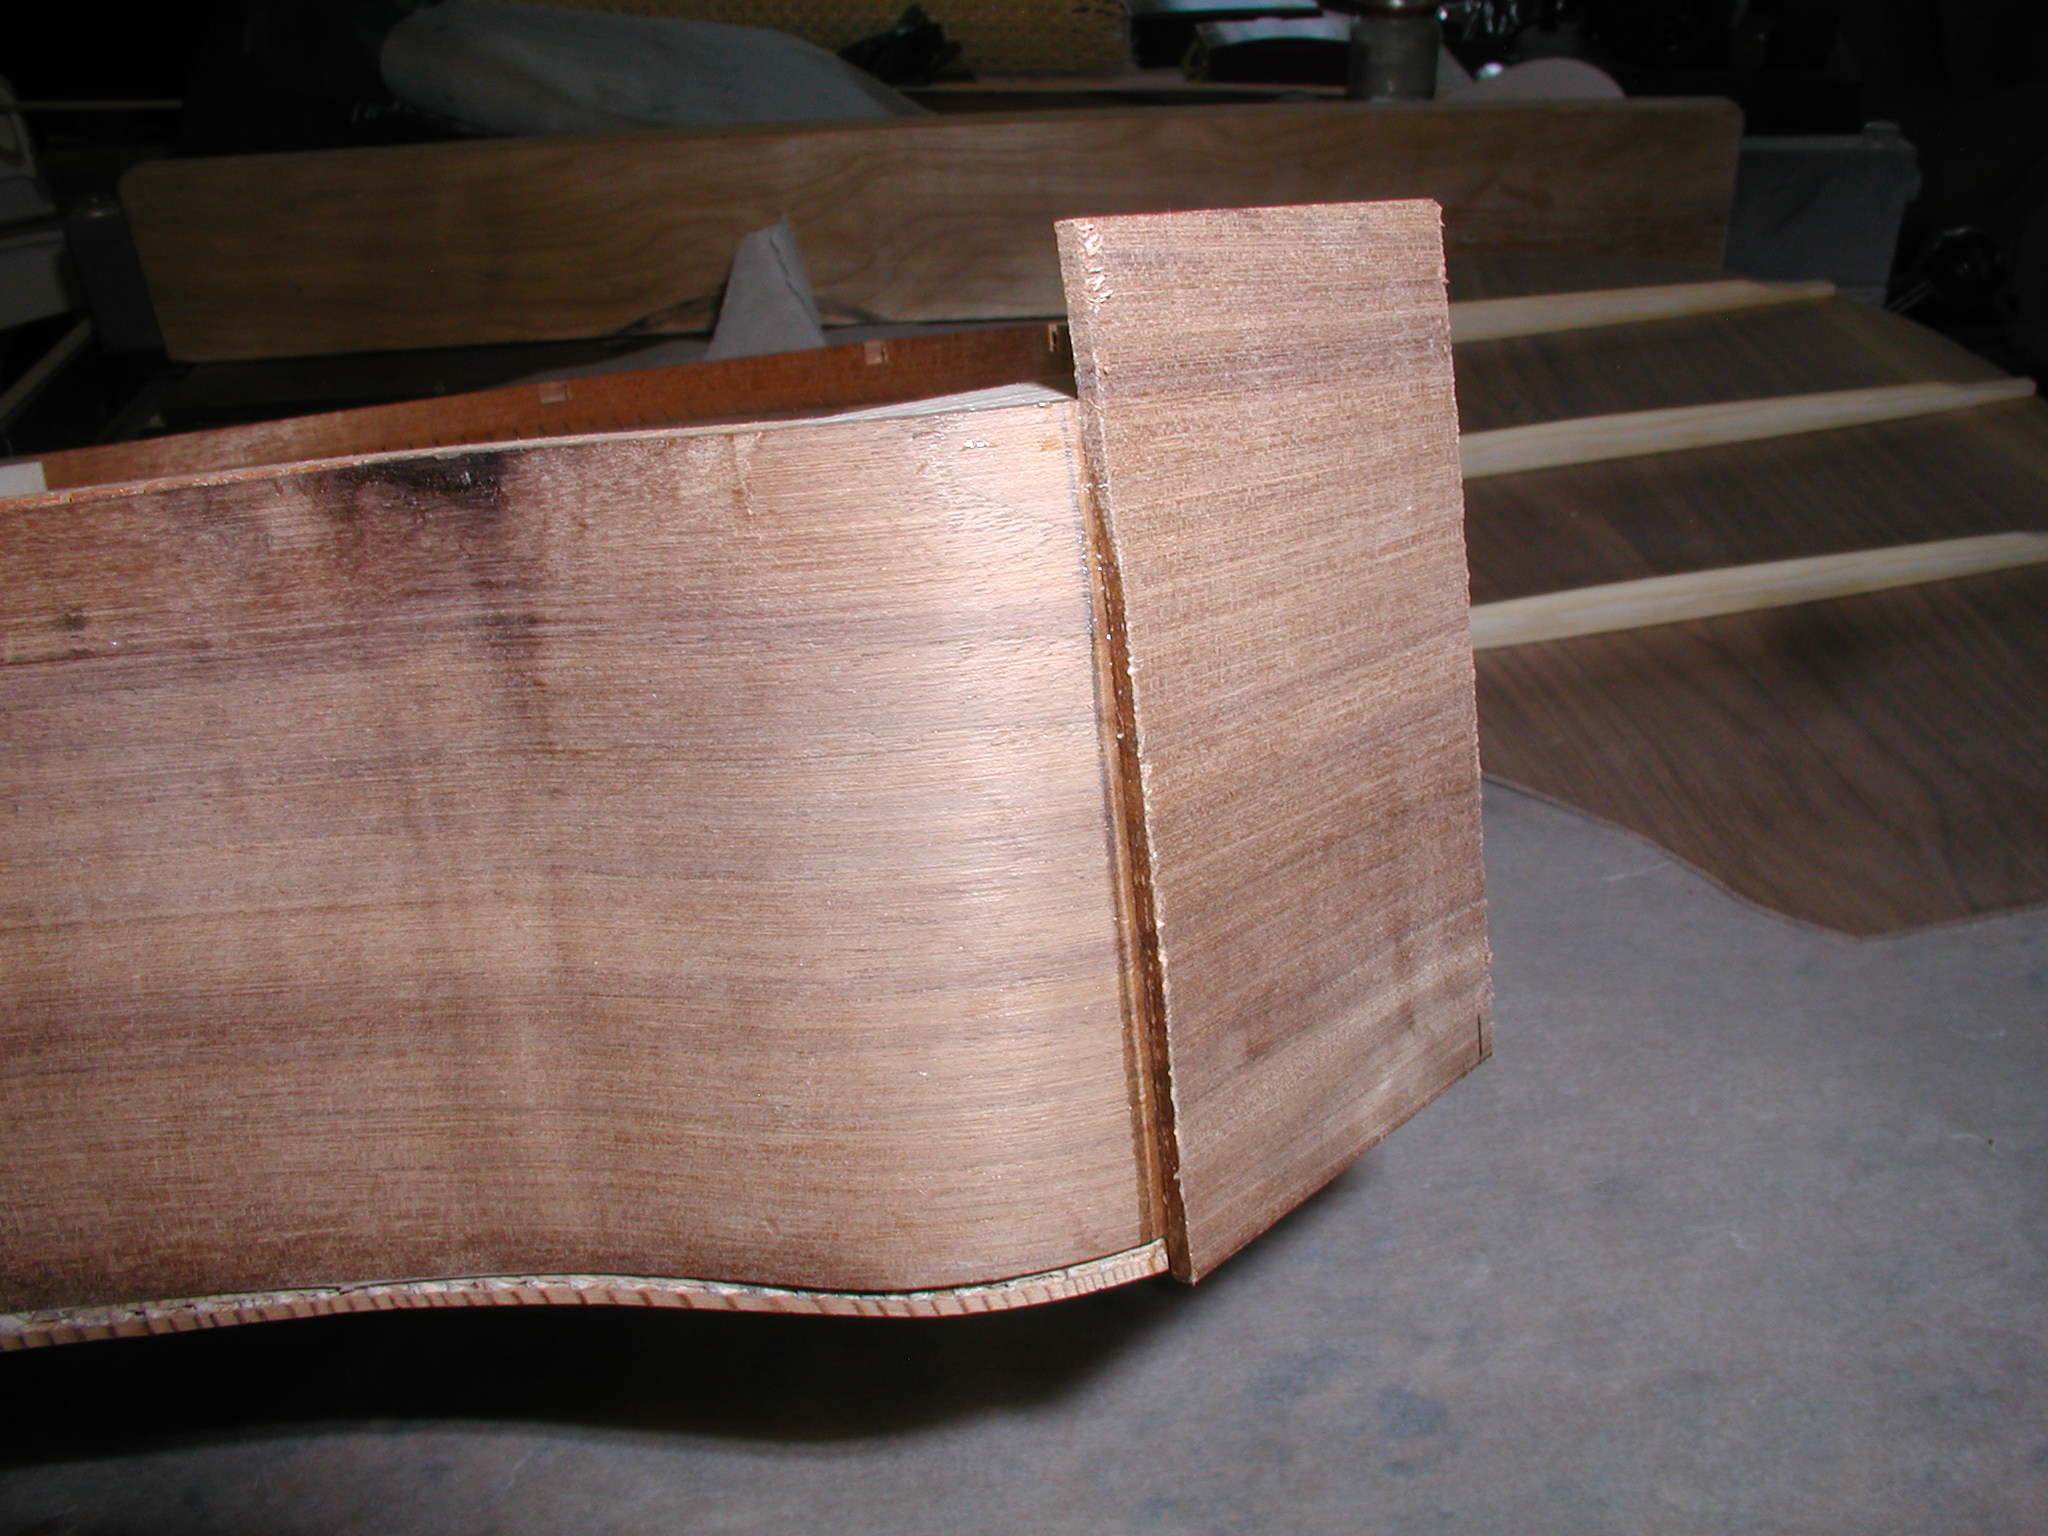
The head and tail blocks are now made. I use European or Birch ply for these. It is very stable and strong and light weight and glues well. It also seems to transmit sound well in the headblock, so no drawbacks to it that I know of. After chunking them out I rough the profile on the bandsaw and then just hit them on the belt sander till them match my simple curvature templates. The templates are for the inside curve of the sides which is not necessarily the same as the inside curve of the form.
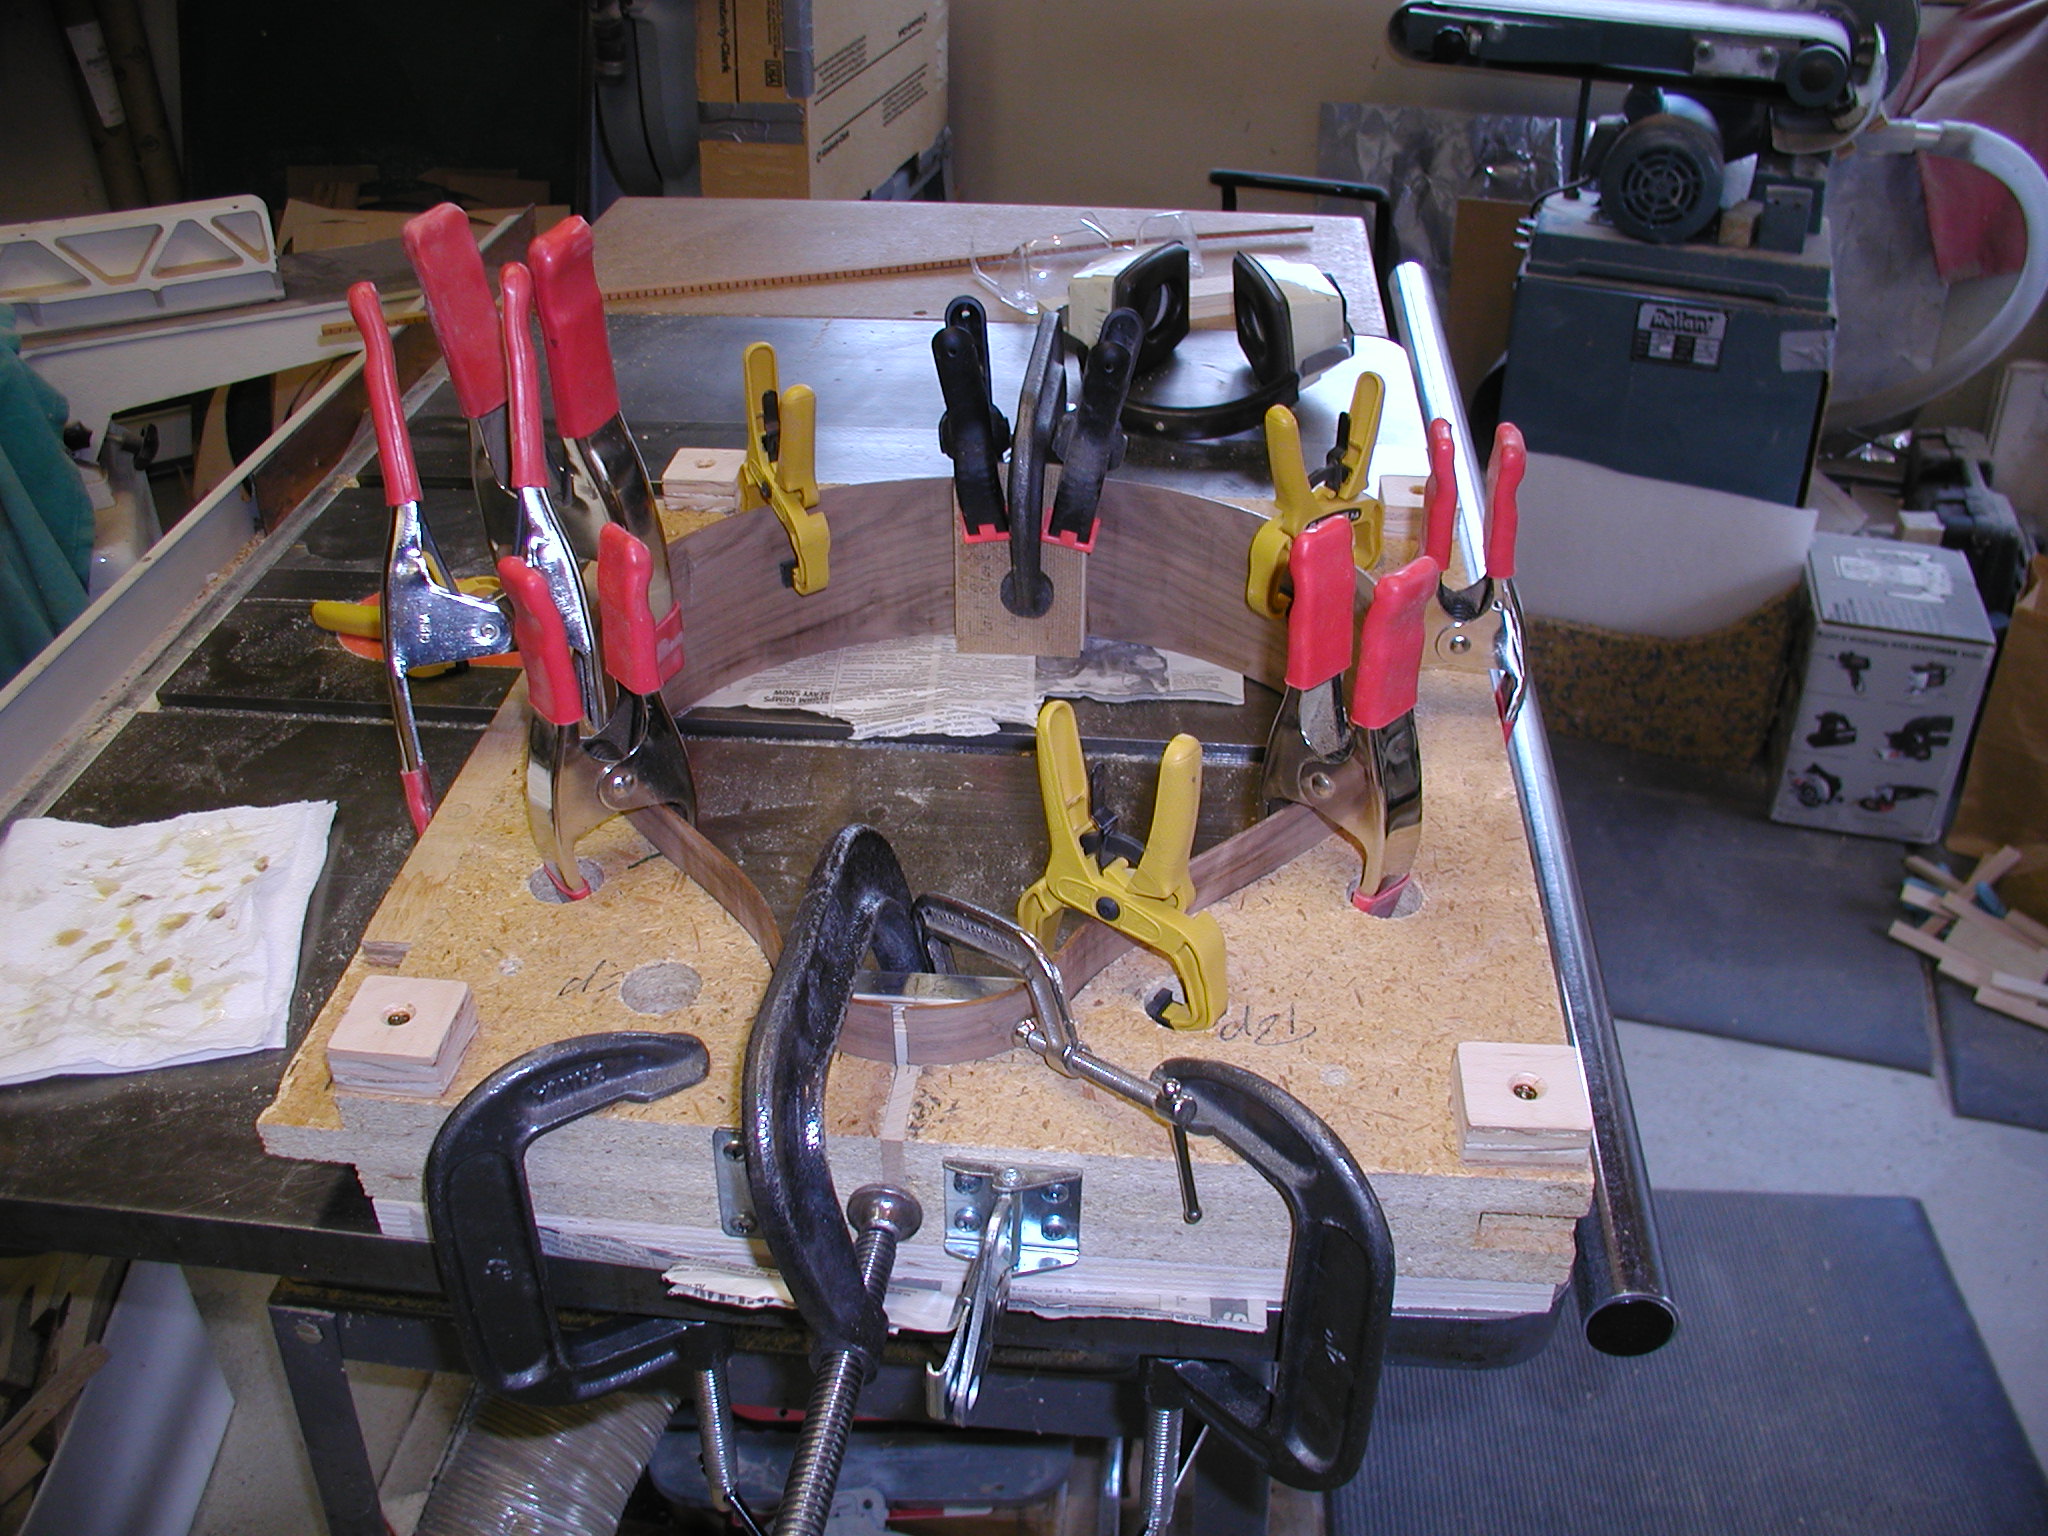
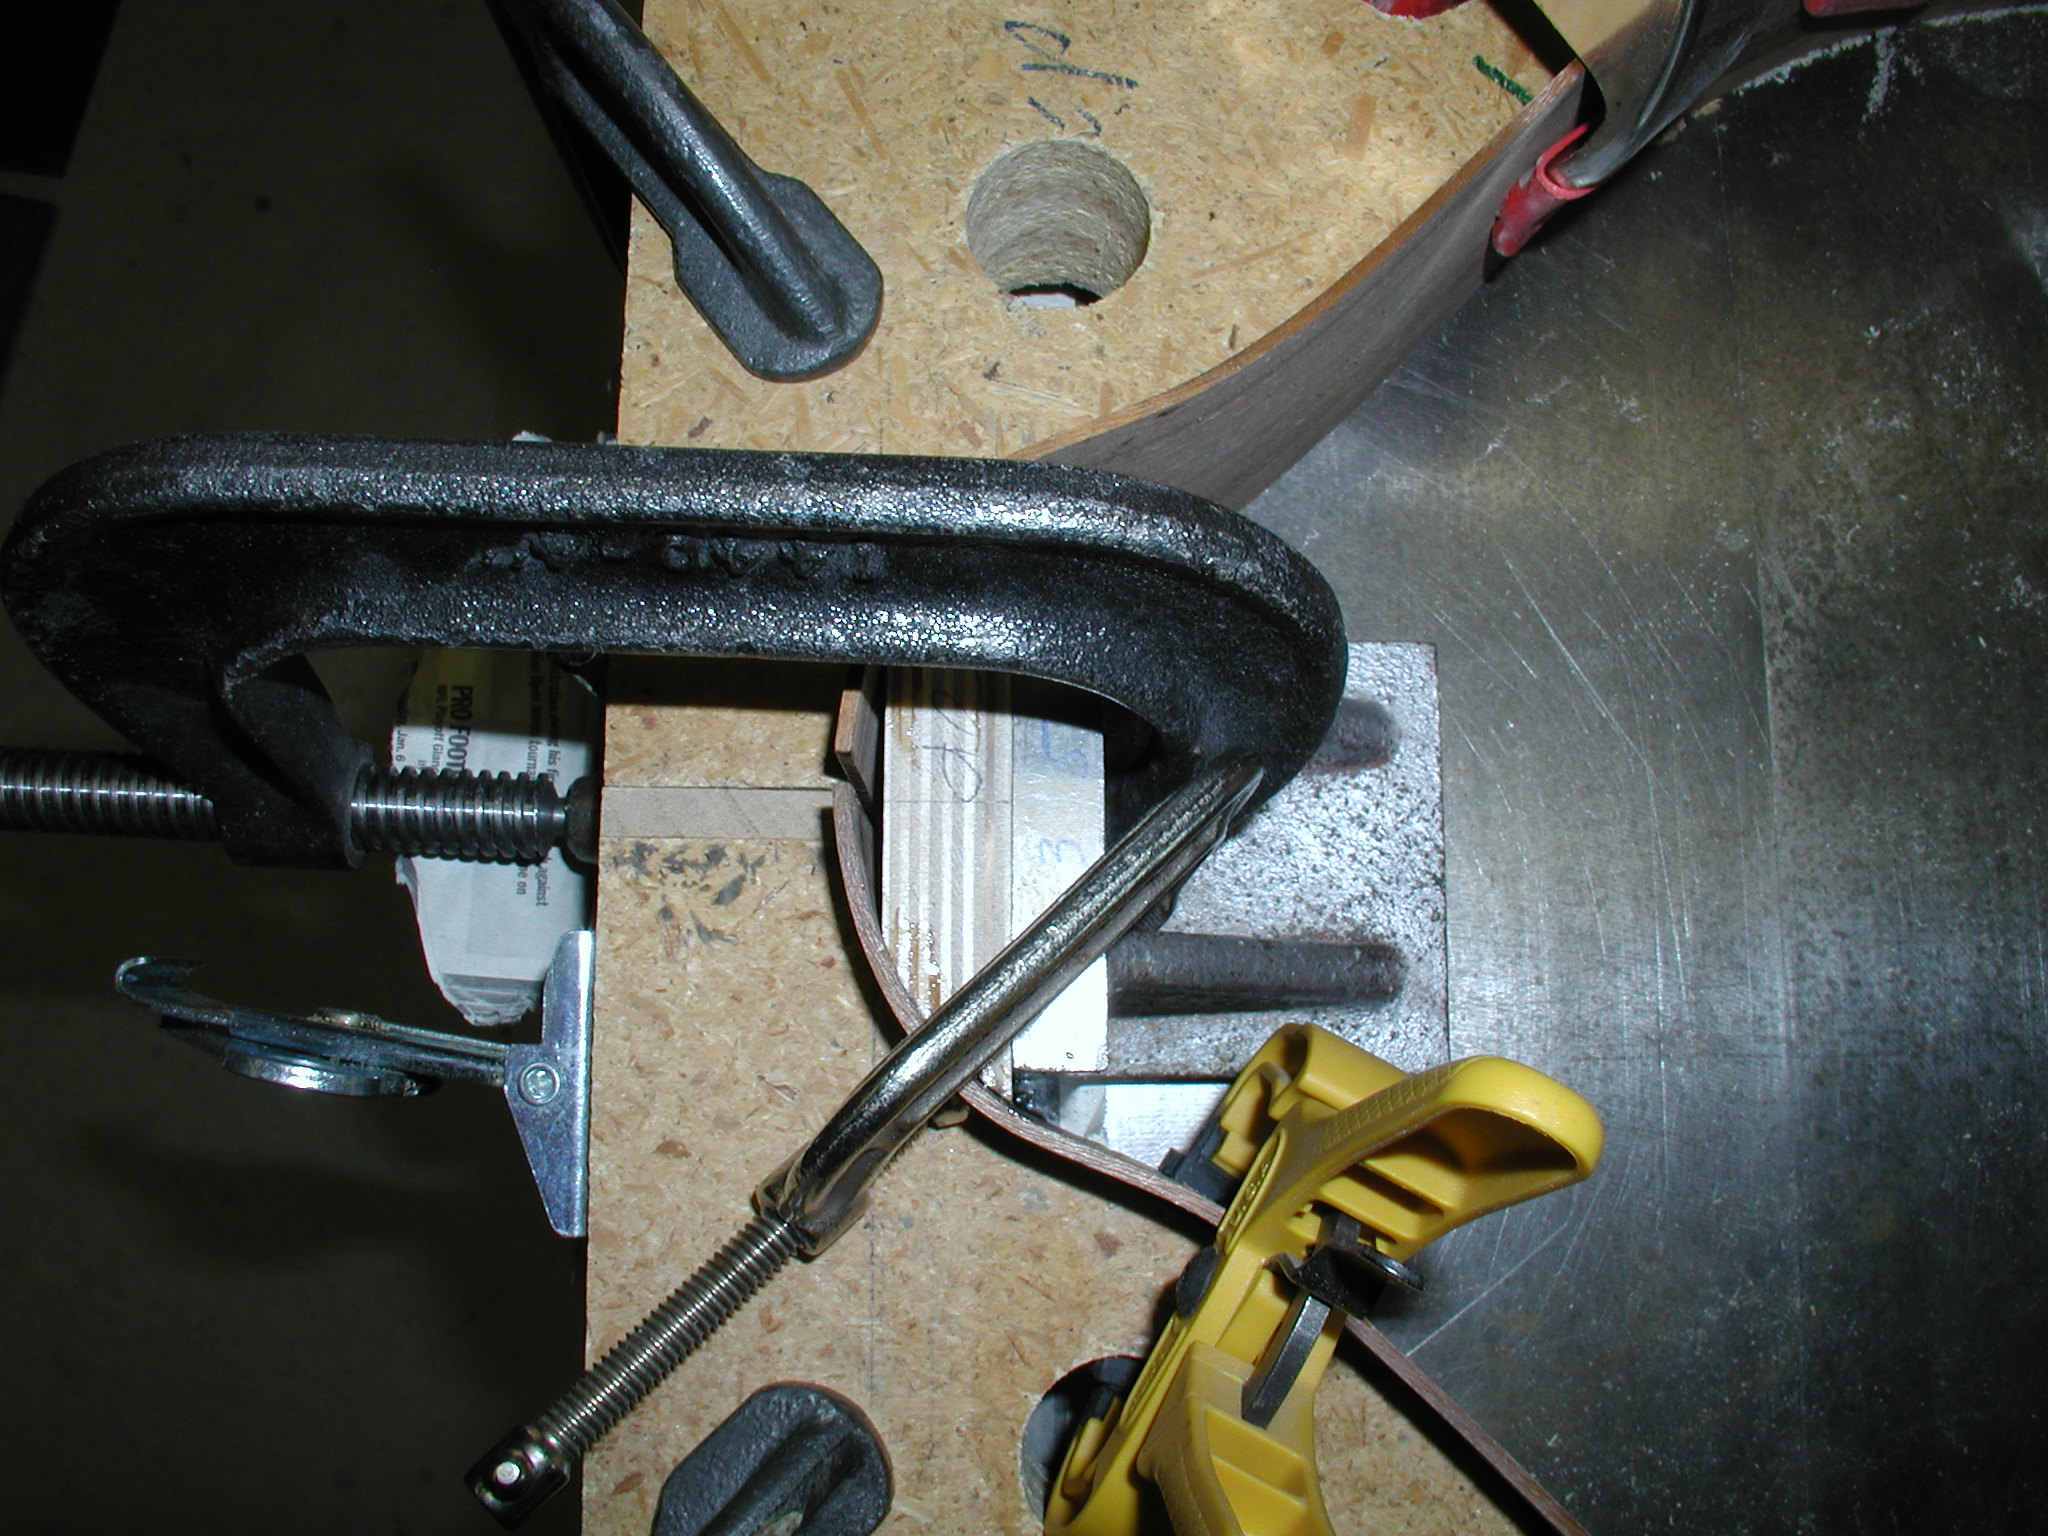
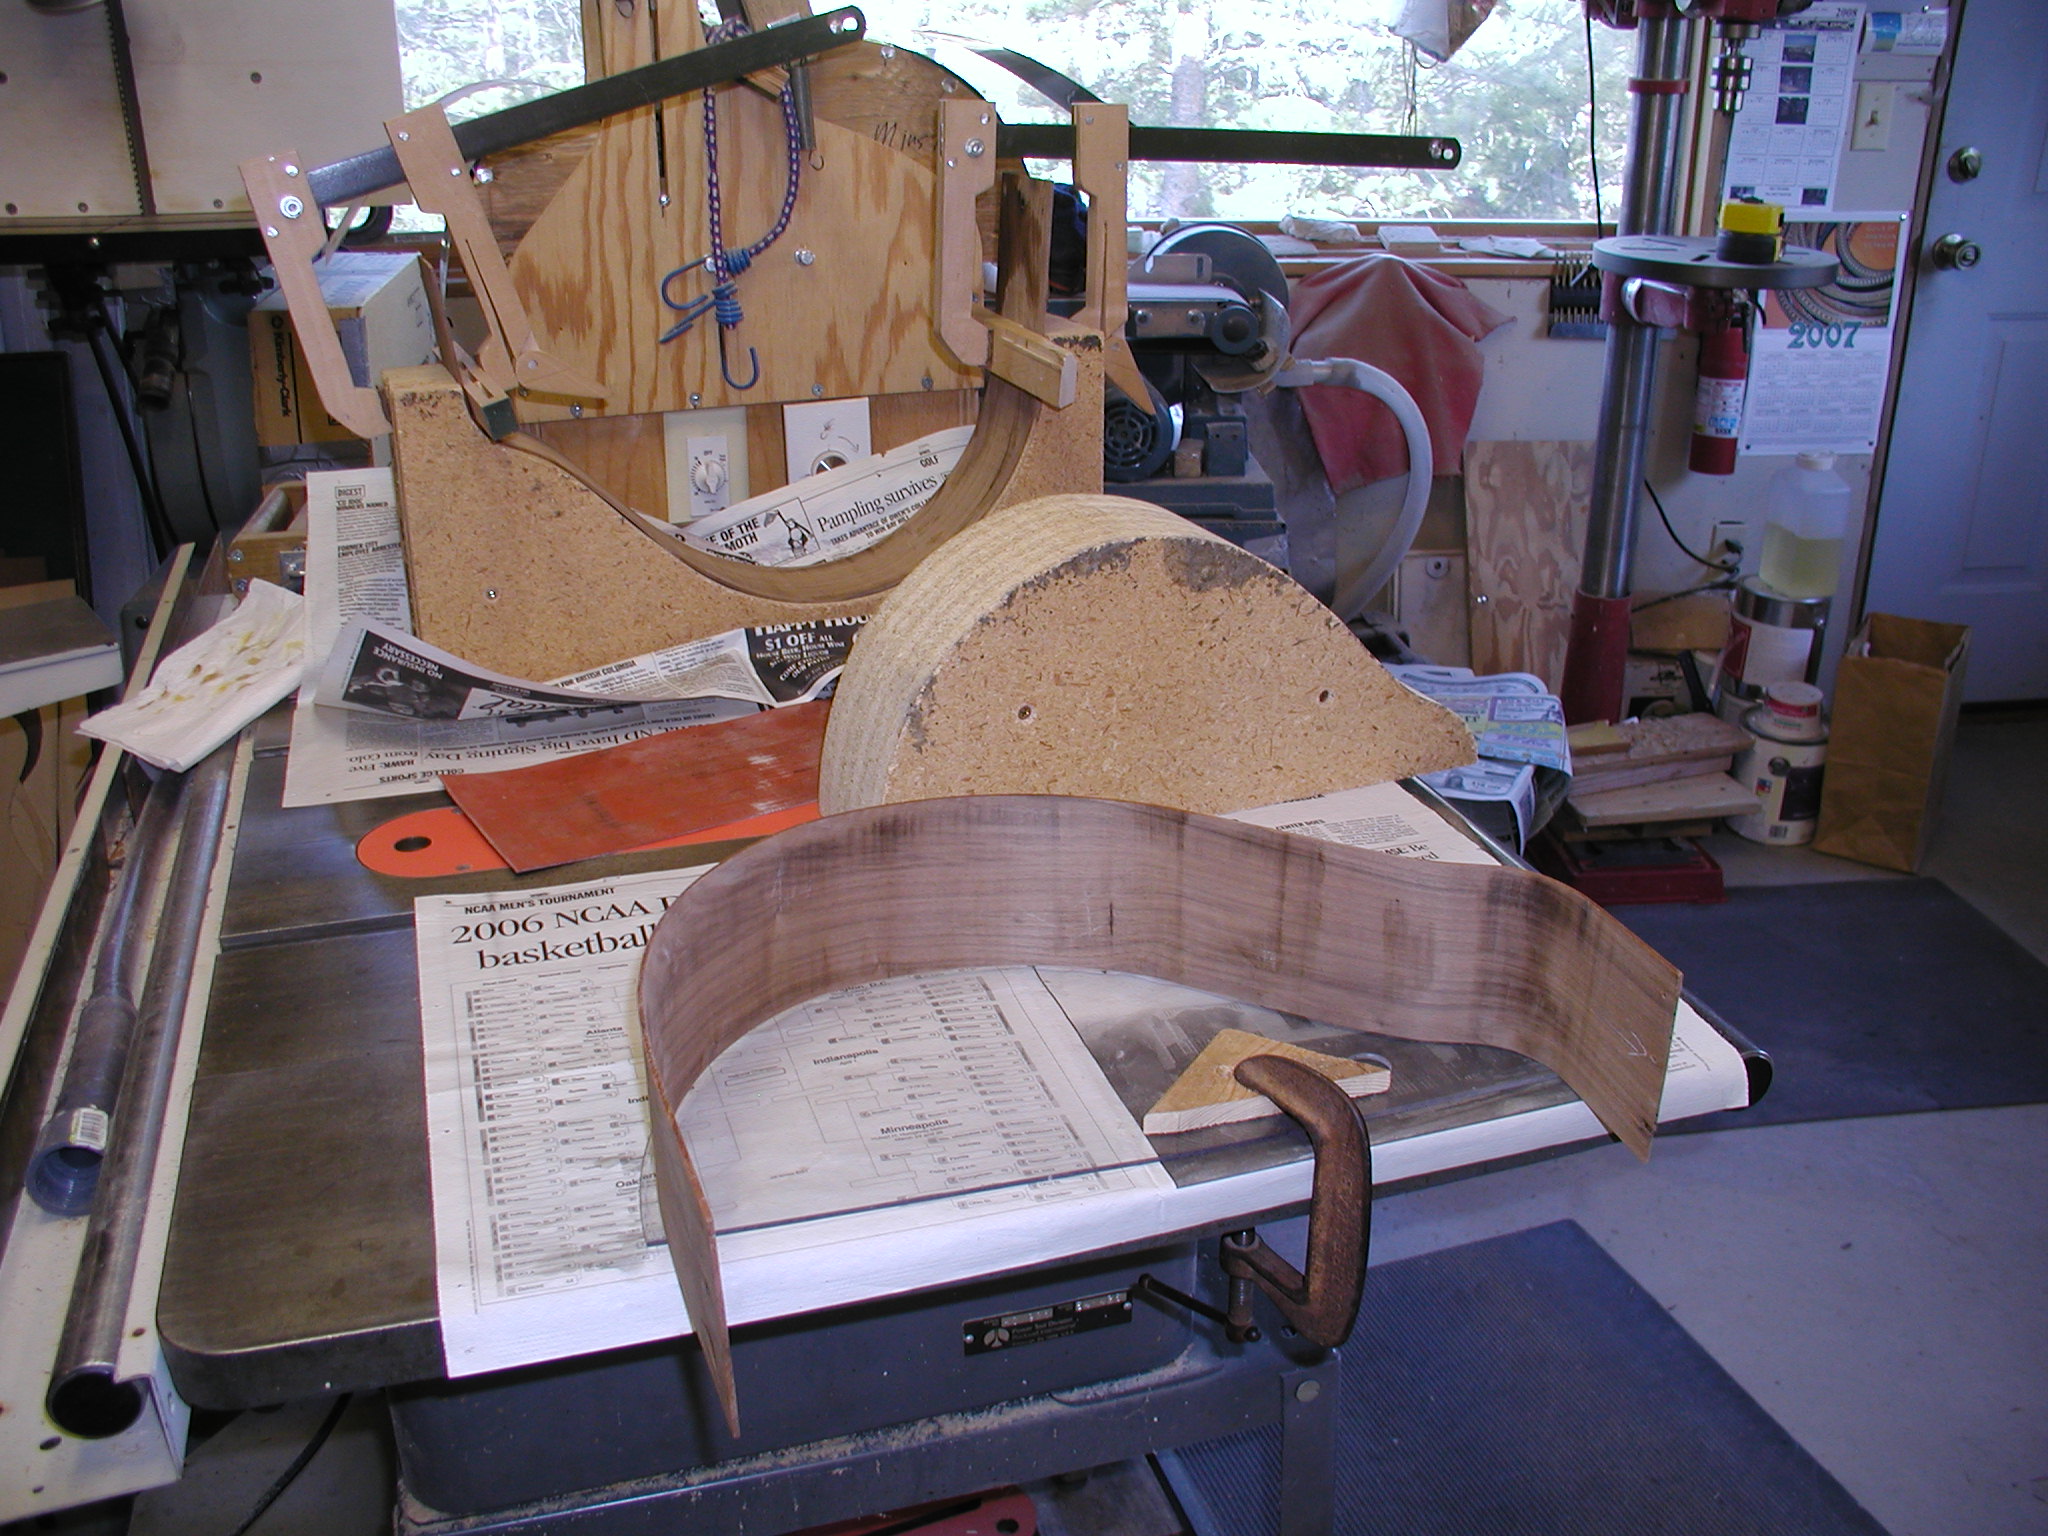
The sides are trimmed to fit inside the form, not a perfect fit, just so they go in. I glue in the blocks using a combination of the form and machinists right-angle blocks to make sure all fits just right and true. I use my cast iron table saw table for the the true line for the top sides of the ribs and the machinists blocks. This works because I do not profile my ribs, the top side edge is still straight as it came off the jointer.
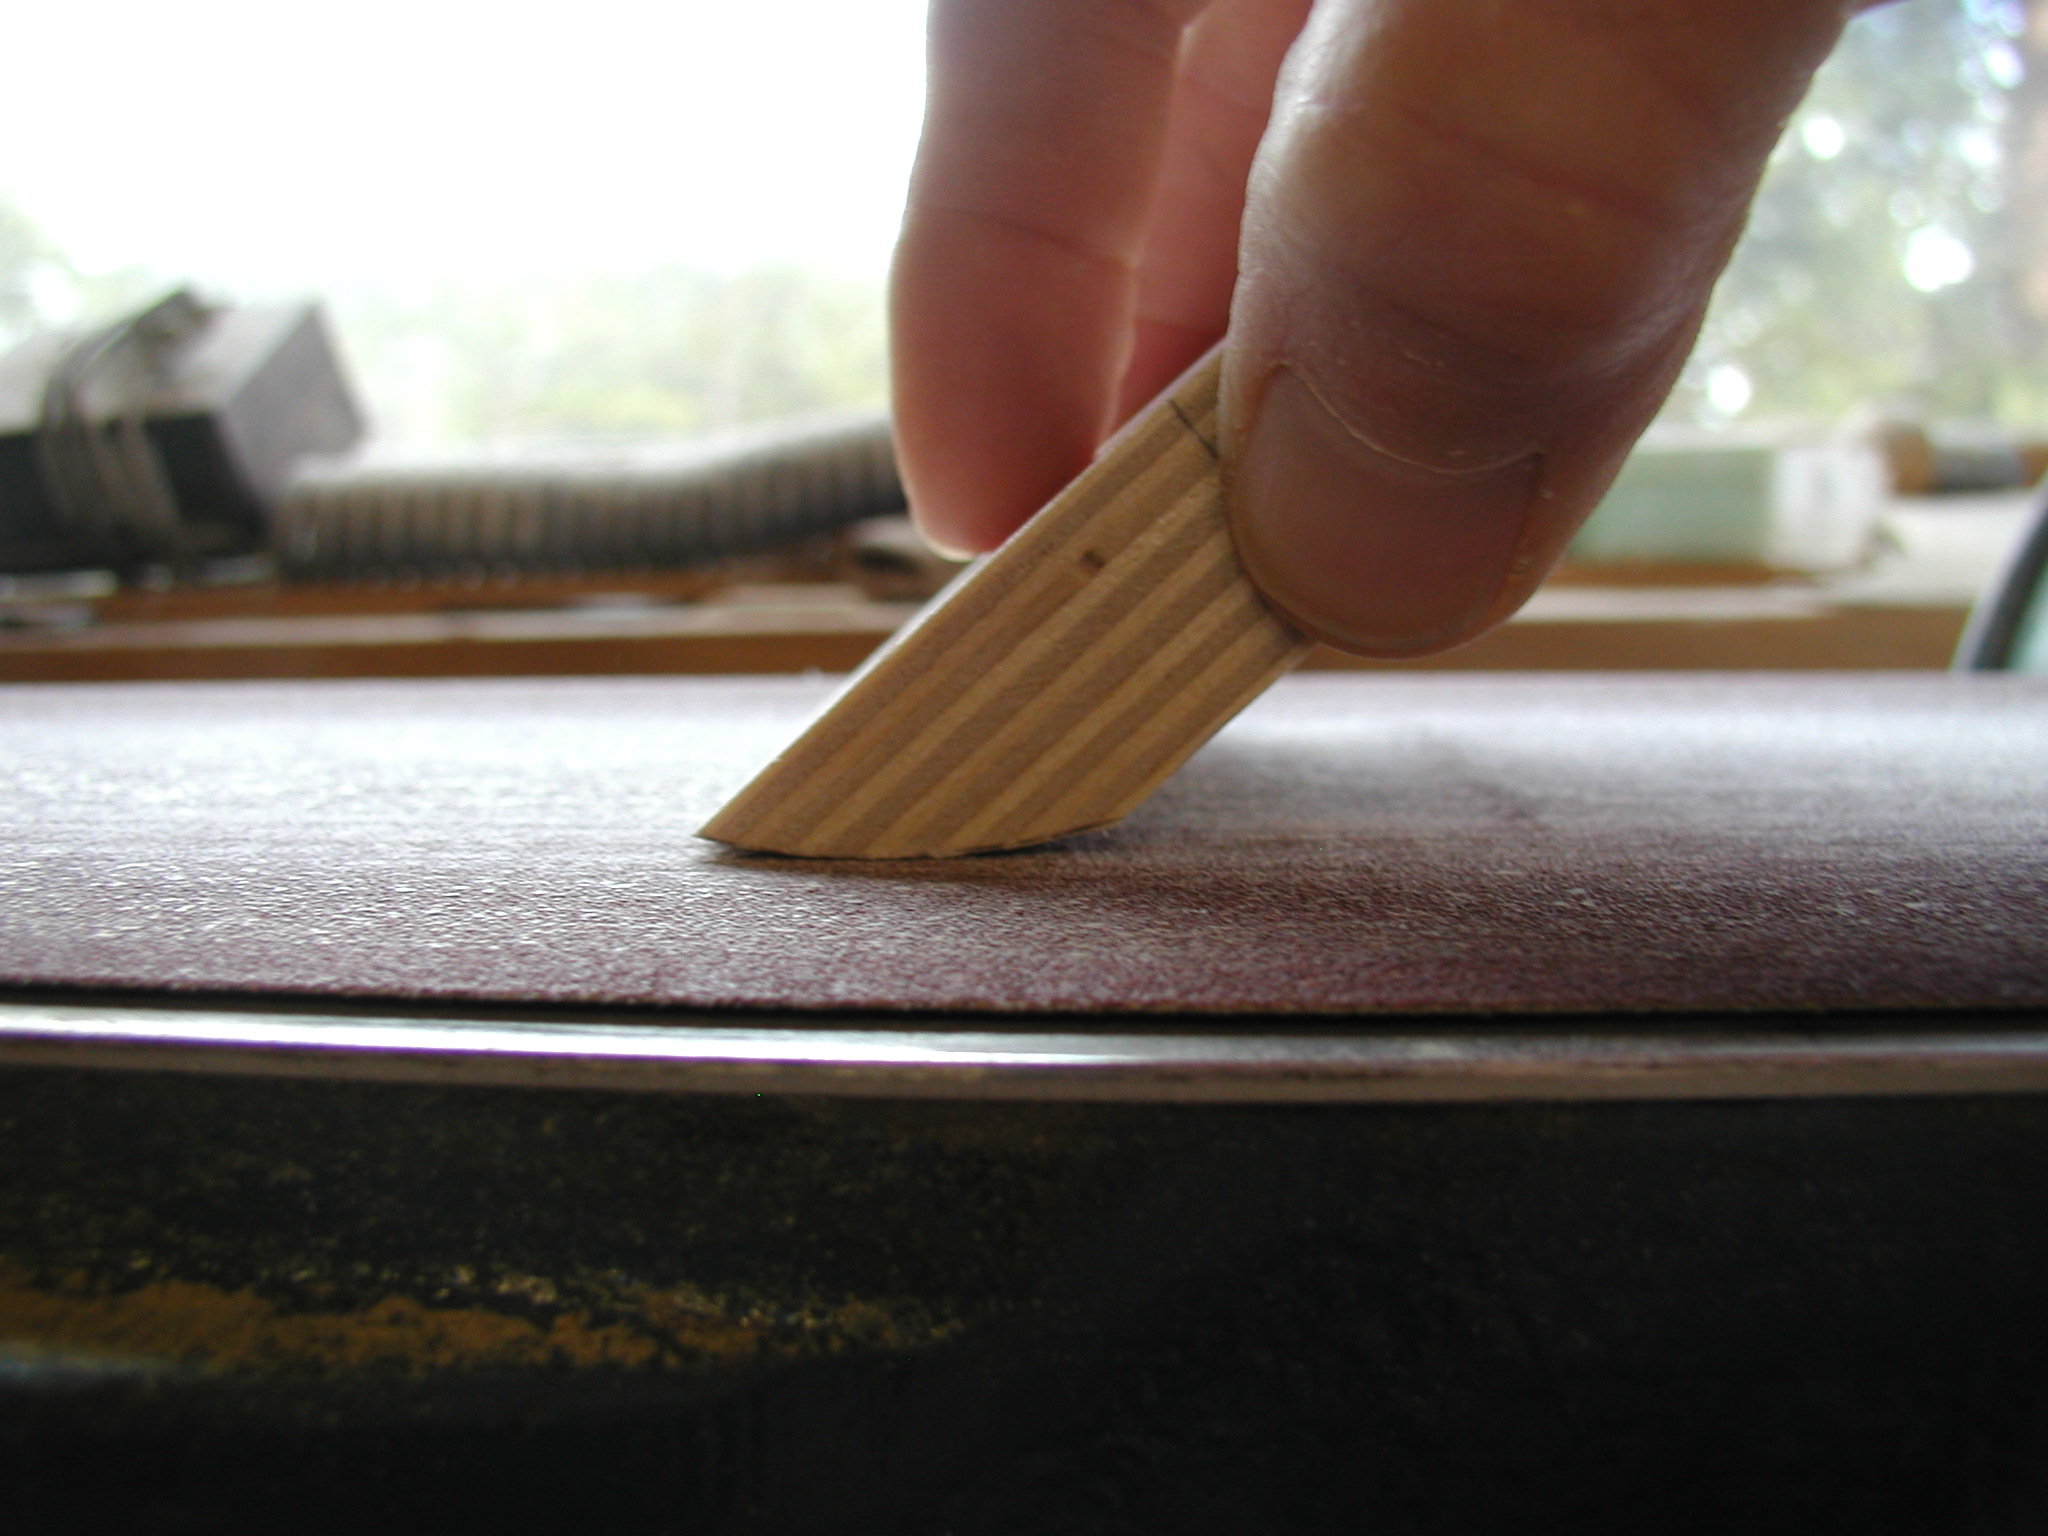
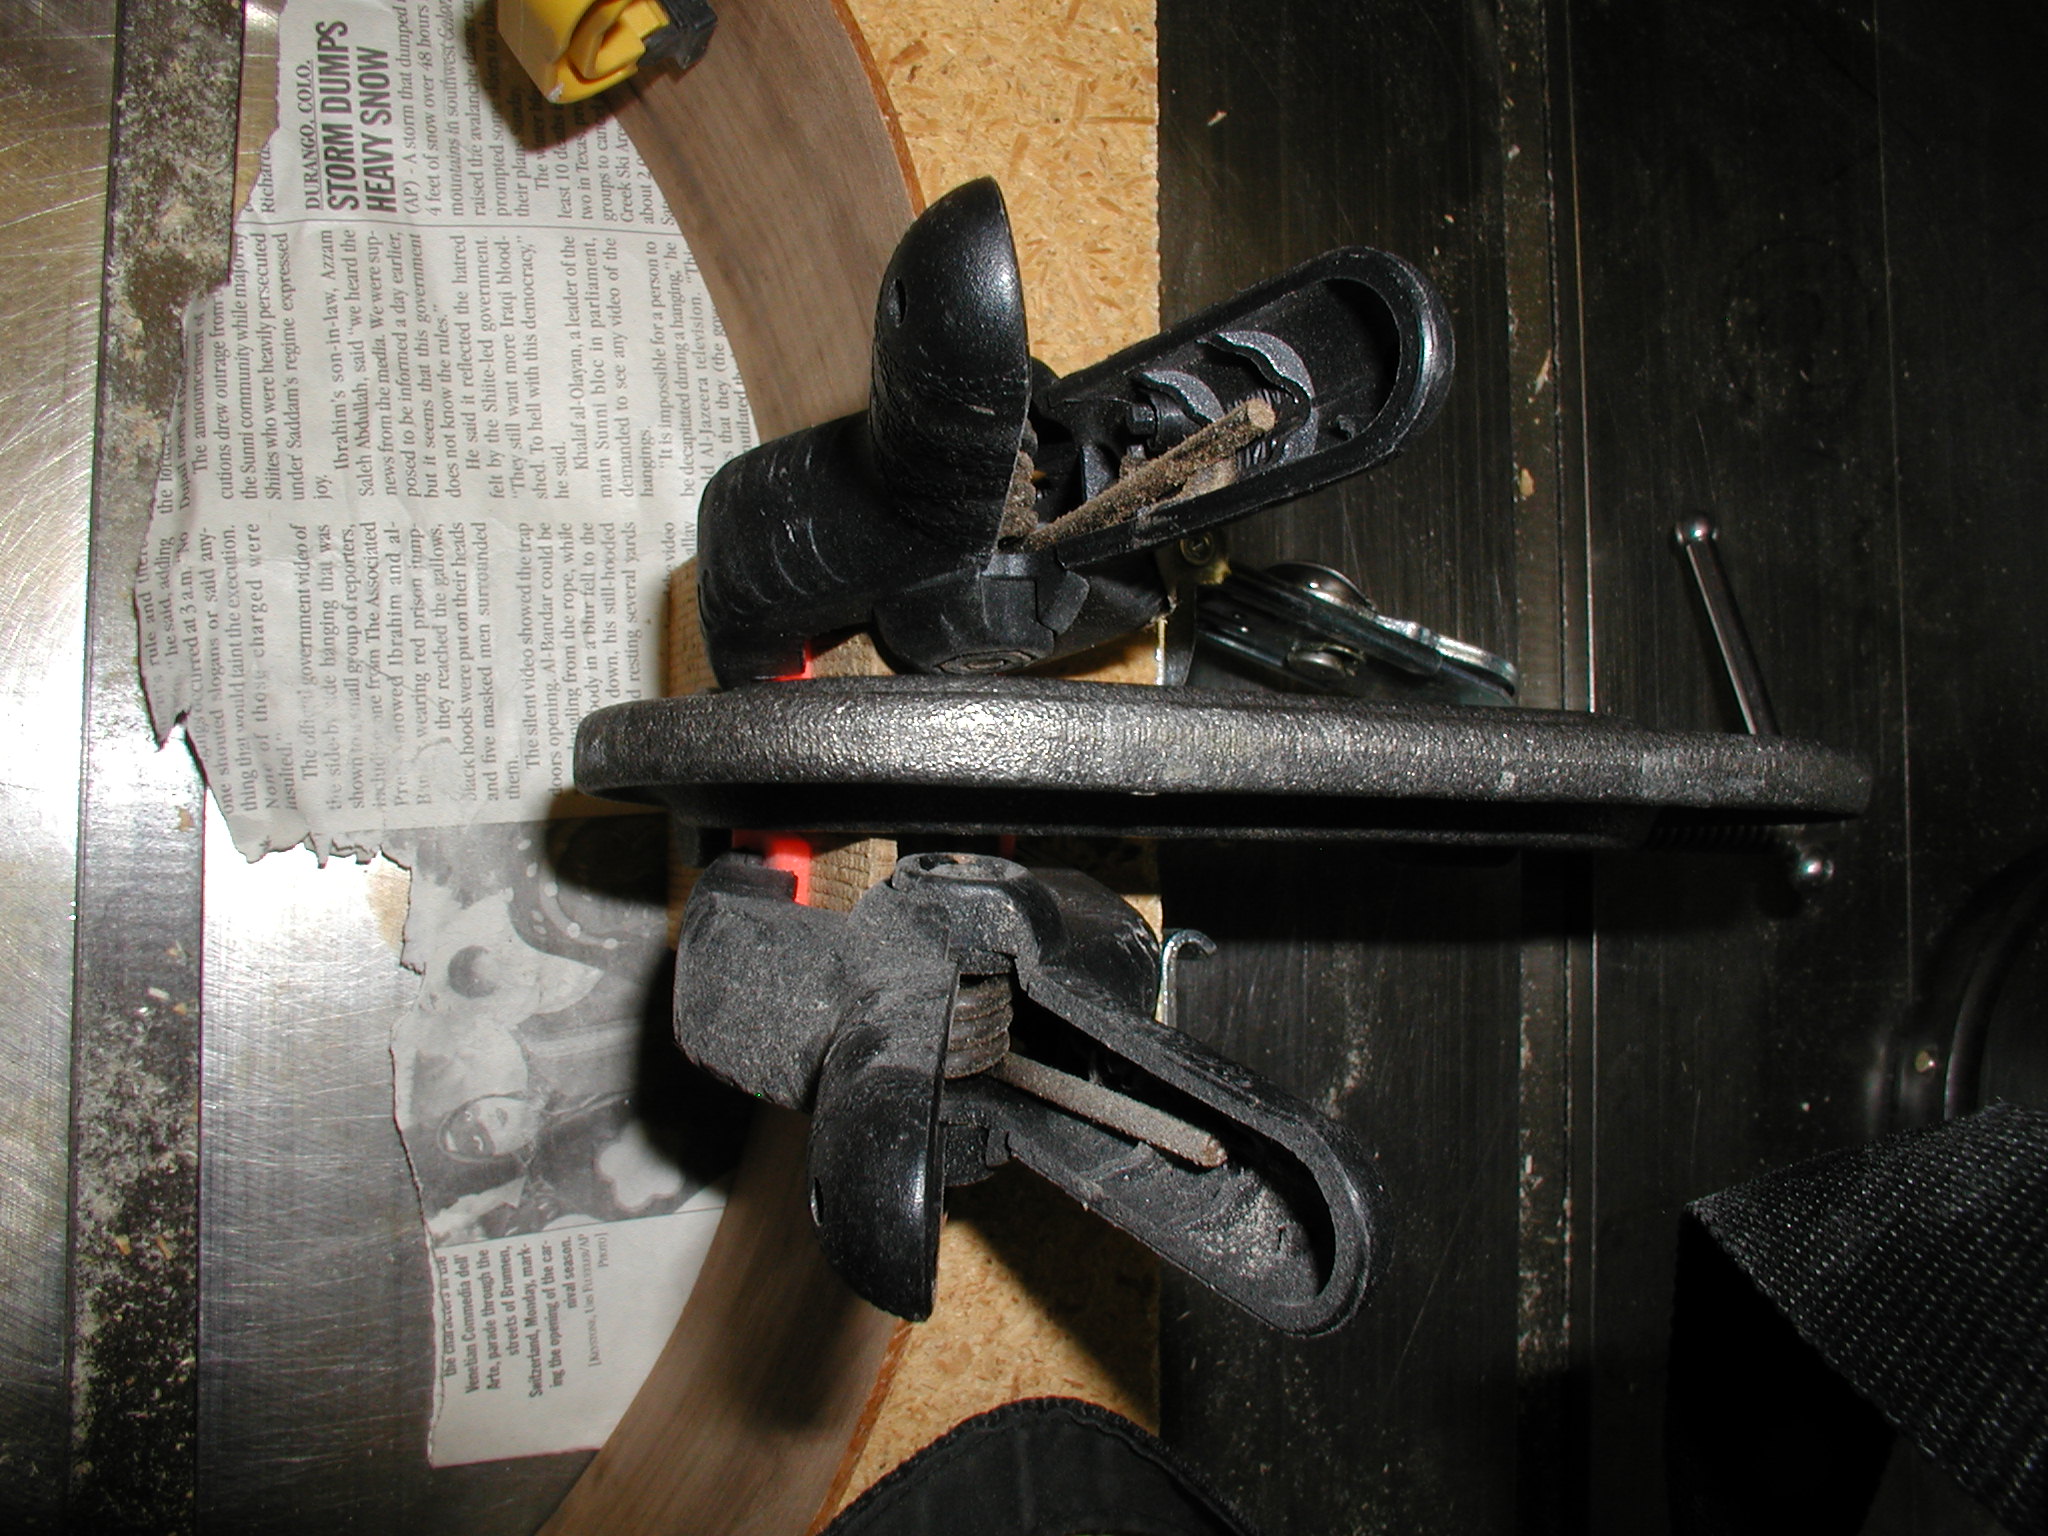
The ribs now need to be trimmed down. I don't profile my ribs ahead of time, I know that some folks have templates and schemes for doing that, but I always just leave them large and squared true and trim them after. The process takes less than 10 minutes for me so I don't see the need to pre-profile them. I rough them down using a low angle block plane to avoid any chance of the side splitting along the grain. If it is a very well behaved wood like I. Rosewood you can get away with roughing down with a chisel first. When I get close it goes onto my motorized hollow form sander that cuts it true to the top or back radius profile. I used to do this by hand with the hollow form resting on top and it took a lot of elbow grease and about another half hour.
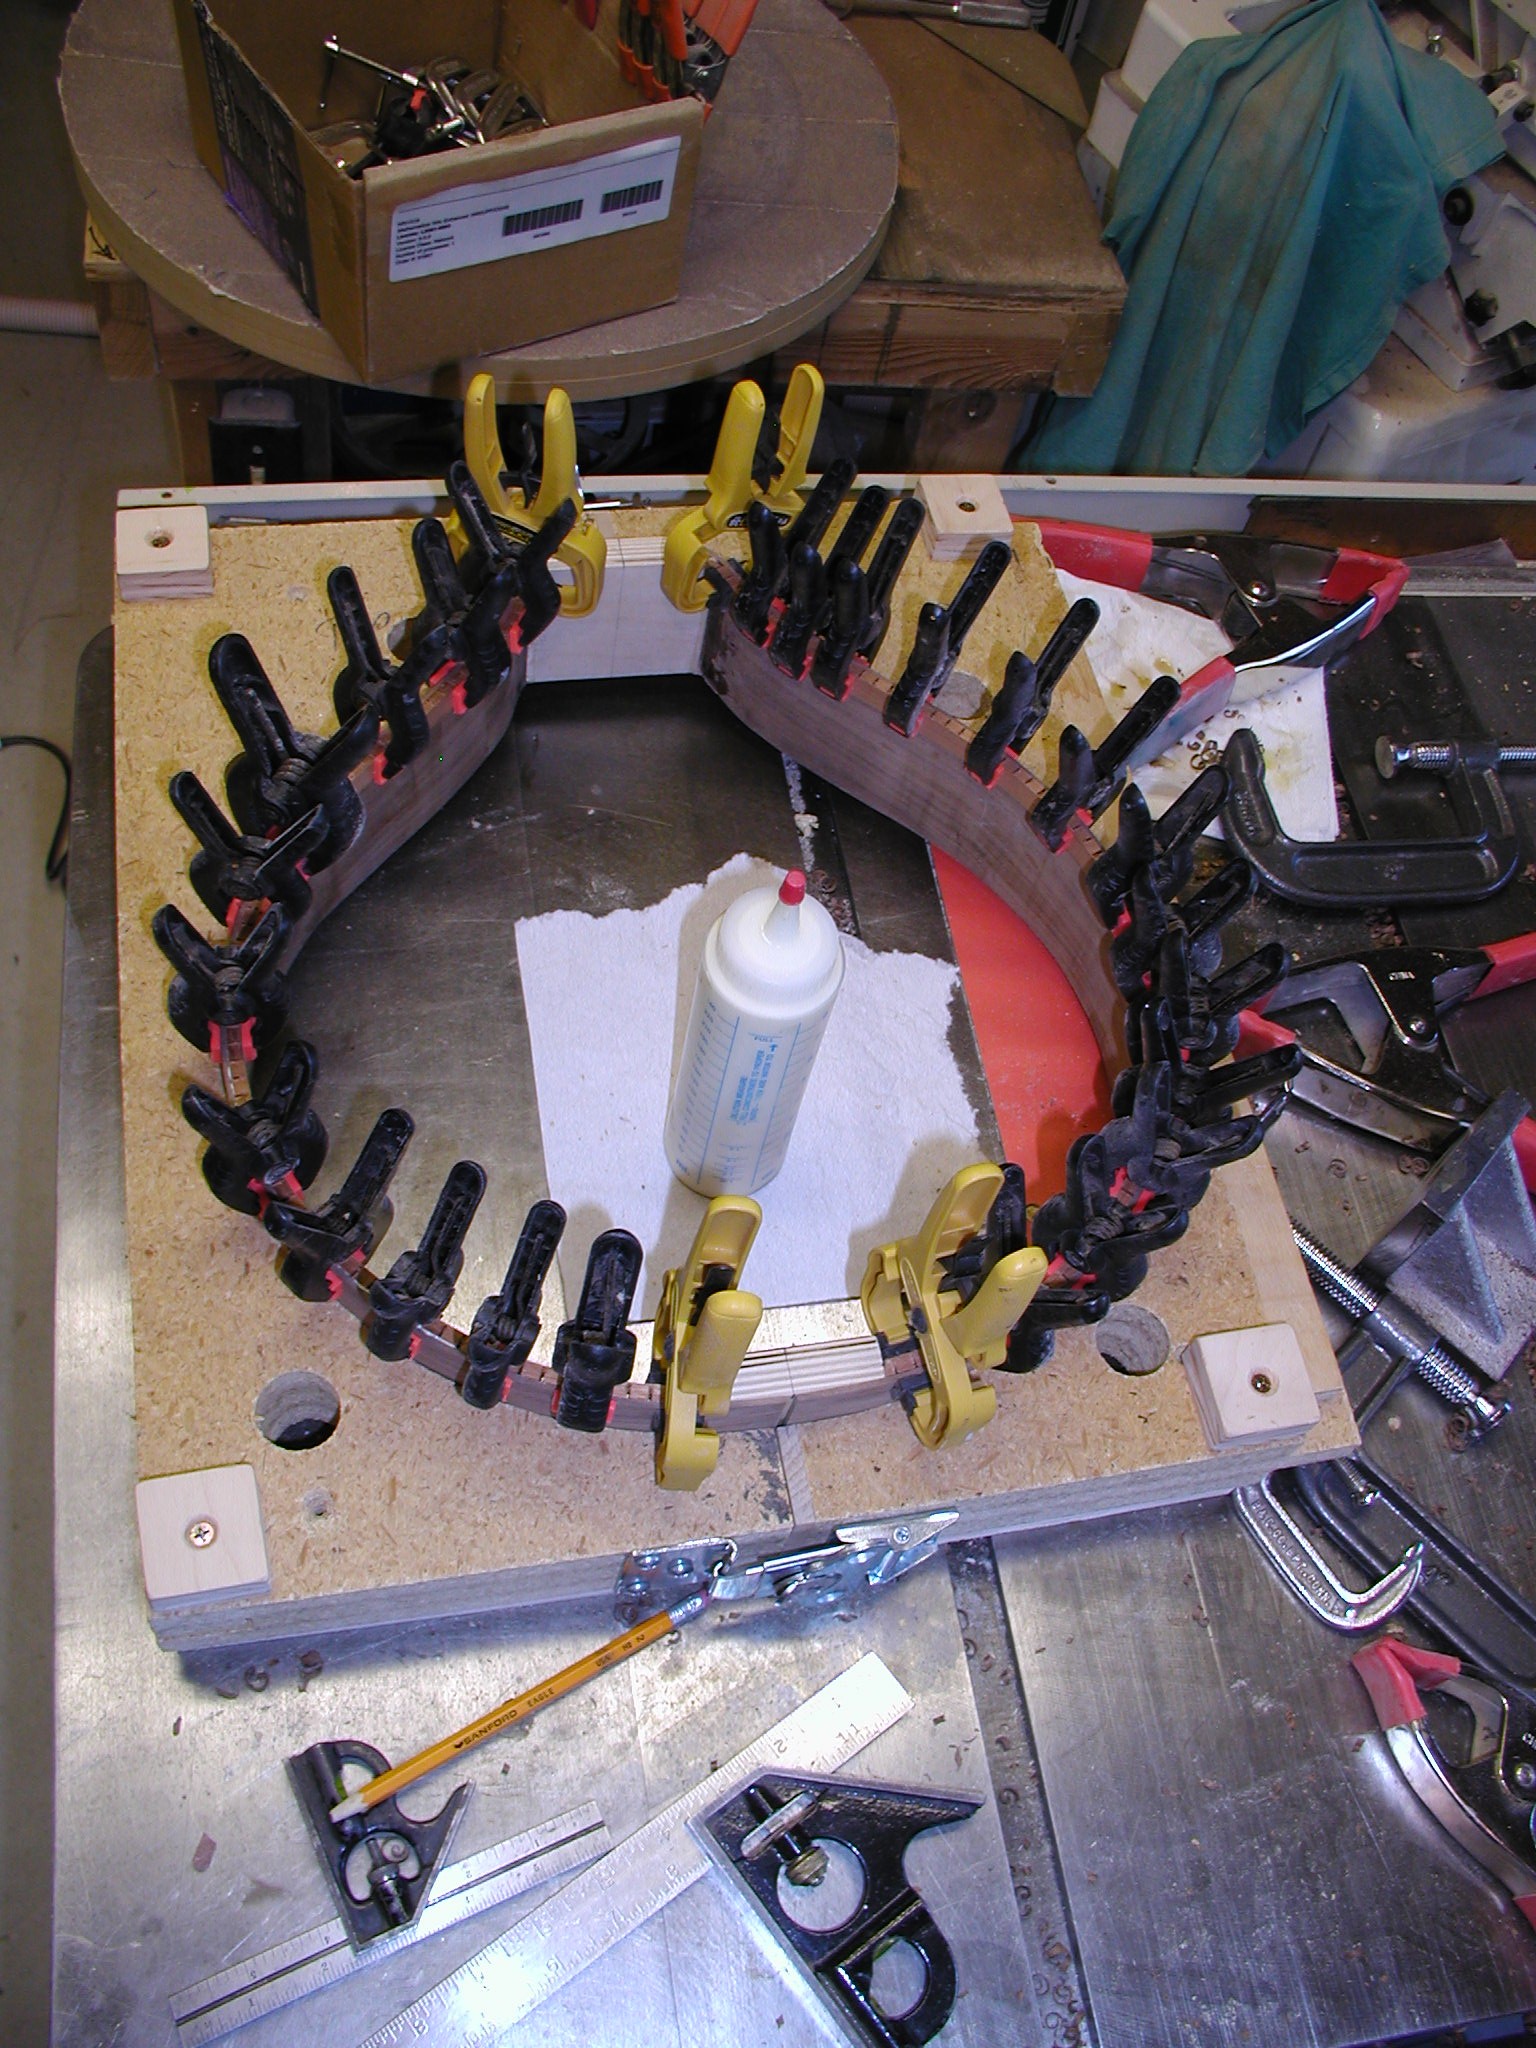
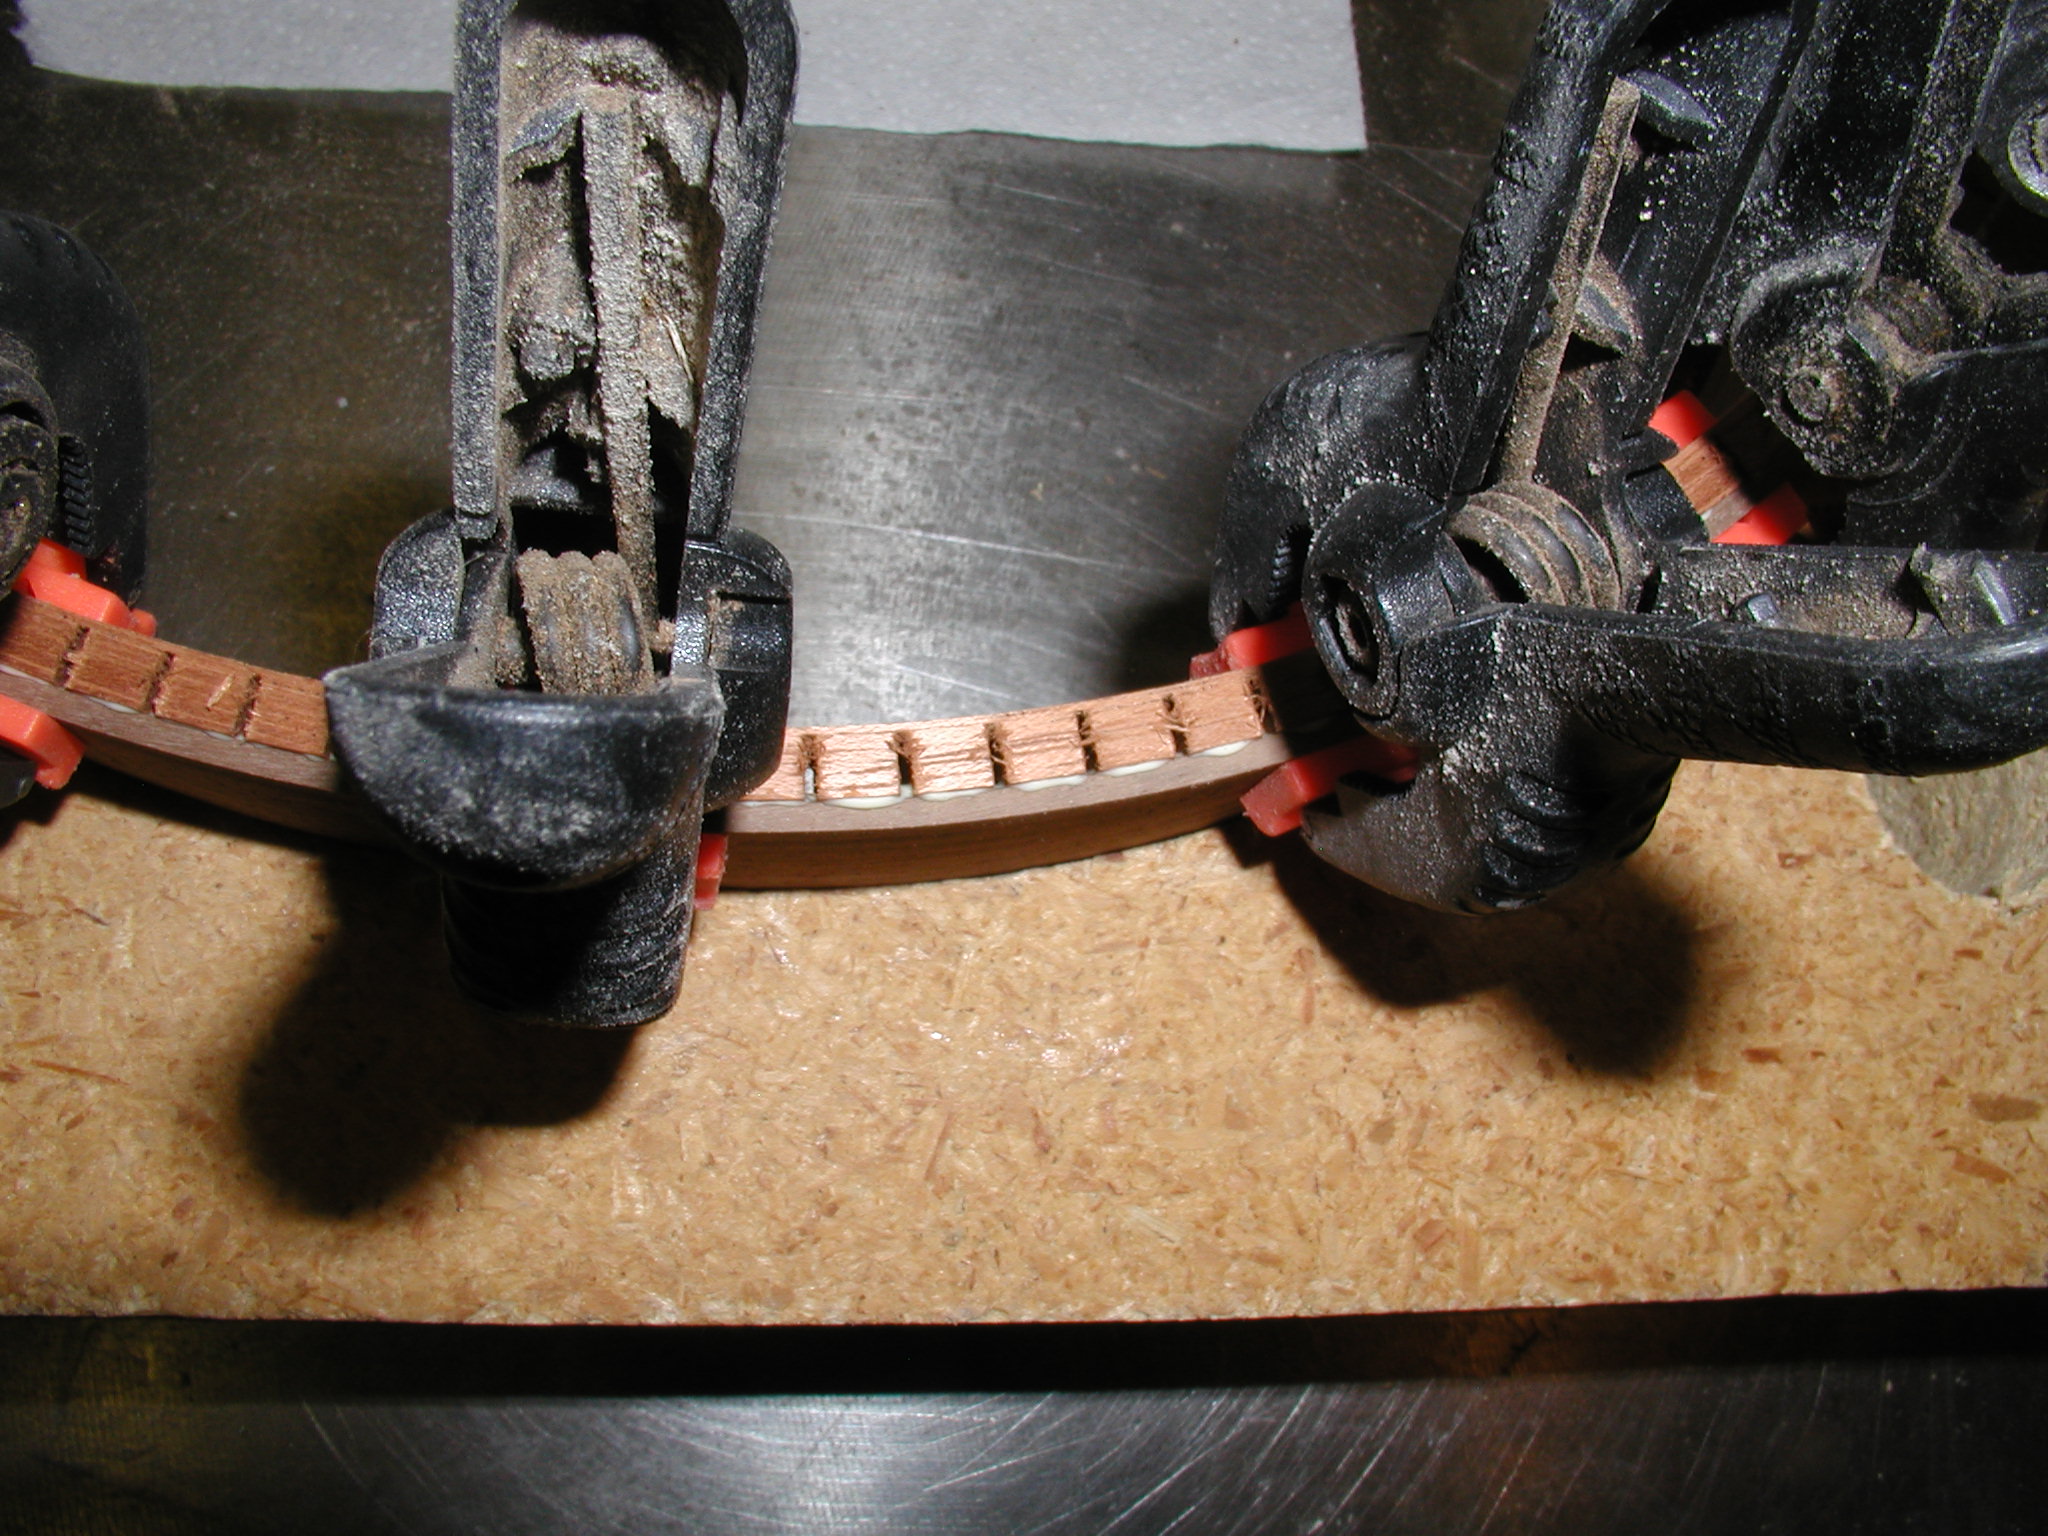
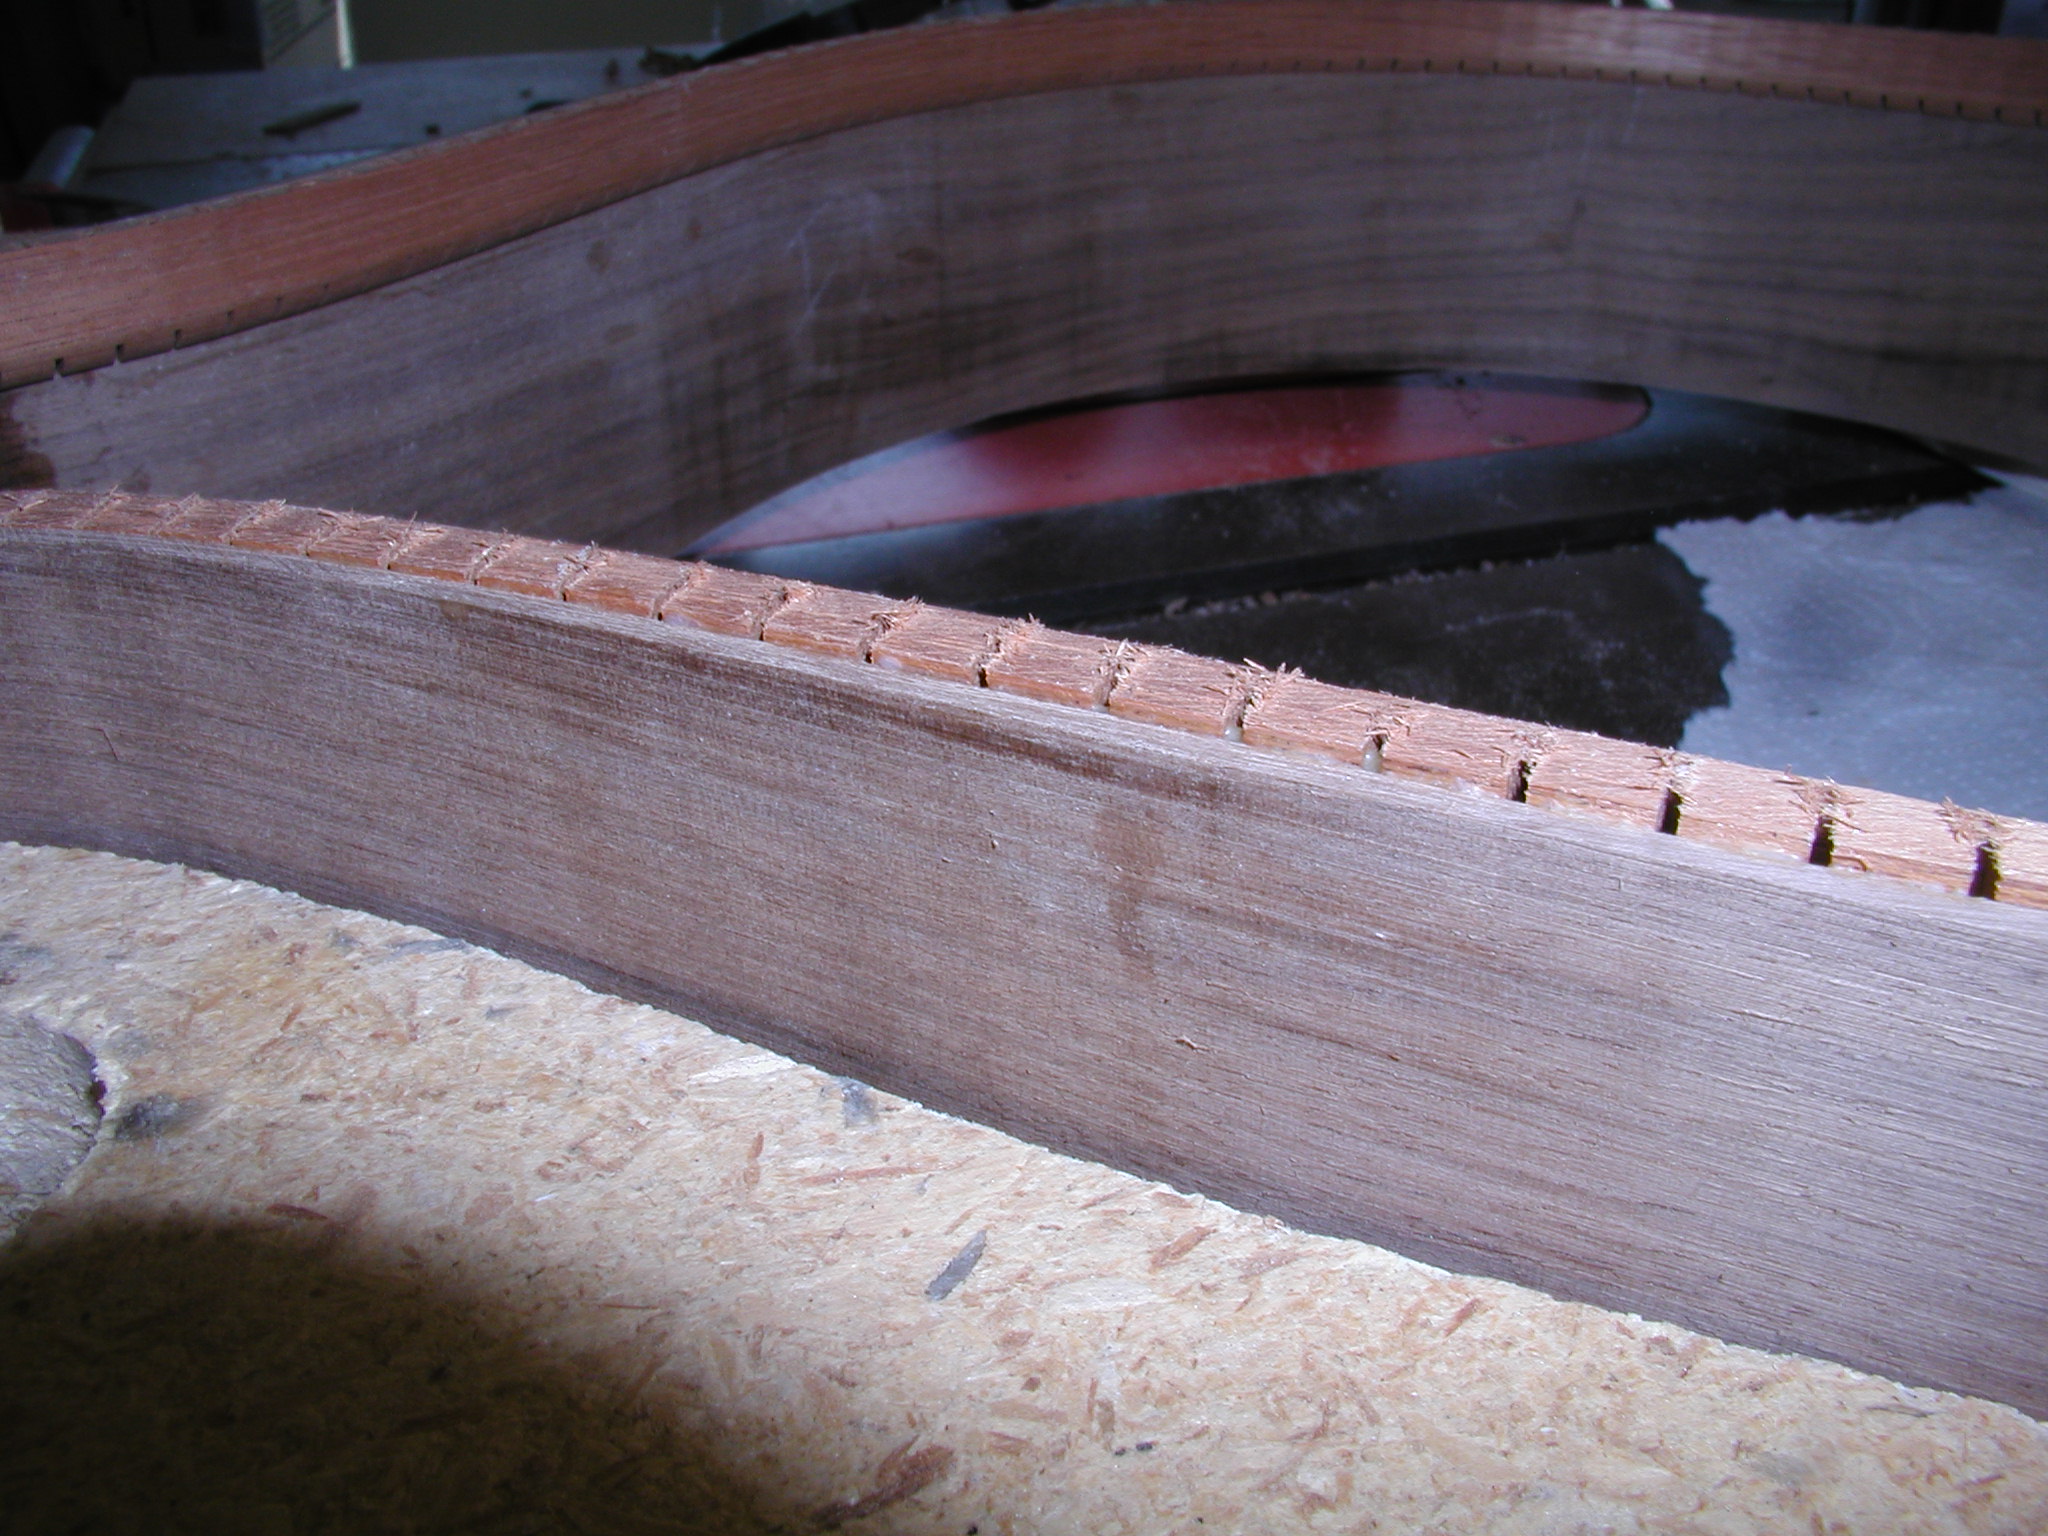
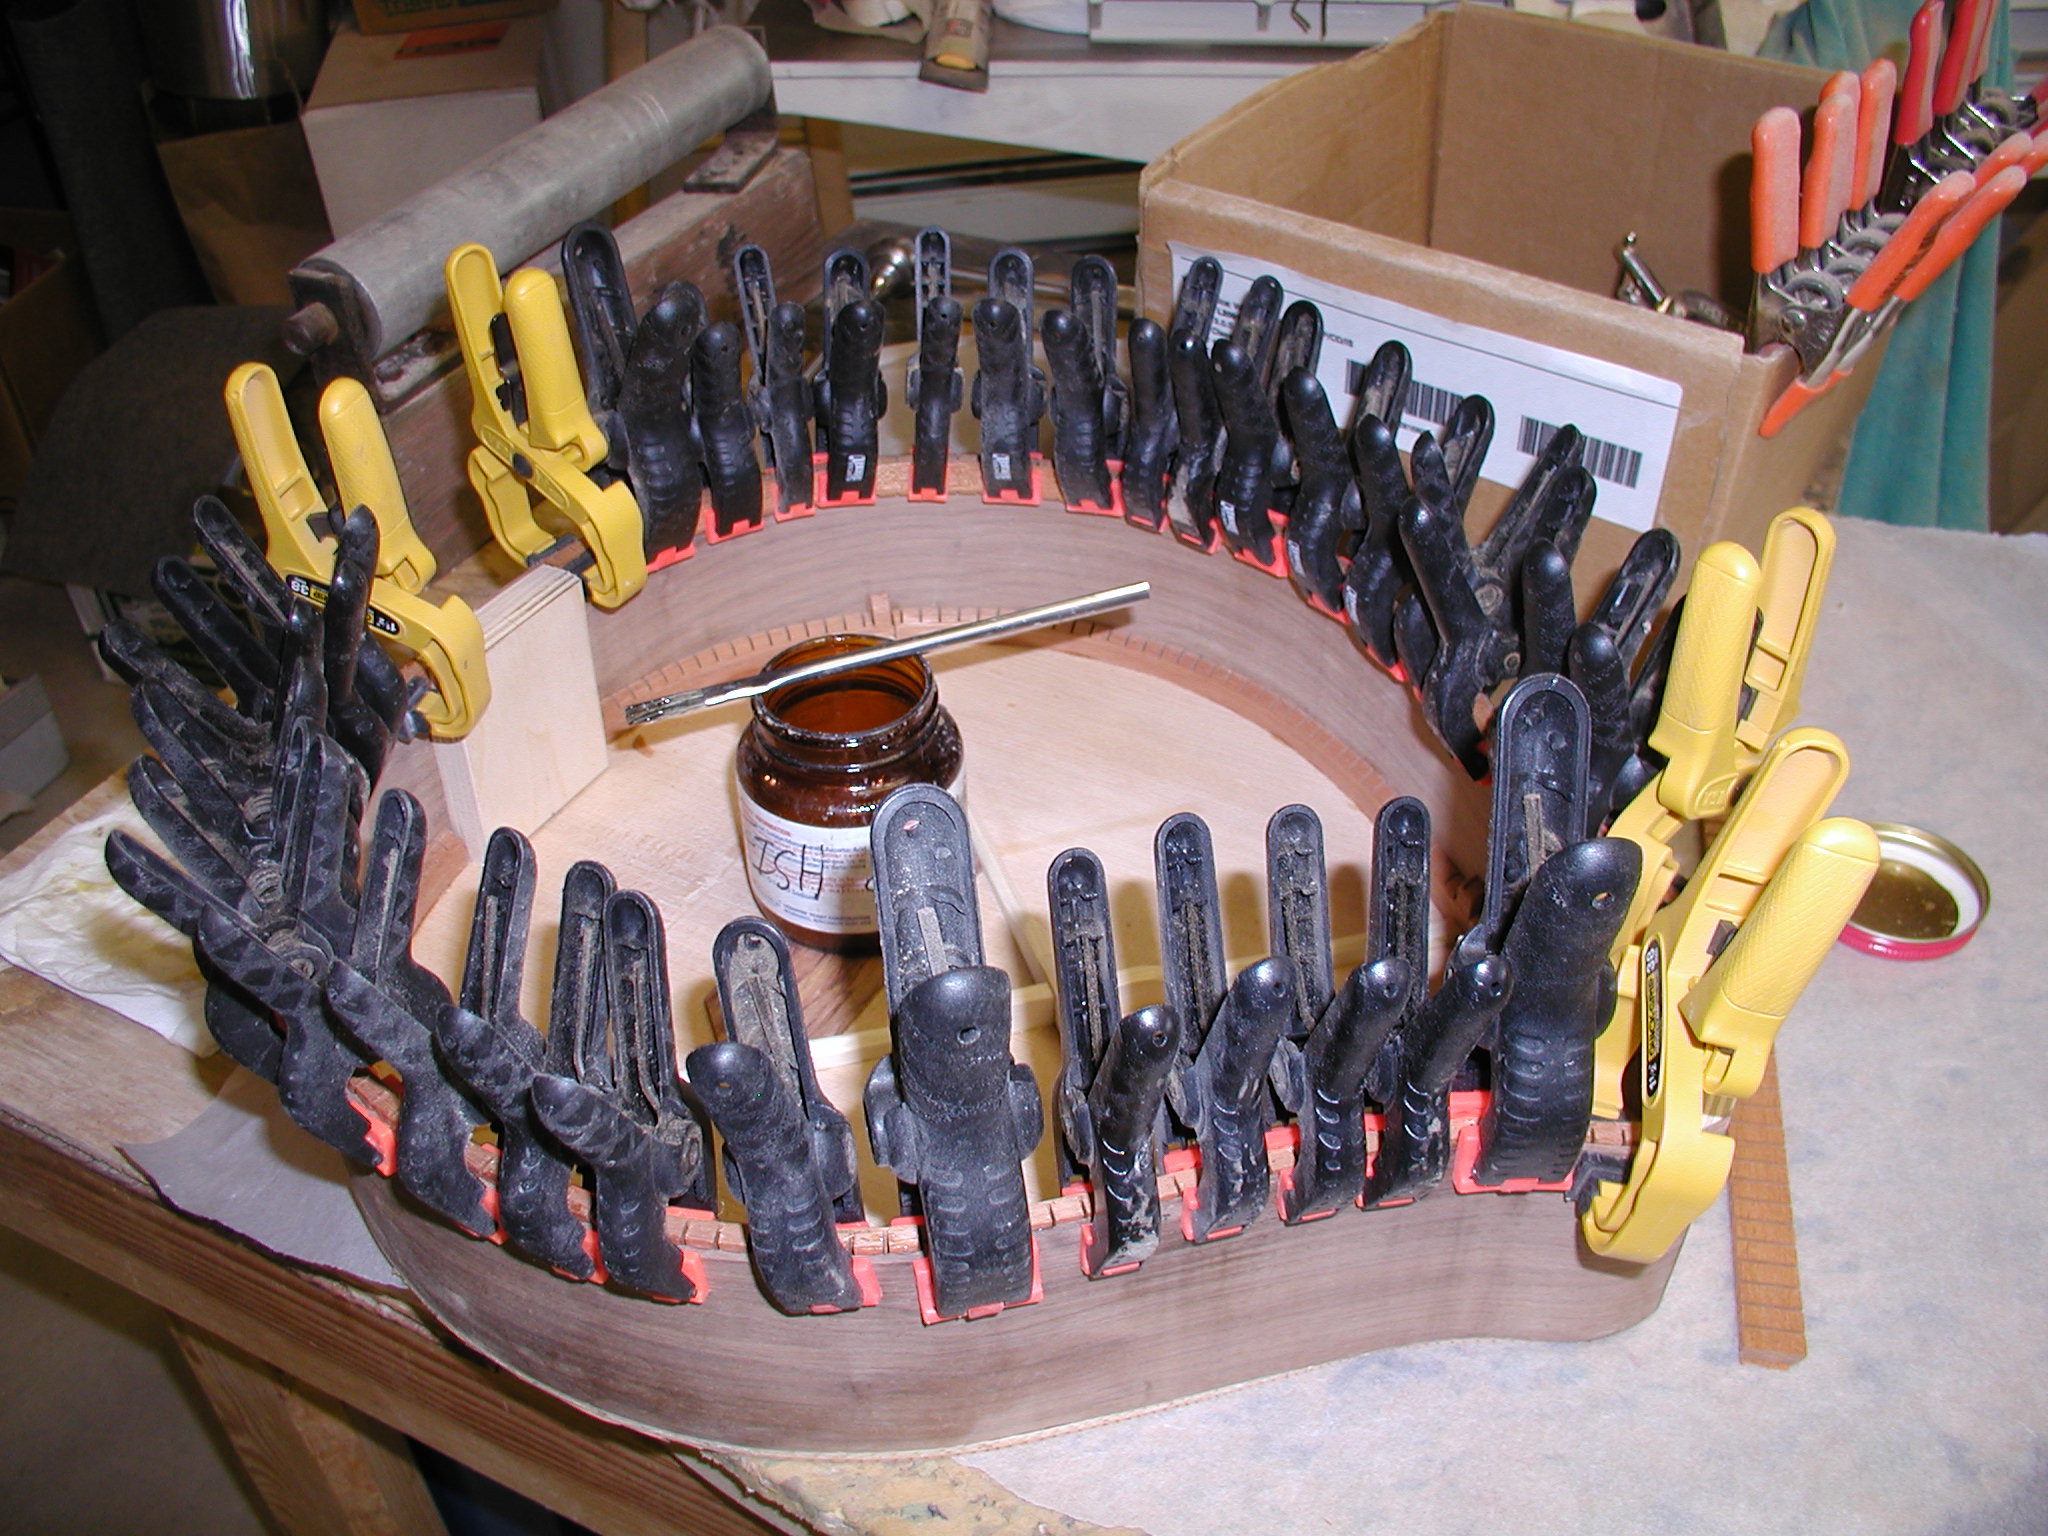
At this point the reverse kerfed linings go in. <Set Rant Mode = ON/ They are linings,they are not kerffing!!! The kerfs are the cuts in the lining.
kerf (kûrf) n. 1. A groove or notch made by a cutting tool, such as a saw or an ax. 2. The width of a groove made by a cutting tool. [Middle English, from Old English cyrf, a cutting.]
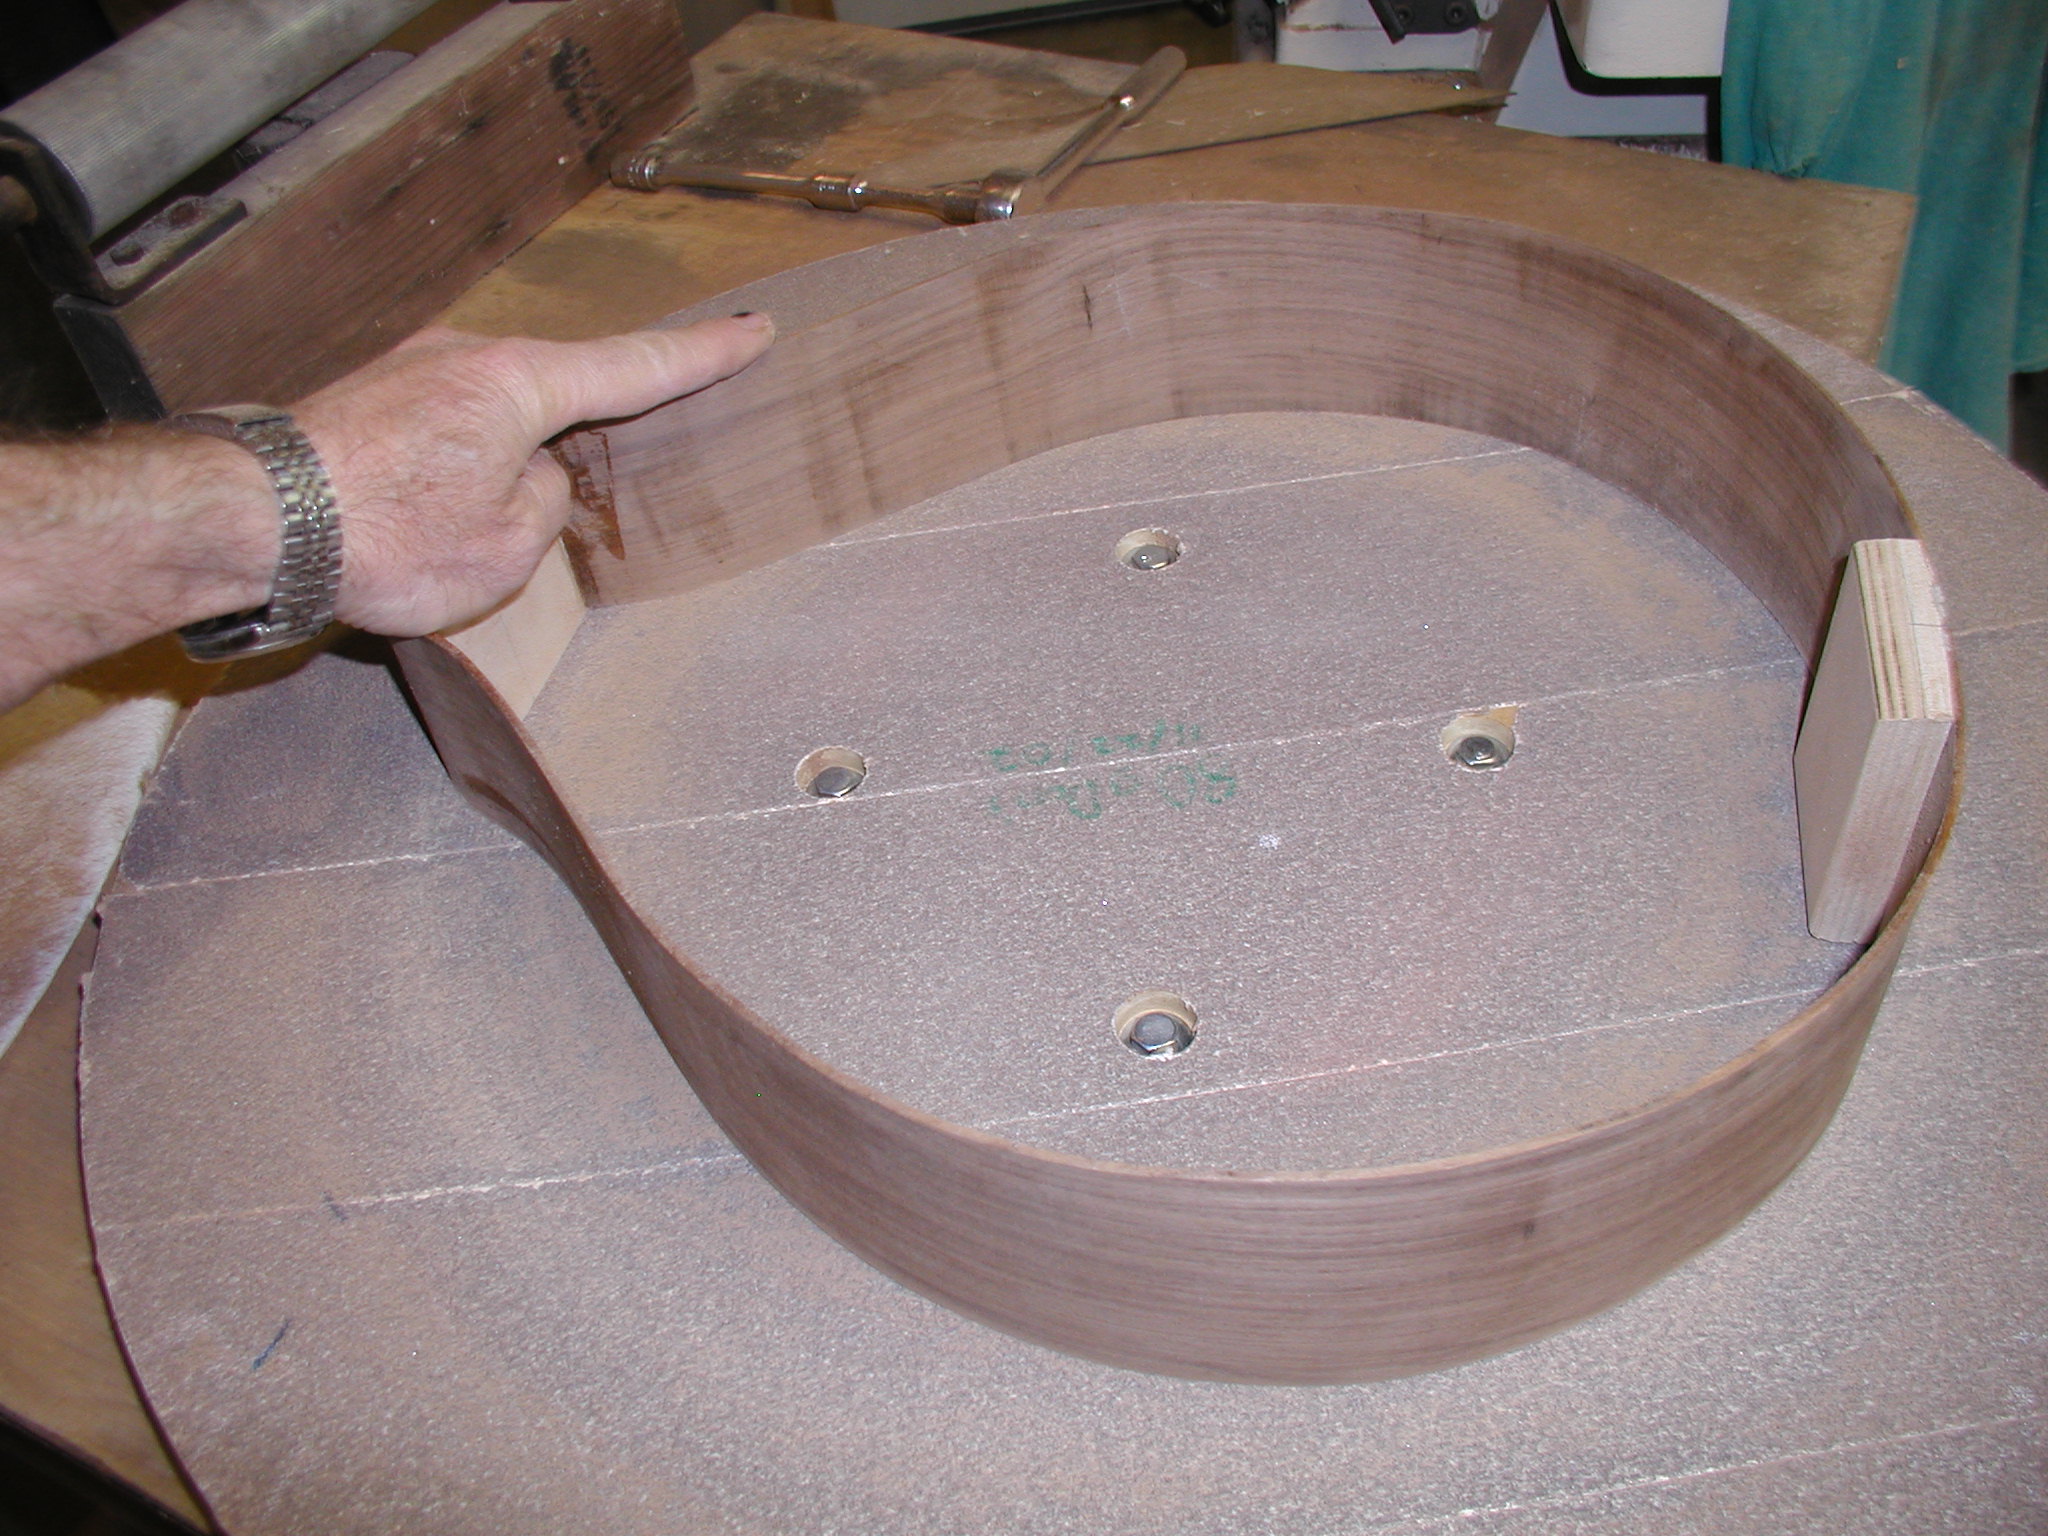
/OK Set Rant Mode = Off> Whew, just had to say that. The reverse kerf has the kerffed part against the side and a continuous part on the inside. This makes a very rigid lining when glued up. Plan on having a zillion clamps, I use the little spring clamps that go on sale all the time at Harbour Freight, a great place for getting simple tools at a low cost. In the last photo with the clamps off, notice how the linings are standing proud of the ribs.
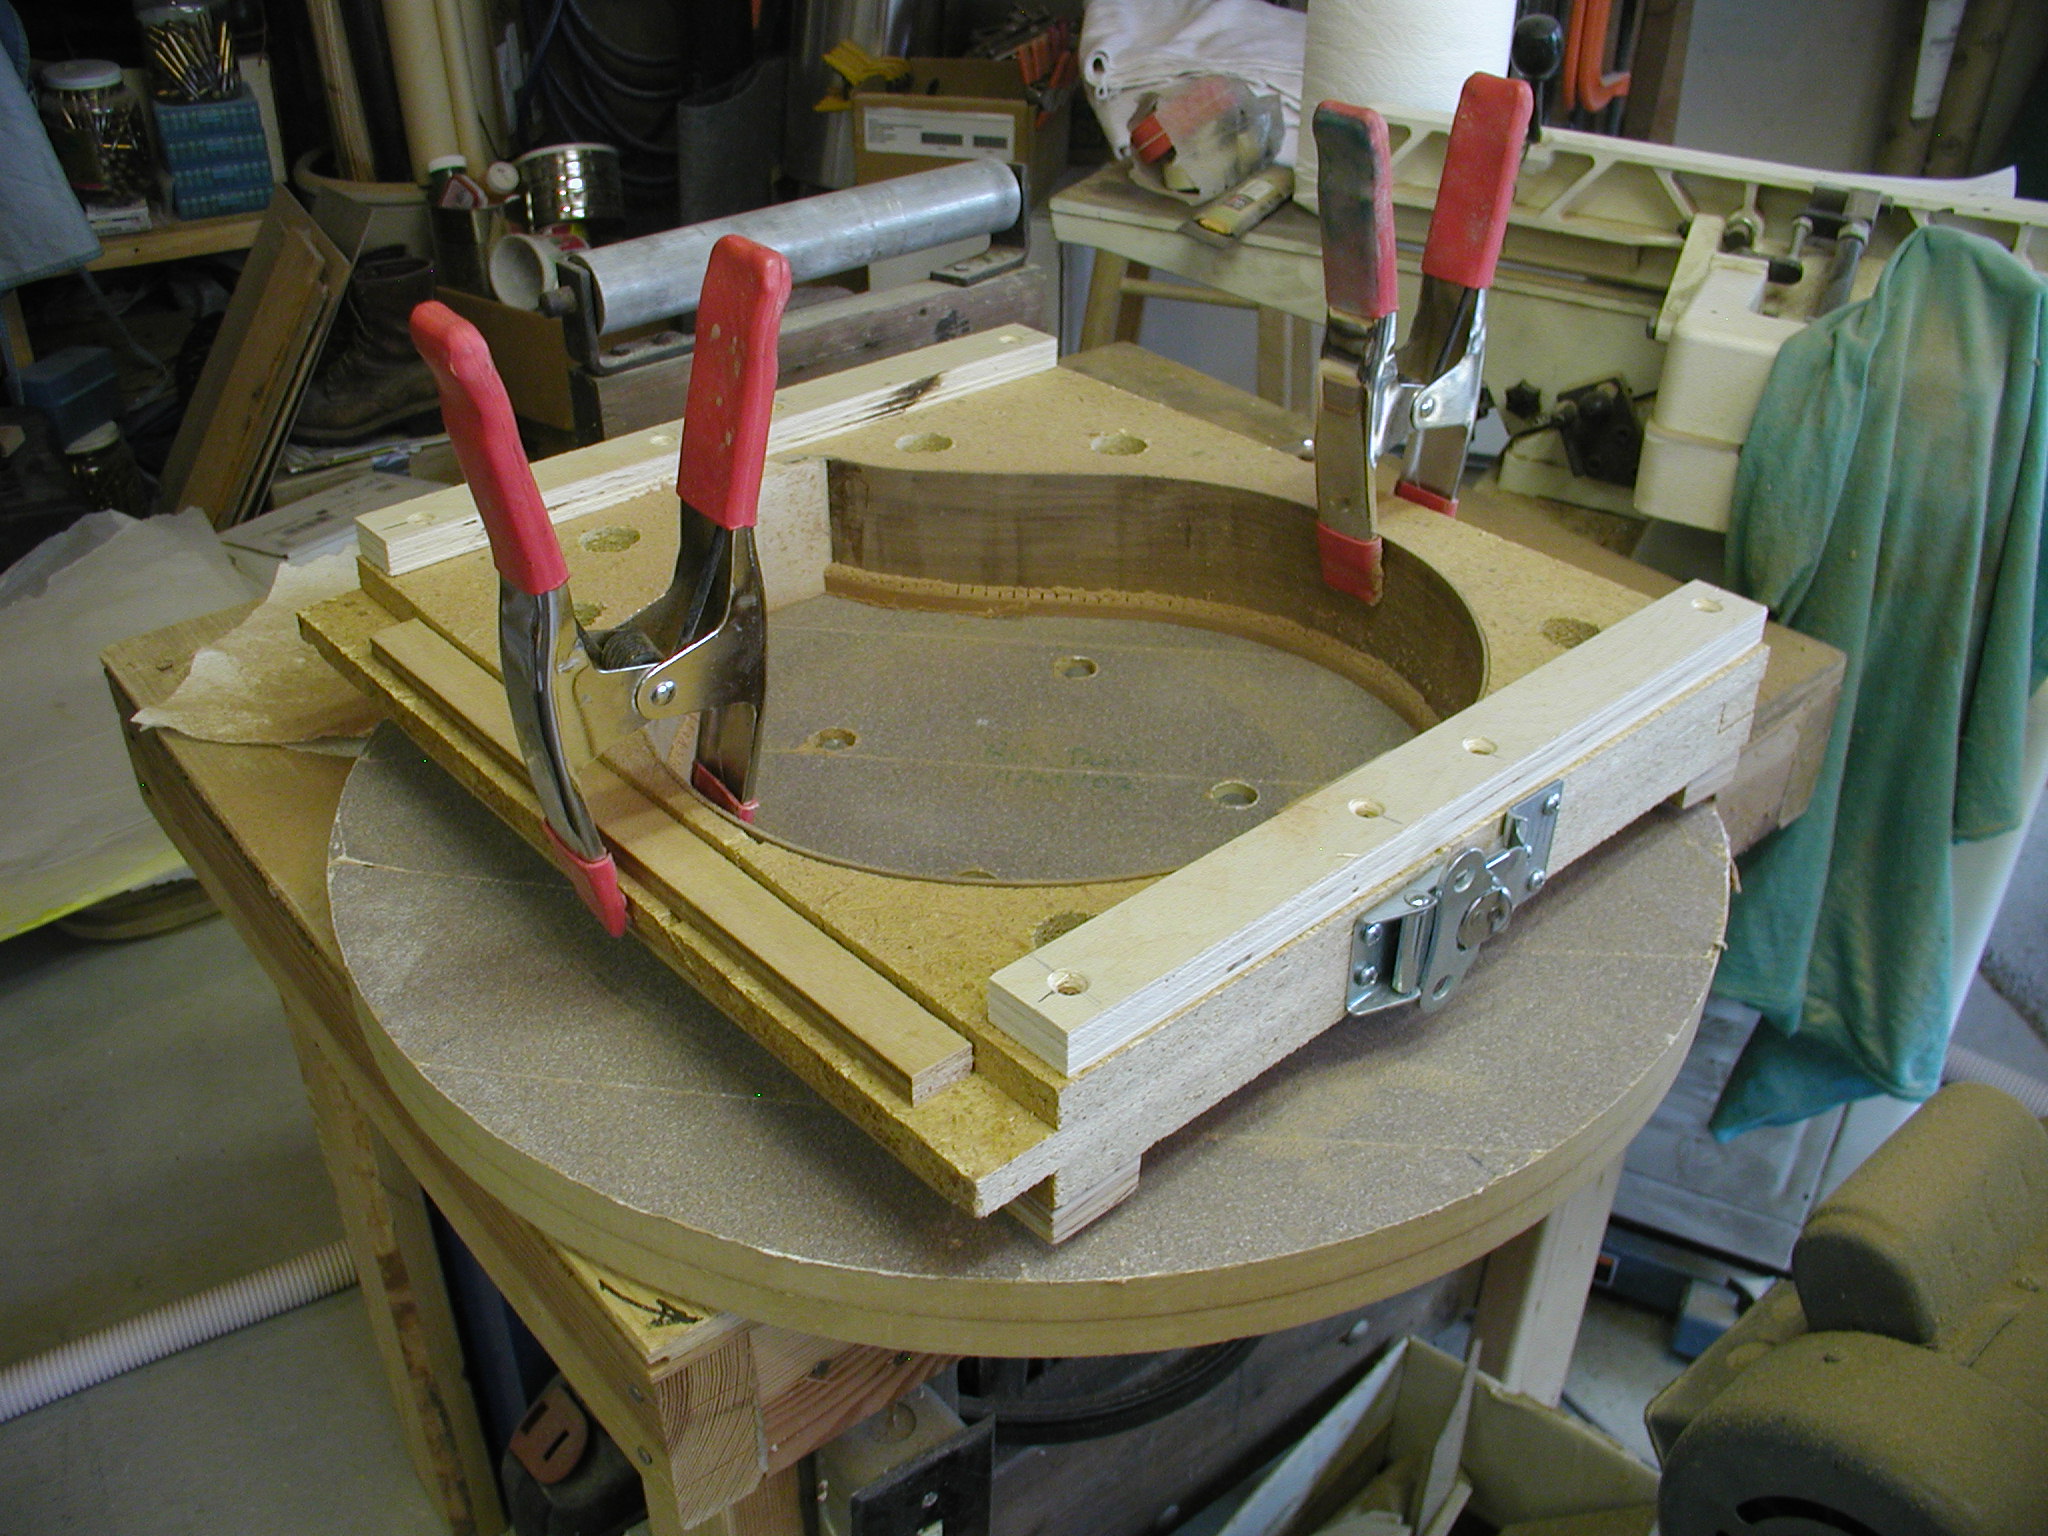
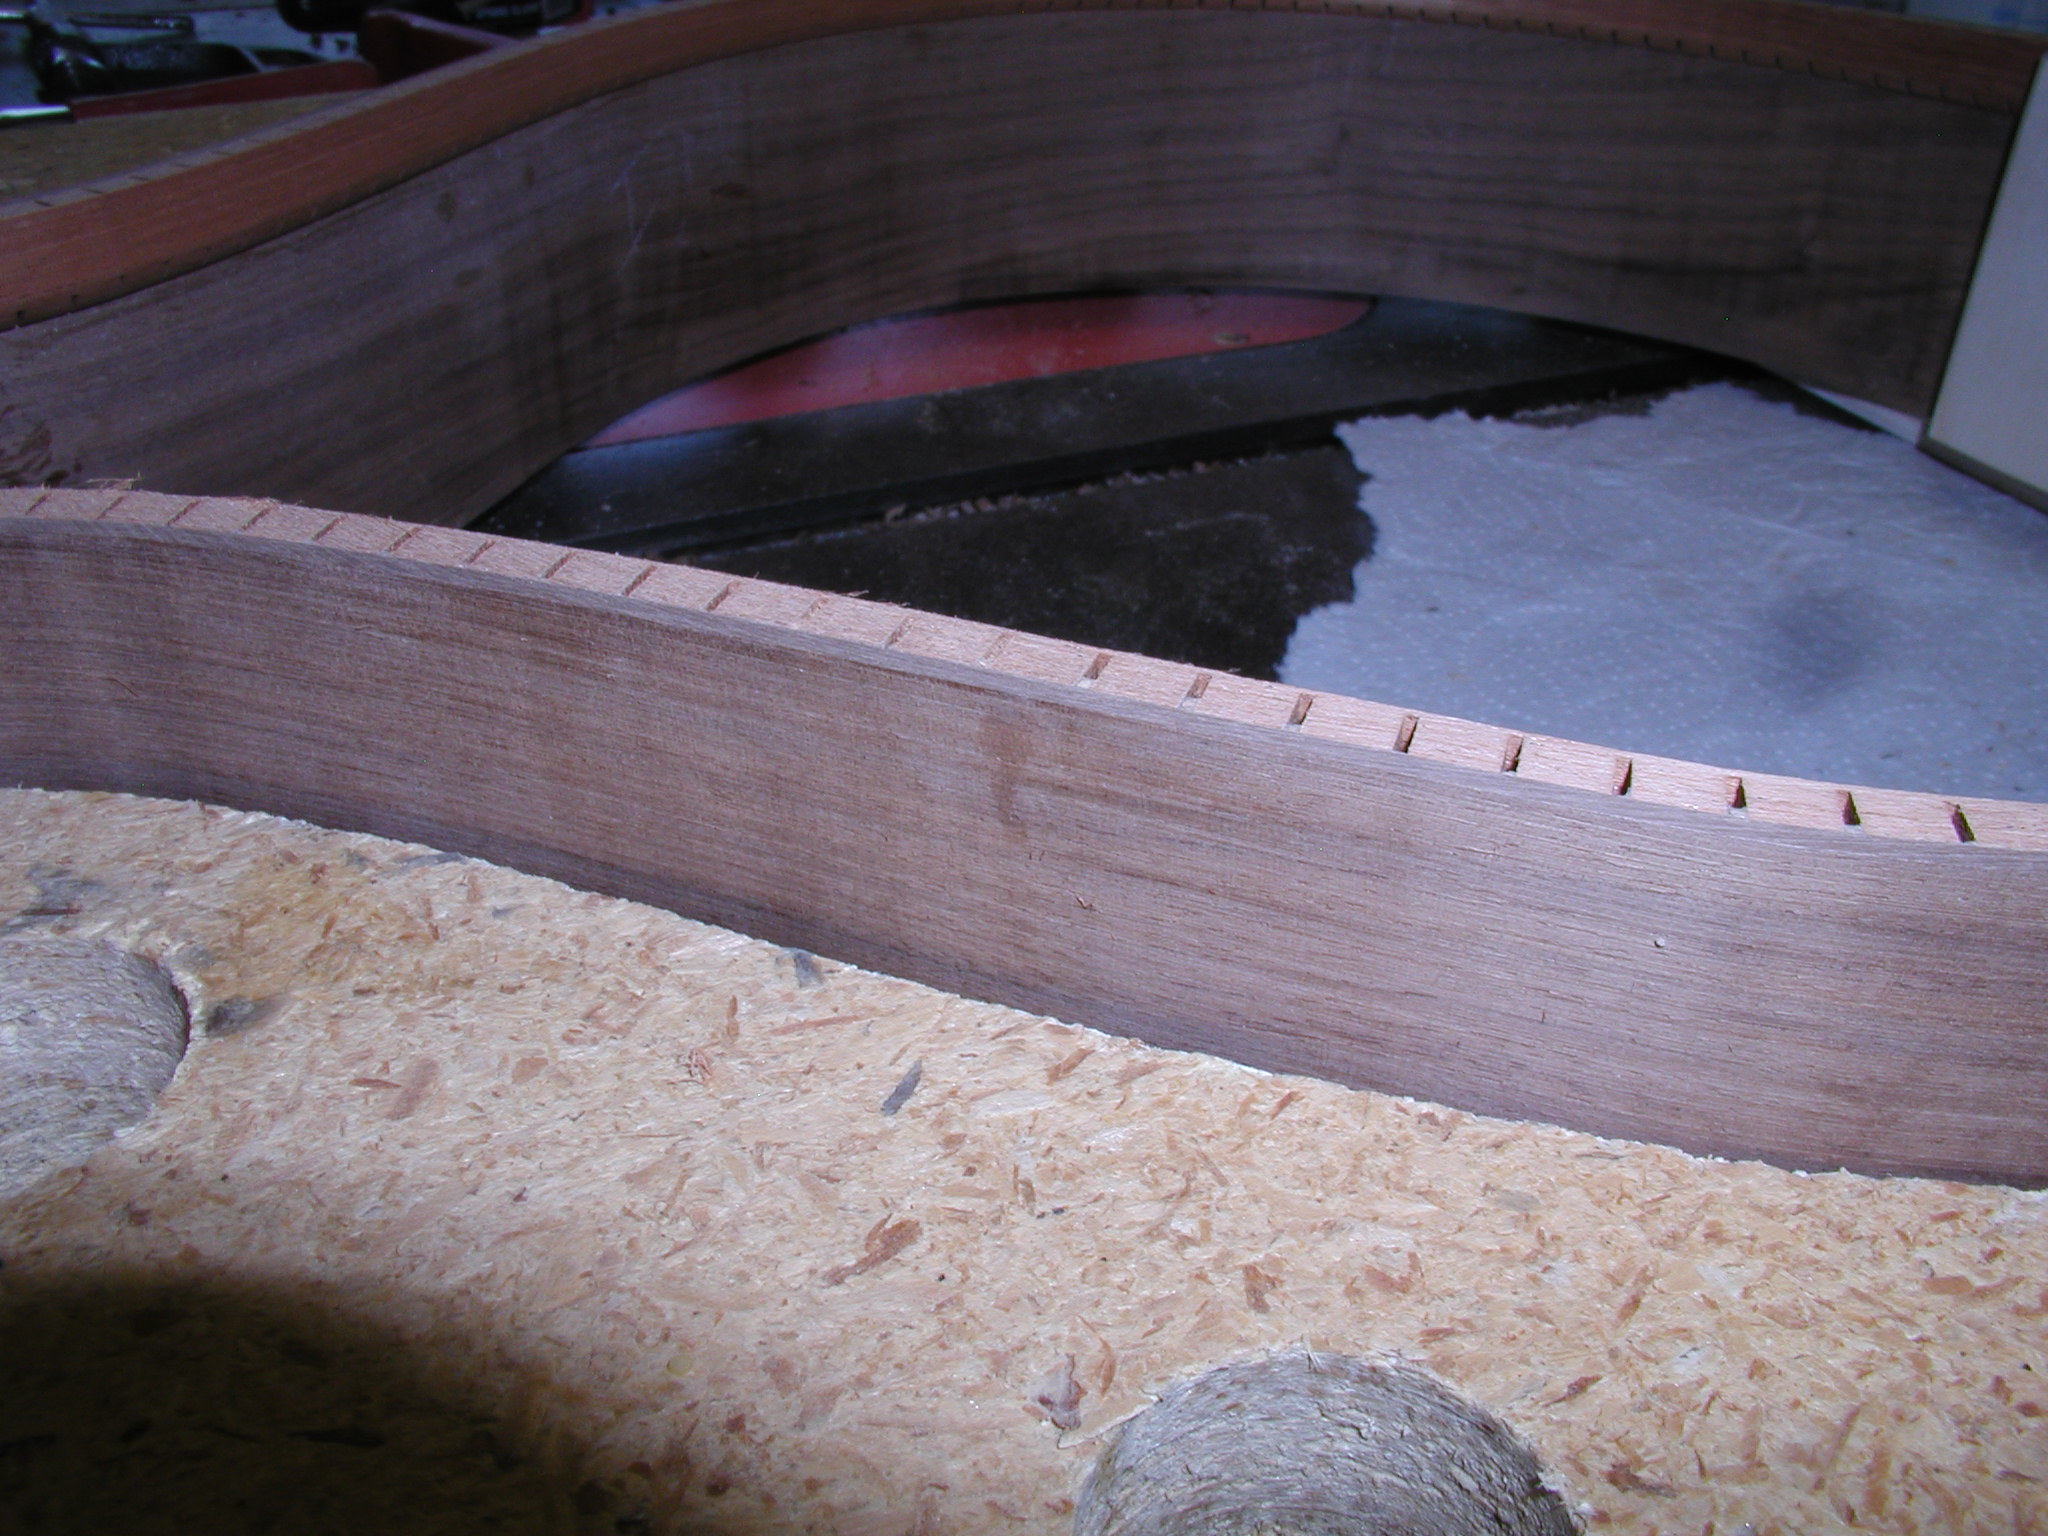
Back to the powered sanding form. I like to hold it all in the outside form here to get it true and it keeps it from chattering. I just bring the linings down till they match the previously sanded sides.


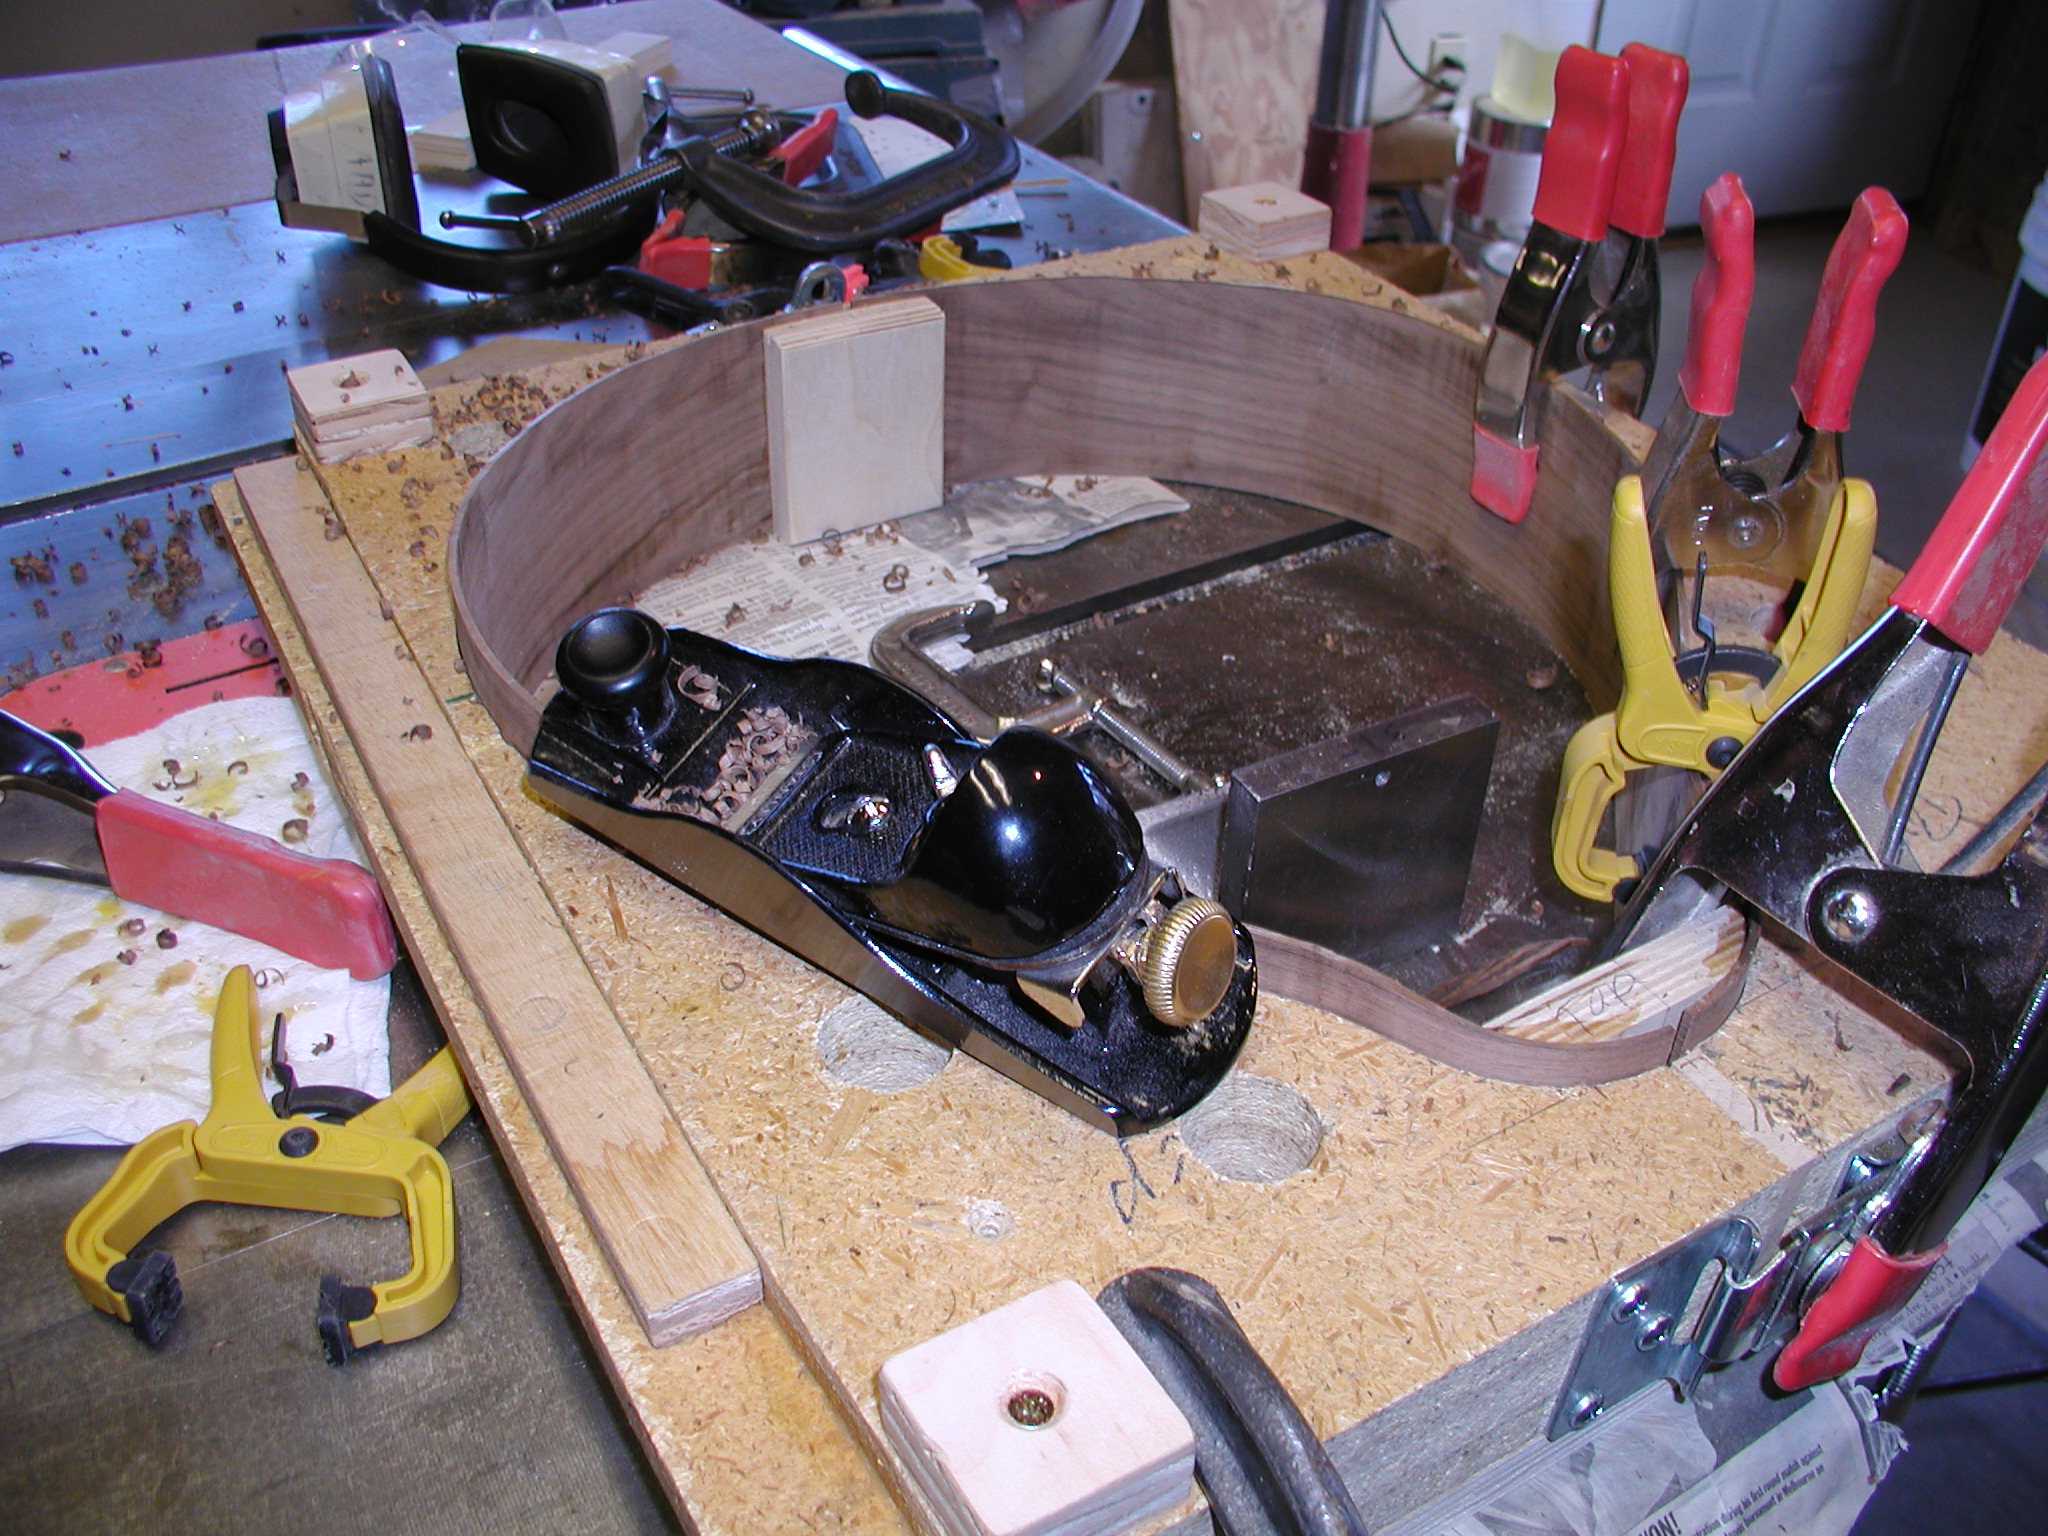
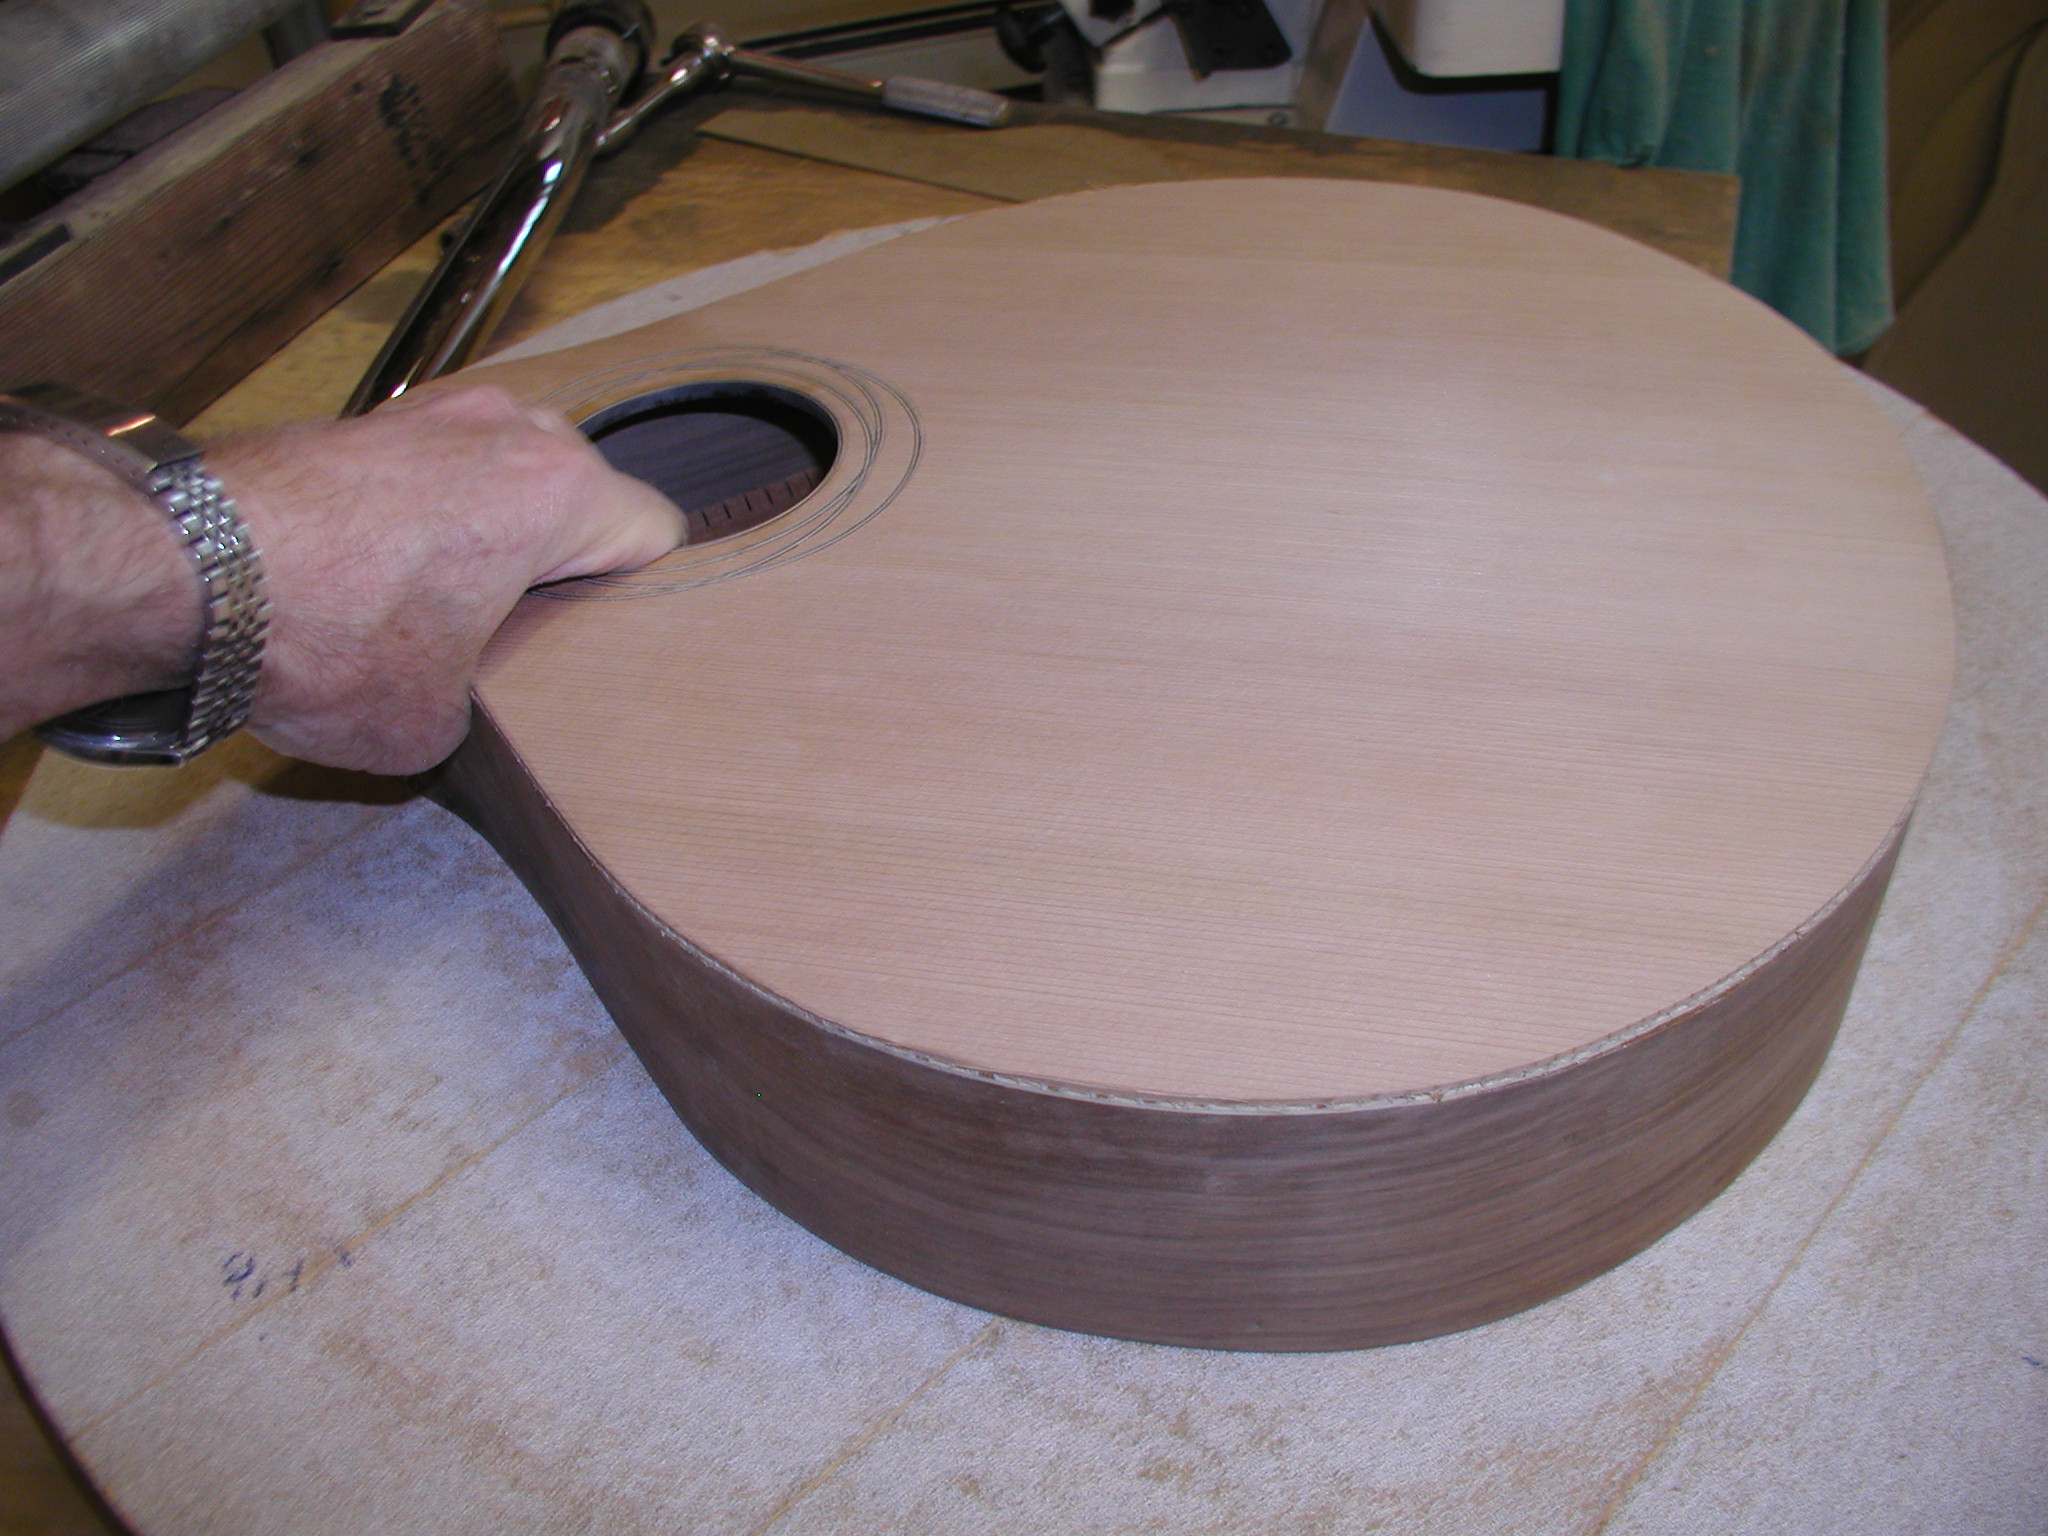
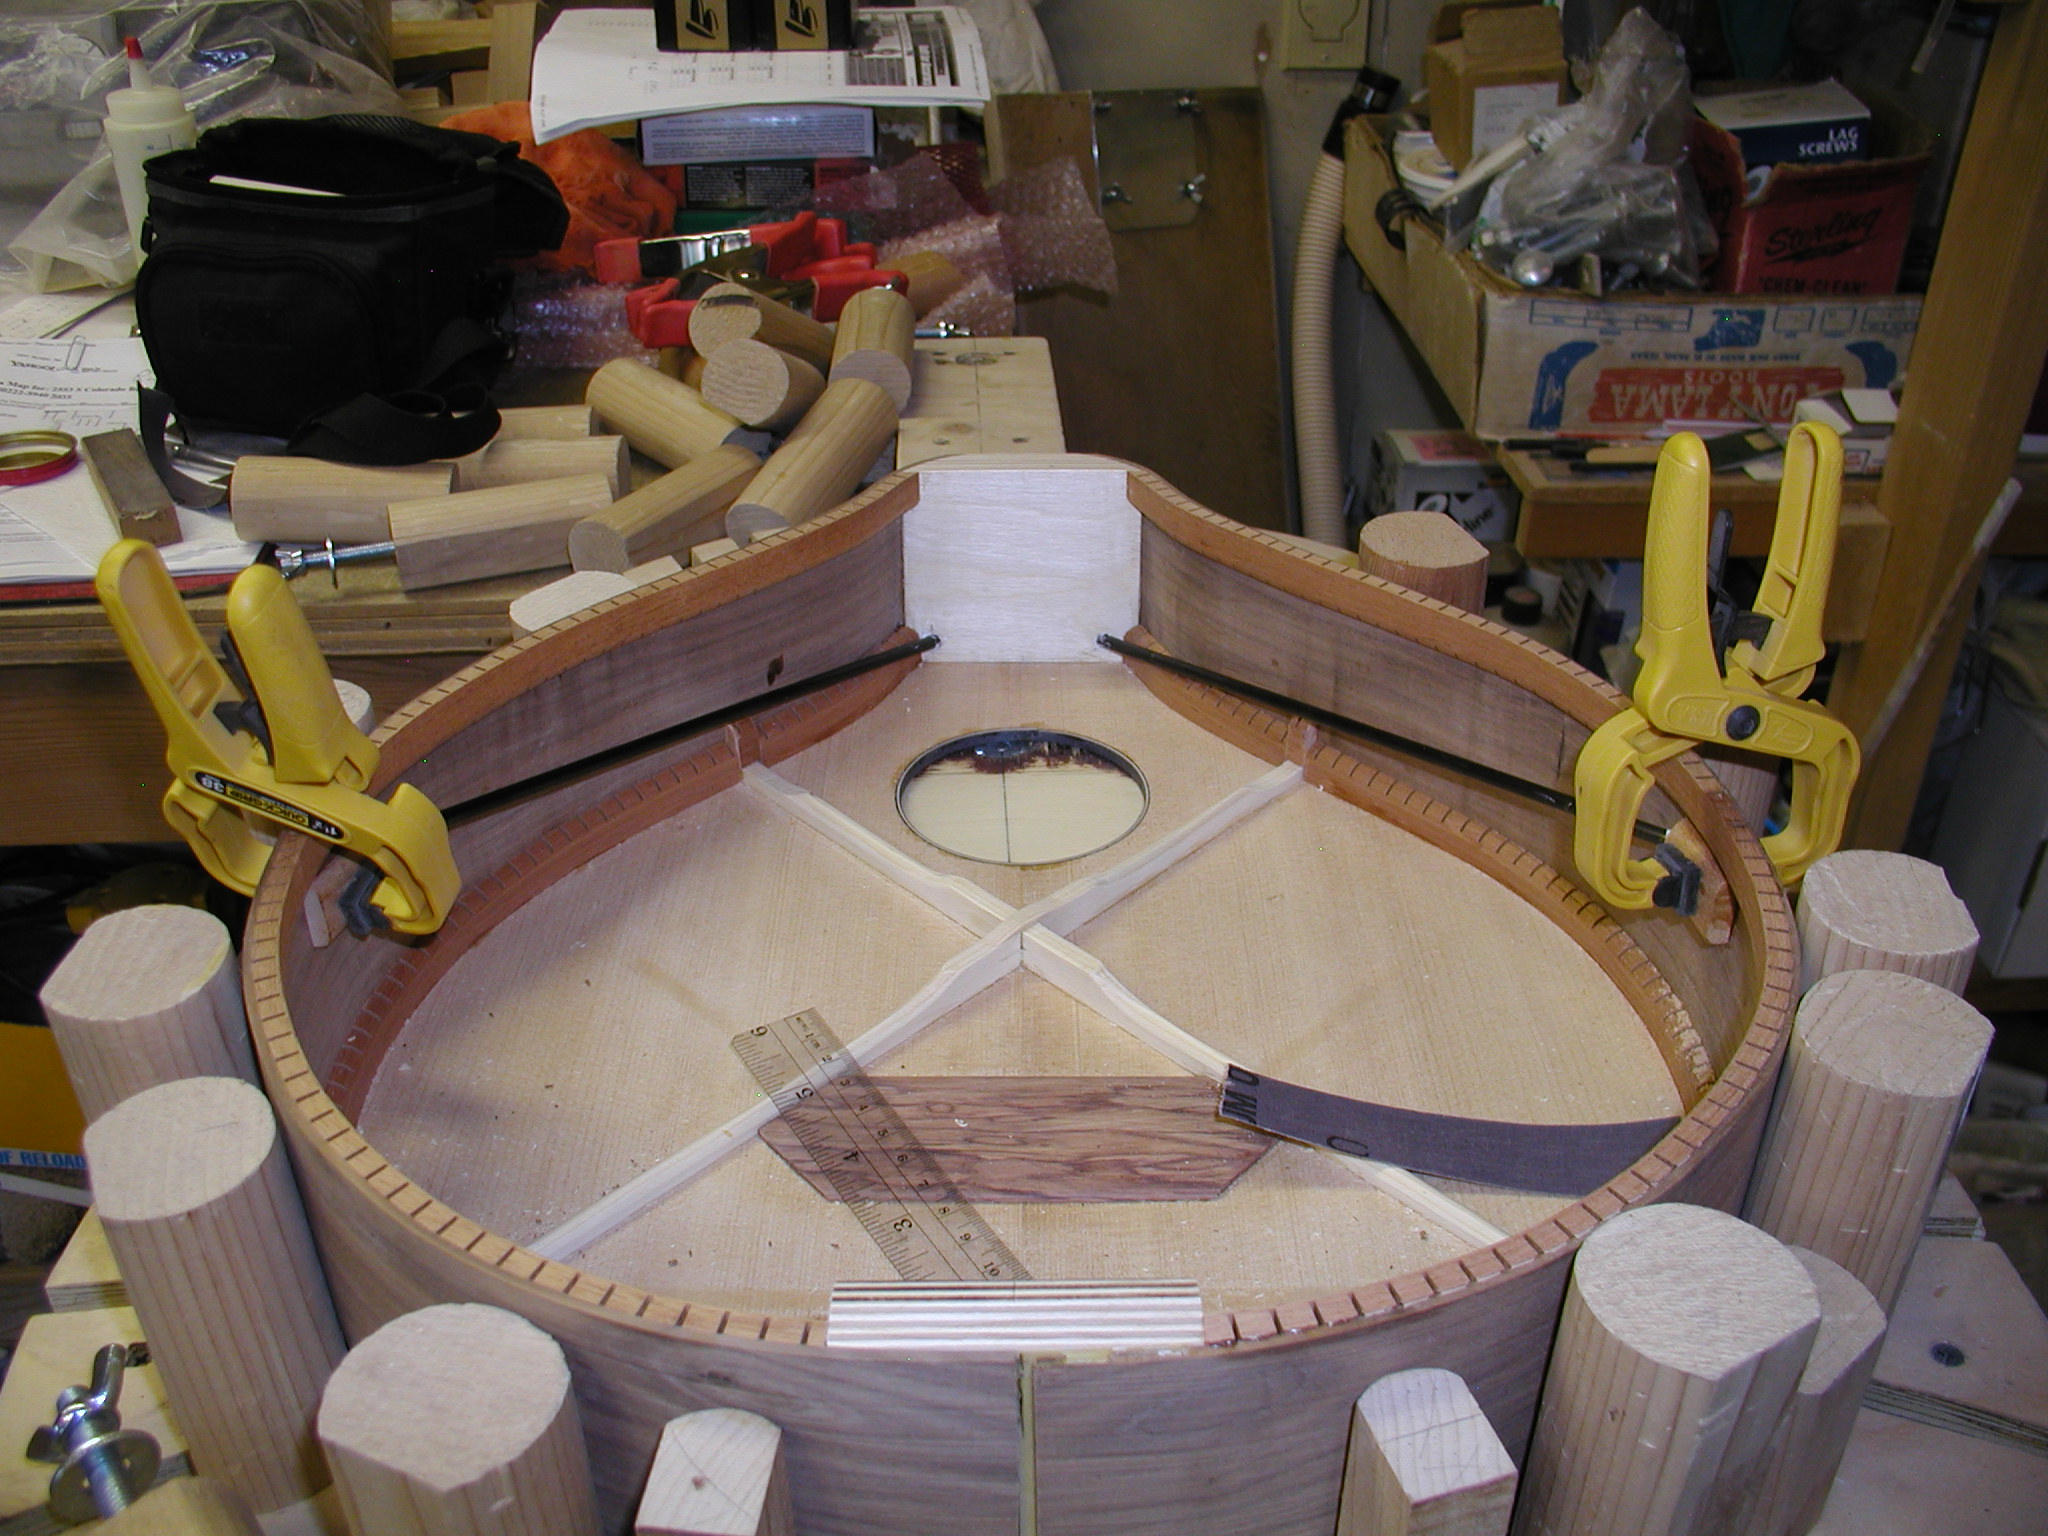
Now we are getting somewhere, it is time to assemble some of the parts. I build on an open form with dowels for alignment. Not seen here is a hollow form piece that is cut out to the body profile. That is down under the top, the dowels get slid up to it to define the side locations. Glue goes on the linings and blocks and the rib assembly goes down on top of the top and it clamped in place. Not too much pressure here or you can get a starved joint, just enough to snug it all up.
Deja vu all over again, the back linings go on and get sanded. The body is now rigid enough that I don't need the form when sanding.
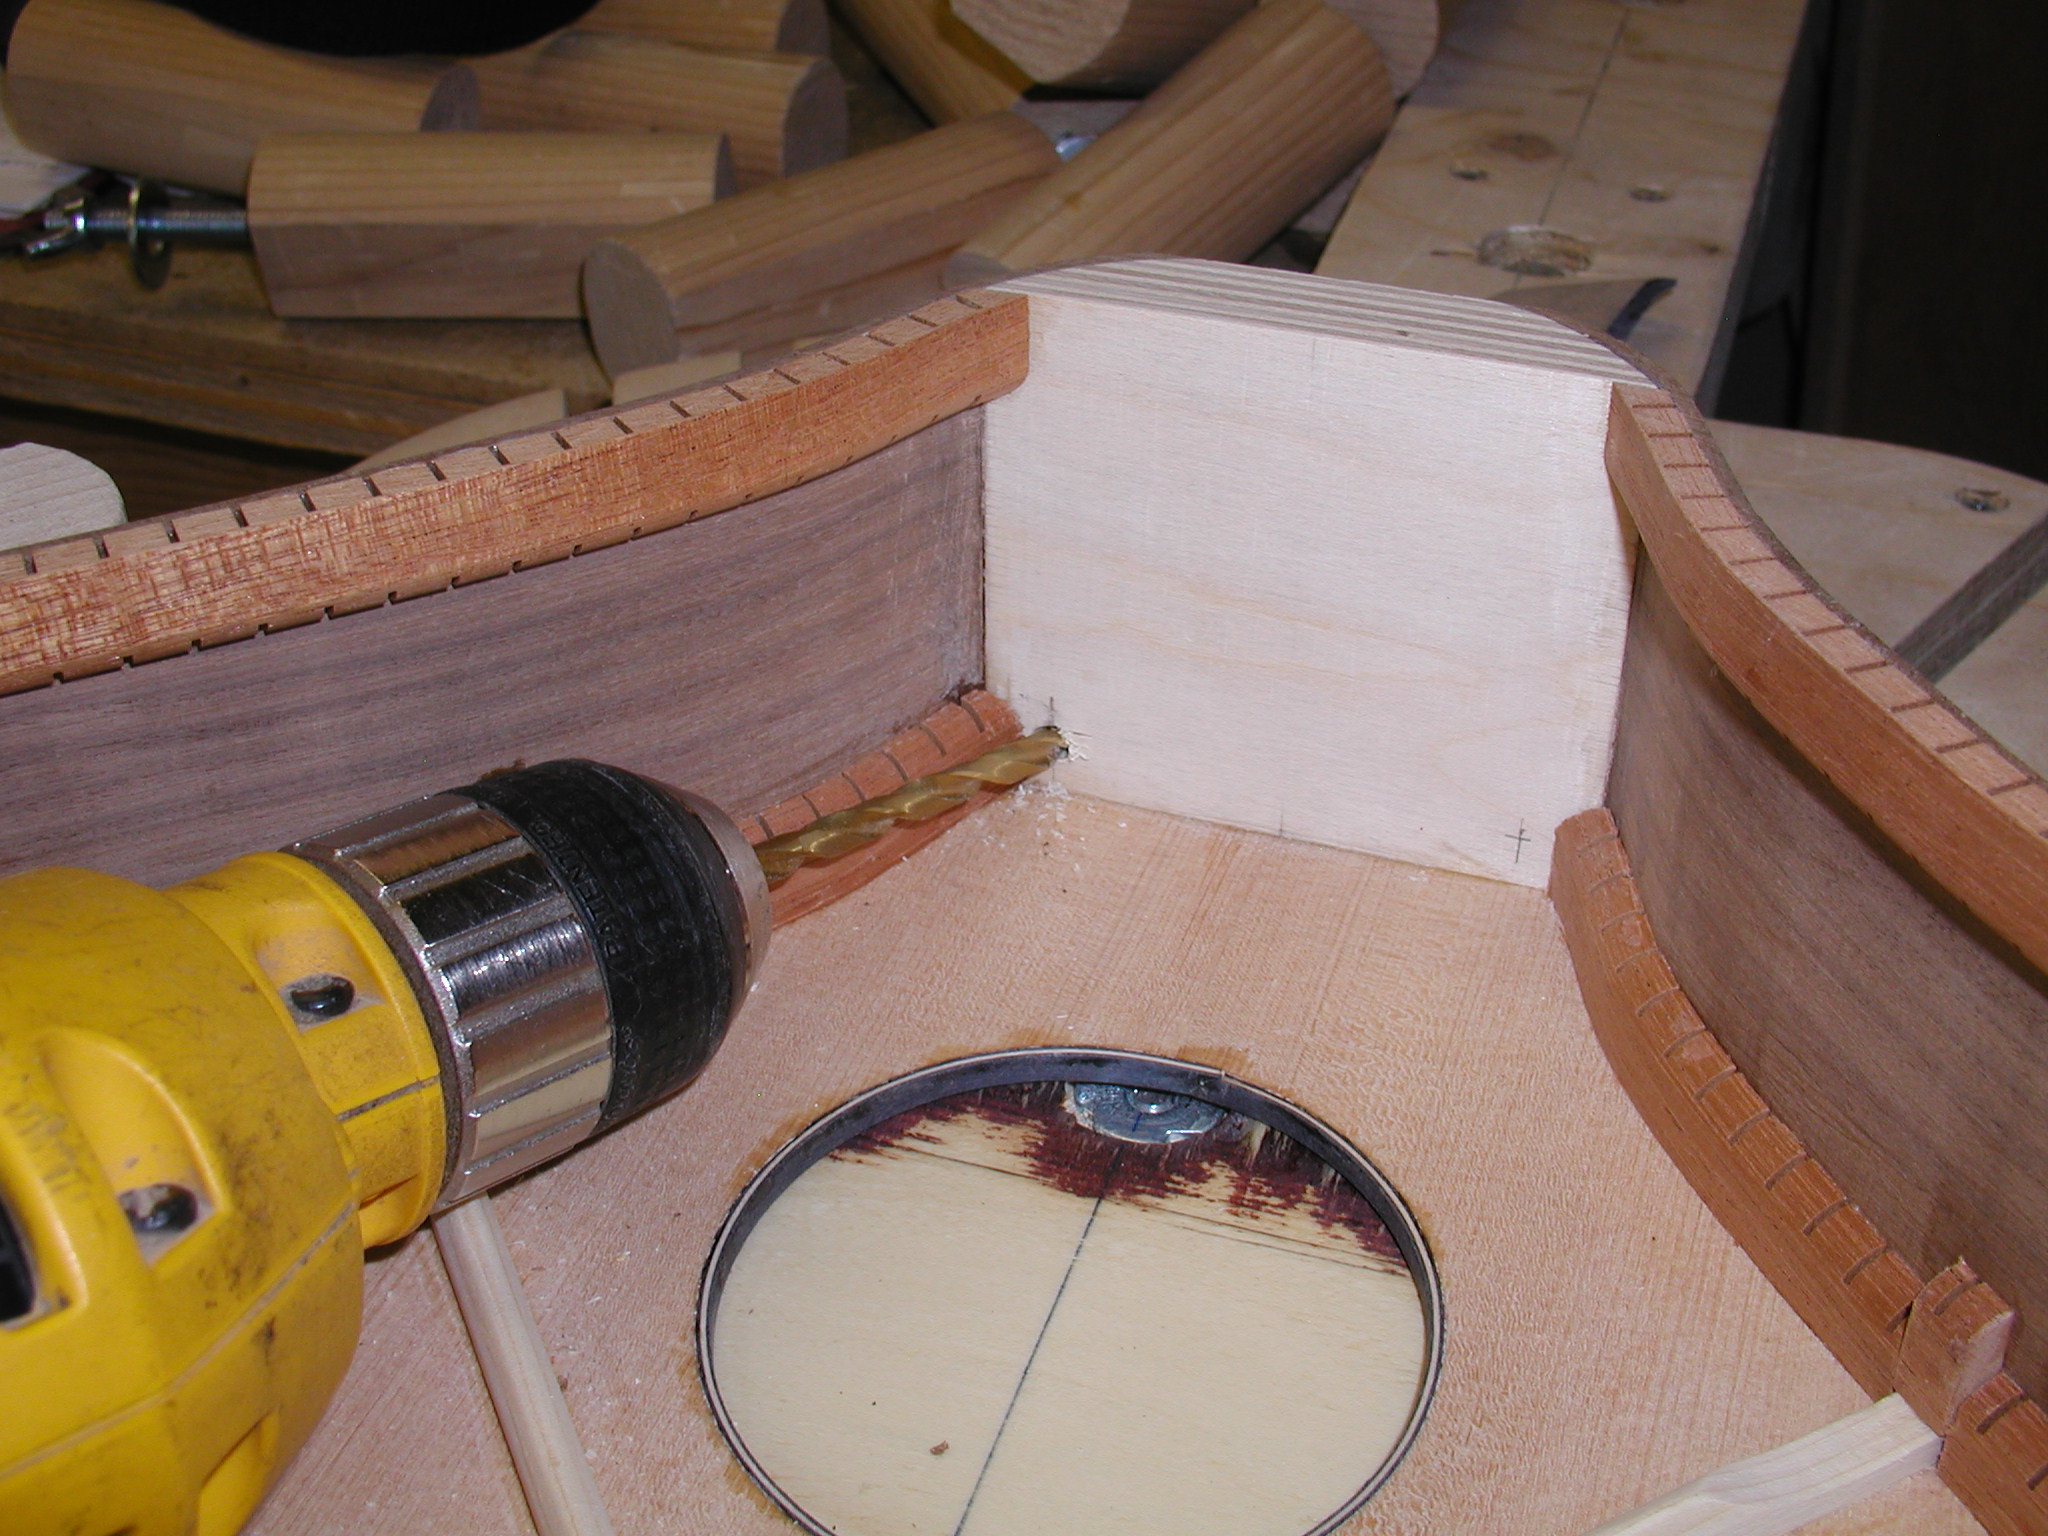

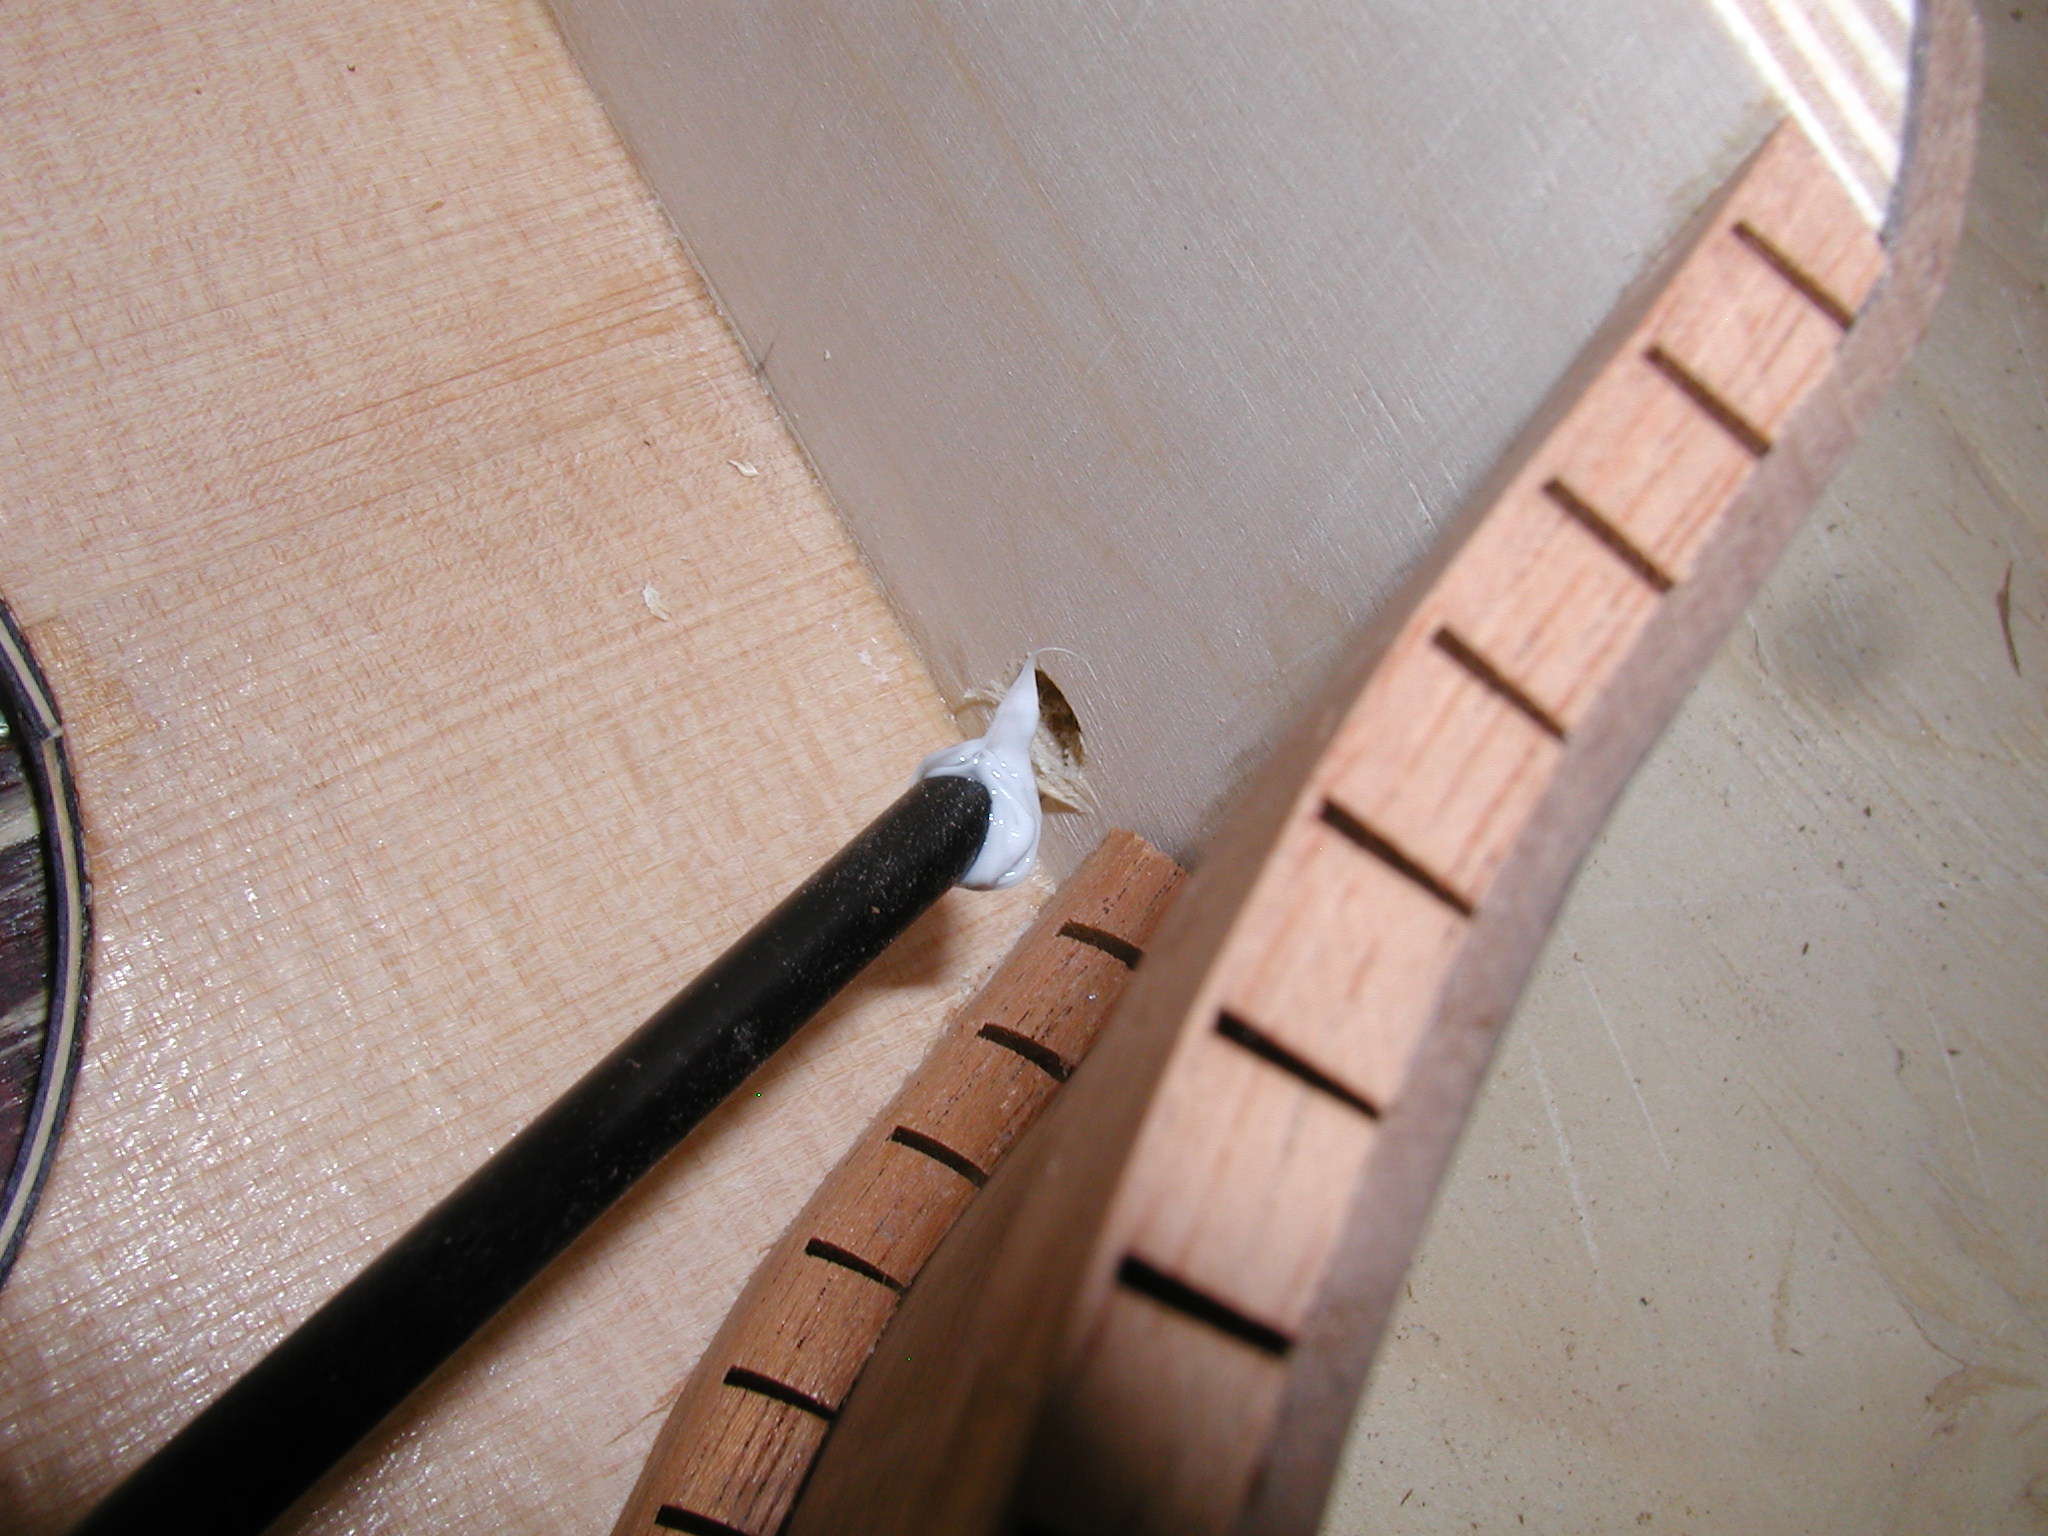
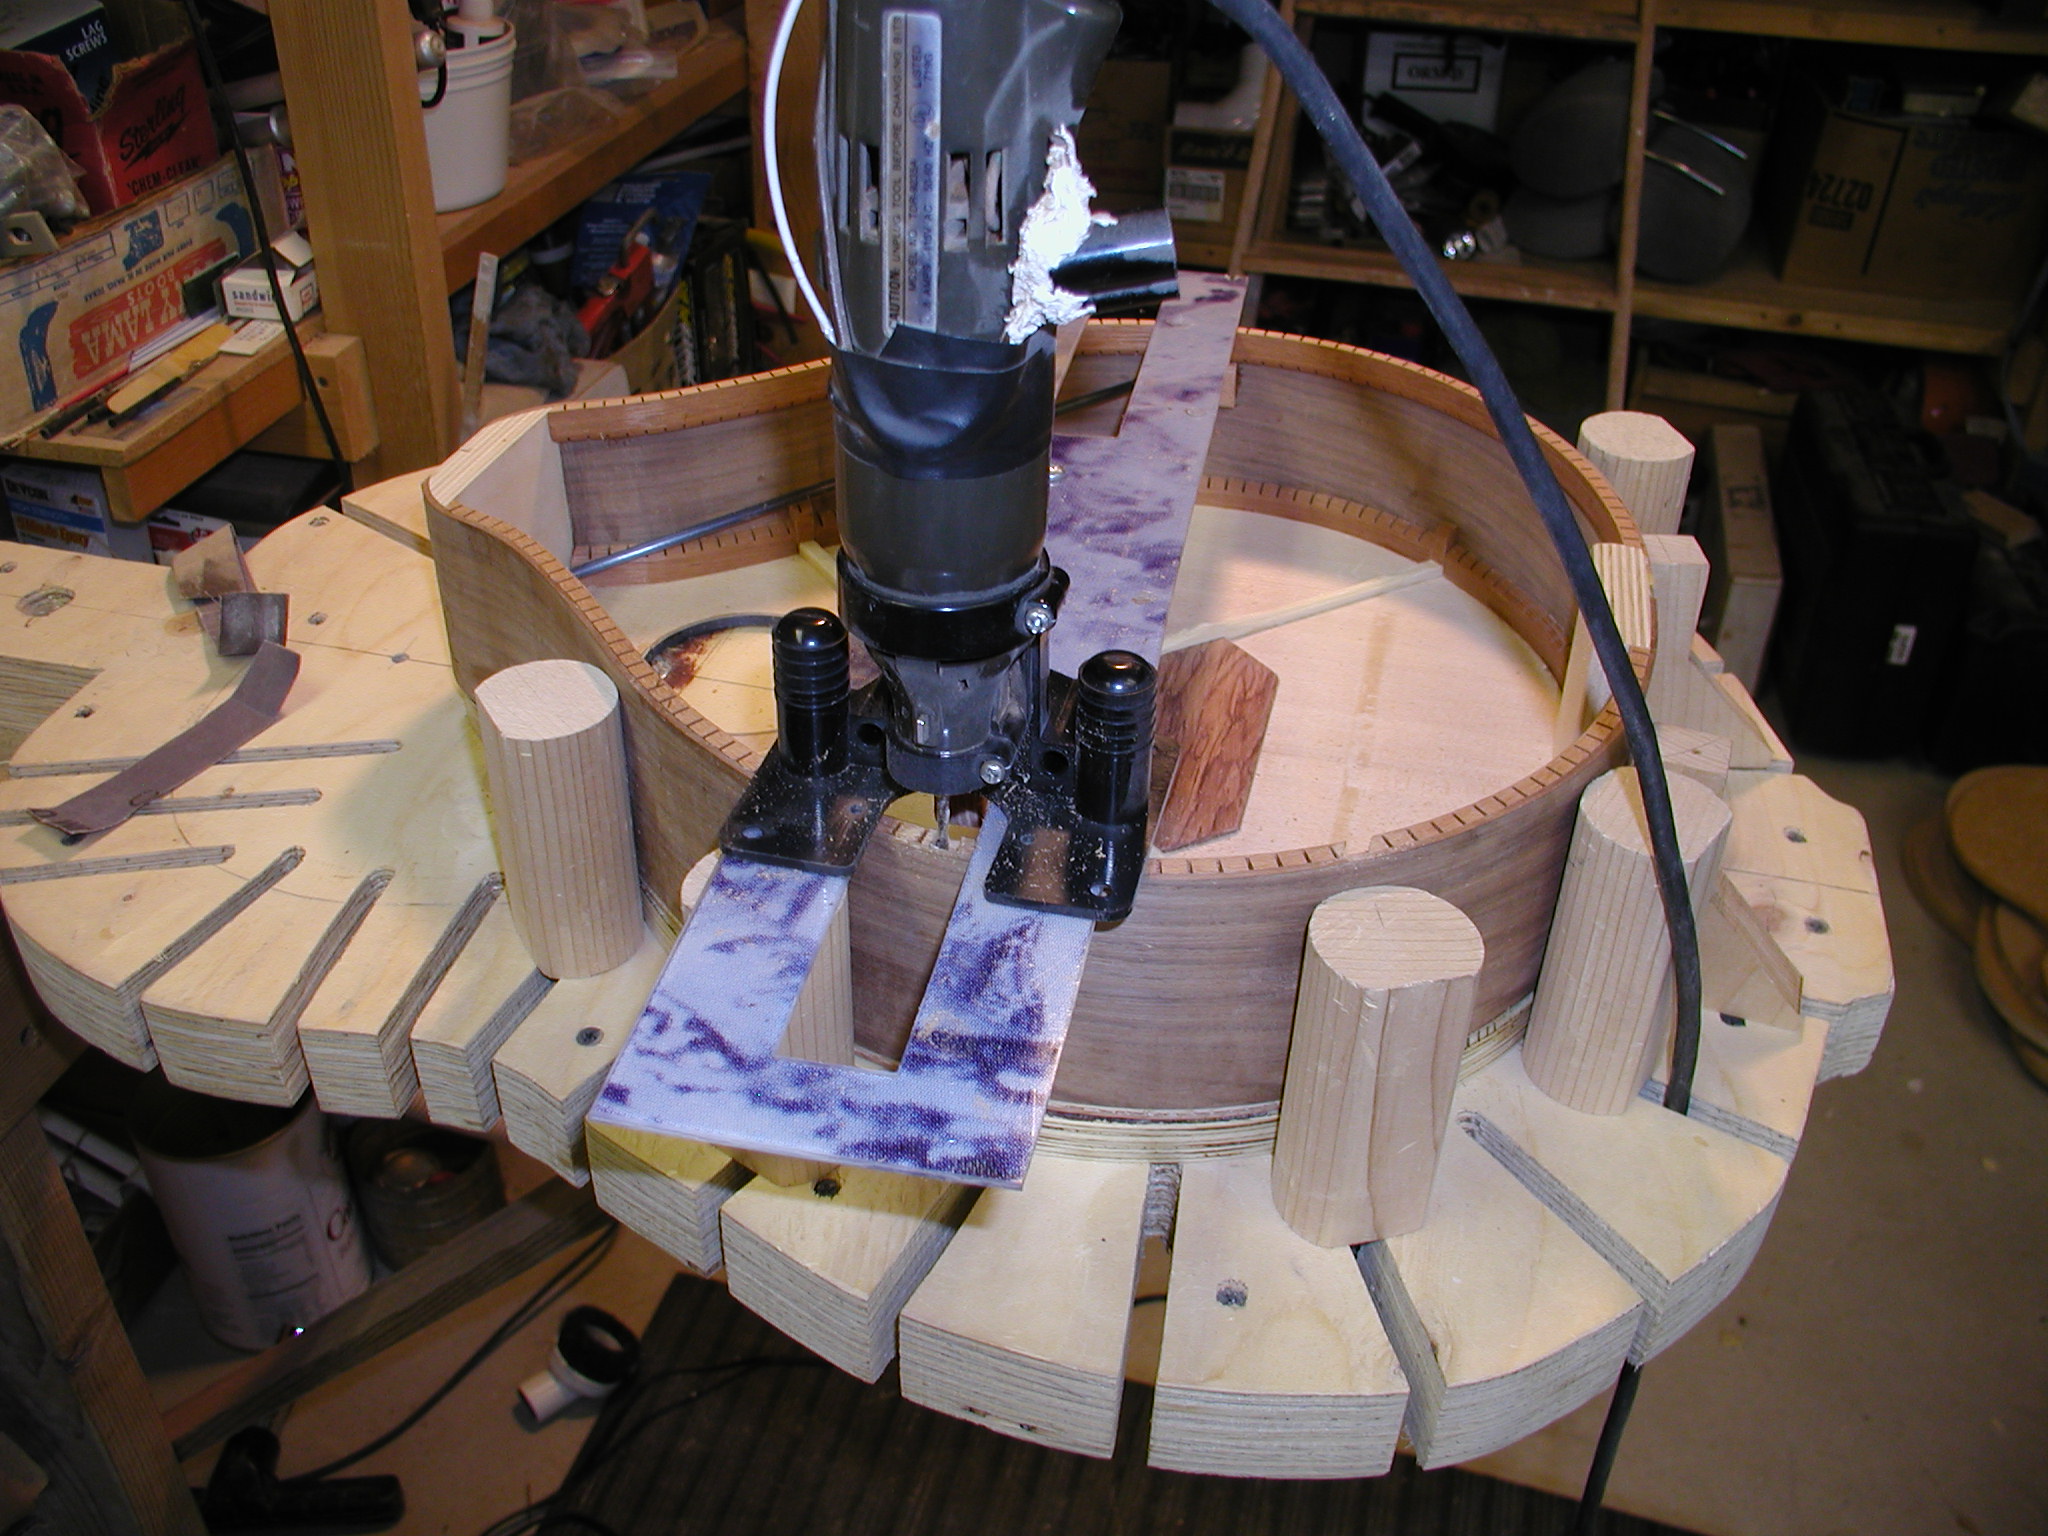
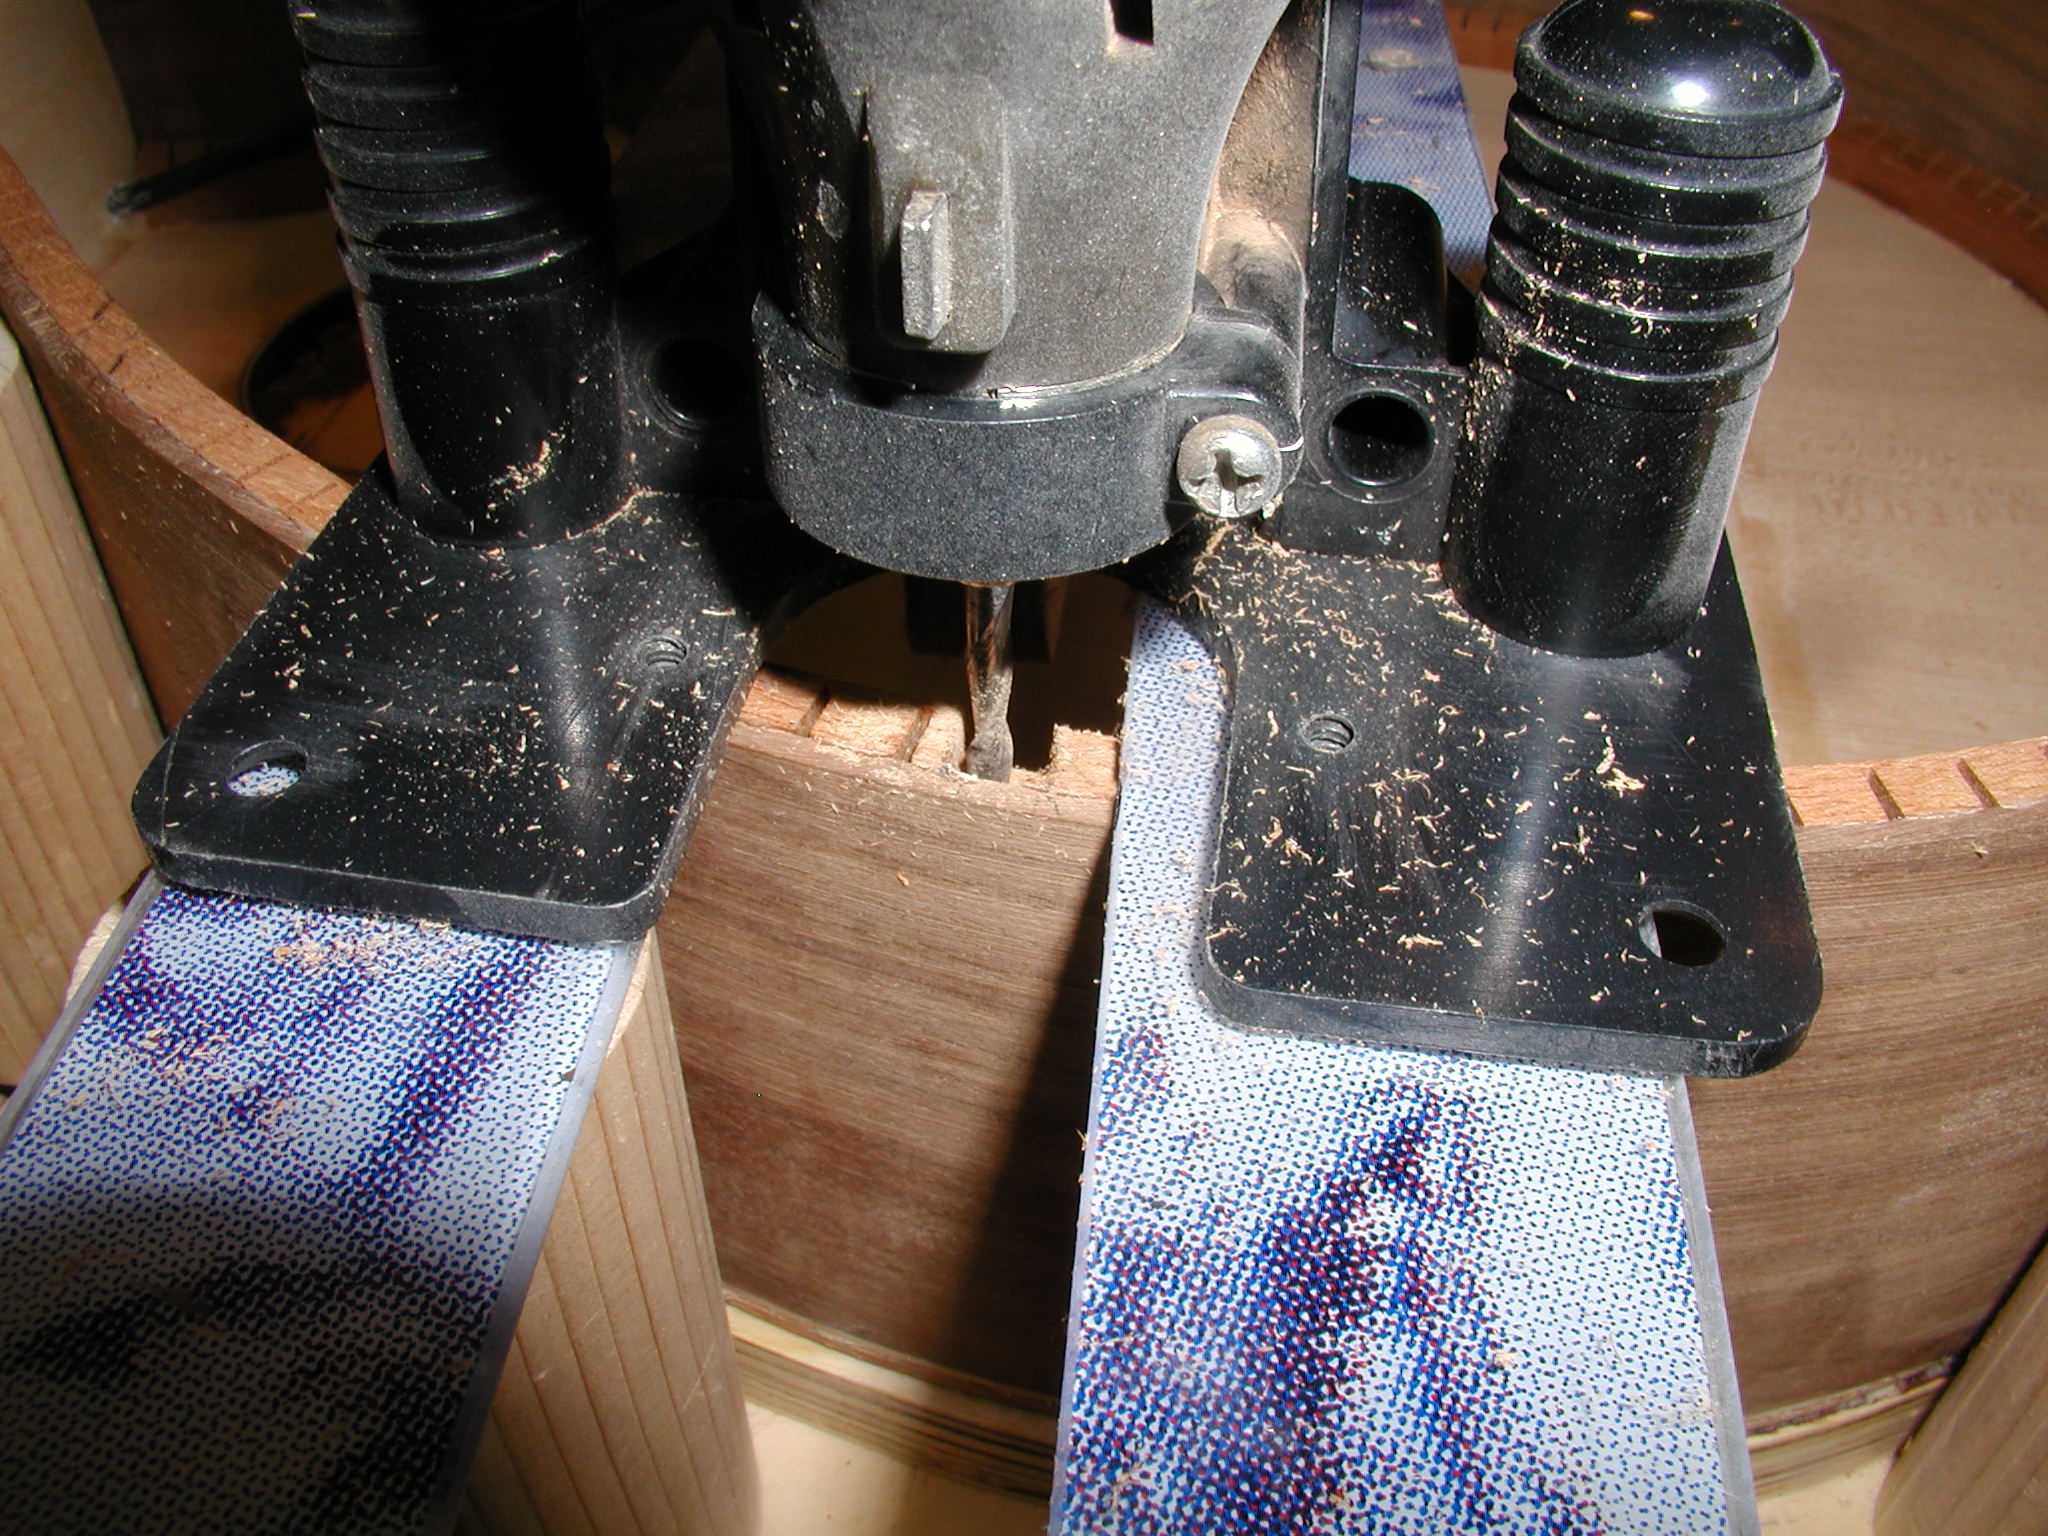
Builders with some experience may have noticed that the headblock was a bit skimpy. That was by design and here is how I am dealing with that. Rather than make a large headblock to contain the compression that will occur when strung, rather I put in graphite tubing "flying braces" anchored to the sides against the back lining. All the testing and design I have done says this should be just fine, but I have to claim it as experimental till it has been in the field for a bit. For sure it will be fine in compression, the only question in my mind is whether a blow to the back side of the headstock might cause damage at the neck joint. Notice how the tubes are going to be in compression so they are not glued in, just held from rattling by some silicon sealant. The blocks are sanded to the curve of the sides. They need to be drilled at a compound angle, note my high-tech holding jig. They then slid up on the tube and are glued to hold the tube in place.
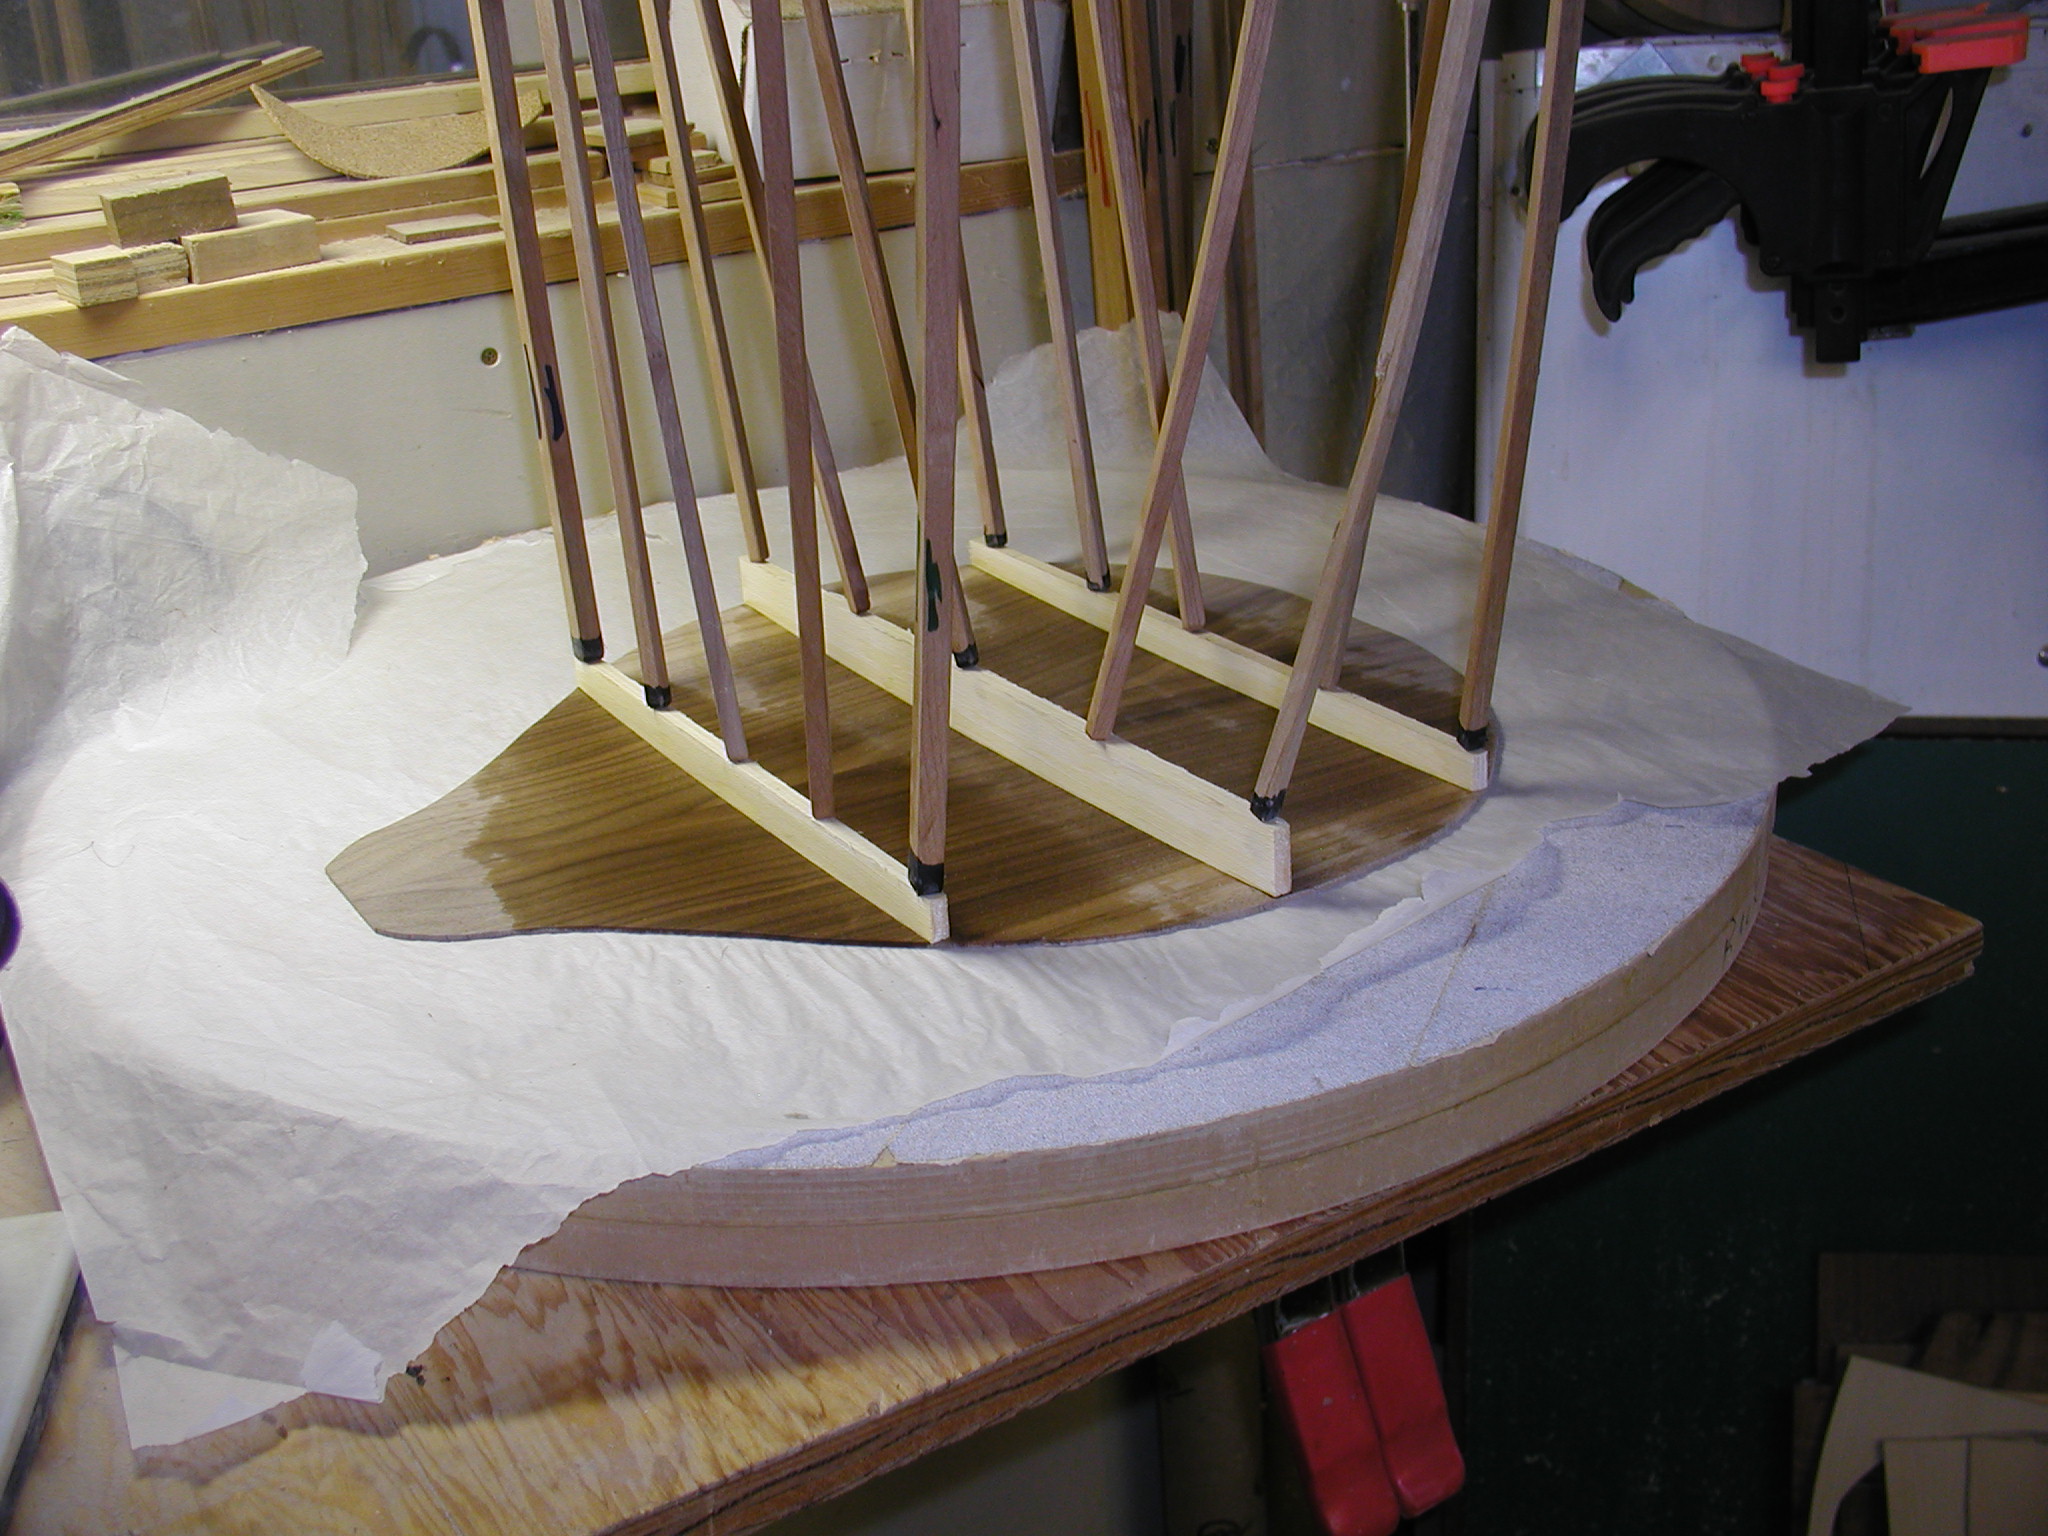
Hmm, we seem to be missing something, oh yeah, the back! More of the same, thickness sand, sand braces, glue them, carve them, run Chladni modes, yadda yadda...
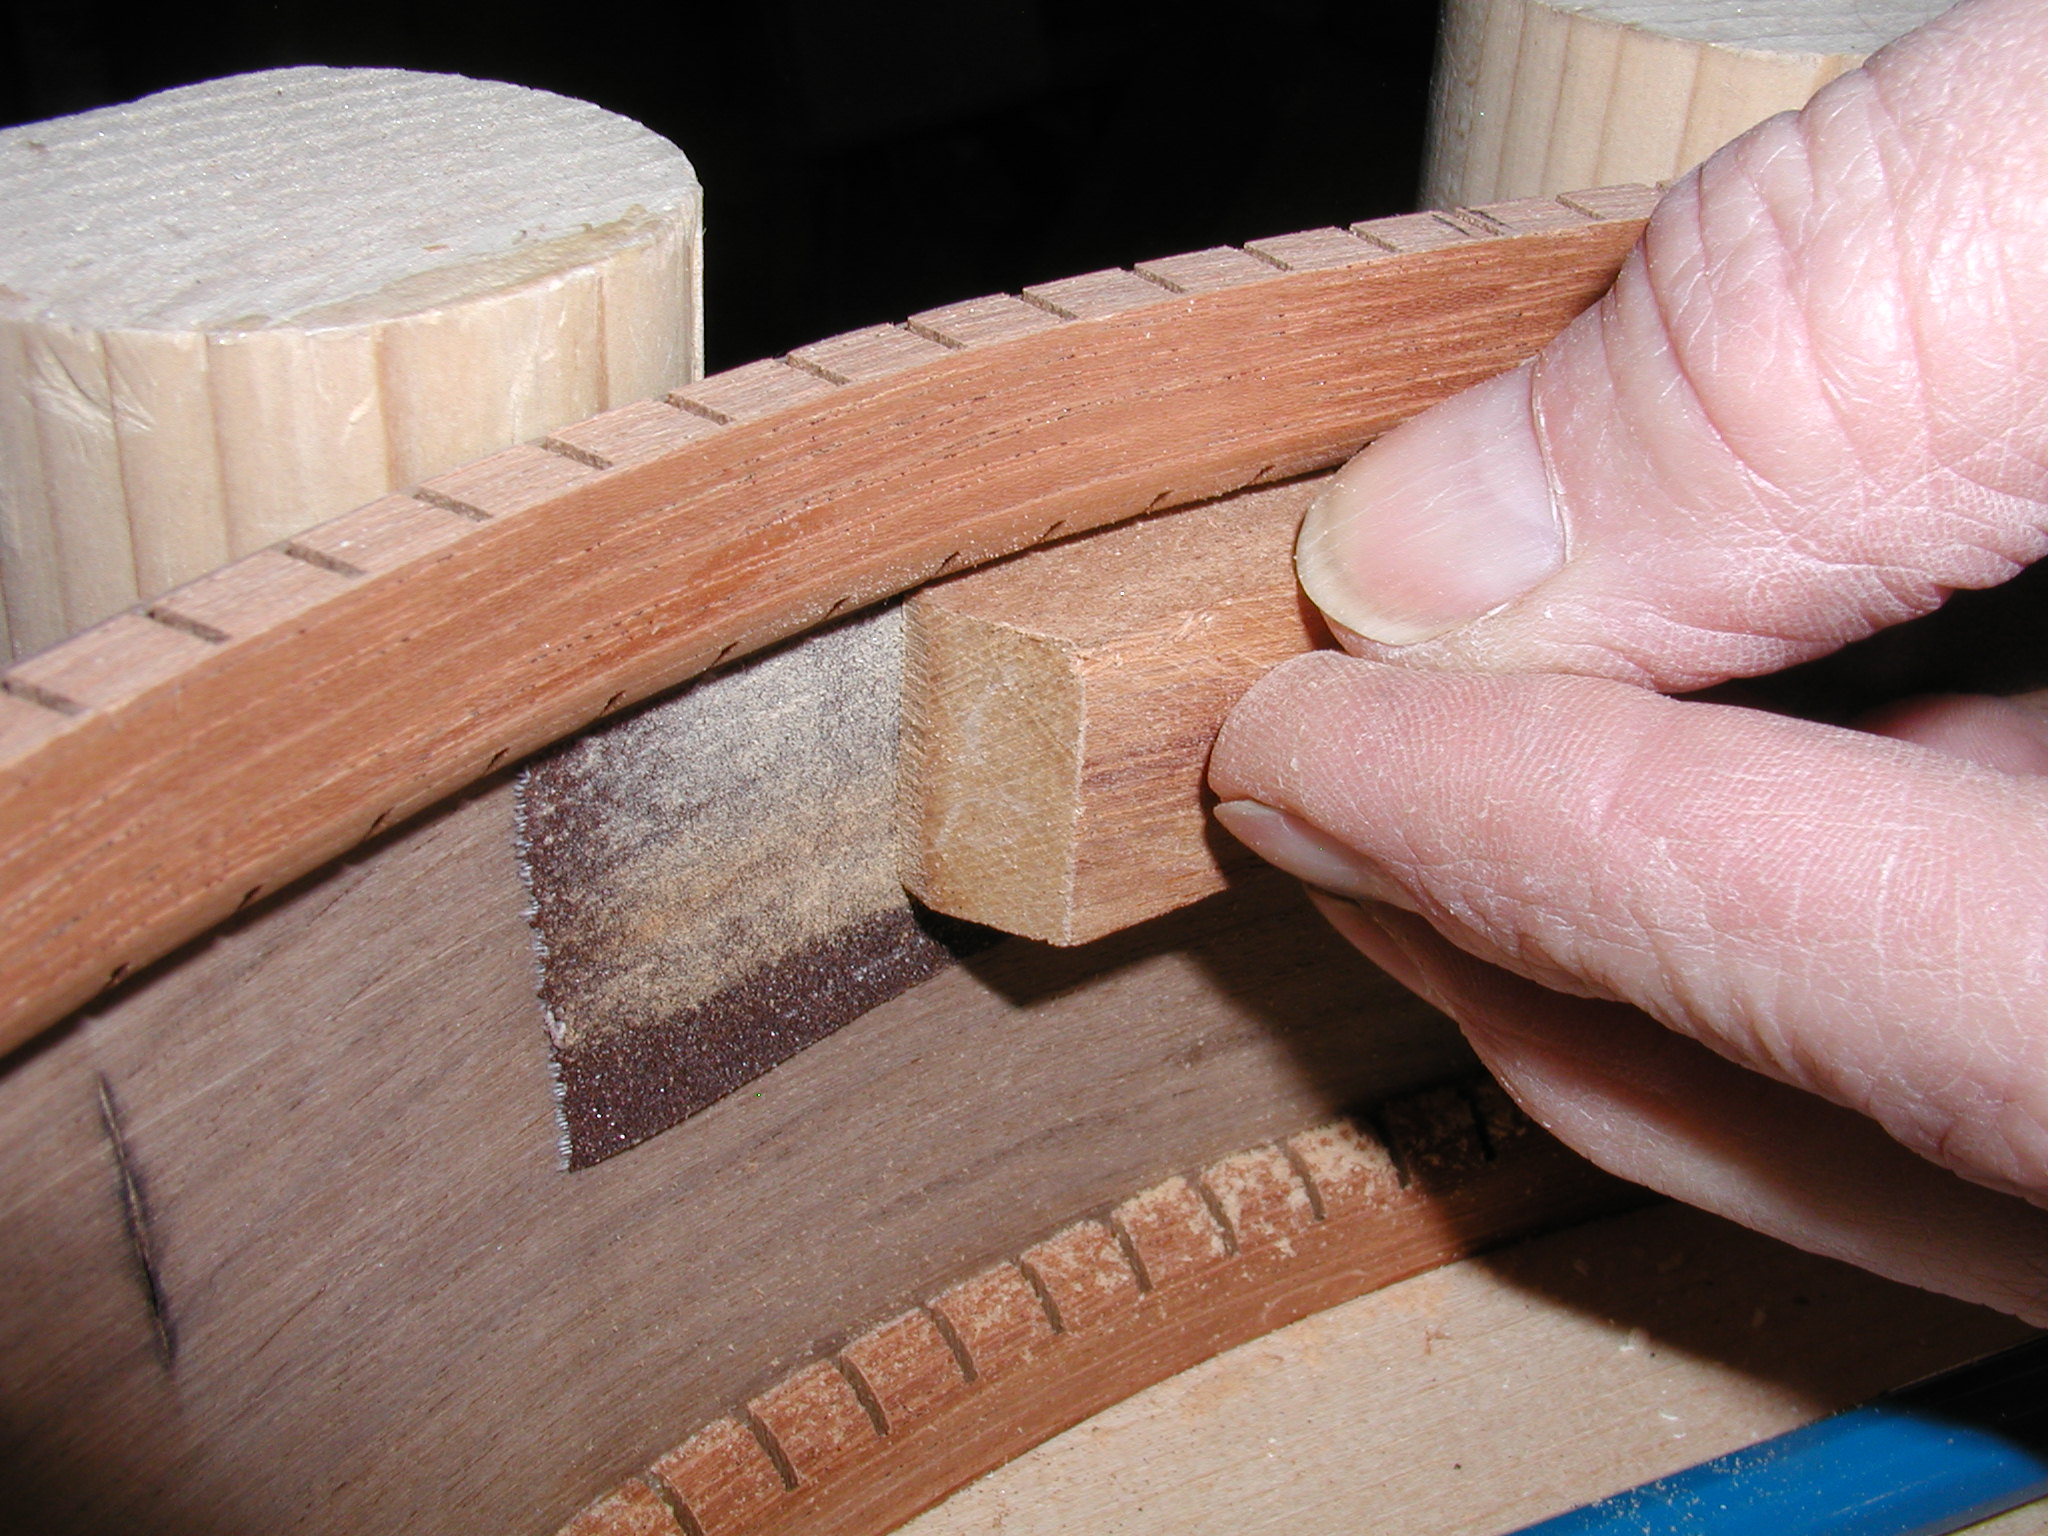
OK, let's prep the body to receive the back. I mark where the braces will go in the linings and then relieve that much lining with a notch. Simple jig that just spans the body and lets me run the Dremell into the linings. I don't cut through the sides, instead I cut the braces a tad short on each end so that they leave 1/16 - 1/32" of space away from the side so expansion/contraction won't damage the side.
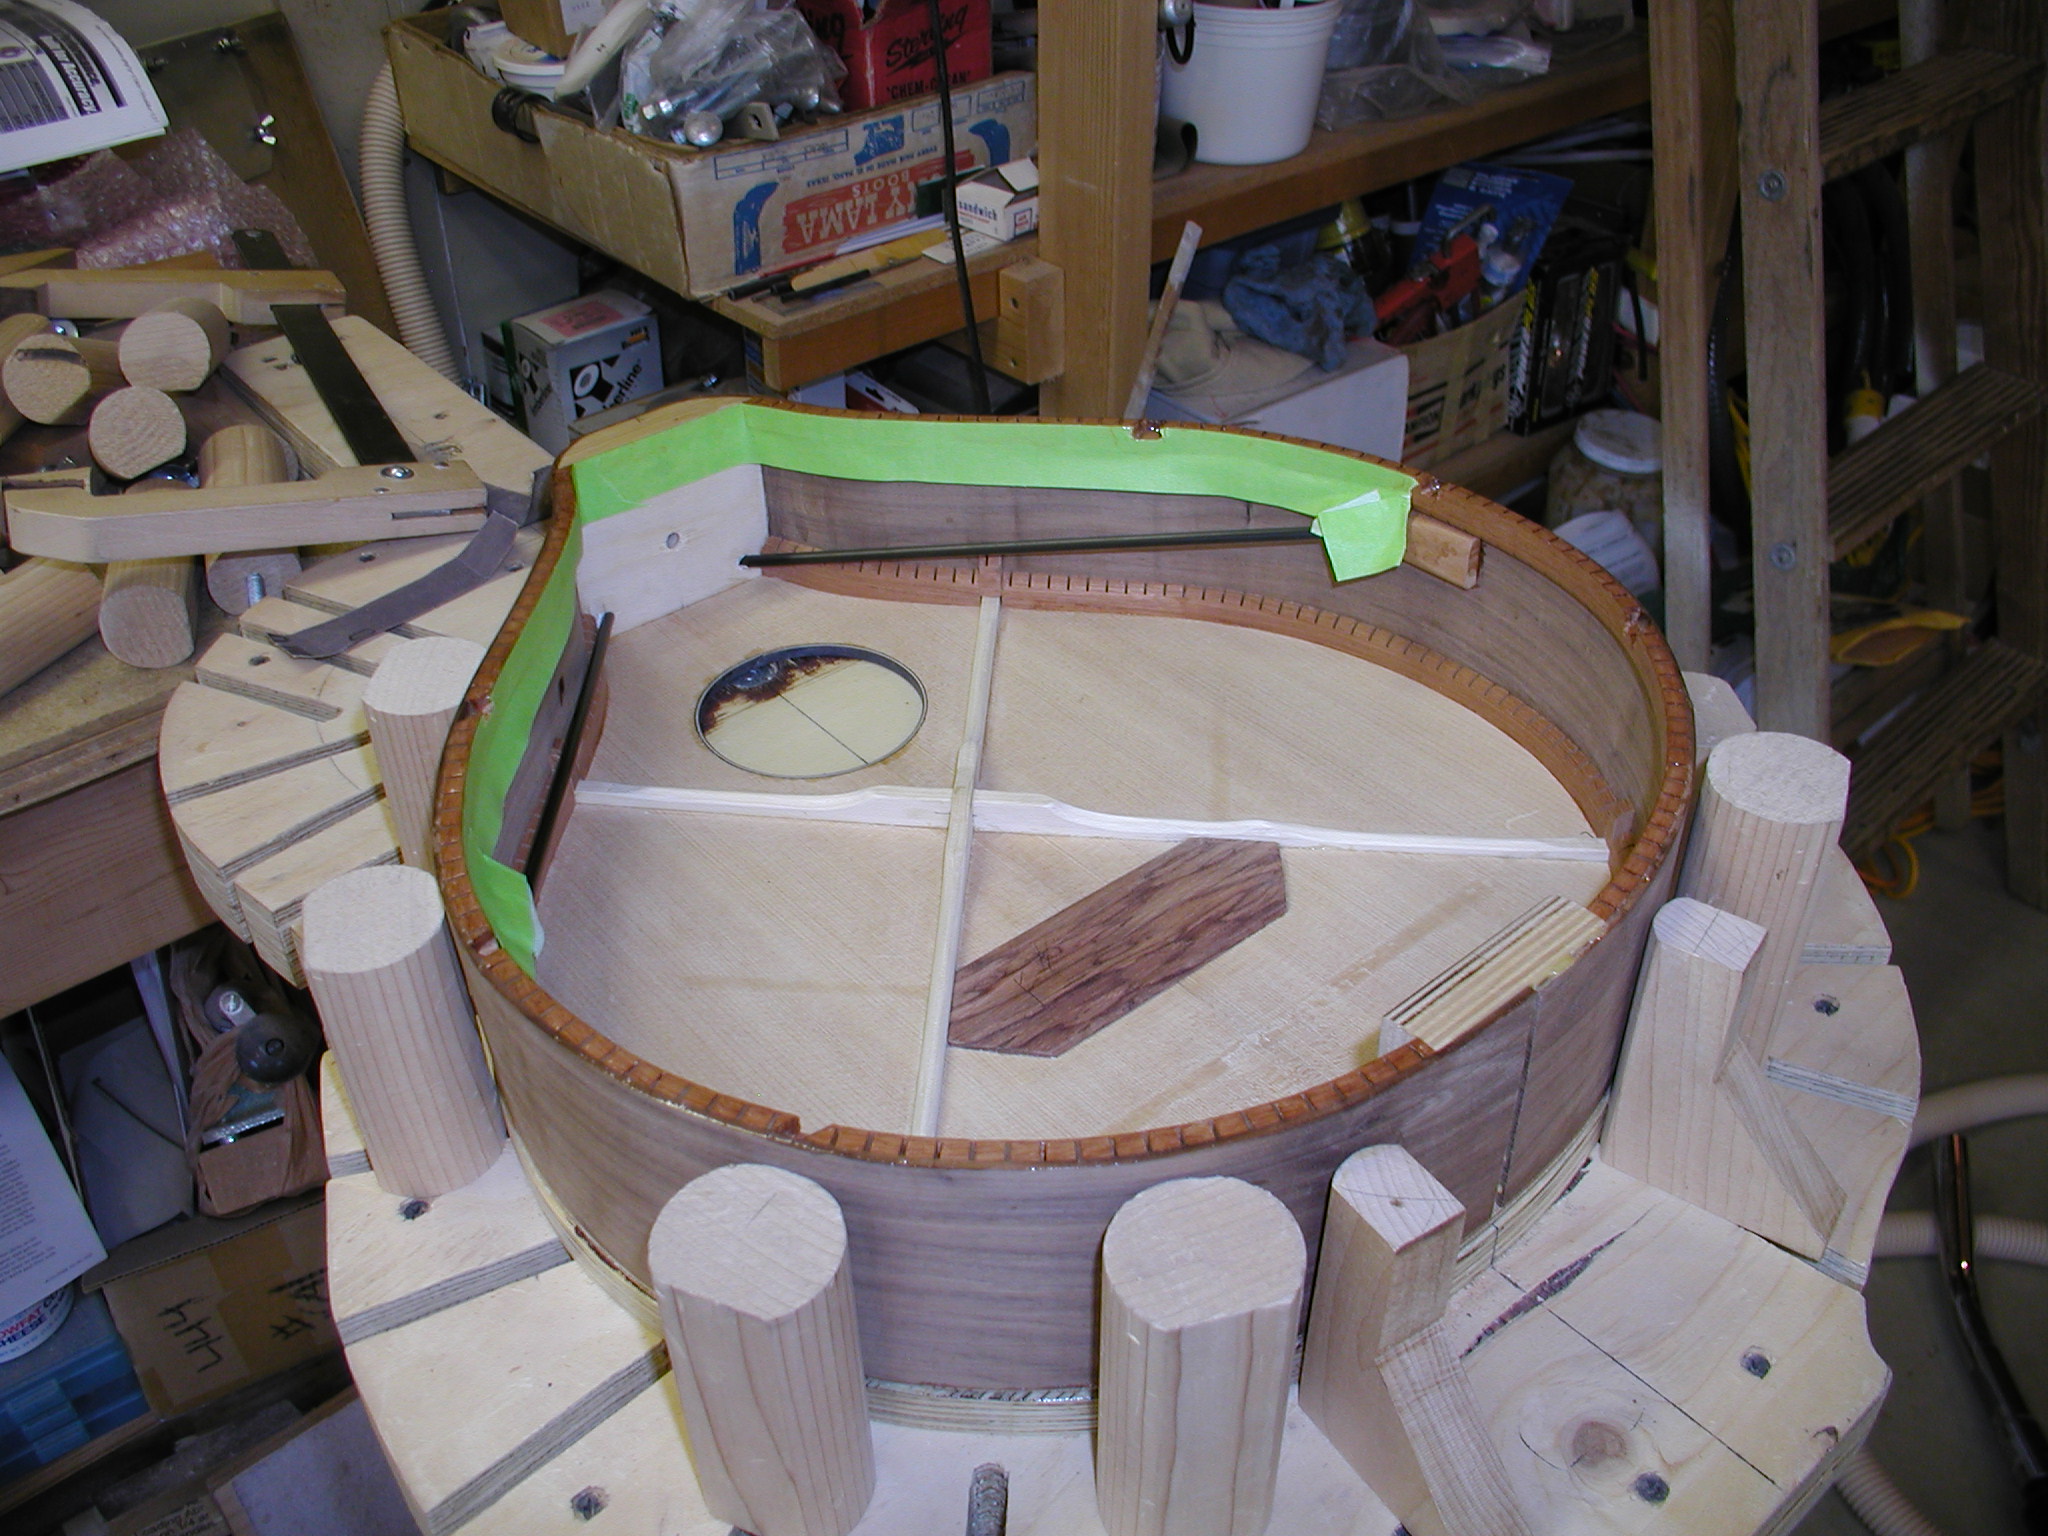
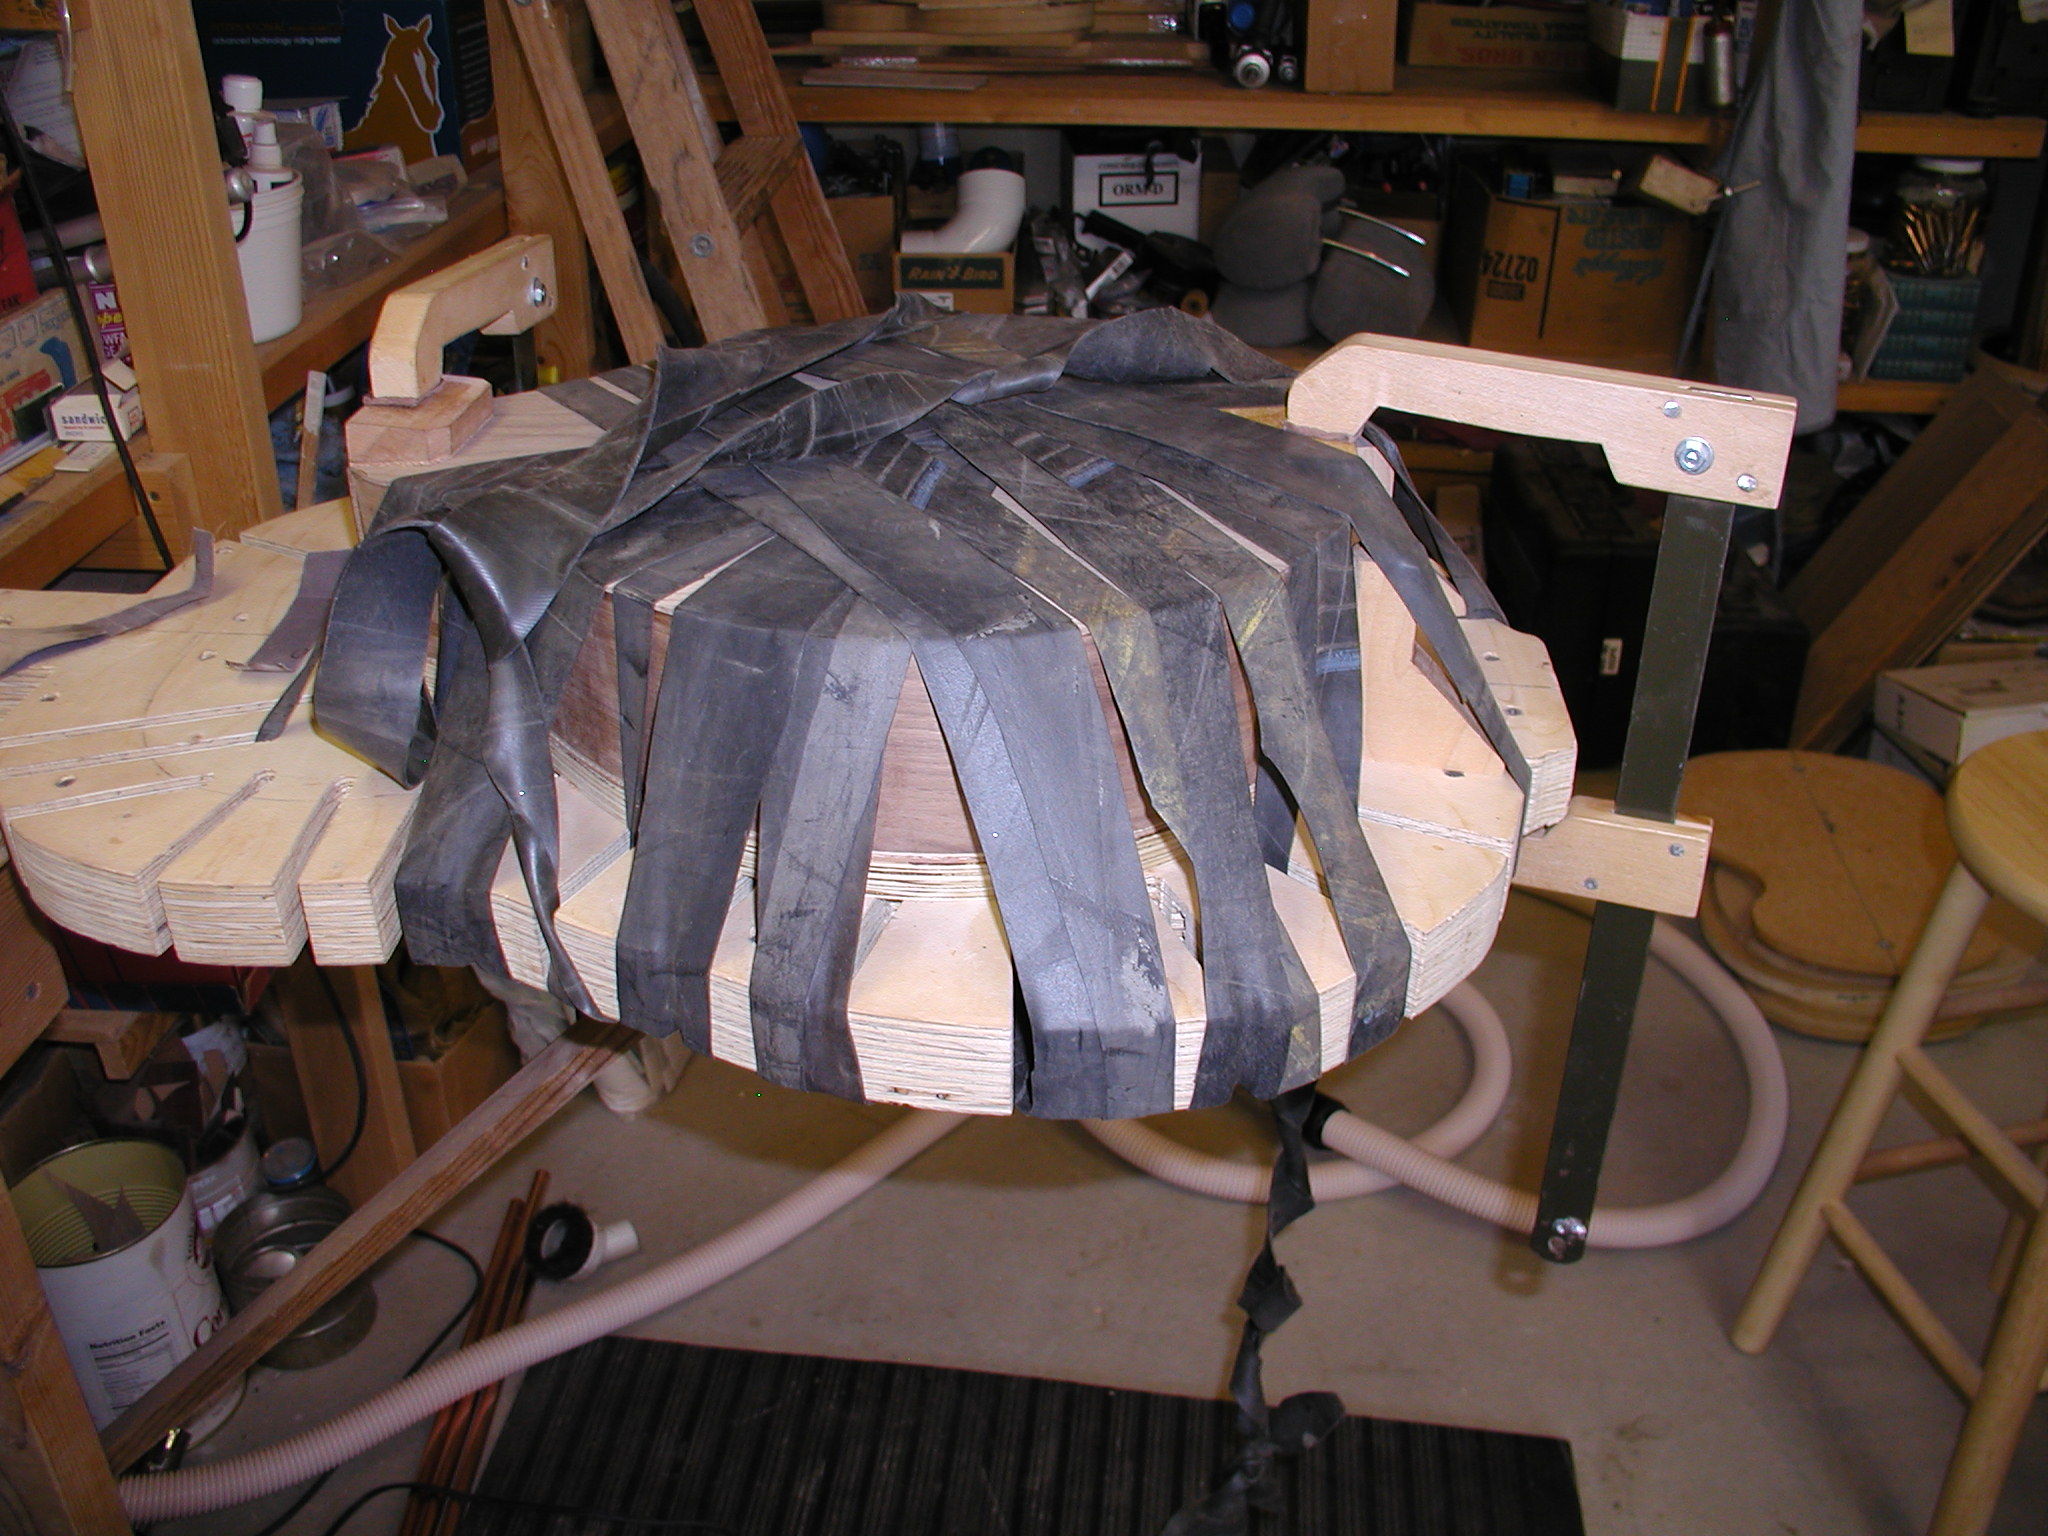
Glue on a piece of side material for the headblock end veneer and trim it top and bottom. I like to use green painters tape on the inside lining to catch any glue squeeze out. I wax this with some plain 'ol Johnson's Wax to make the glue easy to get off. I just do this where it will show through the sound hole and where I can reach in and pull it off via the sound hole. Then glue onto the linings, back on, clamp at the blocks, and the attack of the great inner tube snake to hold it all down. I wait about a half hour and the fish glue is dried enough to hold but not hard. I unwrap the snake and reach in and pull the tape and clean up any squeeze out. Then back on the open form and snake it again overnight.
That pretty much completes the fabrication of the box itself. Next we will attend to all the external parts of the box.