Installation and Materials
Once the company was selected and the design planned out we could
consider the installation. The first thing I did was to have a good look at
the roof. I have fiberglass tab-lock shingles because they hold up well in
our high wind (100mph+) area and they had better fire rating than most metal
roofs. They do however wear over time and they are currently about 15 years
old. So if I needed to re-shingle this was the time. The shingles have a 25
year rating/warrantee and they have held up quite well, so I decided to not
re-shingling. However, this is an important step that you should not skip
over.
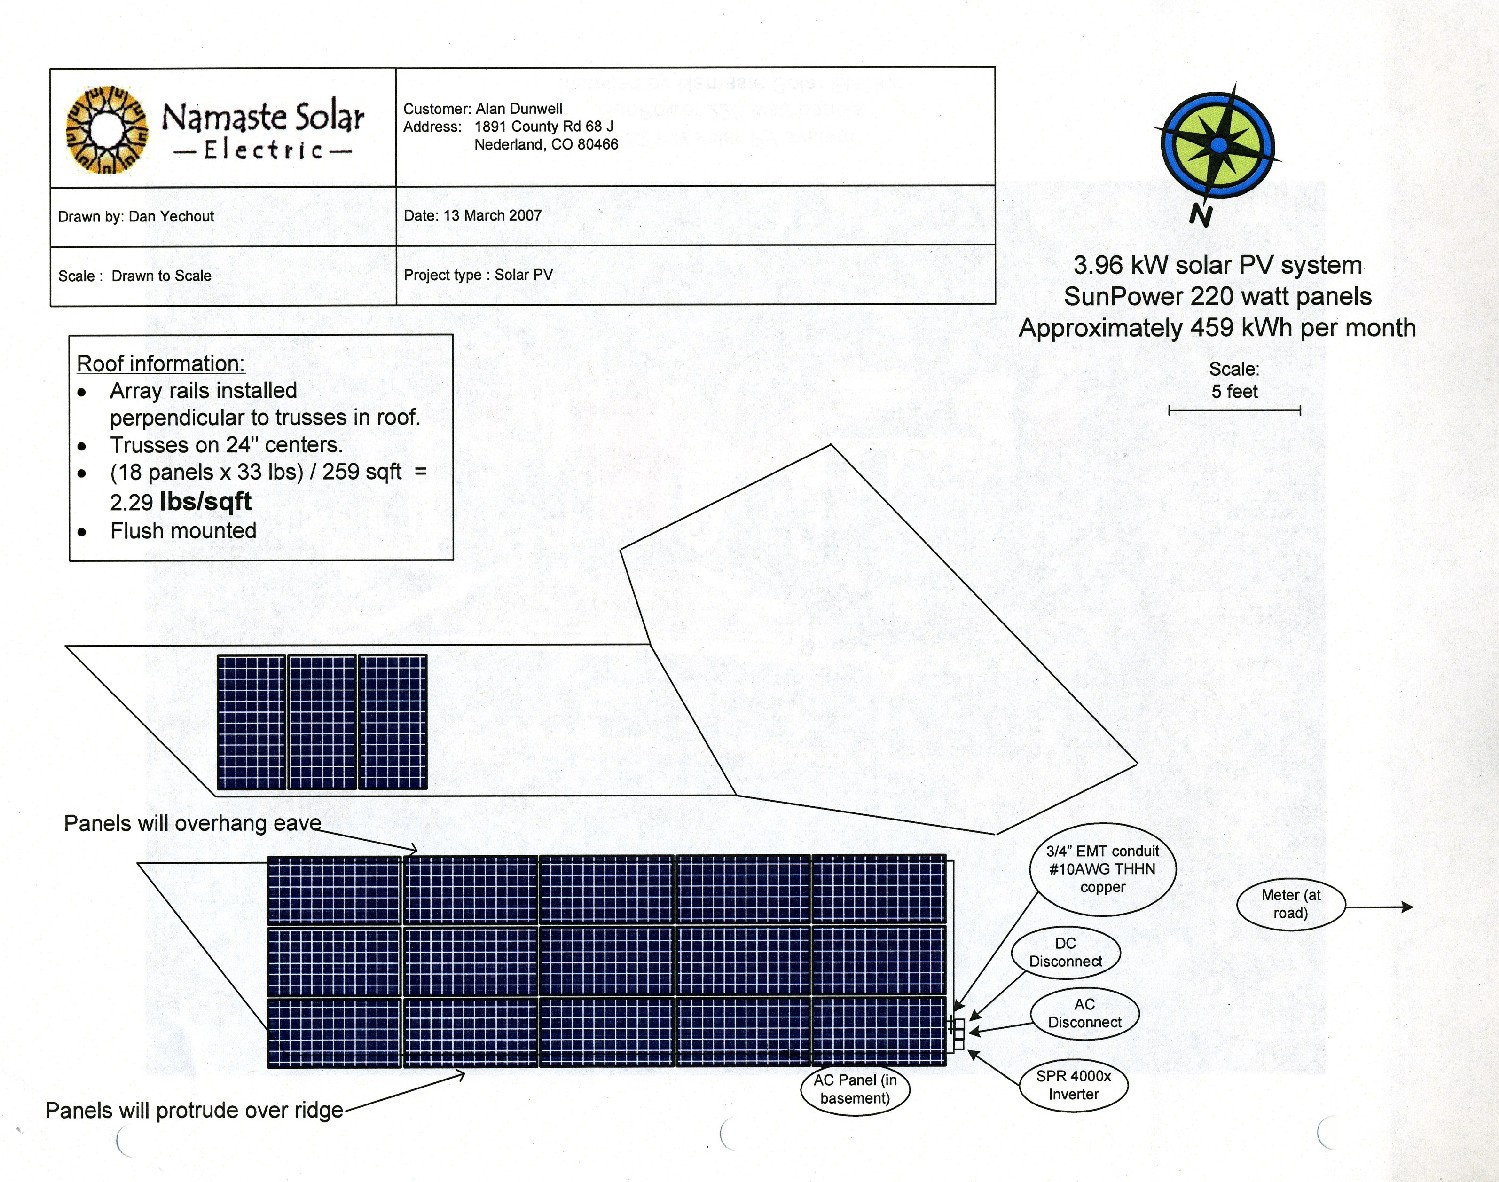
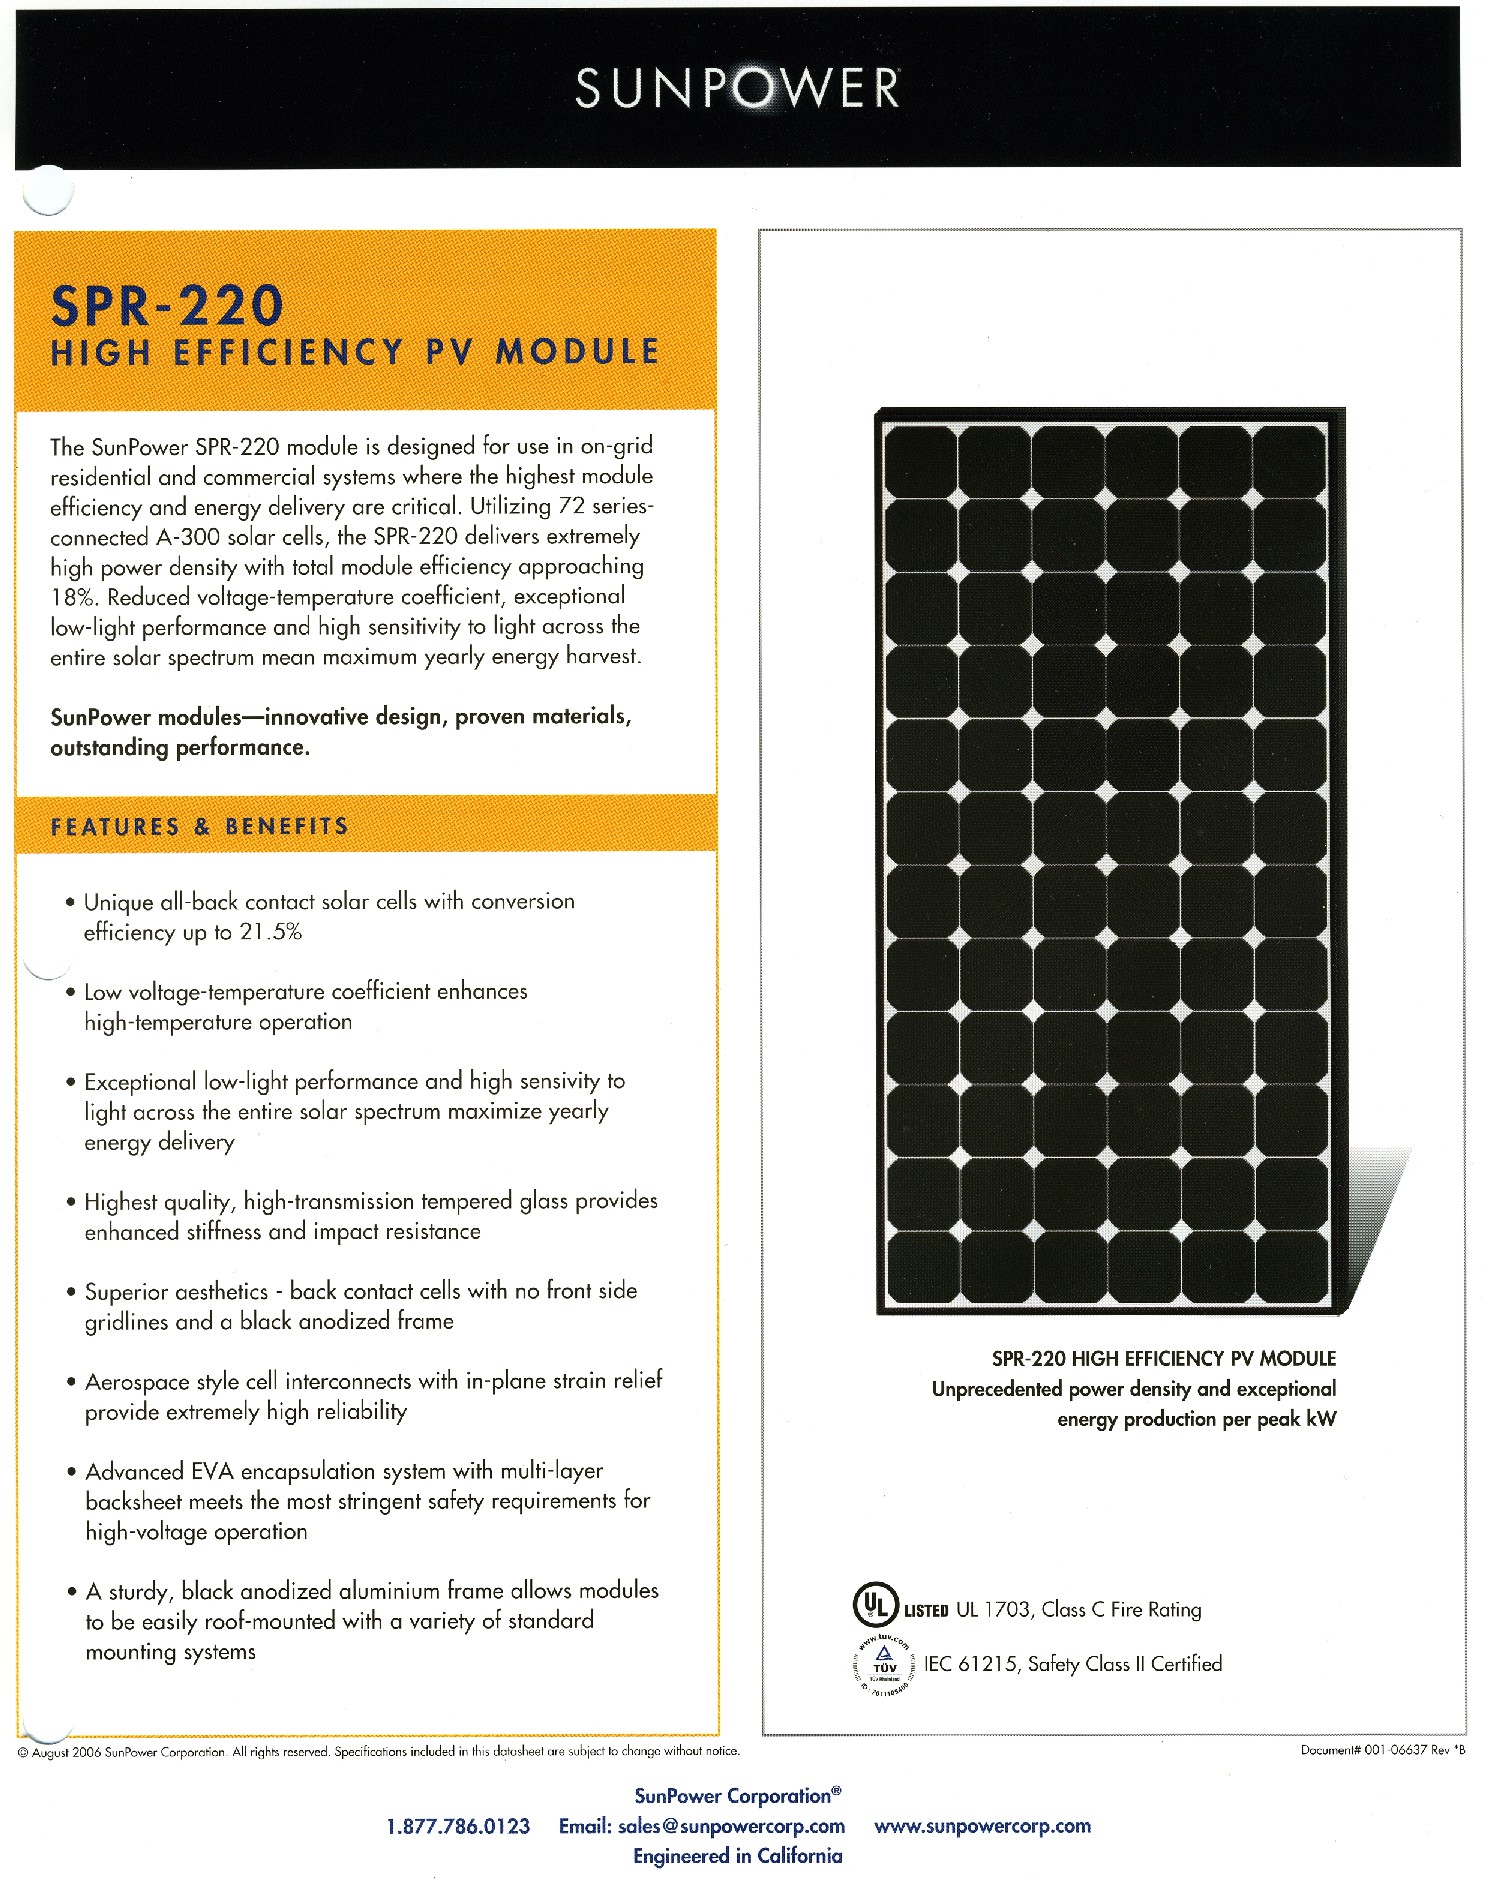
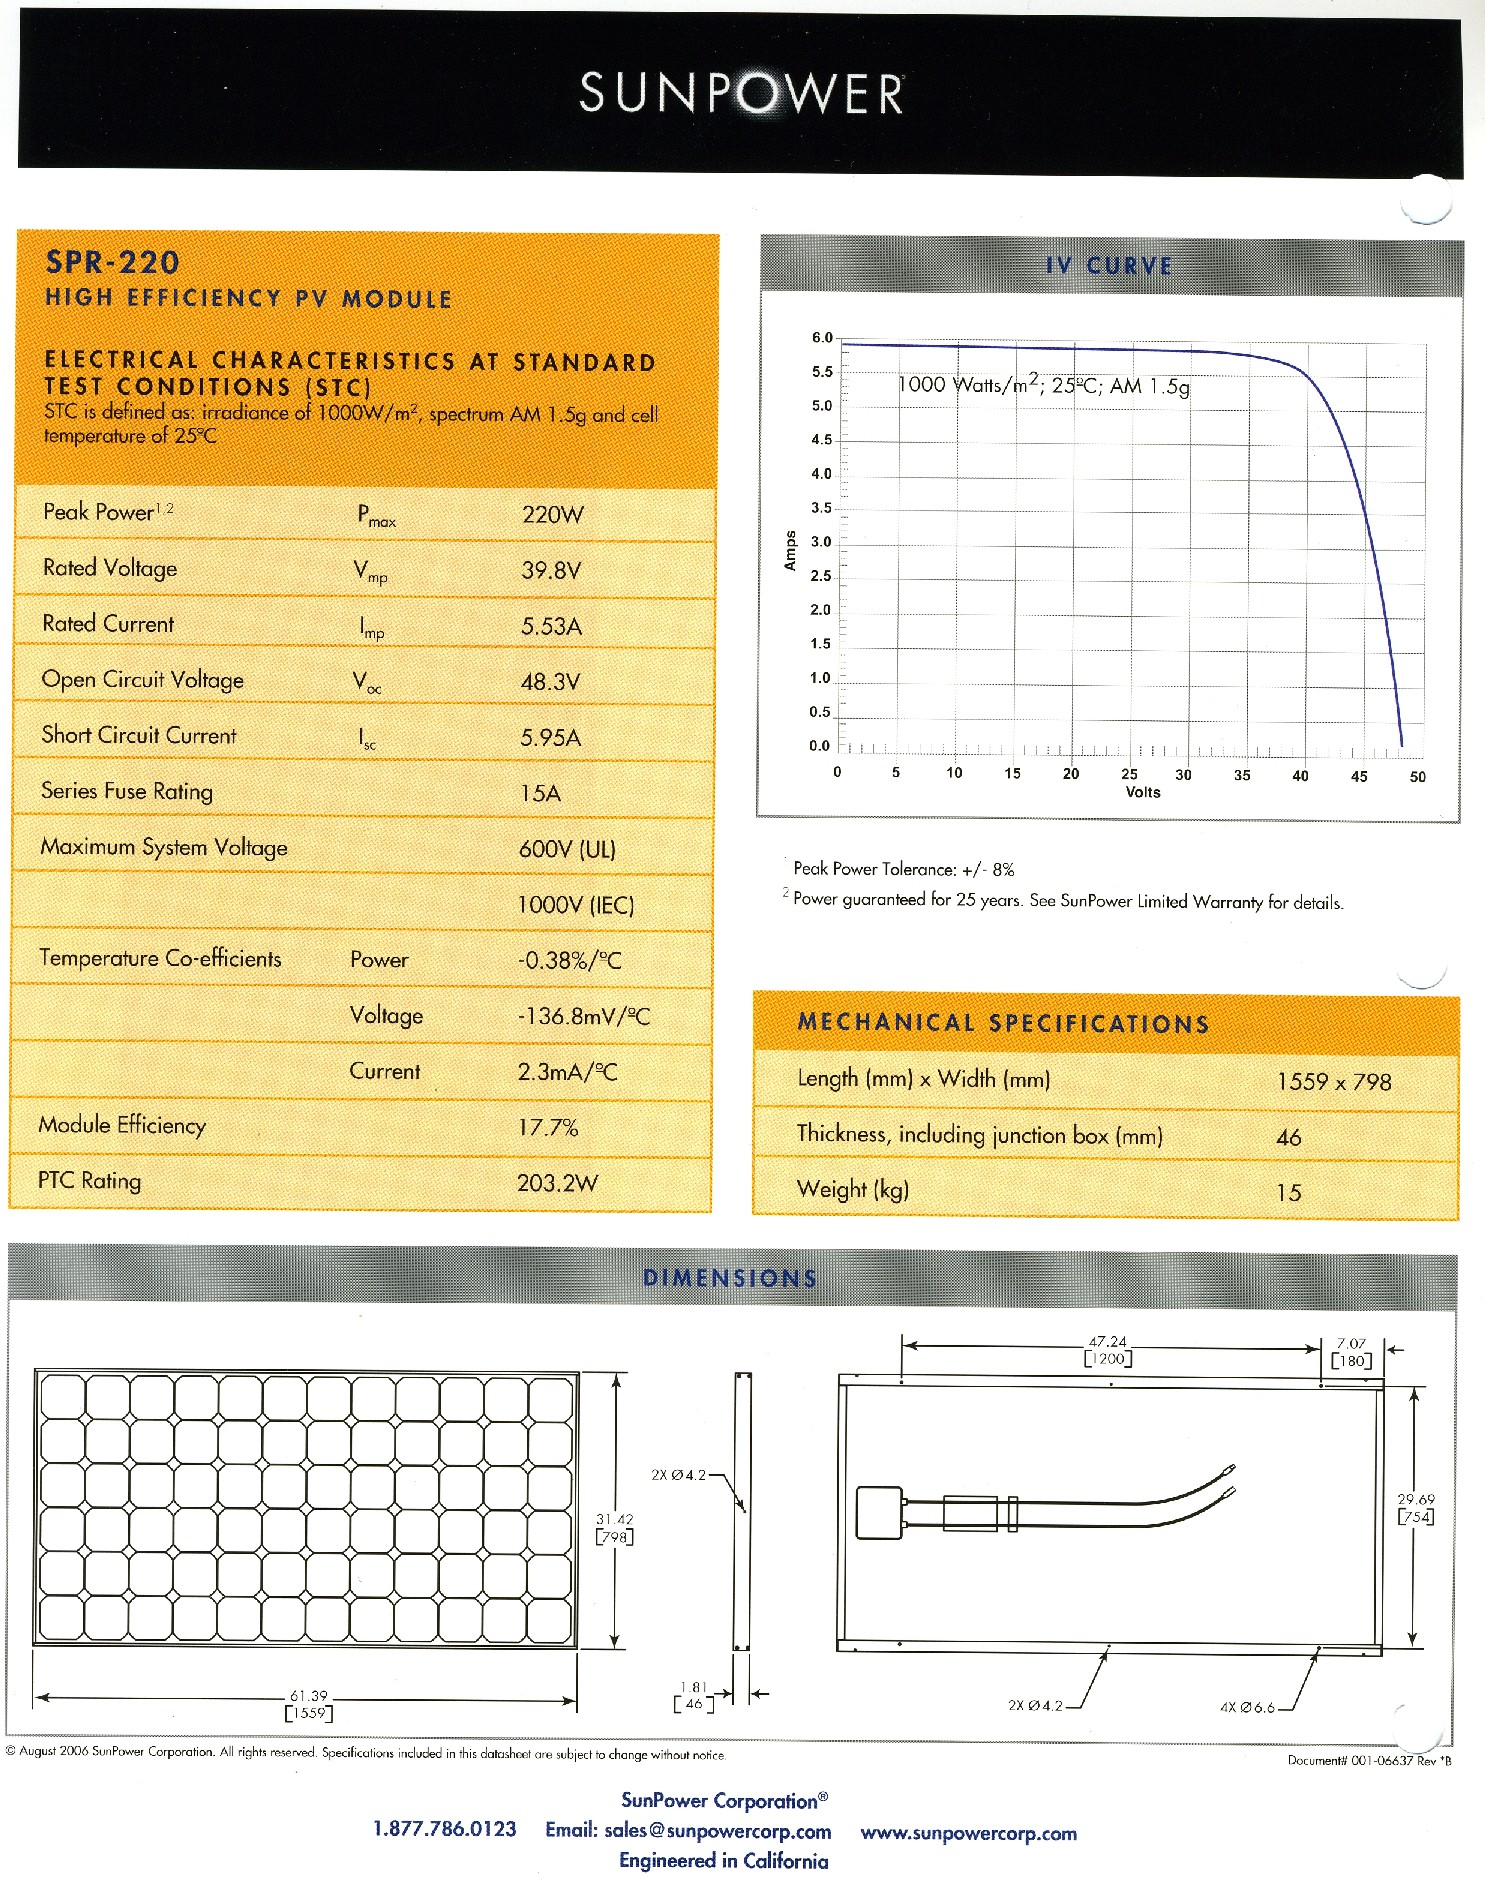
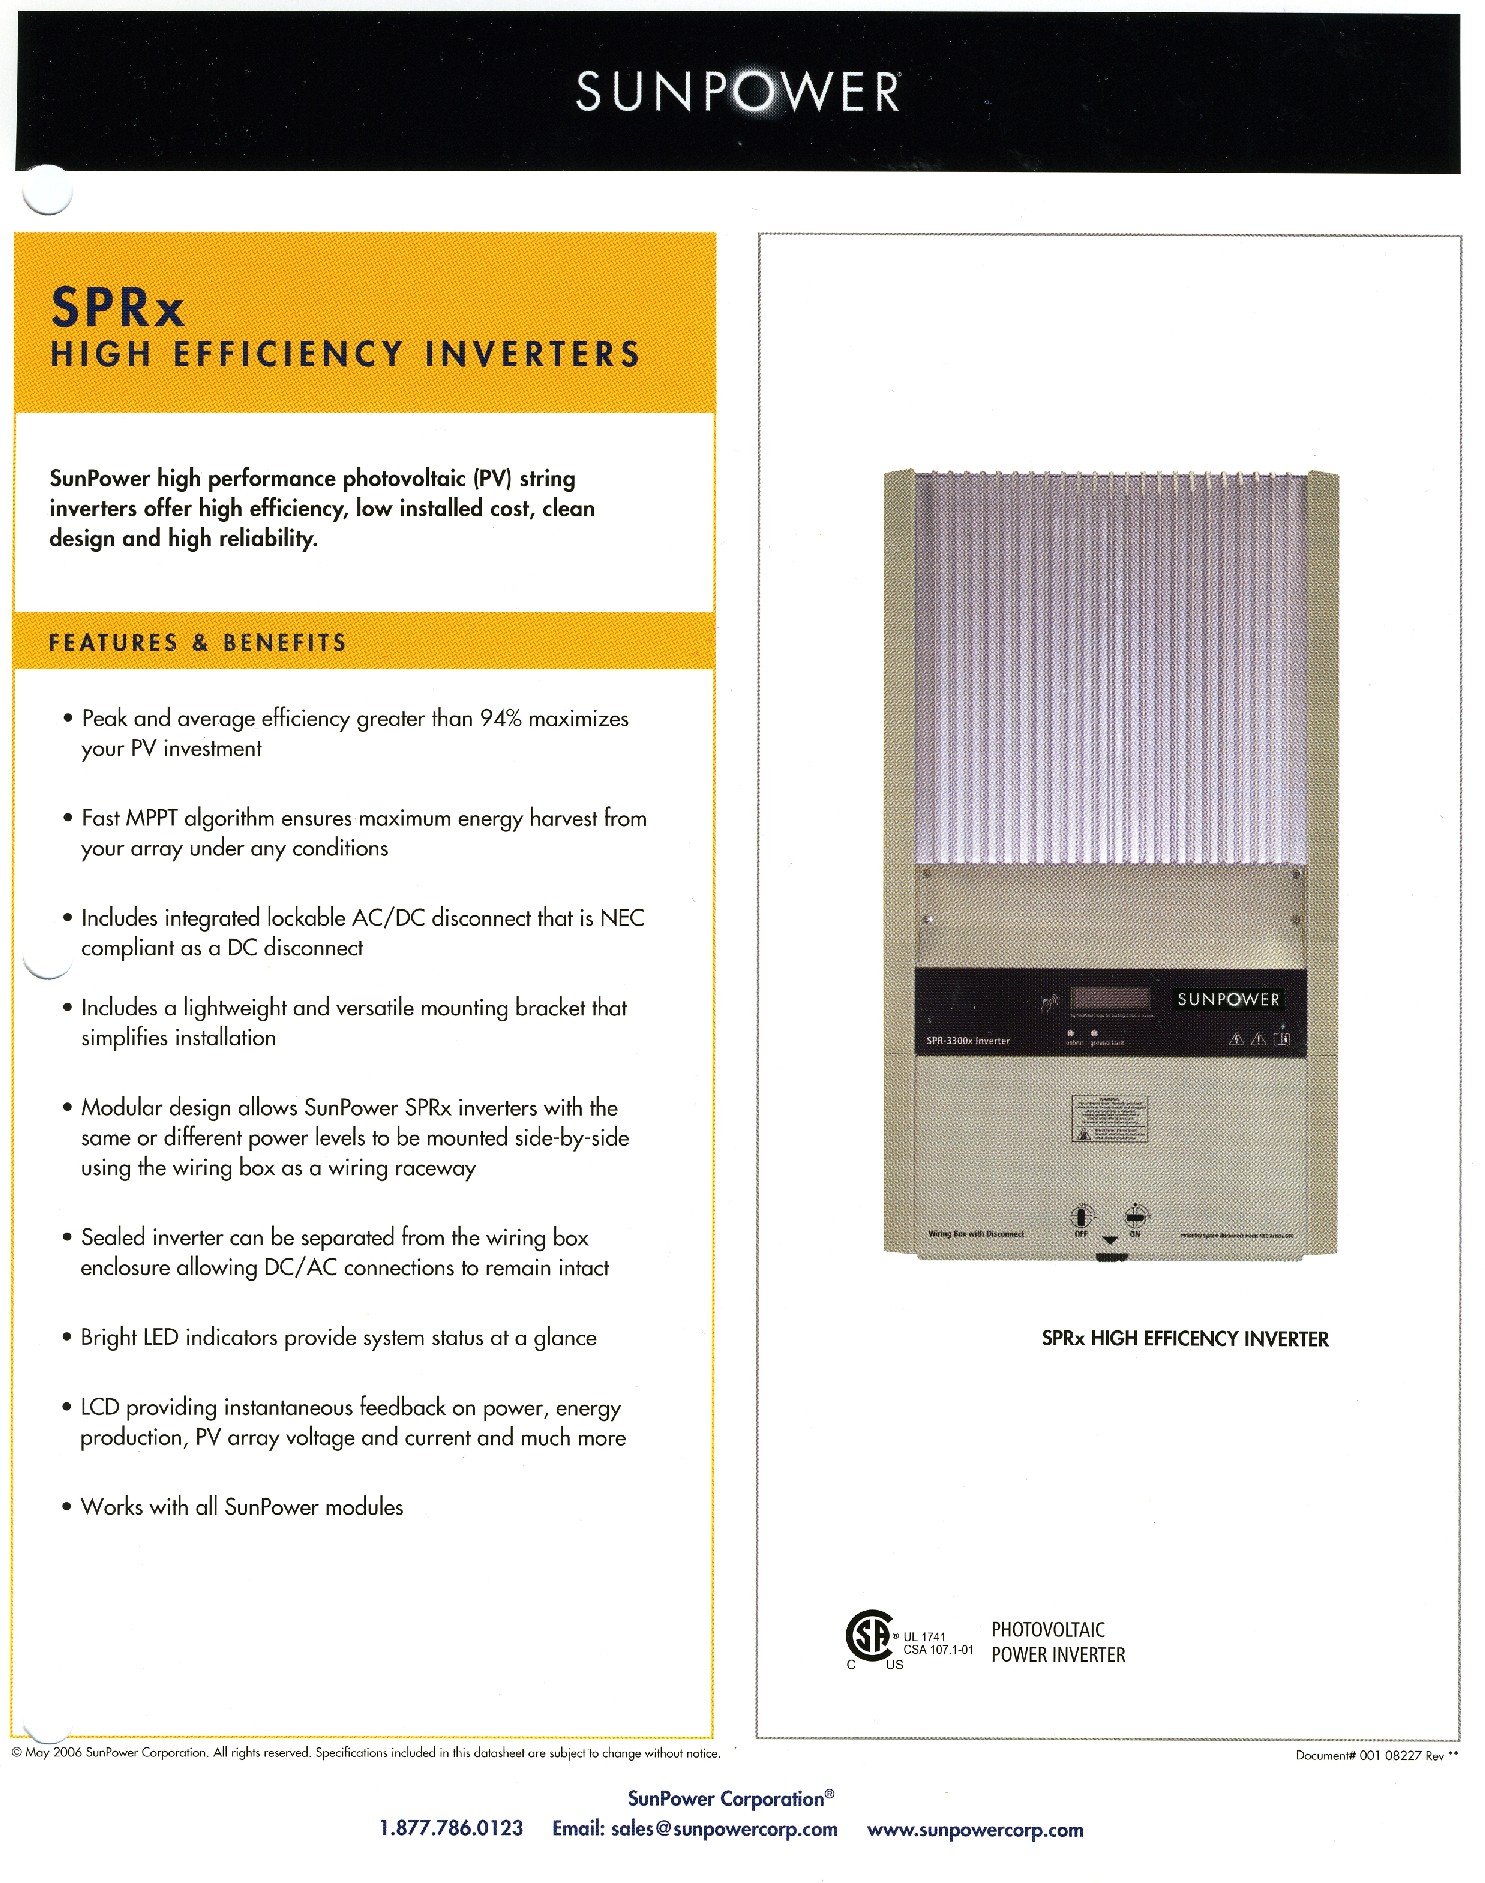
Namaste had provided a list of materials and a site plan which was pretty much what we went with. The only changes were to locate the three panels on the lower roof horizontally near the roof edge for foot access and to avoid any shading in the summer from the upper roof, and move all the disconnects and inverter off the roof area to a shaded spot on the back wall of the house. The solar panels used were the Sunpower SPR-220 (Spec-1, Spec-2)[Spec sheets may load slowly], which is no longer made. The replacement is identical except it is 210 watts instead of 220 watts. The inverter used is a Sunpower SPR-4000x (Spec-1, Spec-2). Note that this is the same as the Xantrex GT Grid Tied inverter. This became important later for accessing it for data monitoring.
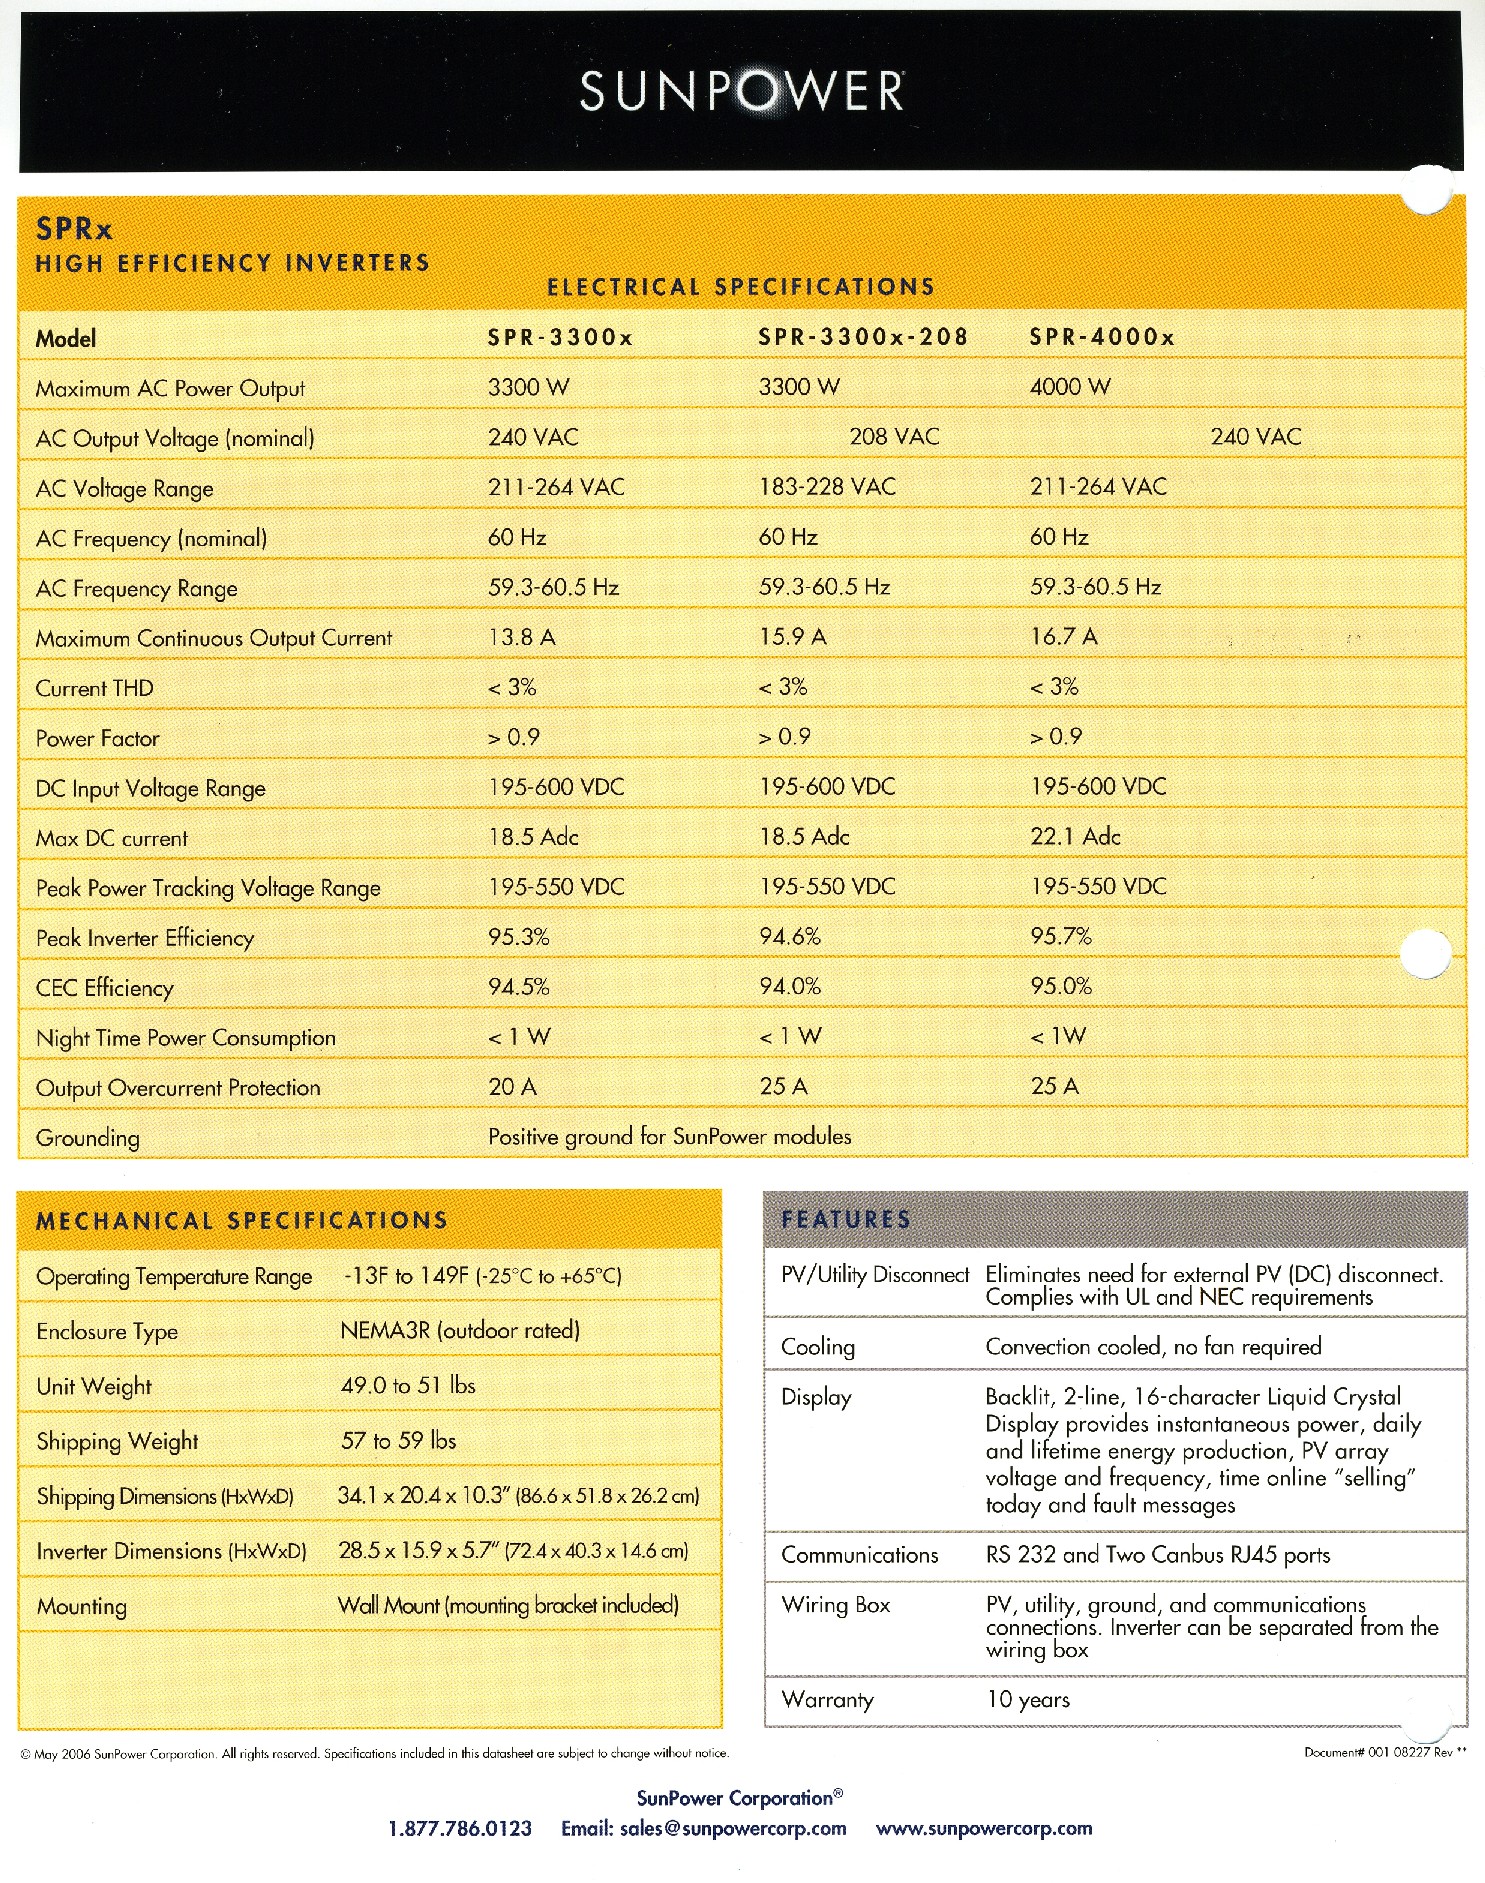
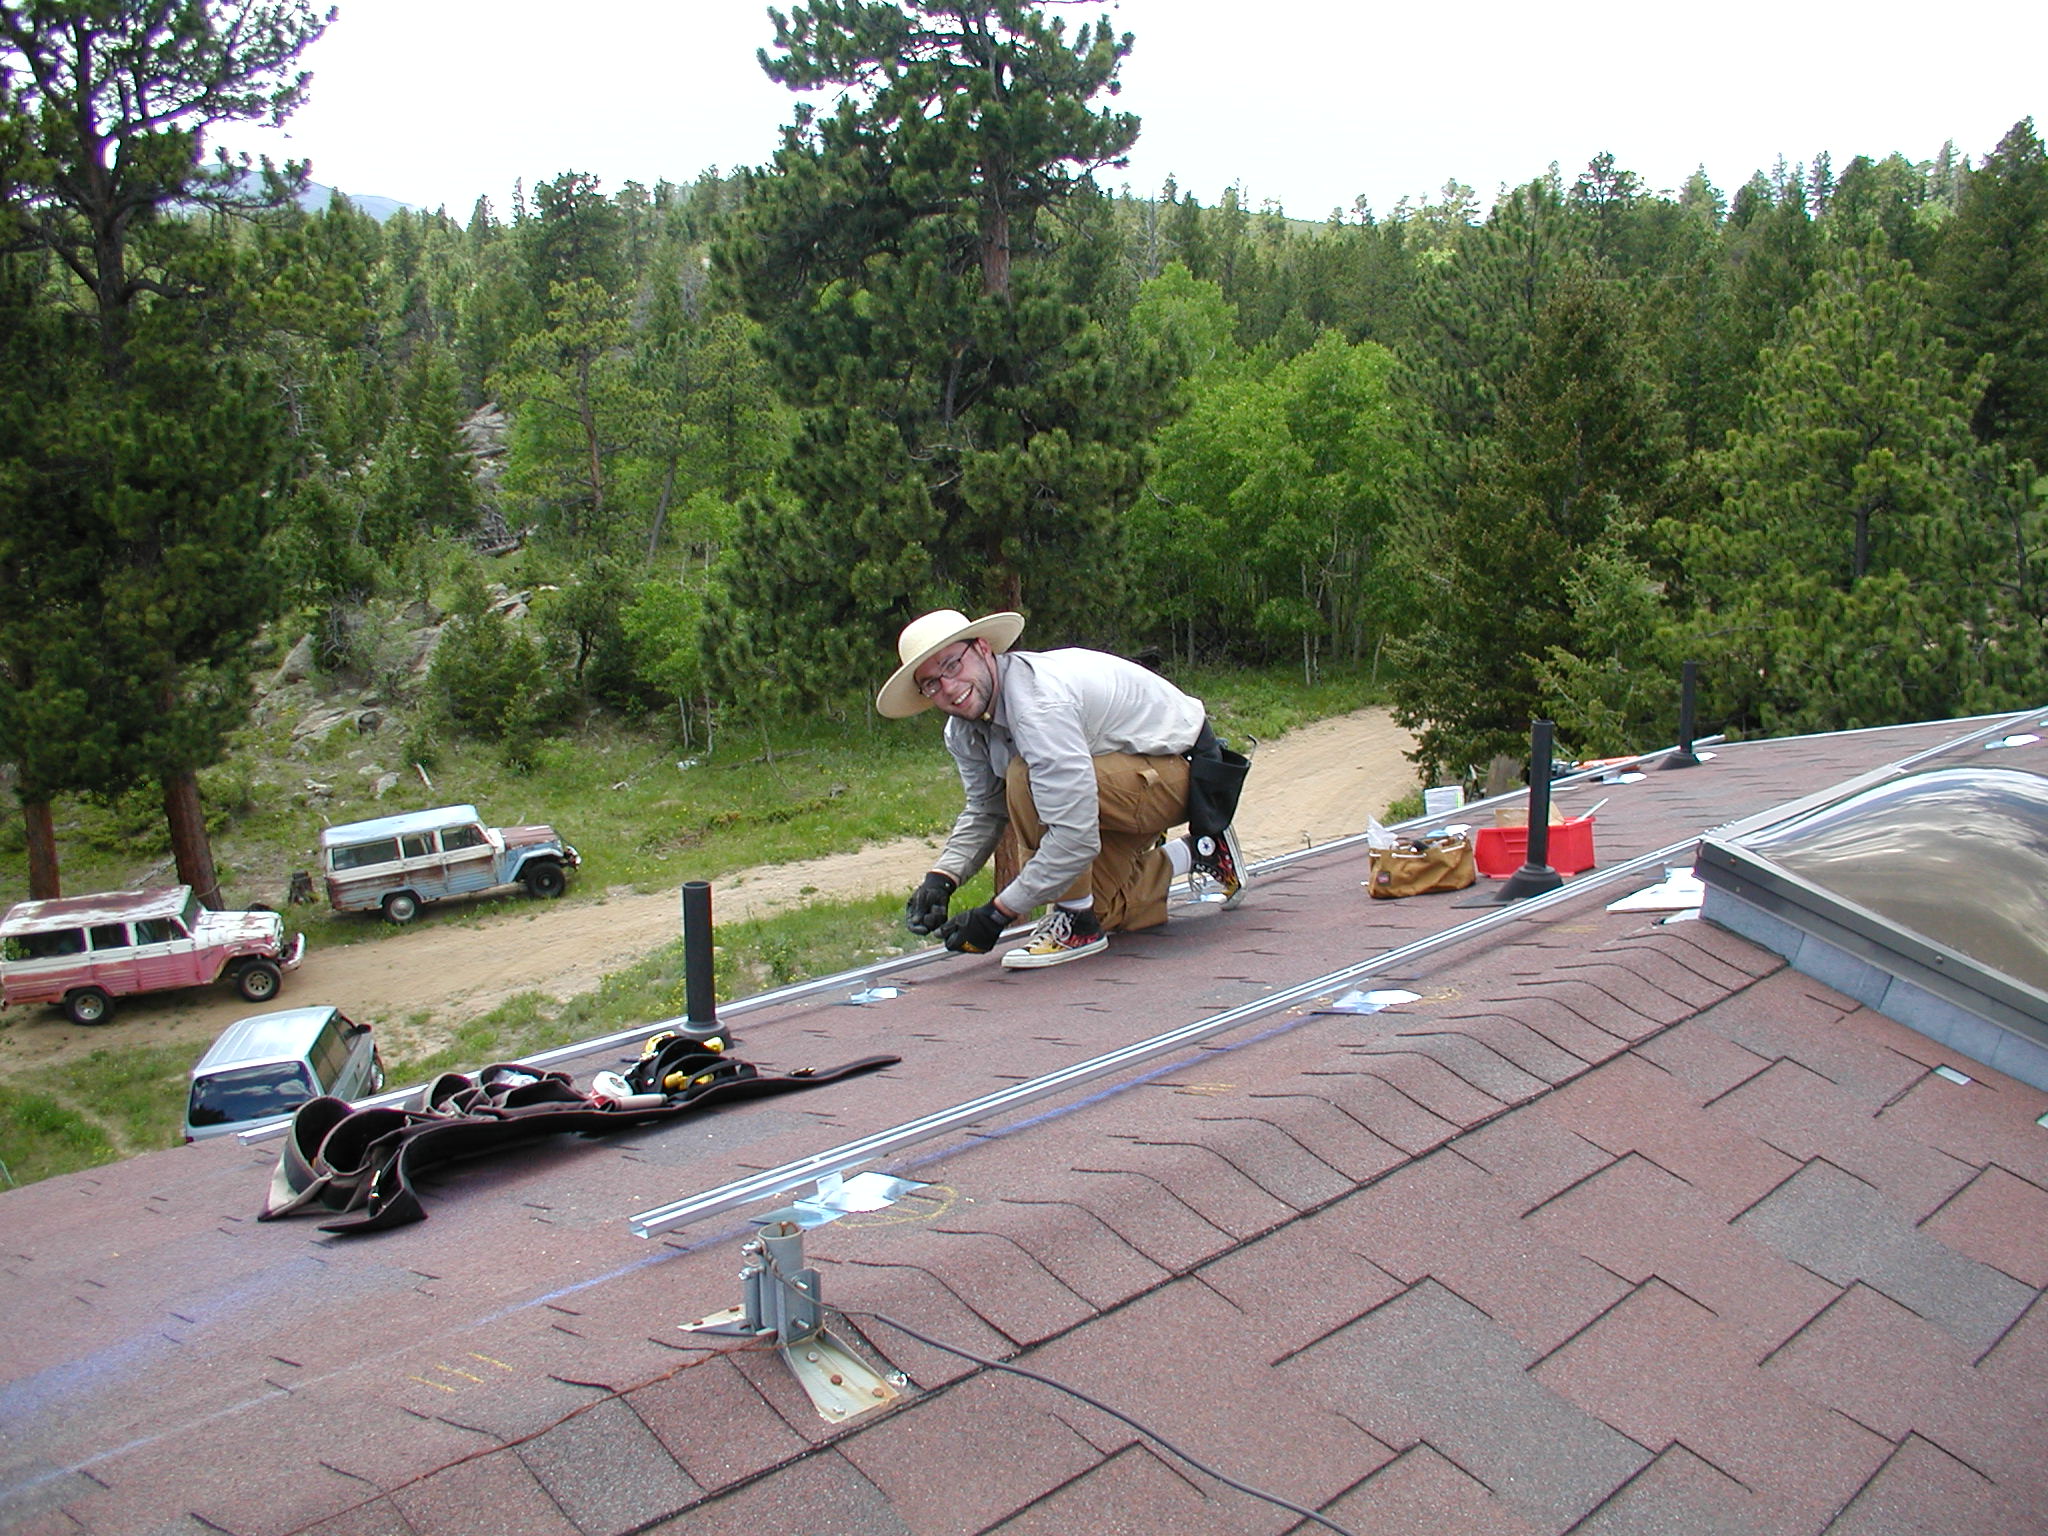
In the following, click on any image to get a large view. Depending on your browser, you may be able to click again to zoom in for even more detail. All this got going in late July and early August and was completed in early September of 2007. The initial conditions looked like this, ignore that shadow person.
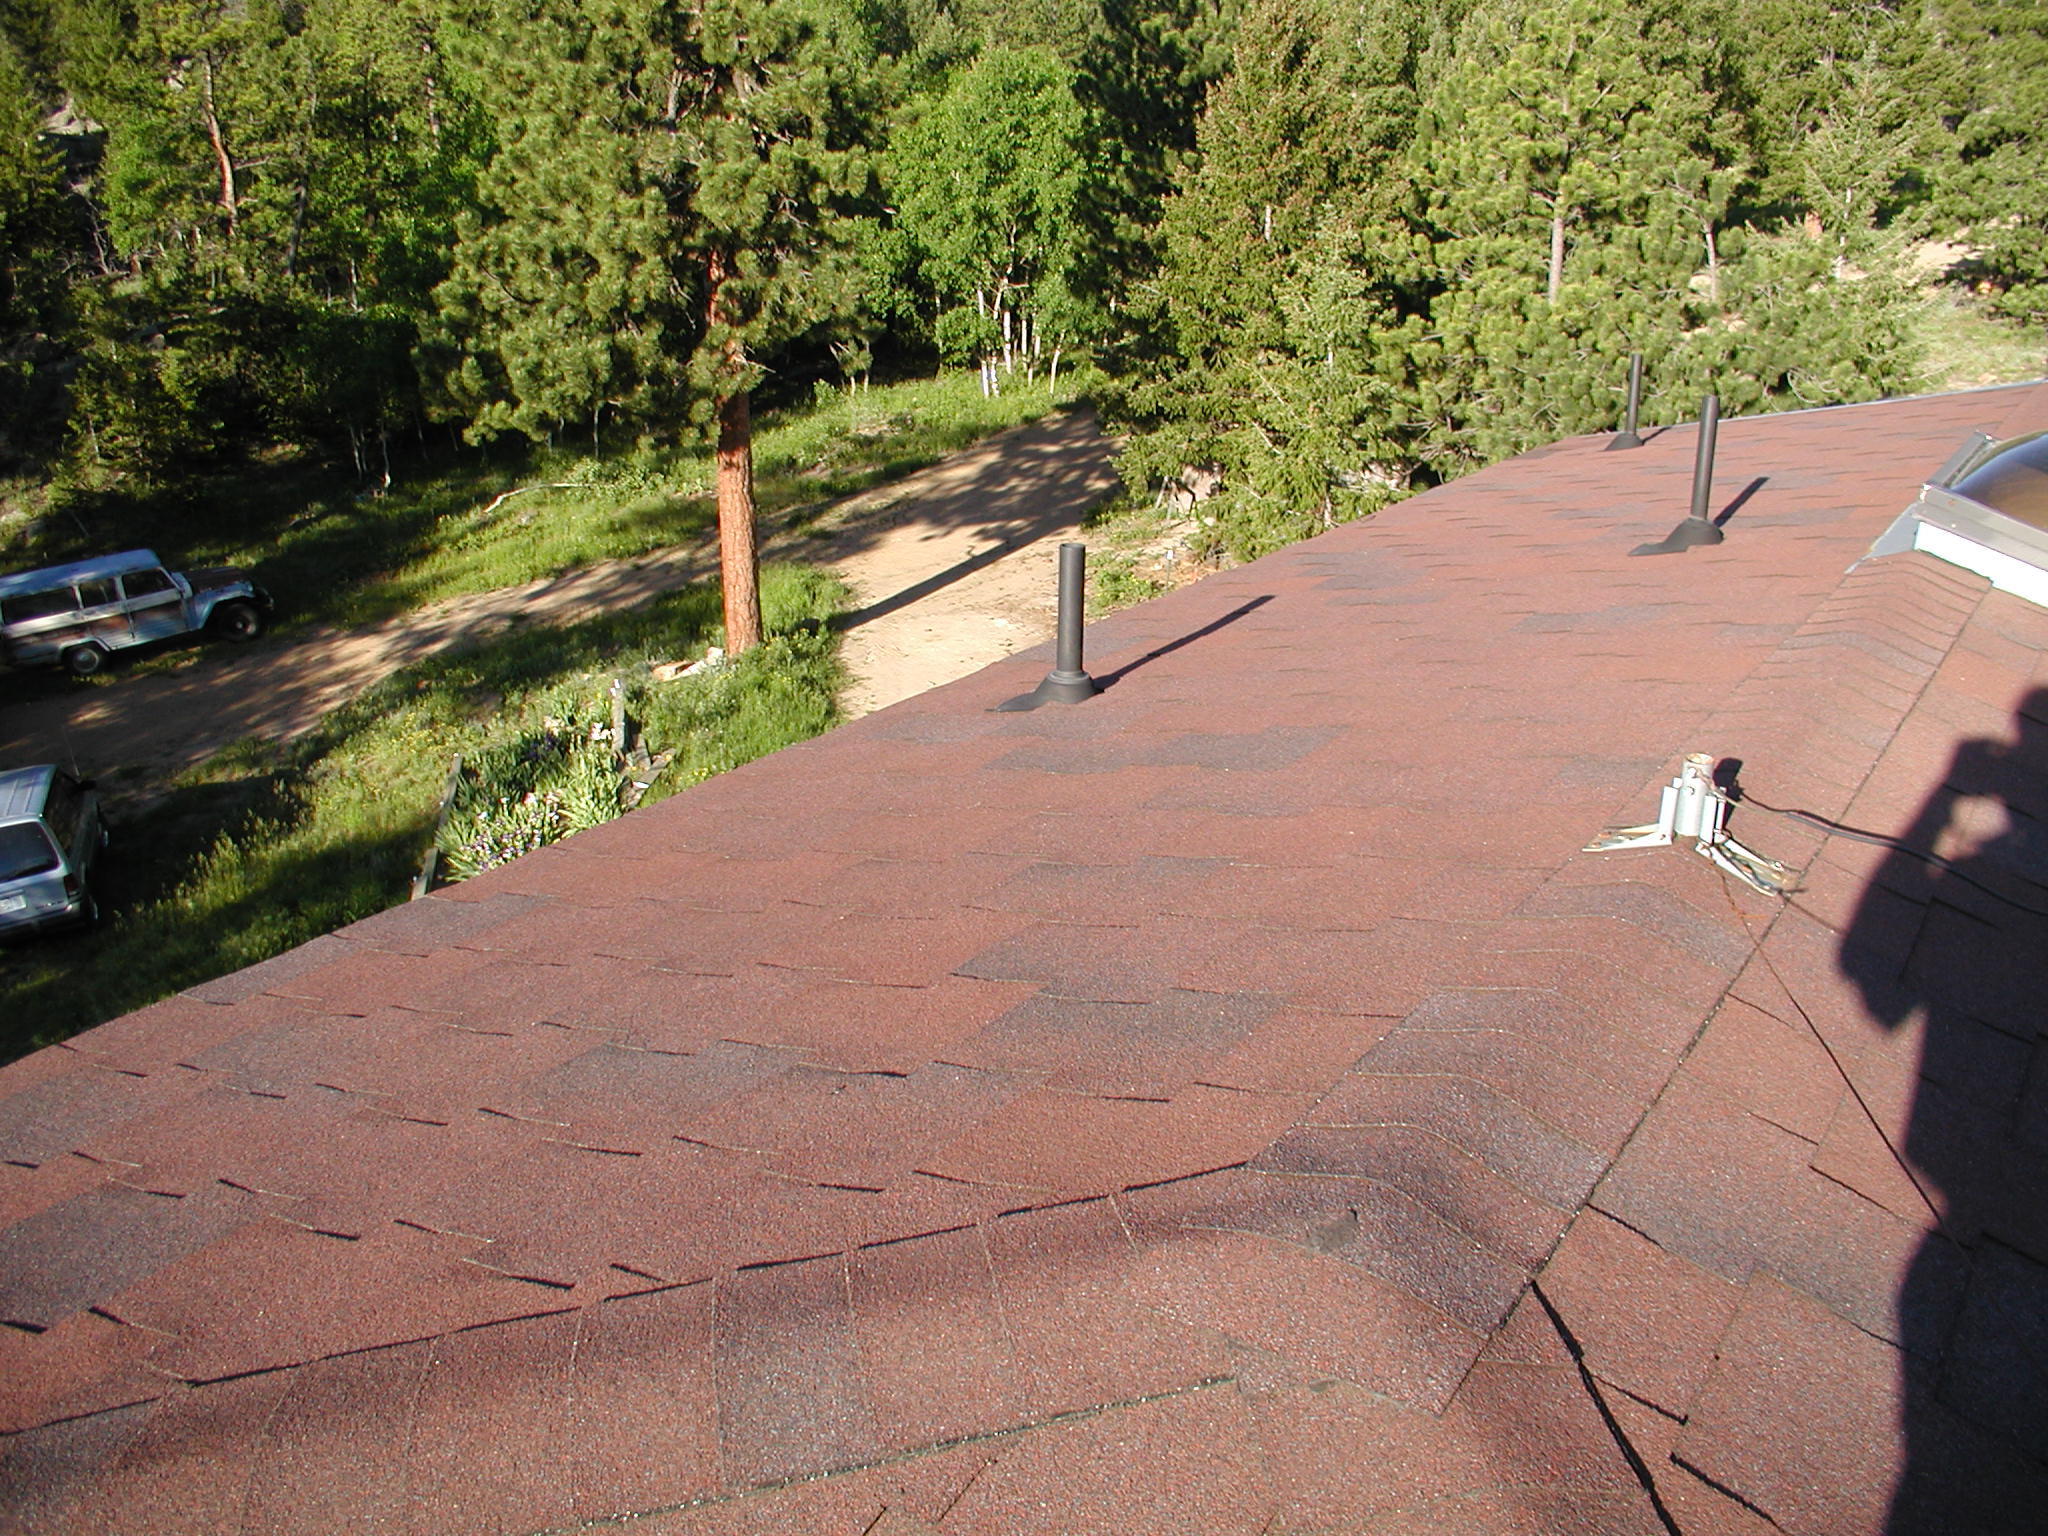

The crew from Namaste, who although are solar centered, are not sun lovers for the skin. Note the great hats and long sleeves! They showed up and installed the panels in two days and did a very neat job of it.
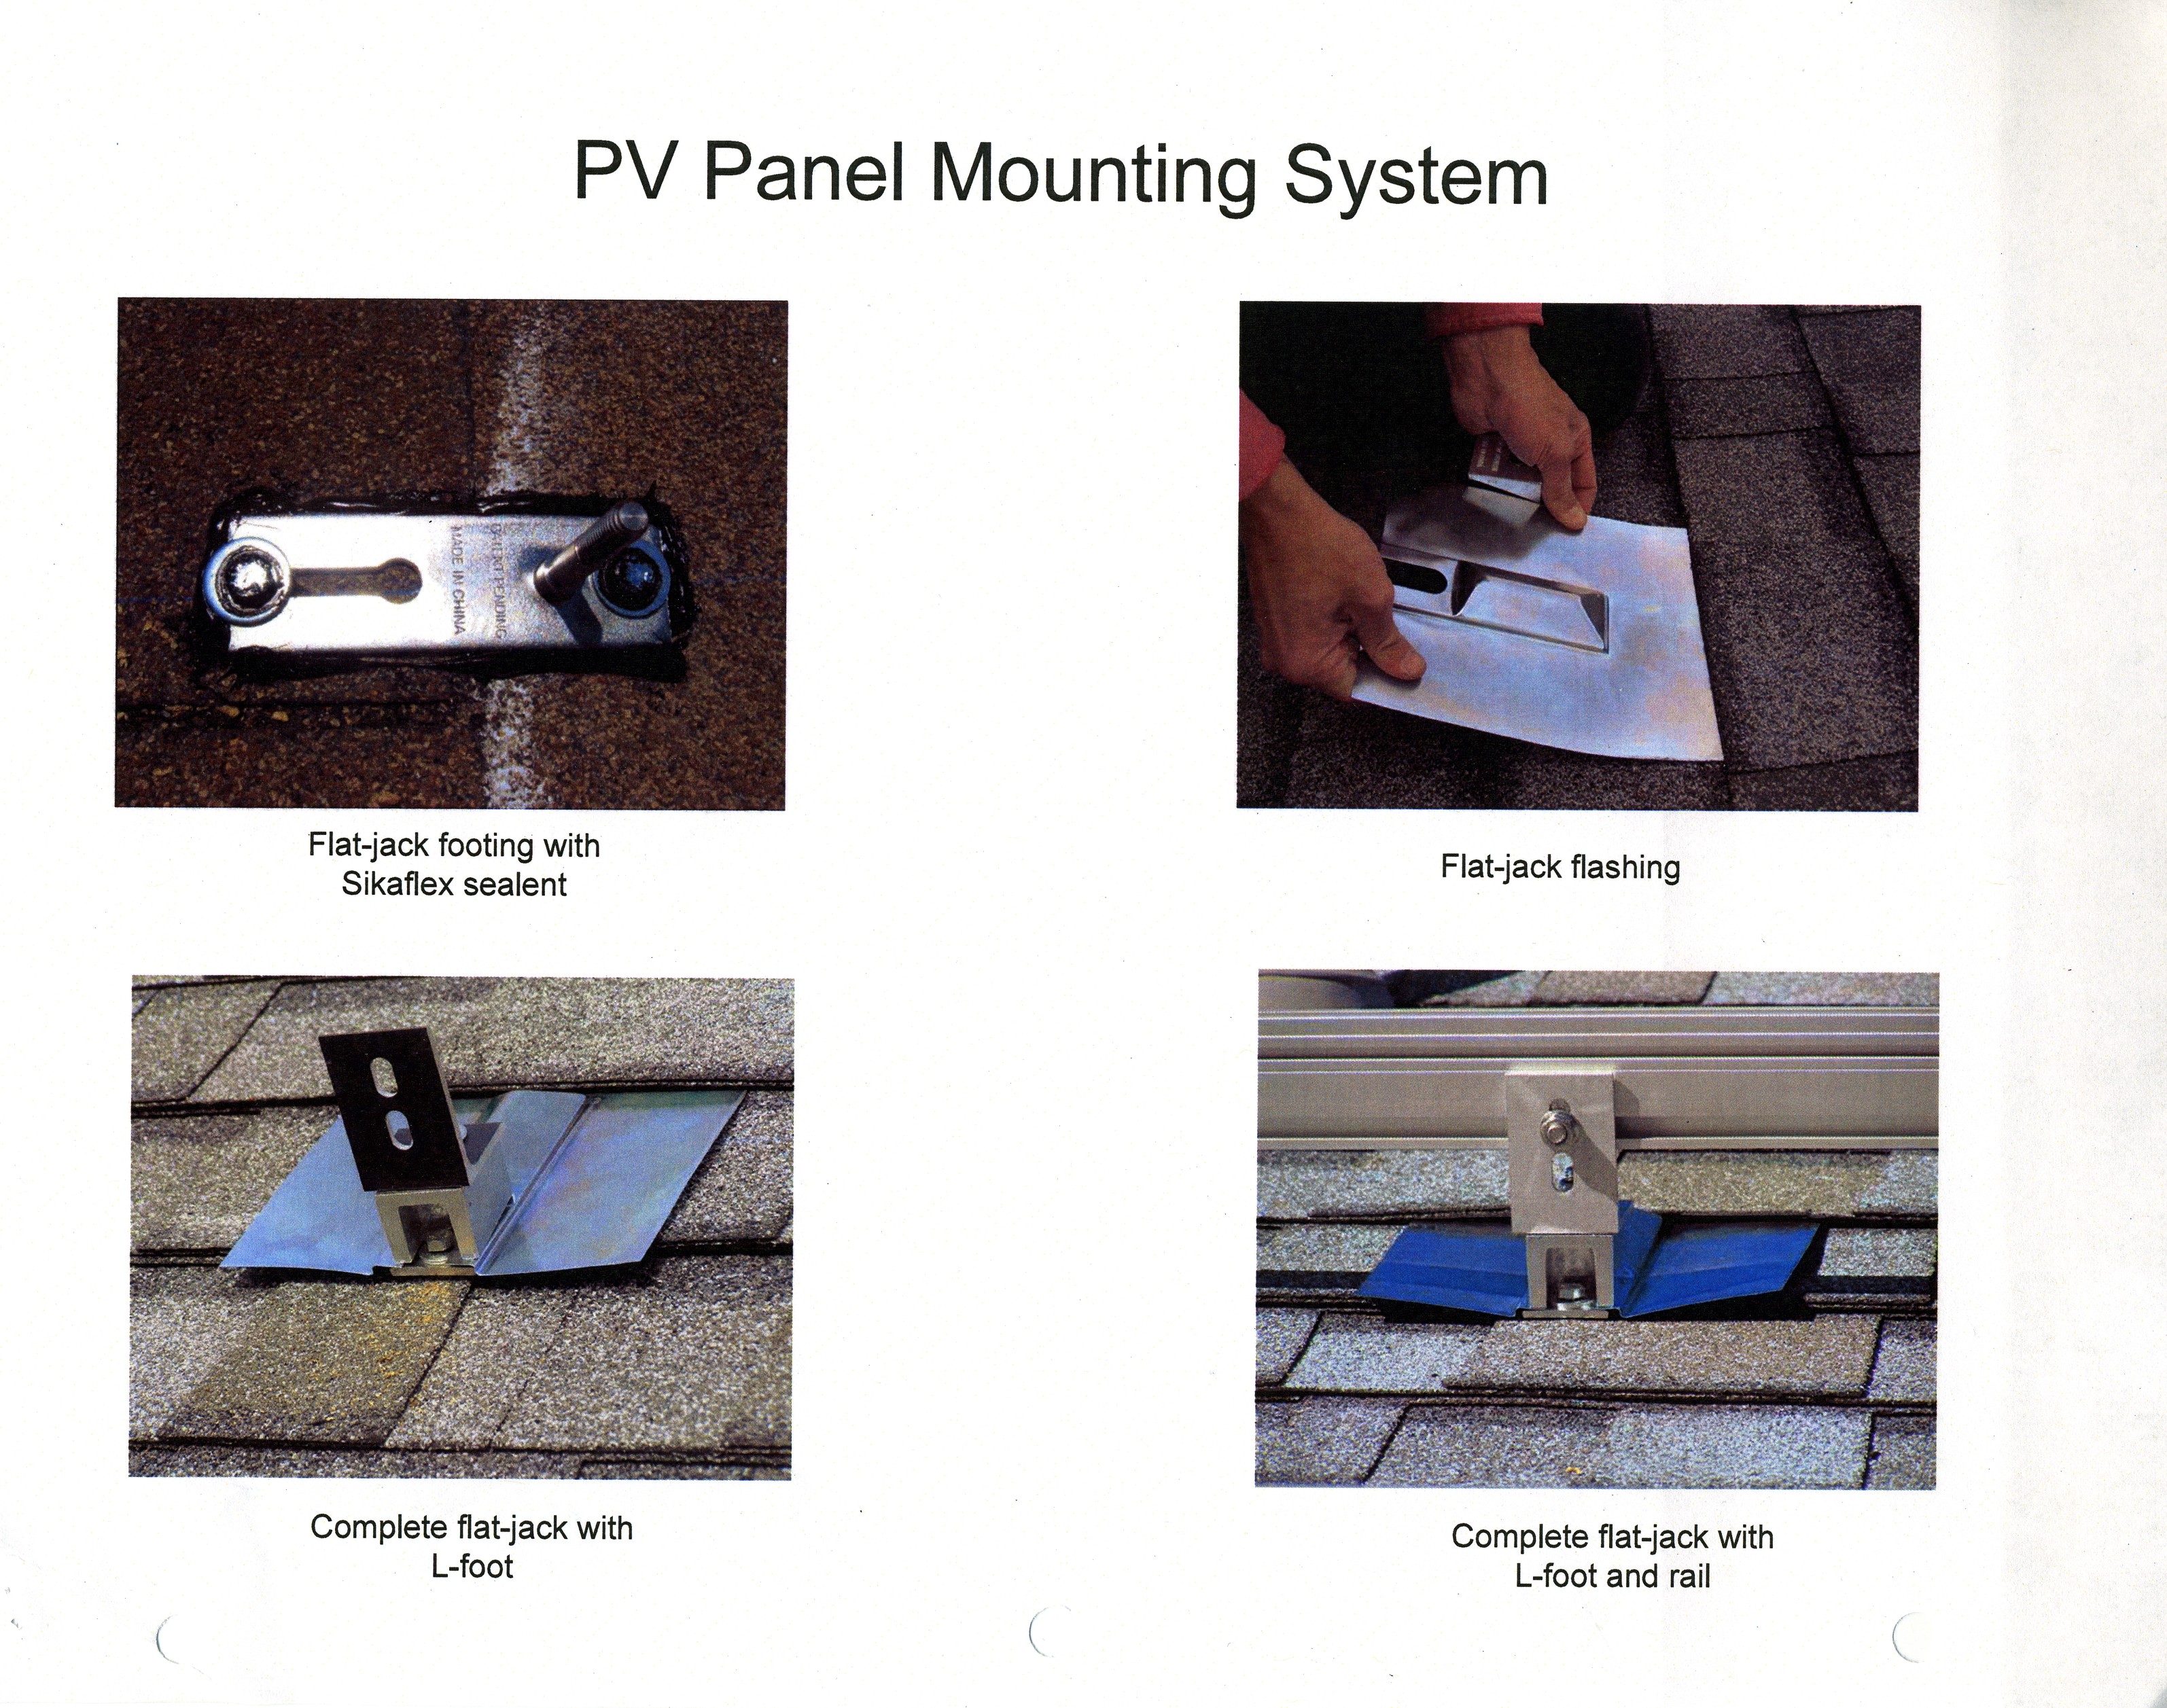
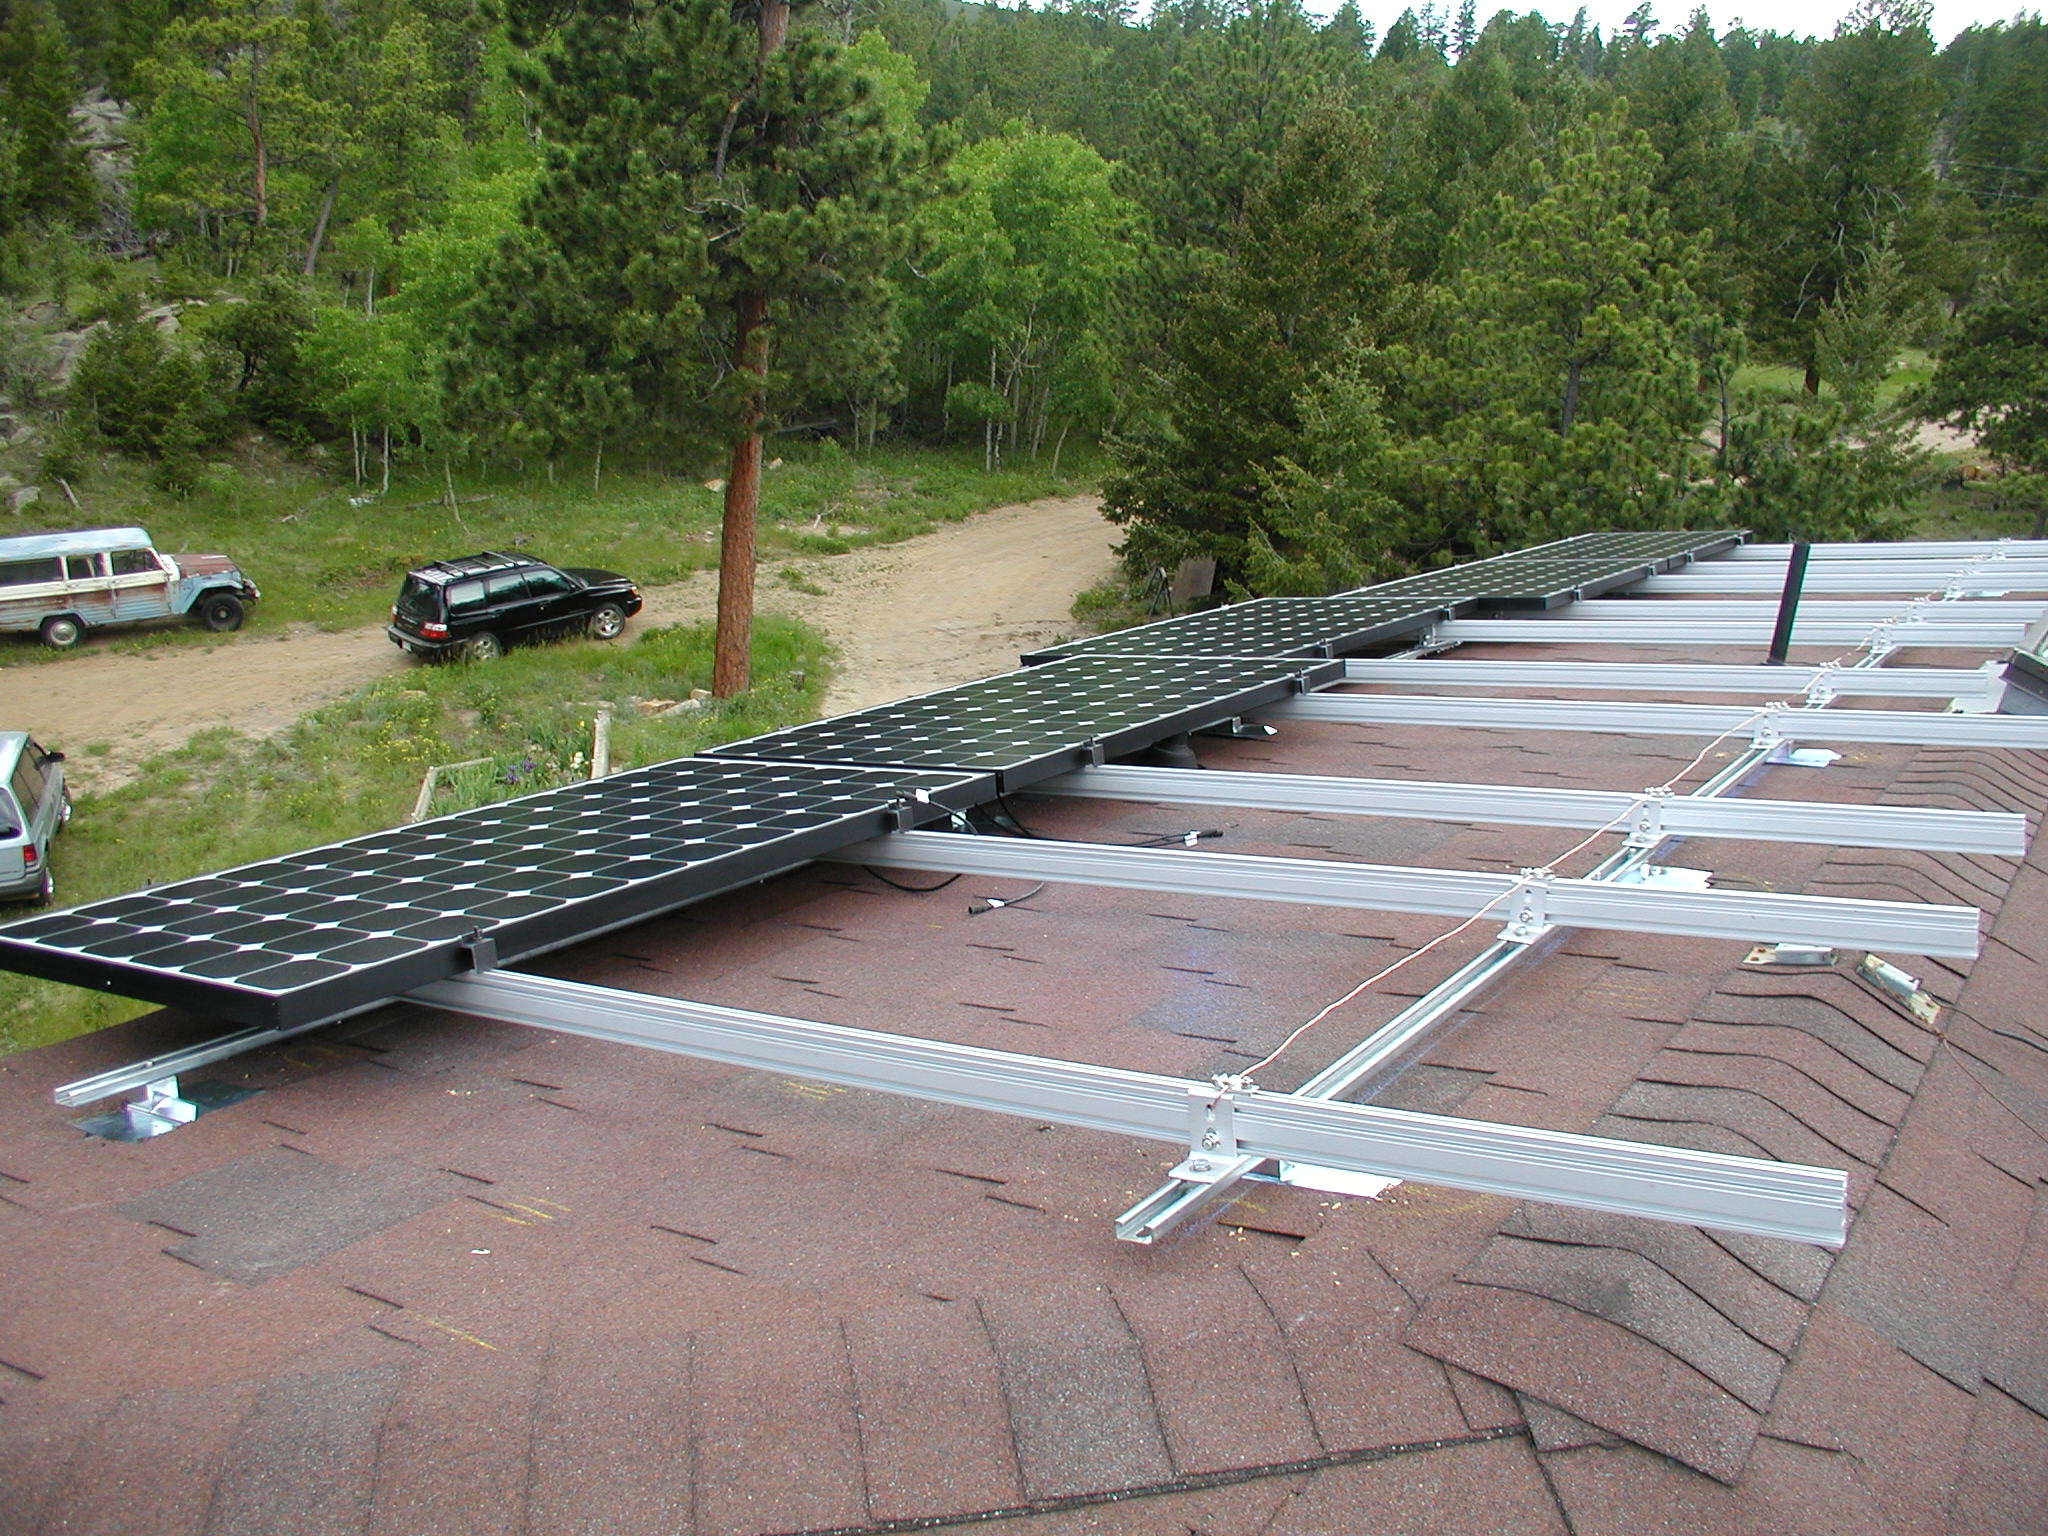
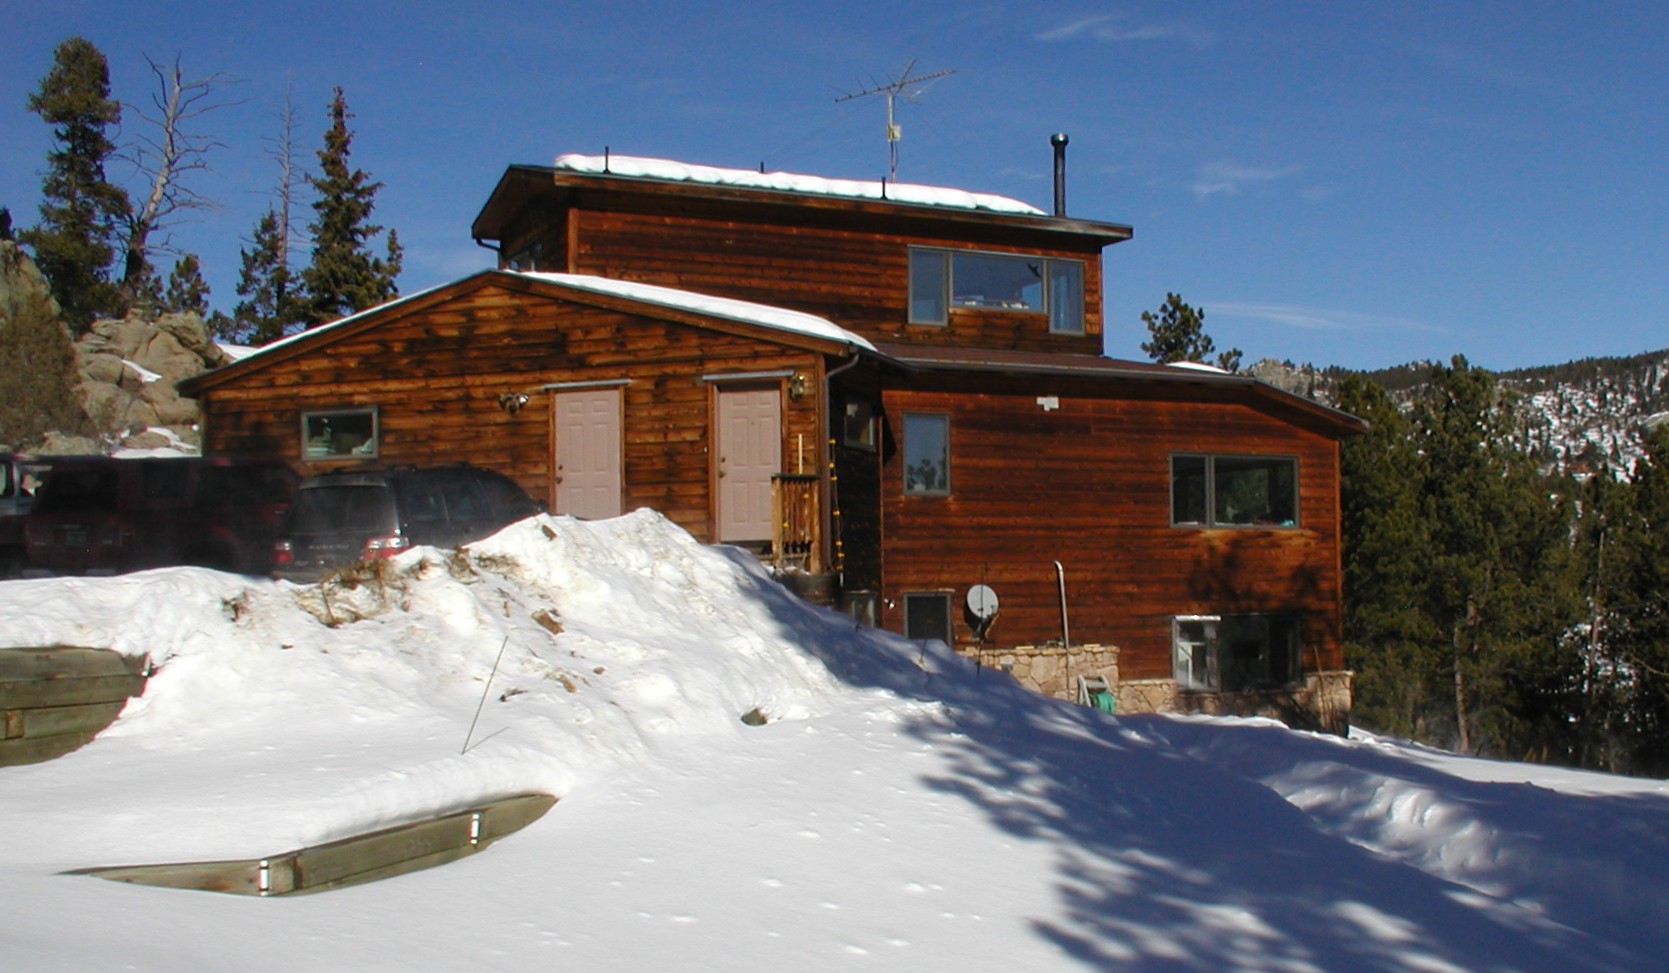
The procedure was to install the anchor bolt system which is called a "Flat Jack". Holes are drilled into the 24" center roof studs and the base plate is lagged down with some sort of super-goober (sorry to get technical on you there) sealant. Then the flashing is put over that with the anchor stud sticking up and the aluminum stand-off slid over that. The Unistrut U-shaped beams slid on top of the standoff, and whole lot is bolted in place. Next the L-brackets are anchored in the proper places to the Unistrut and then the aluminum Unirack rails are bolted to the L-brackets. This forms the base support system. The panels are then laid on the Unirack rails and held down by some angle clips that bolt to the rails. Very slick system and makes for a very clean looking installation on completion. Notice how in the low shot you can see that the vent stacks have just been just cut off to live below the panels and everything is grounded with running wire. The wire looked like overkill to me since it is all metal and bolted together, but probably some code that must be satisfied, and it can't hurt to have a good solid ground.
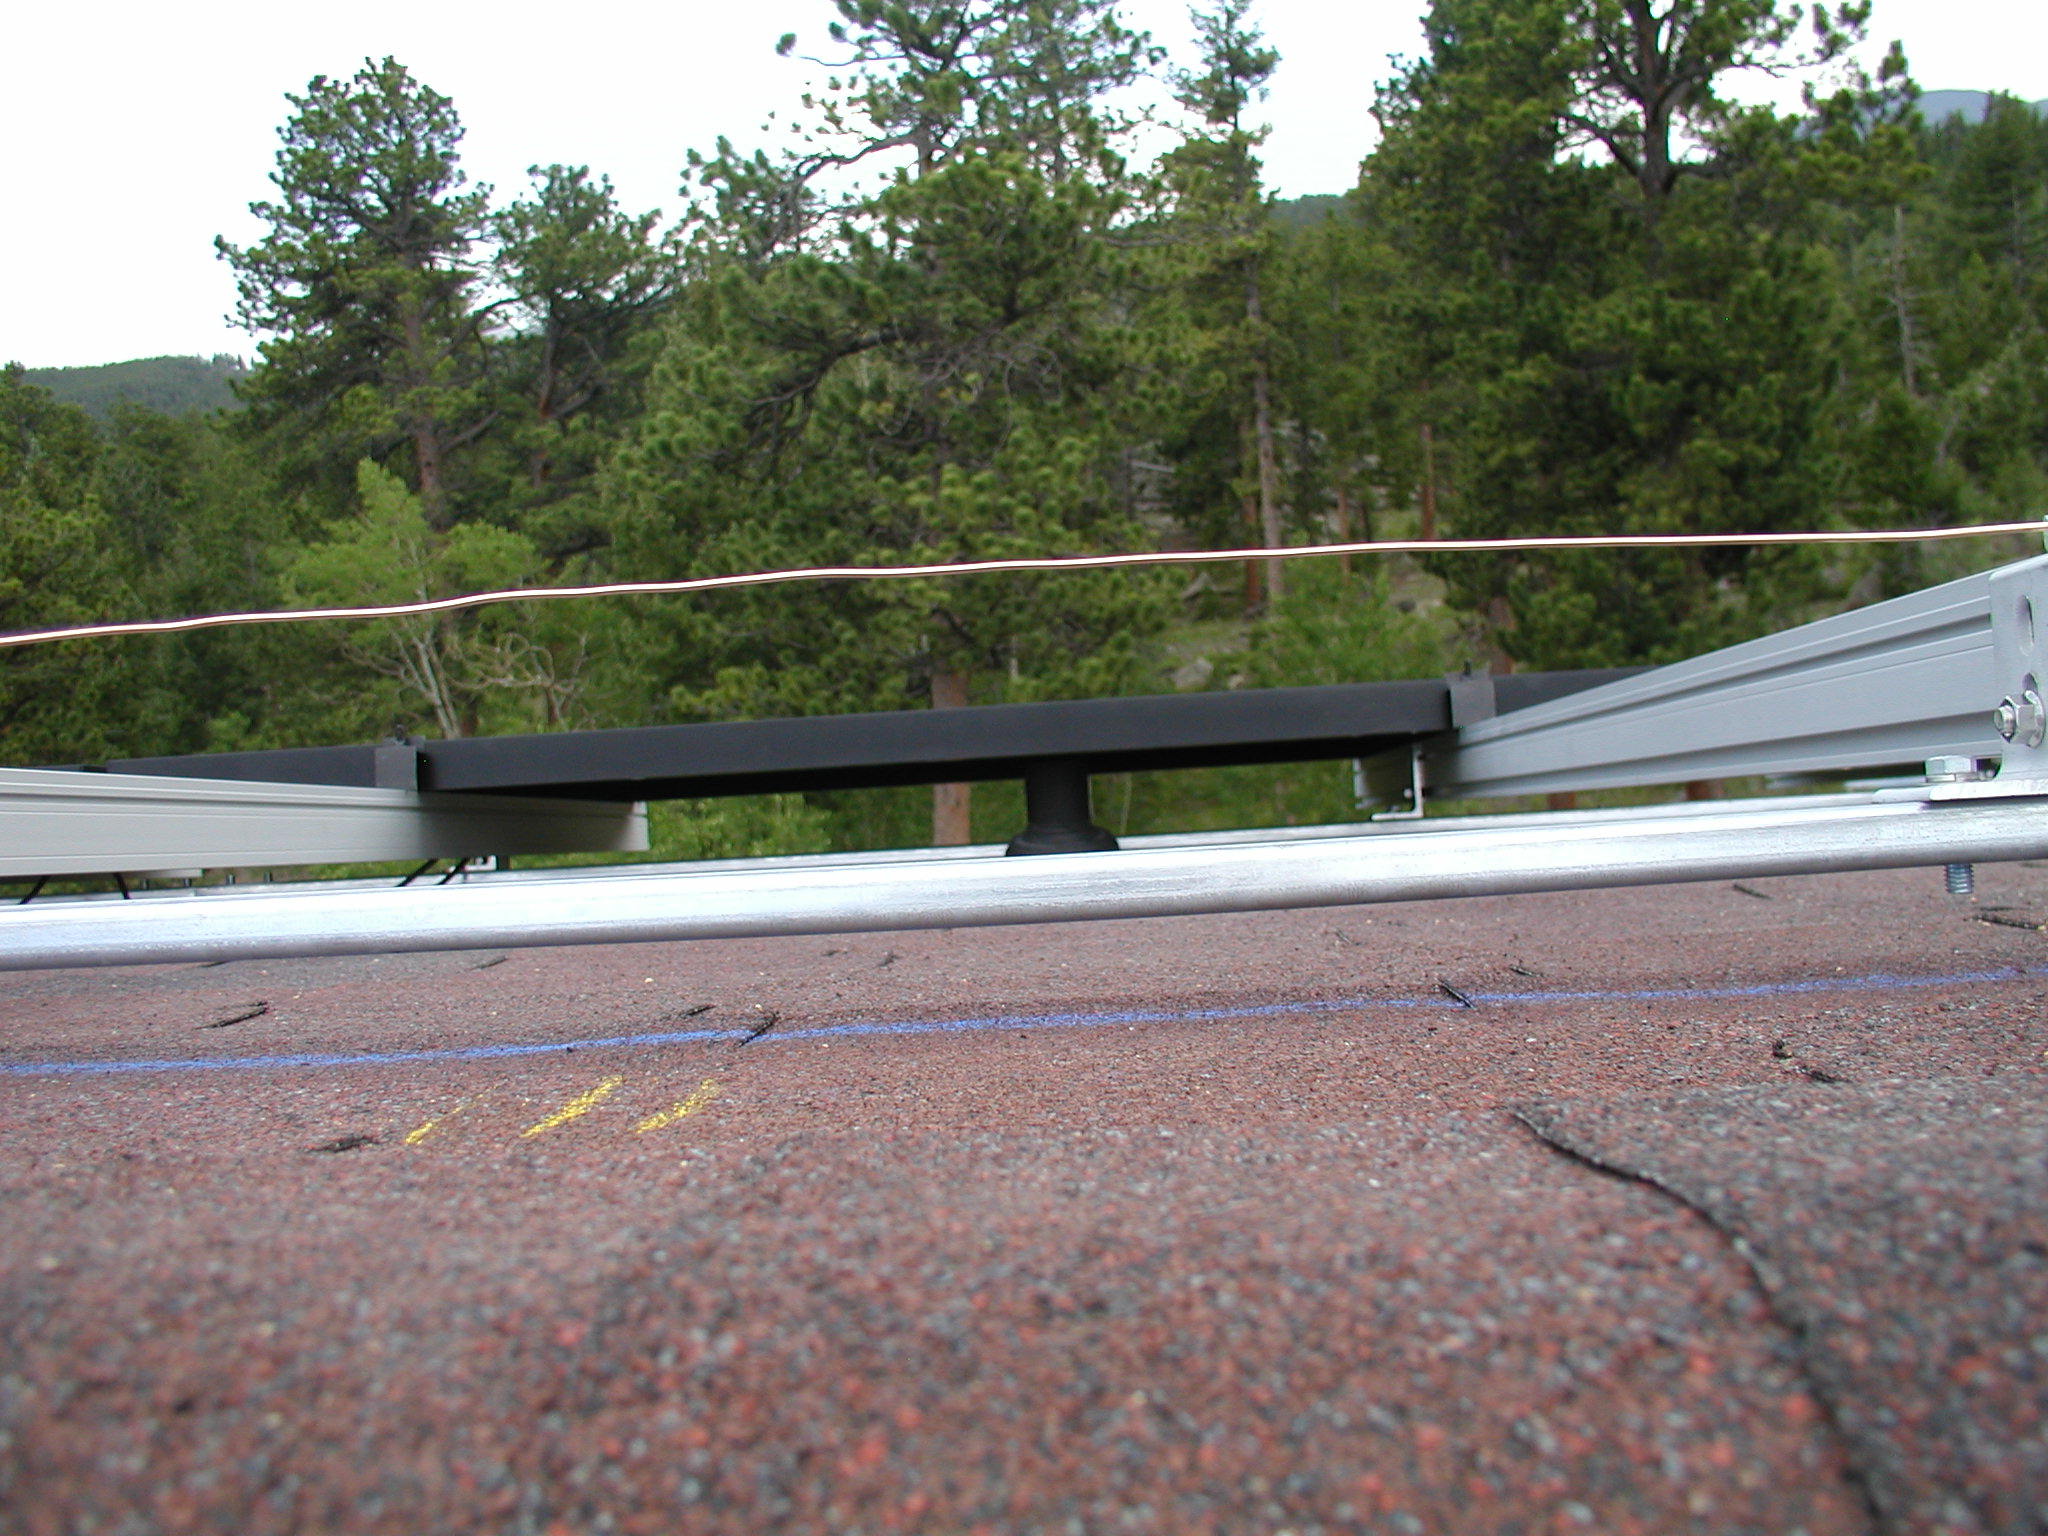
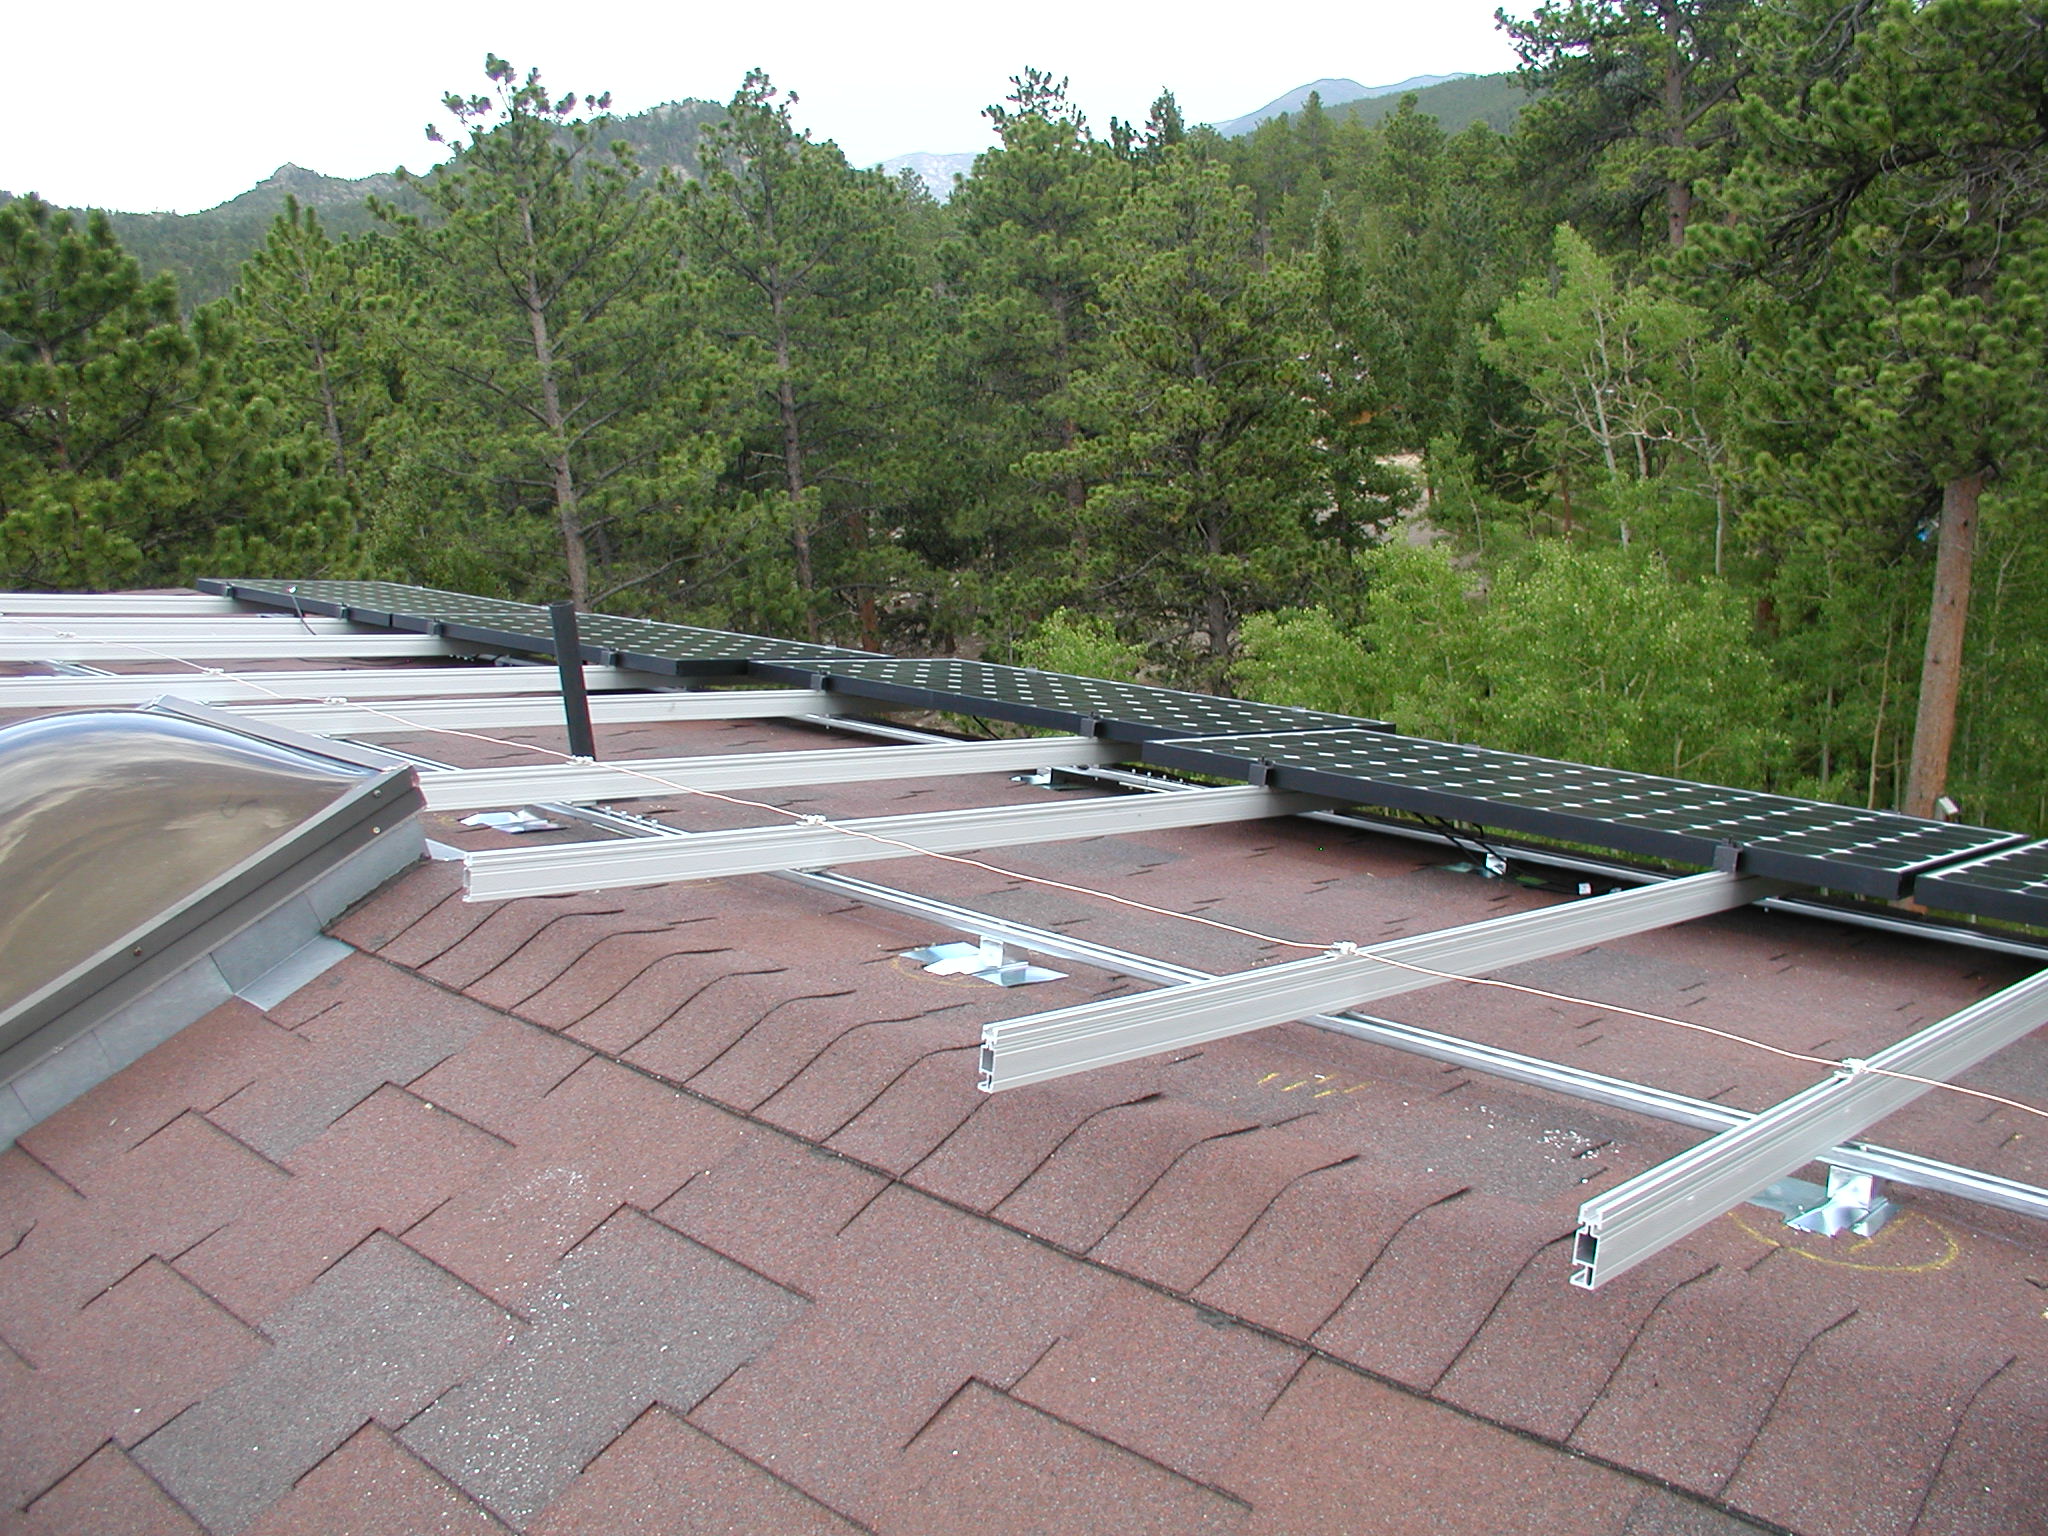
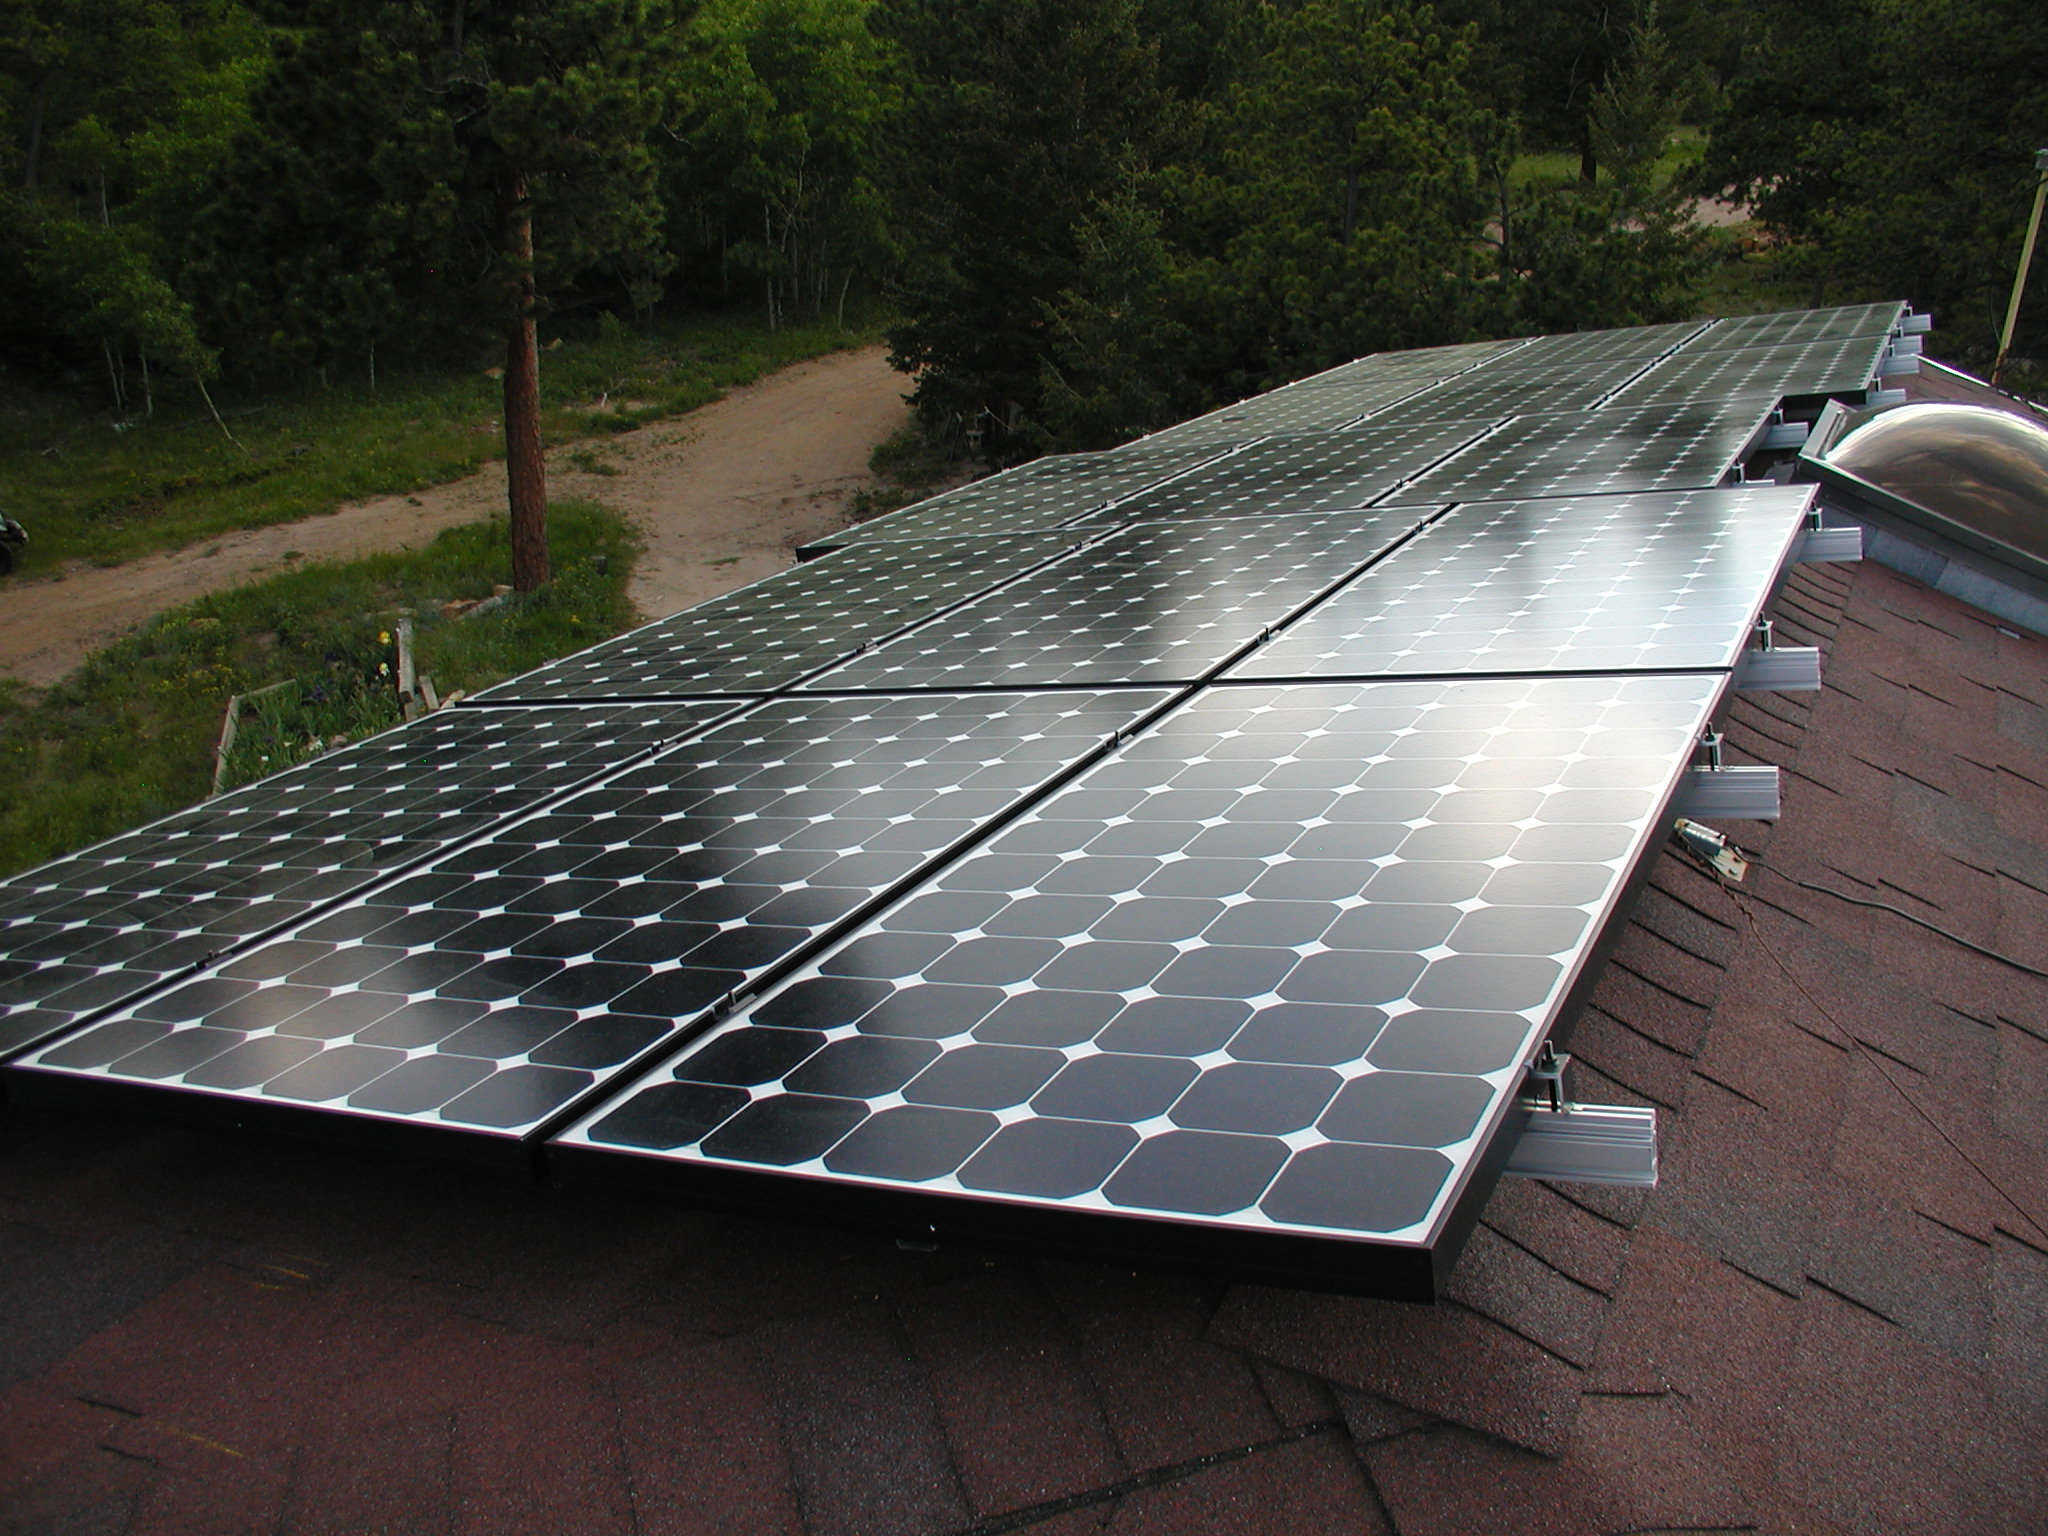
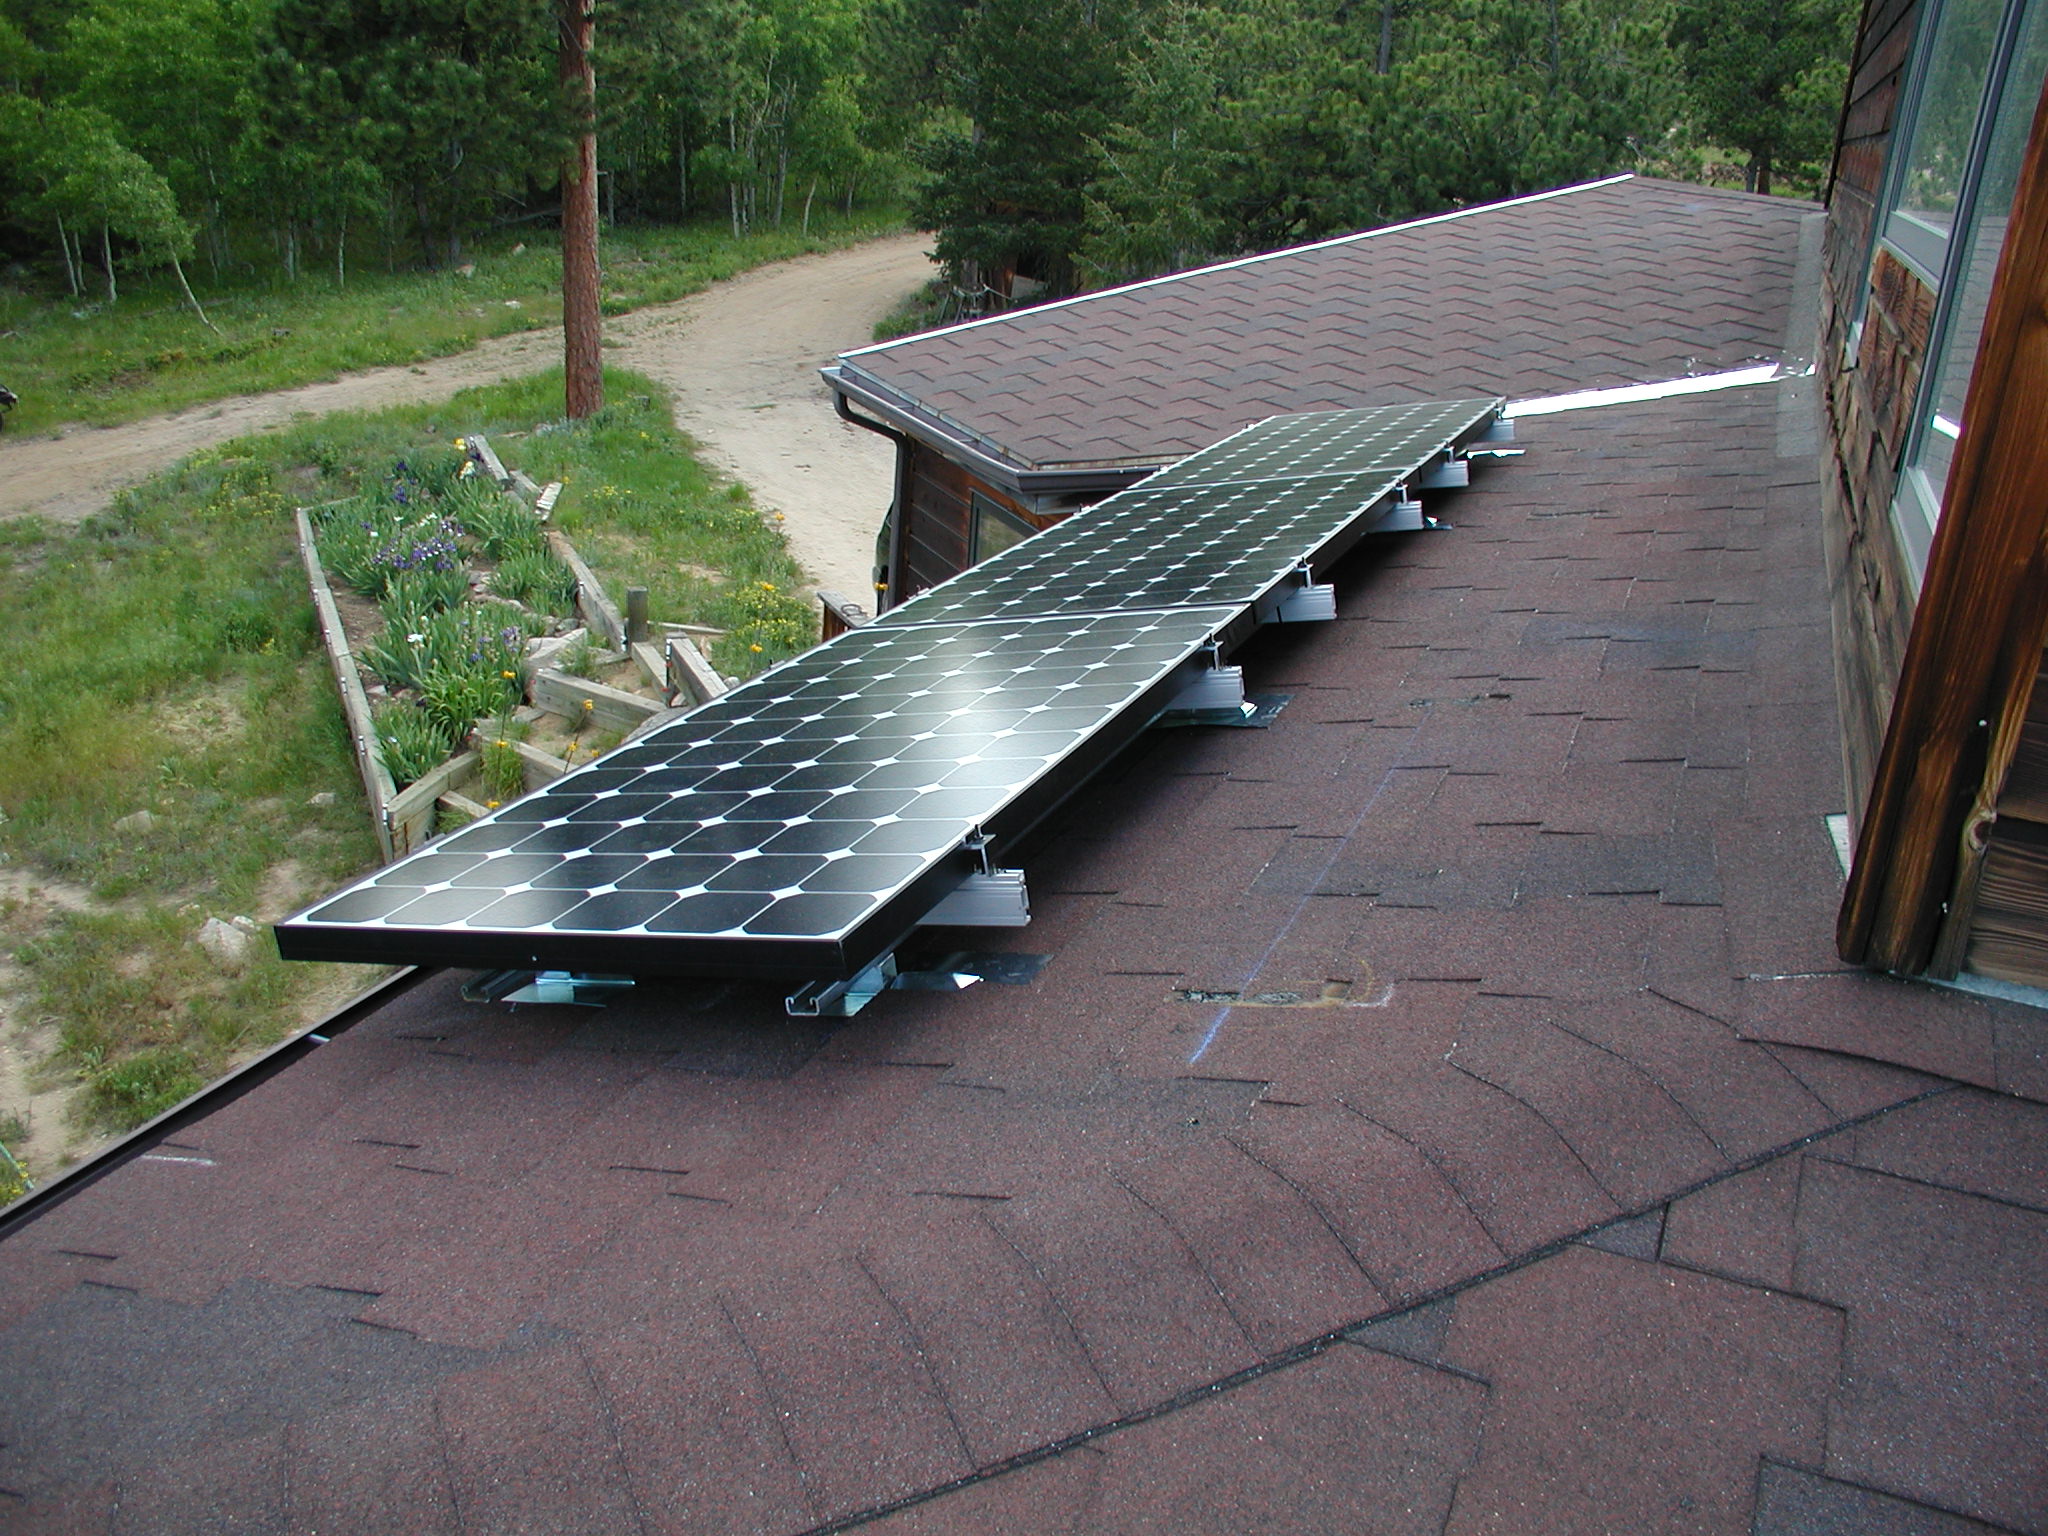

Notice that there was a bit of a glitch on the upper roof in that we had to jog down a bit to miss the skylight. The view from the lower roof shows that amount of overhang. I was a bit worried about this because of our winds, we almost always get blows in excess of 60mph on a regular basis in the winter, and often get several that are over 100mph. The folks at Namaste assured me that this would stay in place, and they seem to have been right. Note also that the lower roof has the panels running lengthwise as we modified from the initial plan.
Next was to get it all hooked up electrically to the grid. For this Namaste just subcontracts an electrician, and they have a top-notch guy and his assistant who is a wizard with conduit bending. All the wiring from the panels on is inside conduit for protection. We are at 8200 feet elevation, and we don't really have any squirrels to worry about that might eat the wiring, so the panel wiring did not have to enclosed in chicken wire or anything like that. The first photo shows the panel to conduit connections, all weather proof. It also show the anchor system more closely.

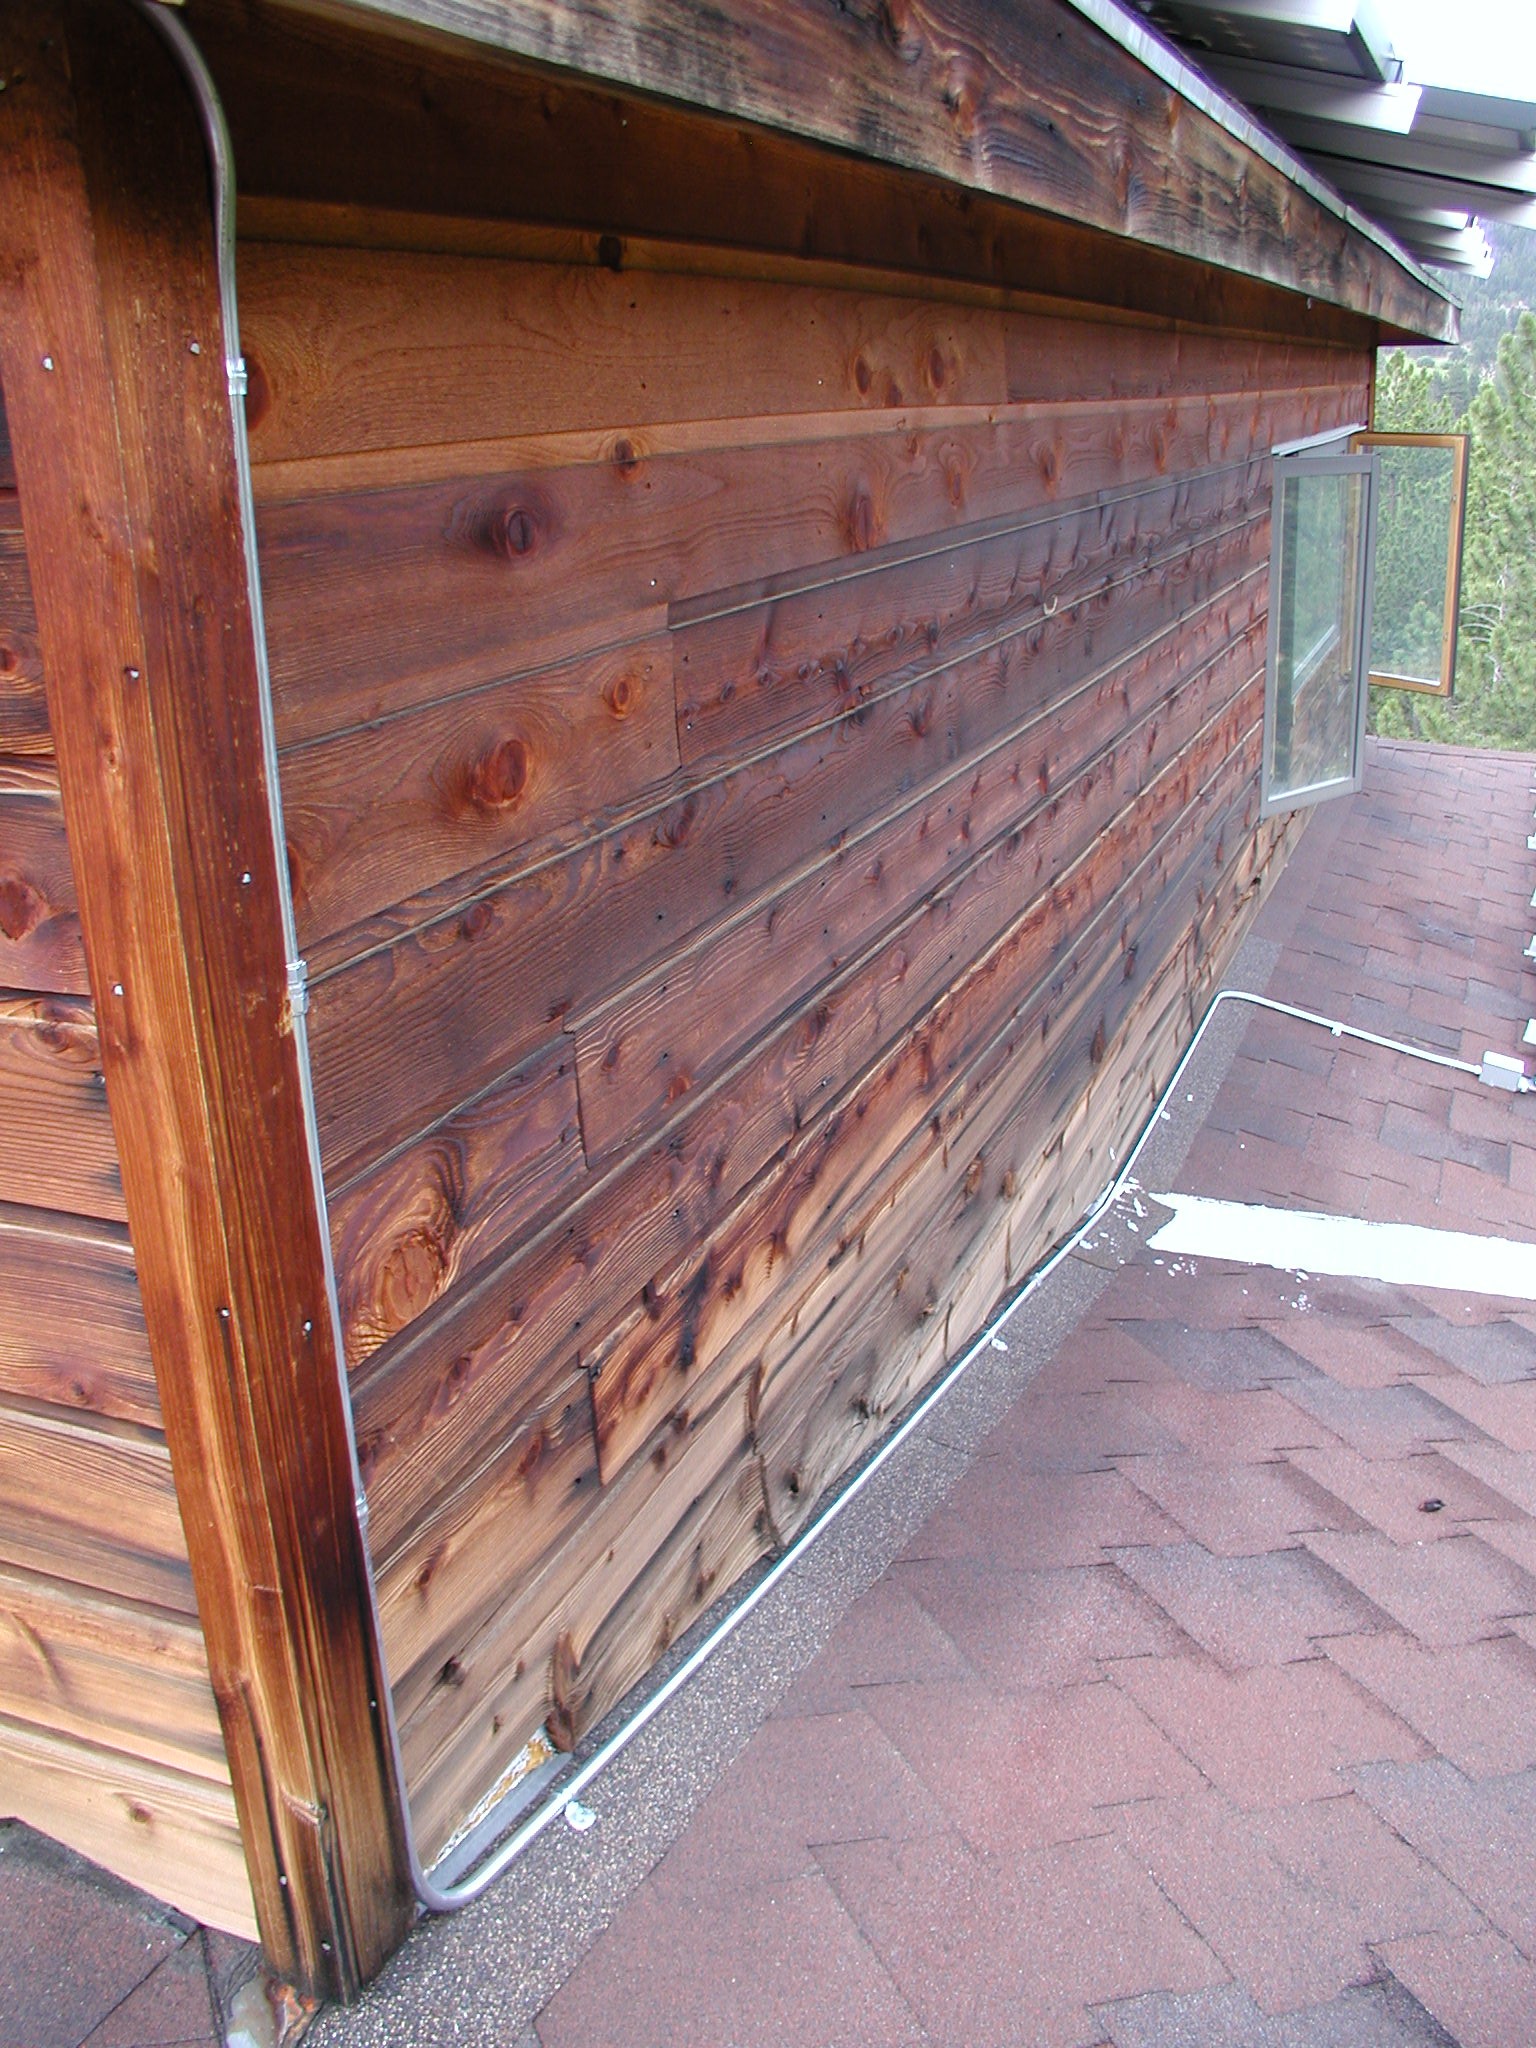
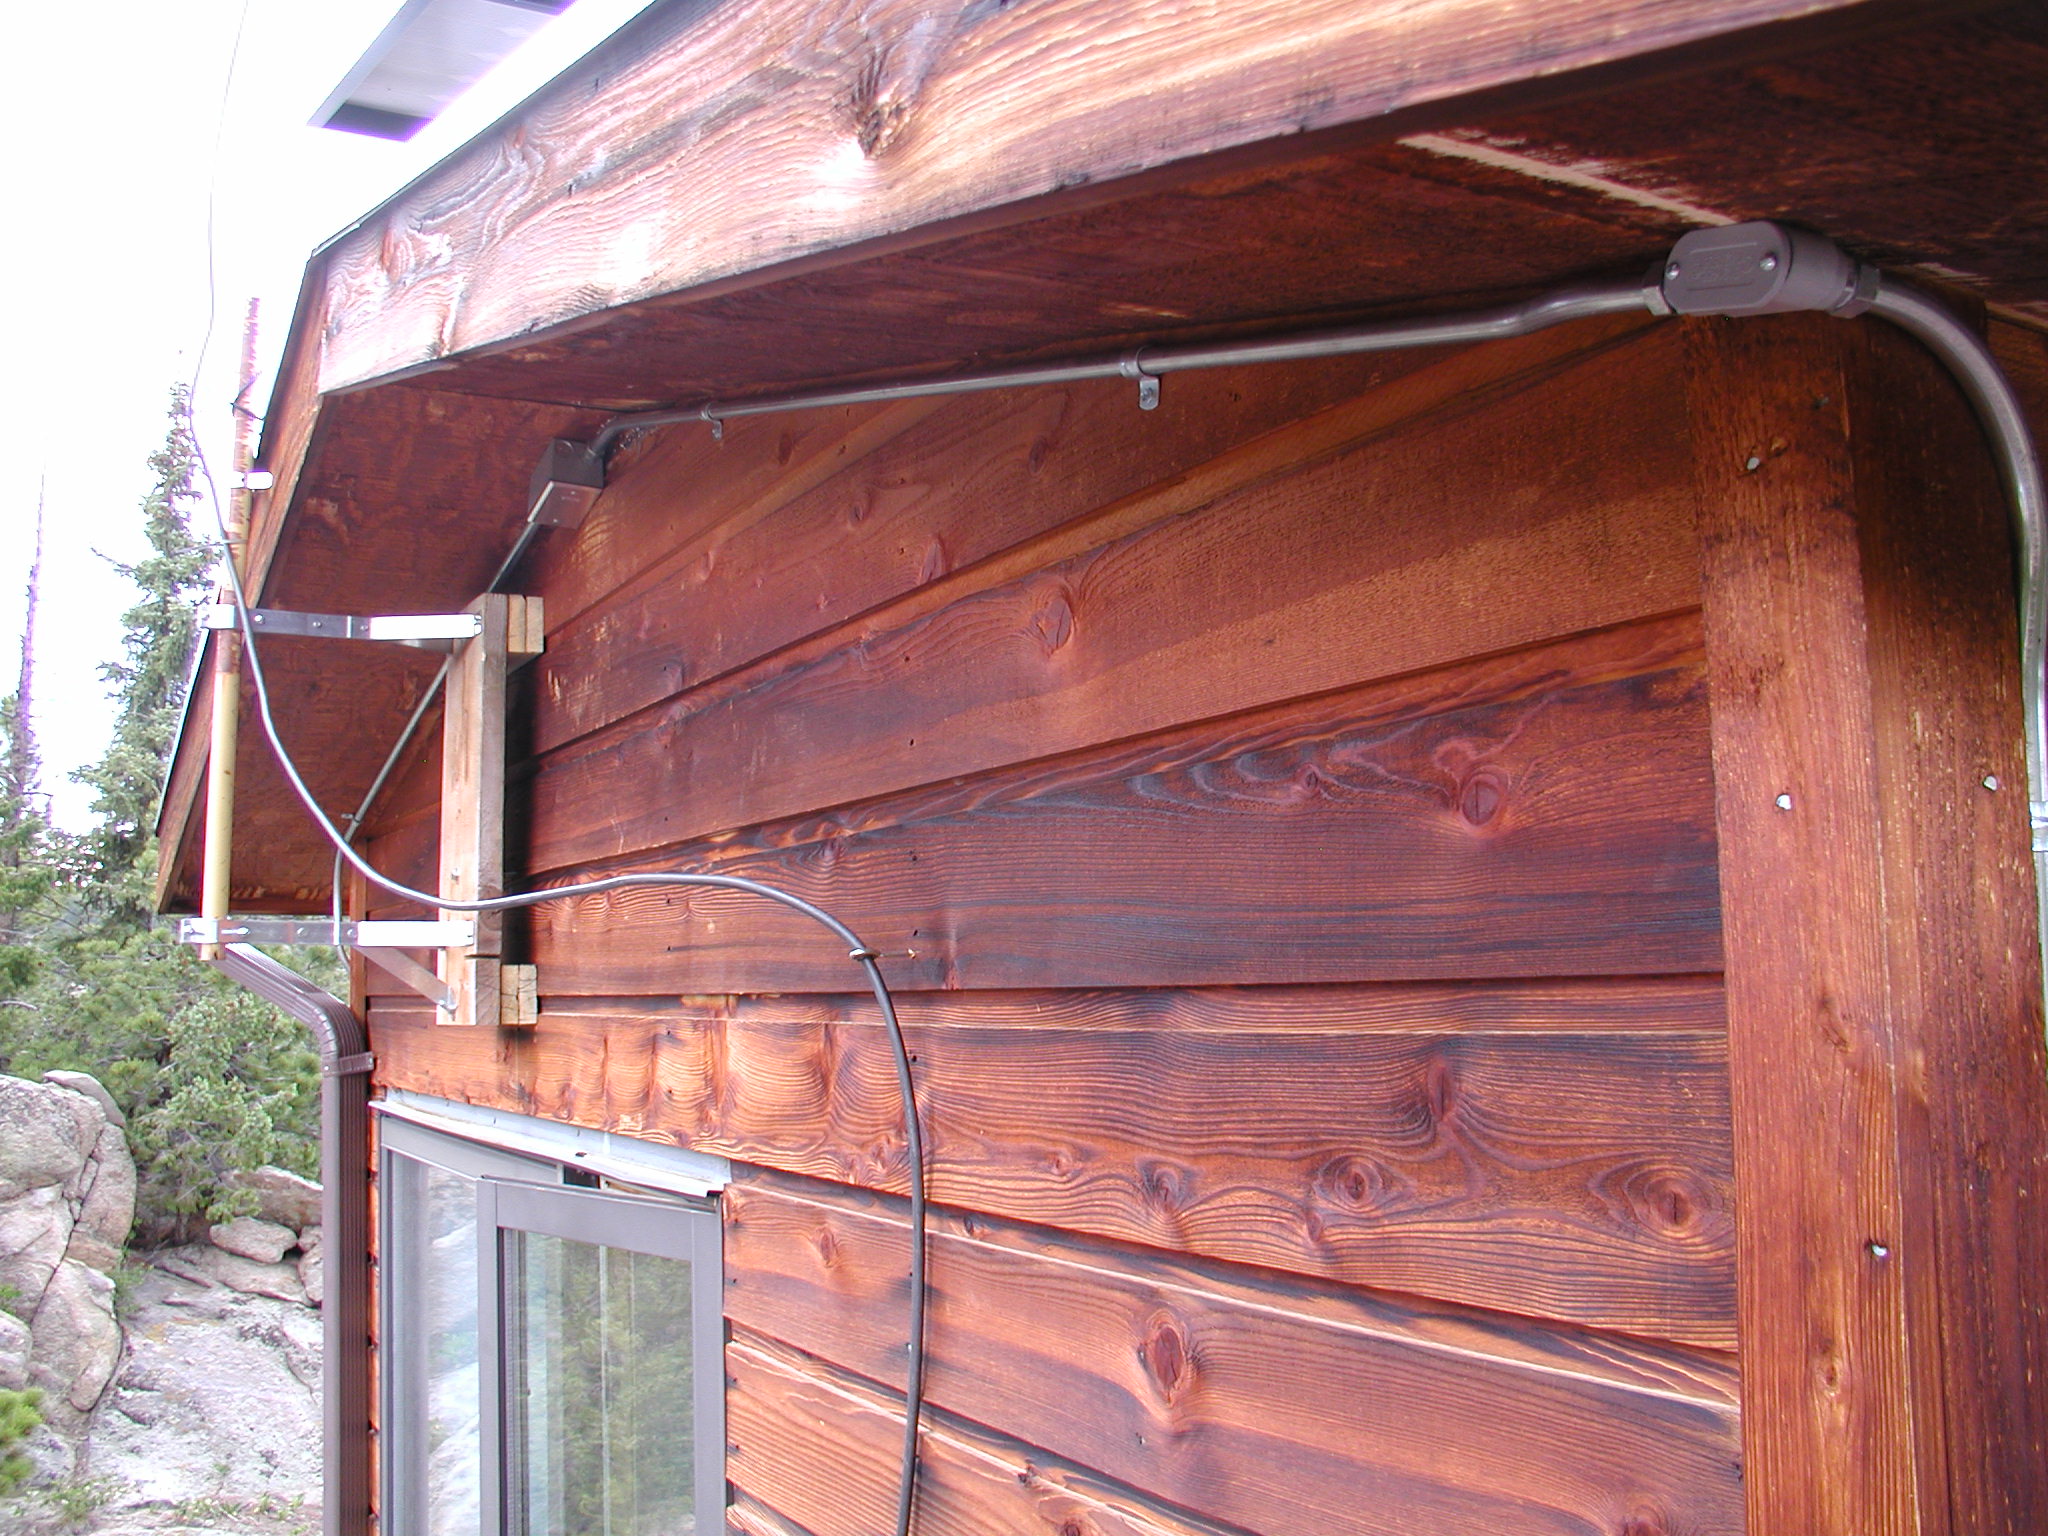
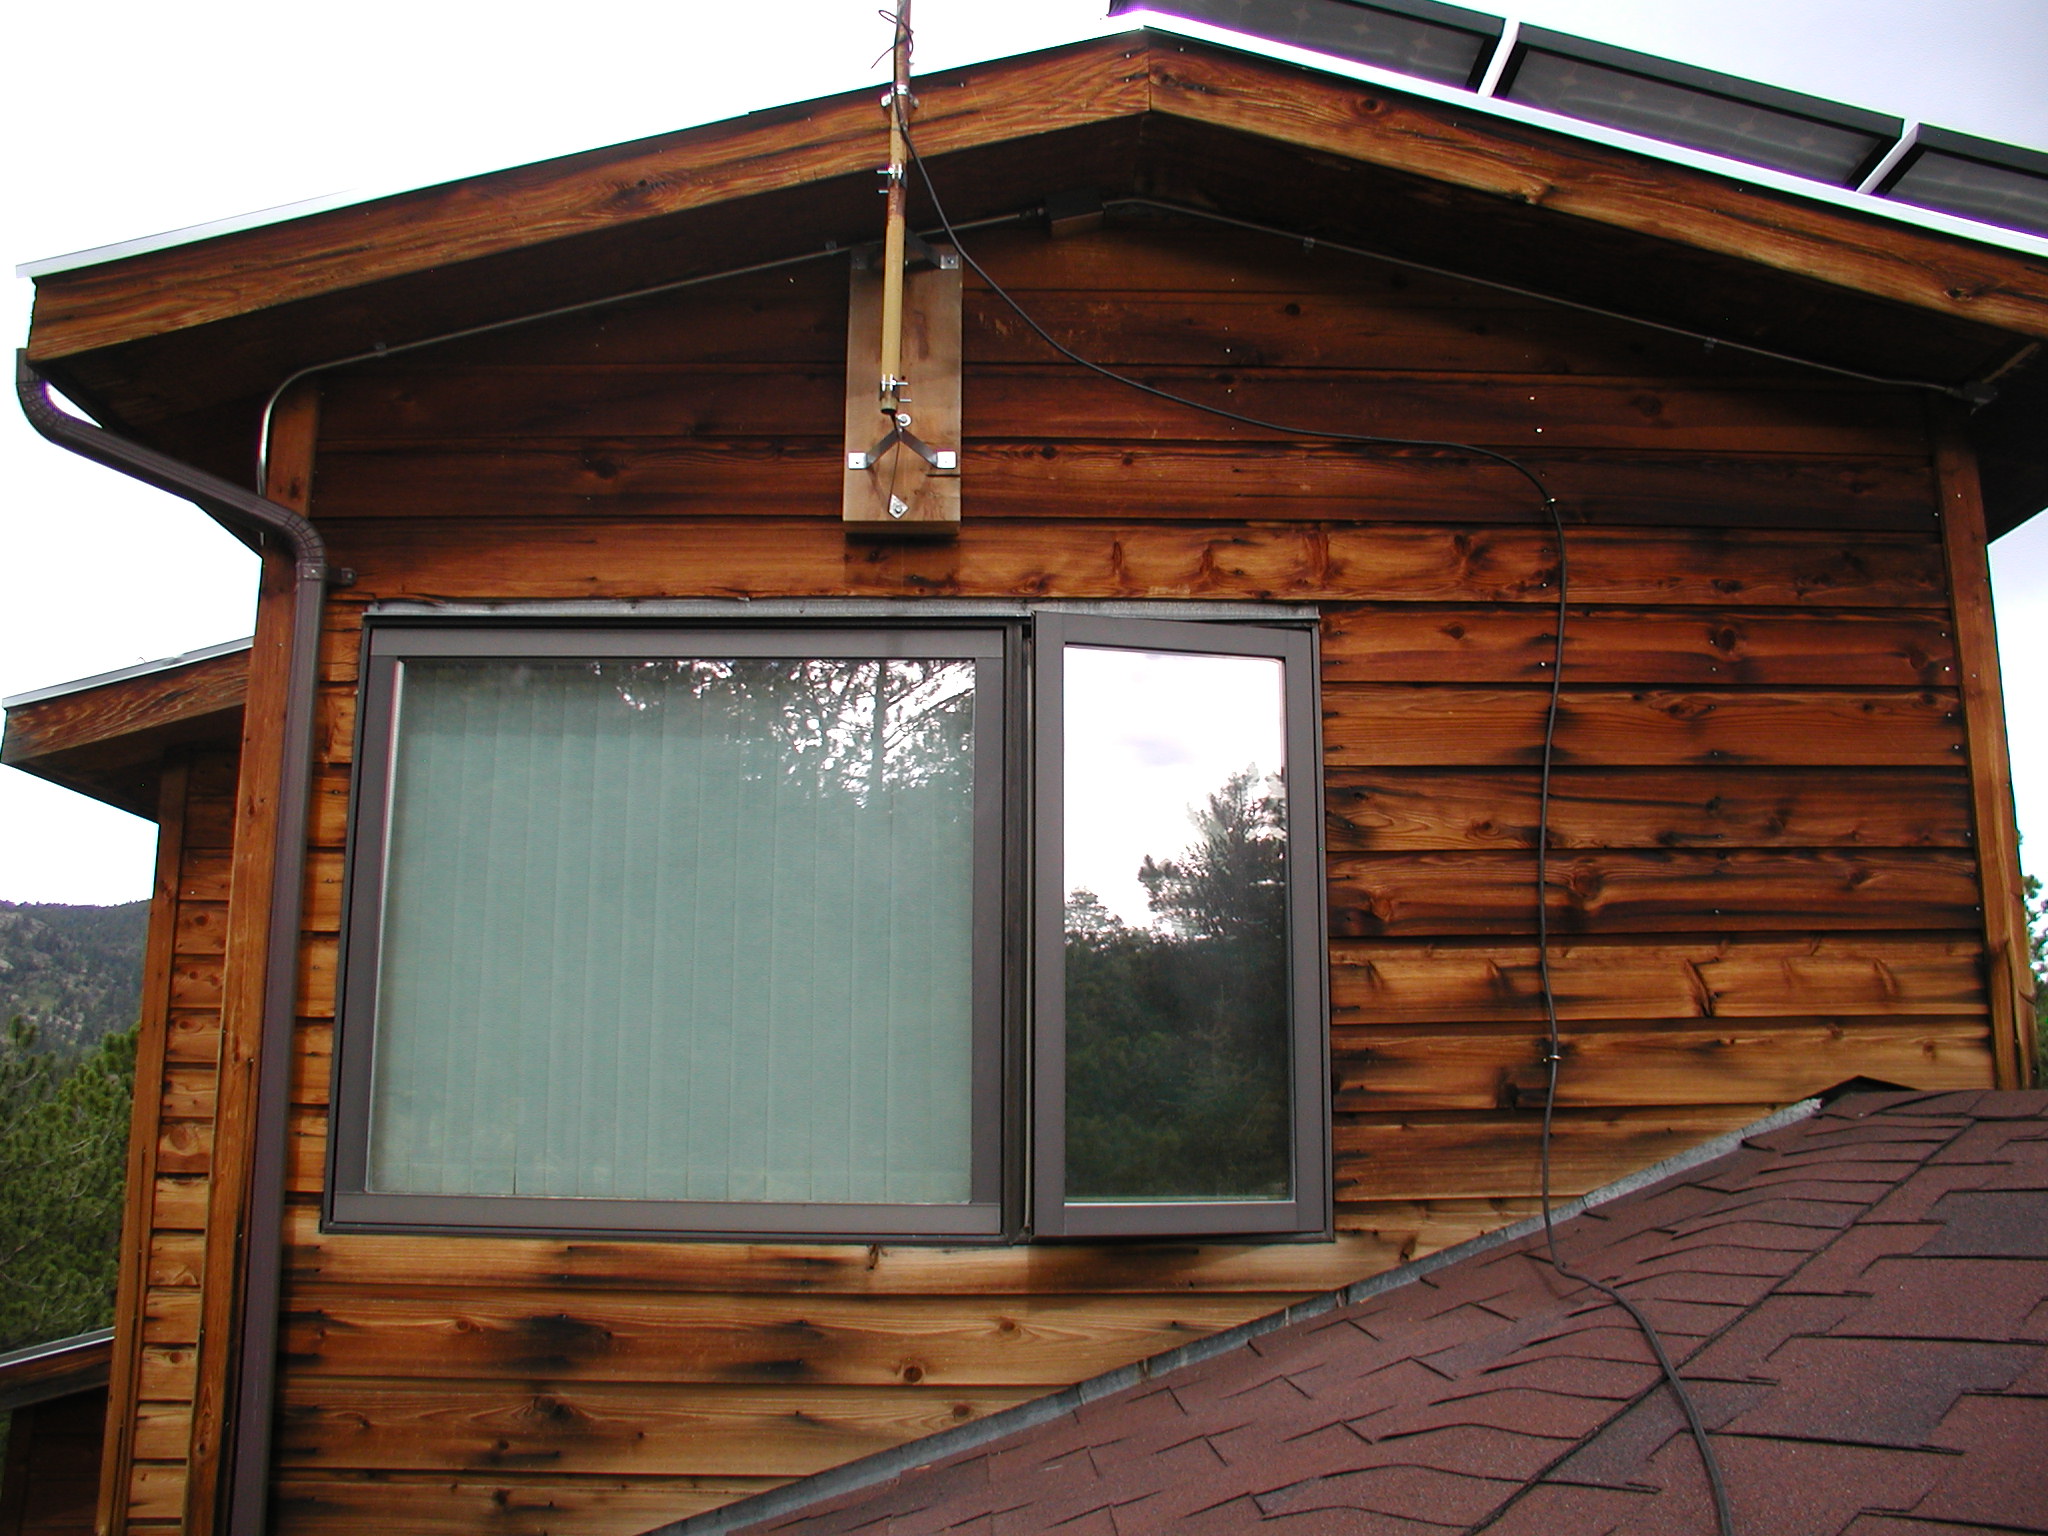
Check out the conduit work in the third and forth photos. The upper roof connection is into a box on the upper roof and then directly through the roof and soffit to the inline box underneath. Then on down and around the corner. The mast anchor in the photo is my 802.11 wireless internet connection through which you are seeing my web server. All that is through our internet cooperative, without which I'd still have to be running through a modem!
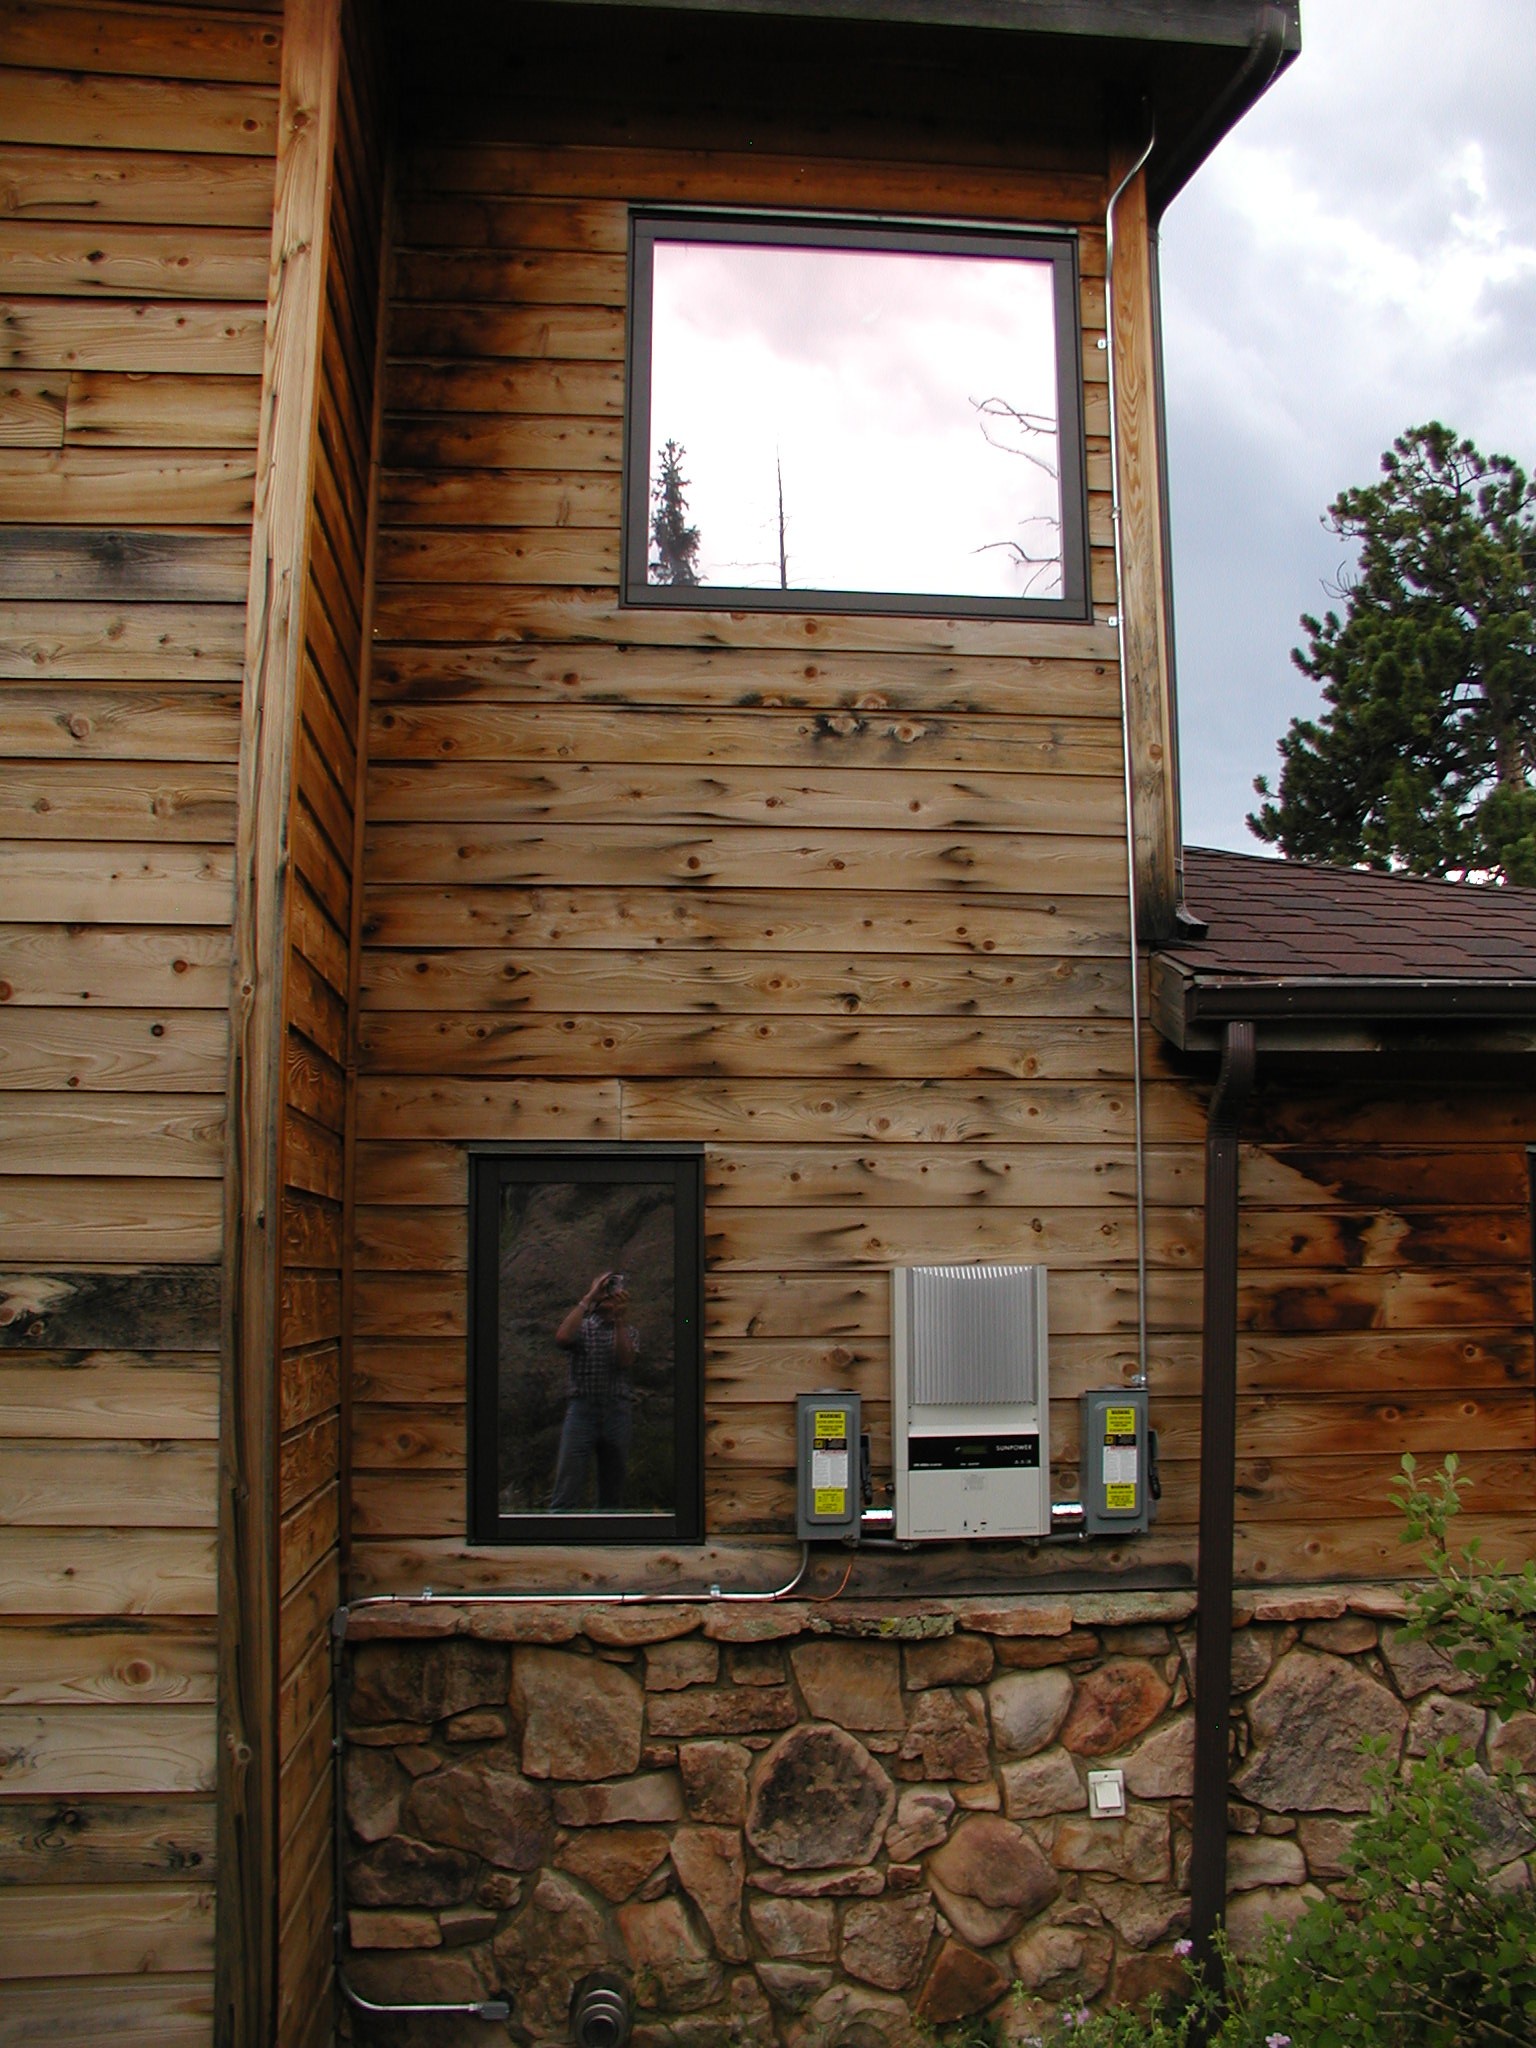
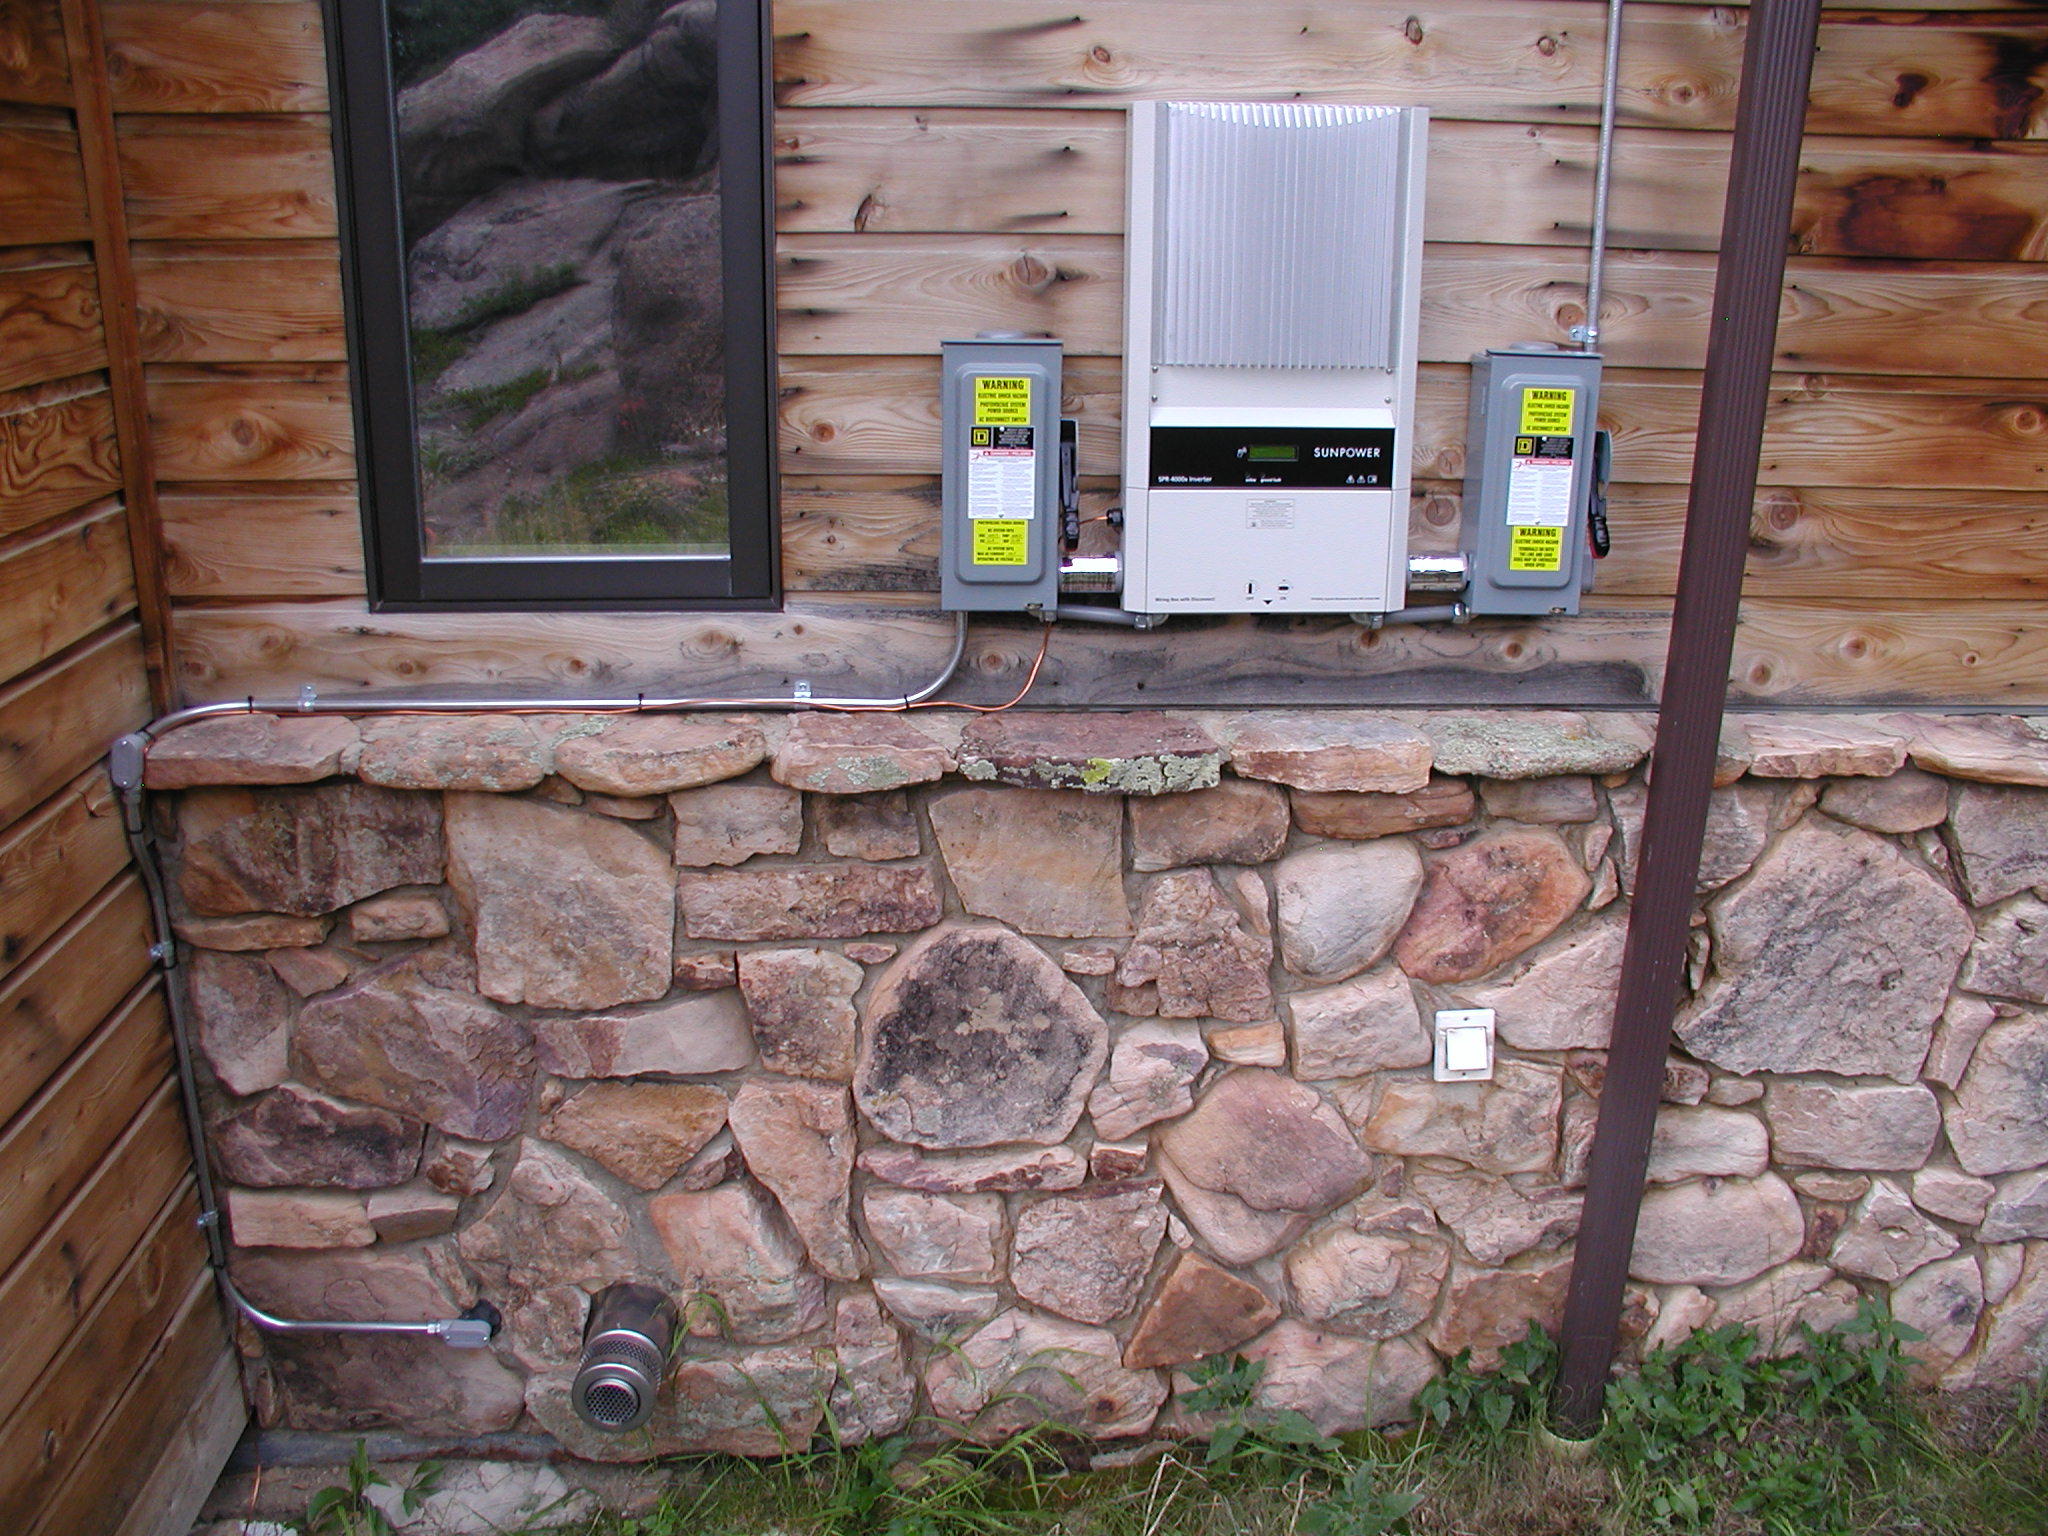
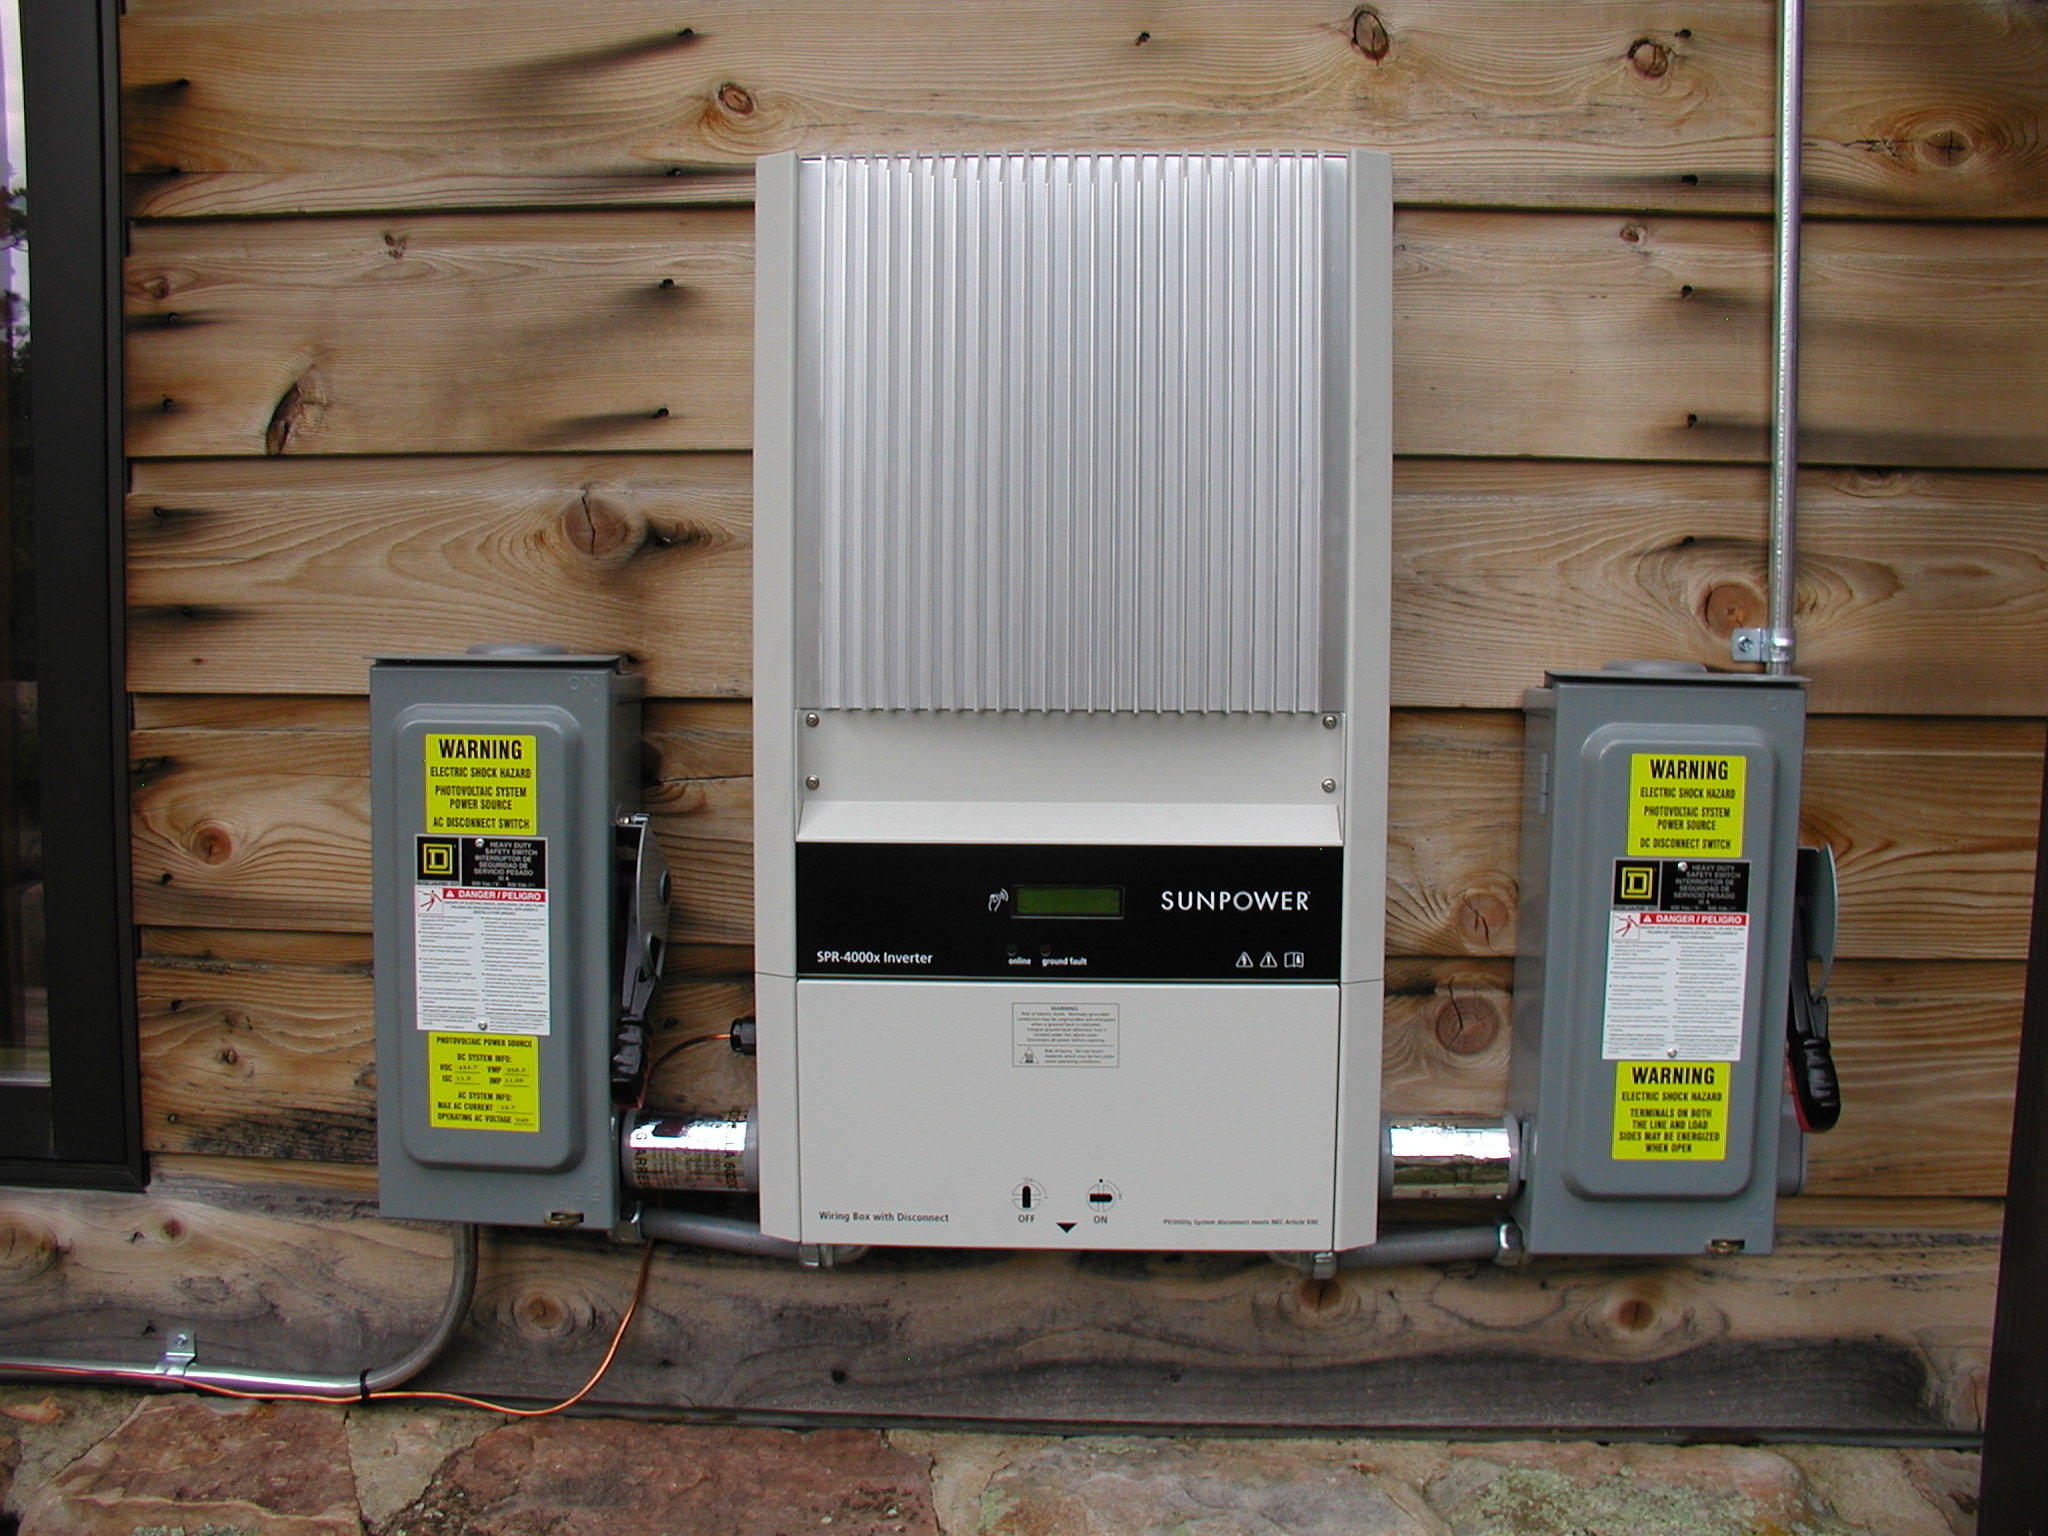
The conduit then runs down to the DC cutout, to the inverter, the AC cutout and goes into the furnace room. Note the double lightning arrestors, the silver cans on the inverter. We do tend to get a bit of lightning in this area. Not shown is the furnace room and another disconnect switch that then goes to a station in my main breaker box. That is pretty much it for installation on Namaste's part. The "Pope of Xcel" then had to come look at it and bless it before the Xcel folks would install the Net Meter that runs both ways. There was some bit of hang up here because the labels that you see on the disconnects and particularly the ones up at the meter had to say certain things. Namaste had been using approved labels, but Xcel changed what they said and what material they had to be made from, TWICE, on the Namaste folks, so it was kind of a moving target. Finally all was well, the net meter installed, and the system ready to go in early September of 2007.
Since I have my Linux server running all the time it made sense to log data from the inverter to that. So an RS232 cable was later wired by me into the inverter and run to the server. More on that in the Inverter and Data Logging section.